Friday, October 28, 2011

Masquerade Ball Masks


Who hasn’t dreamed of attending a Masquerade Ball! My daughter loves to play dress up and I have to admit I do too. That’s how I dreamed up these fun, fanciful and easy to create masks, using SVGcuts.com files and a few other items. Make them exactly as I have here with the full directions and files used or use these as a guide to come up with some new ones. Have a ball!

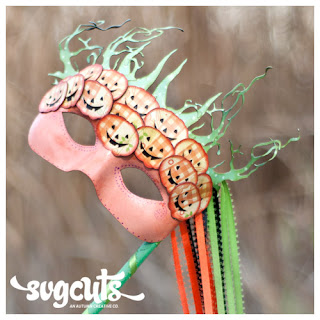
For full instructions, supplies and collections used click here: Designs By: Fleurette F. Bloom @ SVGcuts.com

Tuesday, October 18, 2011


When I think of Halloween the Headless Horseman and Count Dracula come to mind. I thought to myself, how fun it would be to make a project that incorporated both! That’s how I came up with “Count Dracula’s Coach” a table decoration that you can fill with treats, using just a few SVGcuts.com files.

Click on this link to see all the details on how you can create this fun project!

SVG COLLECTIONS USED - to creat this project
To help save you time, you can click on the links below for the SVGcuts.com collections below.

Bundle of Joy SVG Kit
Gothic Flourishes SVG Collection
Halloween SVG Collection
Monster Mash SVG Collection


Thursday, September 1, 2011

Winners of the SVGcuts.com "It's A Nice Day For A White Wedding" Challenge


I want to give a big thank you to everyone who entered the monthly SVGcuts.com challenge, "It's A Nice Day For A White Wedding"! I really enjoyed hosting this challenge and seeing all the beautiful and creative projects! You are all winners in my book :). Of course this is a challenge so, as promised we have to pick the official winners. This challenge was hard to judge as the entries were so fantastic. I am so glad there are six of us judging!

Thanks again to everyone for playing :)

The winners are as follows:


1st place winner is - Stampgram

You win a $30 SVGCuts.com Gift Certificate or $30 Micheal's / JoAnns Gift Certificate!


2nd Place – Irishmist59

You win a $10 SVGCuts.com Gift Certificate!


3rd Place – Kathy Helton

You win a $10 SVGCuts.com Gift Certificate!


Honorable mentions:

4th Place – Mackie


5th Place - Lori Ell

Thanks again to all the fantastic entries!Everyone that entered the challenge will receive a $5.00 SVGcuts.com Gift card. To claim your $5.00 gift card your need to email info@svgcuts.com and include your post # from the challenge. Thanks!!

Hope to see you at the next challenge J

All My Best,

Fleurette Bloom

SVGcuts Design Team

Friday, July 29, 2011

Butterfly Lantern to go with Wedding Collection

I am hosting the SVGcuts.com monthly challenge "It's A Nice Day For A White Wedding". When I saw Mary's new Garden Nouveau SVG Kit, with a butterfly lantern, the wheels started turning. I knew I had to create one that would go with the wedding collection I created. I added wires and more butterflies so it could hang. I thought it might be a nice inspiration for others to enter the "Wedding Challenge" :) I think it would also be great for any garden or room in your house, not just for weddings. (to light it, use battery operated tea light or white battery light)

Here it is outside (click on photo to see larger pic)
This is what it looks like indoors with a light (click on photo to see larger pic)

(no not use candles please)

Tuesday, July 12, 2011

New Category "Crafty" Fun T shirts


I just couldn't wait to show you my new category "Crafty" For all us crafters. :)
Here you can find really cool, fun apparel for the whole family! I will be adding new designs all the time, so be sure to check back for more. I also will be running contests and giveaways, lots of fun :) Be sure to join the Florie Facebook Page To enter the giveaways :)

Here is this weeks design "Crafters Rock"

*All original Florie designes are Copyright protected and may not be reproduced in any fashion, without written permission from Fleurette@floriegear.com


Thursday, June 23, 2011

"It's A Nice Day For A White Wedding"

Be sure to watch the video at the top left side of my blog to see This Wedding Collection!!! :D

Weddings are a beautiful time for sharing so why not create something fantastic for the bride and groom! I thought it would be really great to create a wedding cake that could collect all the wedding cards and then later be a keepsake. Imagine this at the actual big day or how fun would it be at the bridal shower! I had so much fun designing this that I went a bit further and designed a total wedding decoration ensemble, including a bouquet of butterflies! How fun! I challenged myself and made mine in all white, but it would be great if done in the wedding colors! Hope you enjoy making these as much as I did.

Tuesday, June 21, 2011

Video Teaser of my New SVGcuts Design Team Project

I am so excited!!! My fist Design Team project with SVG cuts will be going up today!!!! Here is a sneak peek of it. Click on this link to see - White Wedding Teaser Video :) All directions and files to follow later today! :D

Saturday, June 18, 2011

New Challenge!

I am so excited, I will be hosting the next SVGcuts.com challenge. Pop back in soon for the announcement. It is going to be FUN, and of course there will be prizes!!! :D

Thursday, June 9, 2011

Have Fun With Color And Texture


Have you ever looked at your paper, only to find that you don't have any prints you want to work with, or you're just very low on printed/patterned paper? No need to fear, pull out all your plain card stock, chances are you will have some fantastic colors you can play with! You can add so much pizzazz to plain paper with a little texture, a few inks, markers and watercolor paint! :)

This Sun Lever Card is an example of a really fun and colorful card I created from SVGcuts.com files. I used only plain card stock! :D No patterns etc. I just used awesome colors, inked the sides and sent some of the pieces through my Cuttlebug to give it some texture.

This card is the SVGcuts.com Sun Lever Card from the

Designer Tips:

1. Ink all the sides of your cut pieces before you assemble and glue together
2. When adding details think in odd number for groupings (I grouped my stars in two sets of three's) odd numbers are more appealing to the eye.
3. Add texture to plain paper, with an embossing machine, then run a marker lightly over some of the raised
pieces, this will give it so much more dimension.
4. Don't be afraid to use bold colors, they really pop :)

Wednesday, May 25, 2011

Sweet Treat Sunday Box

Here is a fun way to give someone a sweet treat! Why not make a box with a delicious ice cream sunday on top. :)

I created this with SVGcuts.com files. It's so sweet! ;)


How To Create A Sweet Treat Ice Cream Sunday Box
Supplies:
  • DCWV Card Stock- Nana's Kitchen (for bottom and top of box)
  • Card Stock - pink, red, brown and white
  • Cotton balls - for whip cream look on top
  • Glue
  • Blue ink - for sides of box and glass
  • Pink ink - for ice cream edges and banner

Files used:
- box.svg 9.75"
- lid.svg 9.75"W
- lace.svg 4.301"W

1. Score the box top and bottom for easy folding.
2. Assemble box with glue.

- bottom.svg 5.0"W (this is the banner)
- top.svg 5.0"W
- Cherry.svg 4.0"W
- sprinkles.svg 4.0"W
- glass.svg 4.o"W (you will need two of these)
- icecream.svg 4.0"W (you will need two of these)

1. Glue the glass and the icecream together.
2. Cut a slit from the bottom up, half way on one.
3. Cut a slit from the top down, half way down on the other.
(This will let you slide them together, so it will stand on your box)
4. Score the very bottom of the glass horizontally, half way through the base.
(This will let you fold easily and glue it to the top of your box, so it will stand)

Use the word "Sweet" and glue to your banner
- sweet_top.svg


Have fun and satisfy your sweet tooth :)


Monday, May 23, 2011

Free Giveaway At Dragonfly Designs! :)

Cheryl at Dragon Fly Designs is having a giveaway! She is going to be a first time grandmother and is so excited she wants to share her joy with everyone!!! Check out her blog and enter to win!

Monday, May 16, 2011

Rock Out One Of These Jammin Cards!

Here is a really fun card idea for anyone who has a favorite rockstar or group!

Select their favorite star and build a theme around it with coordinating colored and printed papers. I created this one for a friend that LOVES Bruce Springsteen, she was so thrilled!

** It would also be really cool to use a photo of your friend and make them into the rockstar! :) **

Pick an artist and get creative!

Below are pictures, materials and details on how you can create one of these fun cards.

I used SVGcuts.com files for everything but the Bruce image.

SVG Files Used:

*Breezy Backyard Lever Cards - Sailboat Card (use only the card pieces, outside, inside, 2 brackets and interior. (in scal keep all proportions as they are)

Jamies Favorite Things:

* Use the record files - 33_top, 33_middle and 33_bottom
* (to size record, click keep proportions and then size to
W 3.569, this will fit the inside of the lever card)
* When you glue on the record, lay the lever card flat and center it

* Design tip: To give the record a more realistic look, I used a
black and white stripped paper for the middle section.

* Use the guitar file: guitar_top and guitar_bottom
(to size guitar click, keep proportions and then size to W 1.260)

Birthday Elements:

* Use file - hbdaycircle. svg _ (1) to size it, click, keep proportions, then size to W 4.760, cut off any excess you do not need. (see picture of card)

I embossed the brackets with my CuttleBug and used the "Allegro" folder. It gave a nice touch by adding texture with music notes.

I found an image I liked of Bruce, sized it to fit this layout, printed it, cut it out and gave it a shadow using black card stock that I cut to fit, by hand.


Papers I selected to use for this card

Screen shot of some of the selected SVG files laid out in Sure Cuts A Lot.

Once I lay out all my plans in SCAL, I cut all my papers to size and adhere them to my cutting mats. If I can, I like to use one mat for each page of my SCAL layout, then cut in order.
(this just makes it easier and you will not miss anything)

After everything is cut out, lay out your pieces, organize them in the order you want to glue them together. Then you are ready to assemble. I like to use Scotch Quick Dry Adhesive, It dries fast, yet gives enough time to maneuver things to fit just right.

When finished you will have a rockin card! :)

I can't wait to make another one of these cards in a different style.

Check back soon as I should have a "Sweet" new project :)
News Of The Day!

I am so excited to share the news that I am officially a designer for SVGcuts.com. Yay :) They just made the official announcement today. Stop by and check it out, lots of fun stuff.
www.svgcuts.com
Say hello to the SVGCuts.com Design Team! We are extremely happy (and lucky) to have these super creative ladies designing for us! Be sure to check our their blogs for lots of inspiration!

Friday, April 22, 2011

Fun and Easy Basket Project for Kids!

This is a really fun and easy project you can do with your kids or a whole class.
kids really like to make things they they can be creative with and give as gifts!

Supplies:
12x12 card stock
Glue sticks
Grass (for inside baskets)
Markers
Easter Egg Treat Bags SVG Kit. By: SVG cuts.com

This will make a basket 6.5" H (including handle) x 5 1/4" in length x 2.5" wide. Great size for putting in a little grass, a plastic egg and a peep. Or whatever your favorite things are.

Decide your colors
Cut the basket shapes
Cut designs for them to glue on
(Do all of your cutting ahead of time, so you are ready to go)

I cut 2 basket shapes for each girl. One pink that they could basically copy the model I brought in and one out of plain white card stock that they could really be creative with.

I worked with about 15 girls all about 7 or 8 yrs. old, on these cute egg baskets the other day. They were all able to put them together themselves after I showed them the steps.

They loved using markers to give them a unique look.

They made some beautiful baskets and had a great time doing it.

I hope you will give this project a try. Show me some of yours on my facebook page! :)

Sunday, April 10, 2011

Monday, April 4, 2011

Create an Explosion Photo Album / Box

I just had a fun free gift giveaway and will have another one very soon! :)

(I created this box for a birthday gift for my friends Mother)
Open it up and it explodes with color

Explosion boxes are really fun, beautiful and useful. If you are not familiar with them, look closely at the above photo you will see framed areas where you can put your photos. Your friends and family will enjoy opening it and viewing all the photos inside. (Click on The last photo in this post for larger view)

Their really quite simple to make. Lets get started. :)

Supplies:
  • 4 or more 12 x 12 pieces of patterned paper
  • Glue
  • Scissors or cutting machine
  • Paper scorer
  • glitter, embellishments and ink (Optional)
SVGCuts Files Used:


Cut the first three papers in the shape of a plus (+) sign (cut each one a bit smaller than the rest if you like for added dimension). Score them and then glue them together in the area that will be the bottom of your box.

Next cut out squares, frame shapes, flowers, butterflies or any shape in the theme you are going for (you can also purchase embellishments and paper cut-outs at most craft stores). Next cut your box top. Start glueing all your frames and embellishments where you would like them to be. Now you are ready to add photos or give it as a gift!

Your friends and family will enjoy opening it just for fun and also looking at photos in a new way. Enjoy and be creative :)

Click on this photo to see a larger view of all the details.