Saturday, February 29, 2020

Tips for Coloring White Flowers + Video


Hi everyone, welcome back to the Ink On 3 blog and Happy Leap Day!  The snow in my home state has reminded me of my love for white flowers.  Achieving the look and delicacy of white flowers is made possible with Ink On 3 Fadeout Ink.  In my video below, I did a little experiment showing you the difference using Fadeout makes and its necessity for beautifully soft white (or light) flowers.


My best advice for no-line white floral coloring--practice.  Mastering your crafting tools is essential to getting the outcome you're looking for.  Having Fadeout No-Line Ink has elevated my floral coloring, and I grab it again and again for my cards.

Hey thank you so much for checking out my video on how I made these cards!  Do you all have stamp sets from Ink On 3 that you would like me to use in a future project?  Let me know in the comments below!  If you like what you've seen from me, make sure you subscribe to my YouTube channel and give me a follow over on Instagram!  Talk to you all very soon!

Materials:
Ink On 3 - Fadeout No-Line Ink
Ink On 3 - Atelier Fusion Ink
Ink On 3 - Dogwood Flower Stamp Set
Ink On 3 - Dogwood Flower Die Set


Jaycee Gaspar

YouTube | Instagram | Blog

Wednesday, February 26, 2020

Dance & Twirl featuring Guest Designer Rachel

Hi there! Rachel is back again with another guest design post and these are SO adorable! They'd be perfect for a card set as a gift or standalone cards. Remember to stop by her instagram and give her a follow!

Hello crafty friends! It's Rachel here and I'm back with one more guest design post this month for Ink on 3! (Big thanks to Ink on 3 of having me!) For my post today, I created two simple but sweet cards featuring images from the adorable Dance & Twirl Stamp Set.


I love how cute these little dancers are! To start my cards, I first stamped my images with some Copic friendly Black Ink onto a sheet of Neenah Solar White 110lb Card Stock. I then colored them with Copic Markers and used my Brother ScanNCut to cut them out. However, there are some coordinating dies here that would work perfectly for this as well!


For my elephant card, I trimmed a piece of pink patterned paper to 4.25" x 5.5" and attached it to my standard A2 sized top-folding card base. I then diecut a stitched scallop circle using the Mini Scallop Circle STAX Die-namics from My Favorite Things. I lightly blended the inside of the circle with some Picked Raspberry Distress Oxide Ink and then attached my elephant to the circle using some 3D Foam Adhesive Squares for added dimension. Next, I stamped my sentiment using my MISTI onto the center bottom of my card and then attached my circle with the elephant last.


I repeated the same process for my teal card, keeping my focal point on the cute little ballerina with her wand.


Instead of pink ink, I used some Peacock Feathers Distress Oxide Ink for my background.

Thank you again for stopping by! Wishing you all a wonderful day!

Friday, February 21, 2020

Fun Spring Tags using Atelier Inks

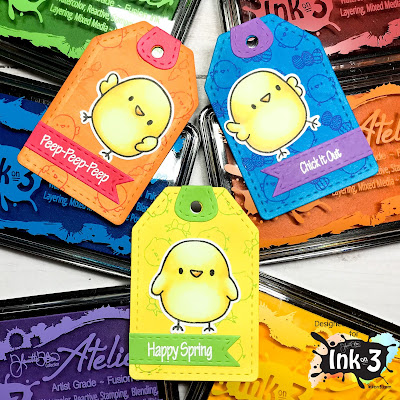
Hi everyone! It's Cheryl with Inkon3's Creative Team here to show you some adorable tags using Atelier Inks to make fun and colorful backgrounds!


Spring is just around the corner and Inkon3 has some really adorable Spring themed stamps! For the project I'm sharing I'll be showcasing the Lil Chicks and Biker Bunnies Stamp sets.

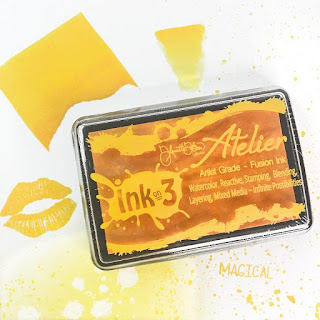
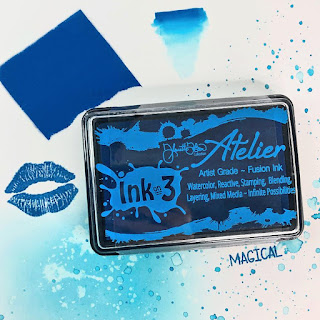
First, I die cut some tags, tag reinforcements, and banner using white card stock.  Then I used Atelier inks to add color to the tags. For one tag I used Bee Sting Yellow, for the other tag I used Peacock Blue, and for the last tag I used Marigold Orange. For the tag reinforcements and the banner for the sentiments I used Marilyn Red, Goddess Green, and My Jam Purple for each one.

Next, I stamped out the three chicks from the Lil Chicks stamp set using Inkon3's Blackout Waterproof Detail Ink. Then I colored the chicks using copic markers, and then fussy cut the images.


Once the tags are thoroughly dried, I create a background using the small stamps in the Biker Bunnies Stamp set. I used Marilyn Red on the Marigold Orange tag, Godess Green on the Bee Sting Yellow tag, and My Jam Purple on the Peacock Blue tag.

On the banners, stamp some sentiments using Juicy Clear Embossing ink, then sprinkle some Arctic White Ultra Fine Embossing powder and heat set. Adhere the banners and tag reinforcements matching the same color as the small stamped images on the tags, trim off any excess banner. Lastly adhere the cute little chickies onto the tag.


Copic Colors Used:
Yellows: Y000, Y00, Y02, Y21
Oranges: Y35, Y38

Inkon 3 Products Used:


Wednesday, February 19, 2020

Platy-rific Pondies featuring Guest Designer Rachel

Hi everyone! We have a special guest designer today... Rachel! Please head over to her instagram and give her a follow! She's created an amazing project today and will be back next week with a second project! Keep on reading to see how she created this amazing pop up box! 

---------

Hello crafty friends! It's Rachel here and I'm so excited to be guest designing today for Ink on 3! I created a 3D Box Card to share with you today featuring some cute critters from the Platy-rific Pondies Stamp Set. I absolutely love this stamp set! It's so versatile and full of so many cute images!


I first created the base of my card using a sheet of dark blue card stock, a scoring board, scissors, and some strong adhesive. I created my base so that when it lays flat, it fits perfectly into a standard A2 sized envelope. I used a rectangular die to cut a window in the front of my box and then glued a piece of clear acetate behind it prior to attaching the sides together.


I then stamped all of my images with some Copic friendly black ink onto a sheet of Neenah Solar White 110lb Card Stock, colored them with Copic Sketch Markers and then used my Brother ScanNCut to cut them out.


I added some inner shelves to my box card to hold both the strips of grass, water background piece, and my critters. For my water background, I blended some Tumbled Glass, Broken China, Stormy Sky, and Chipped Sapphire Distress Inks onto another small piece of Neenah Solar White 110lb Card Stock. Once blended, I then used a #4 paint brush to flick some water droplets onto the ink to create some more interest to this panel and to also look more like water. For my grass, I diecut each piece from white card stock using the Grassy Edges Die-namics from My Favorite Things and then blended each entire piece with Mowed Lawn Distress Oxide Ink. I then blended it again over the tips of the grass with Mowed Lawn Distress Ink.


Lastly, I added a background sky by blending some Ripe Persimmon, Wild Honey, Fossilized Amber, and Squeezed Lemonade Distress Inks. I stamped my sentiment onto the top right corner of this piece before I adhered it to the inside of my card.

I hope you enjoyed my card today! Thanks so much for stopping by!

Sunday, February 16, 2020

Very colourful no-coloring cards with Erica!

Hi guys!

Apologies for the confusing headline, I was trying to be a bit clever and funny. Not the best idea on a day when you are tired, possibly on a delayed sugar-high and too full. Technically these cards are coloured, BUT only the backgrounds. The images themselves are not but oh well, I hope you will forgive me when you see how easy these cards are.

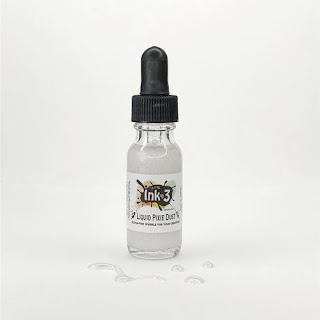
I started out by watercolouring some background panels with the Atelier Ink re-inkers. A bit too late I had a super brilliant idea (I’m totally tooting my own horn here but I can’t believe I didn’t think of it sooner!) I have dripped ink into a plastic palette and I use these for water colouring but it’s getting to the point where I’m running a bit low. Instead of adding more re-inker to the colours, I added Liquid Pixie Dust to the remains of the colours! This makes the colours shimmery without contaminating the colours on the paper, which is where I got the idea from. On my first two panels, the Liquid Pixie Dust smeared the colours a bit and I had to be very careful how I added it. With the Liquid Pixie Dust already mixed into the colours, you don’t have to worry! How brilliant is that??


The colours I used are Bee Sting Yellow, Goddess Green, Peacock Blue, My Jam Purple. Marilyn Red  and Marigold Orange. With the backgrounds done, it was time to start thinking about the rest of the card making.


One of my favourite stamp sets from InkOn3 is the Magical Unicorn and I decided to use this one yet again. I also grabbed the Oh Deer set and heat embossed these on vellum with Gold Rush and Chrome embossing powders. First I used a anti-static tool on my pieces of vellum, and the images are stamped with the Juicy pad.


After they were heat embossed, I used the coordinating Magical Unicorn and Oh Deer diecuts to cut them out. I also stamped up some sentiments and heat embossed these too.


At first I did them all in Gold Rush, but then when it came time to put the cards together I decided to redo the sentiment for the Chrome Unicorn also in Chrome. This time I did it on turquoise card stock, instead of white.


The vellum images are adhered with a vellum adheisive. It works relatively well, but oh man, it is a pain in the bee-hind to work with. The sentiment strips are adhered with liquid glue and with that, the cards are done!

I made a video for this post too, you can find that over on my YouTube channel.

Thanks for stopping by today!

Lots of love and happy crafting from Erica

Wednesday, February 12, 2020

You're a Beautiful Friend

Hi everyone! It’s Jeannie (InsideoutJeans) on the blog today featuring a bunch of Ink on 3 products all in one card.

I stamped out the floral images from the Heels to You stamp set using Fadeout Ink. I love using Fadeout Ink for no-line coloring and today, I wanted to go for purple/blue flowers.

For the background panel, I used the new Atelier inks in My Jam Purple and Peacock Blue. I used these inks on watercolor paper and created a simple striped background. I painted three lines of purple and two lines of blue. I love how it turned out and it's such a pretty and vibrant background.

I trimmed my card panel and matted it on gold cardstock. Using some rectangular dies, I cut out a few borders. One was actually by accident but I liked how it looked a bit wonky and uneven so I used it.

I adhered the two sets of flowers on the top right and bottom left corner of the card. For the sentiment, I used the coordinating dies from the Heels to You stamp set to have the sentiment "Beautiful Friend". I also decided to use Juicy ink to stamp "You're A" directly onto the card and using Artic White Embossing Powder, it worked perfectly to match the sentiment in white cardstock.


I do adore how this card turned out and am really loving these Atelier Inks to create with.


Thanks for stopping by today and I hope you get inspired to create. Come back again soon for more inspiration and ideas! Happy Crafting!

Friday, February 7, 2020

Hey Gorgeous, Colorful Birthday Card by Ilda | Coloring with Atelier Inks


Hey Gorgeous, Colorful Birthday Card by Ilda | Coloring with Atelier Inks

Hello, my friends. Ilda here! 

I am back again today with a colorful Gorgeous Birthday Card featuring the new HEY GORGEOUS stamp set recently released from Ink On 3. I love the size of this large stamp image! Plus, it comes with a bunch of little flower accessories and great sentiments to create some great girlfriend cards.

If you know me I love all things rainbow, so of course rather then just painting one plain old hair color I had to use all of them, lol!

CARD DETAILS

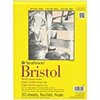
For this card, I began by stamping out the image from the HEY GORGEOUS set using BLACKOUT INK onto Bristol paper.

Hey Gorgeous, Colorful Birthday Card by Ilda | Coloring with Atelier Inks

I then began by water coloring her skin using a small tip water brush pen. To create the skin color I used a blend of Atelier Twiggy BrownBee Sting YellowMarilyn Red, and Marigold Orange.  To her cheeks, I added a touch of Marilyn Red color.

Next, I colored her hair in rainbow order starting with Atelier Marilyn RedMarigold OrangeBee Sting YellowGoddess GreenPeacock Blue, and My Jam Purple.

For her hat, I watercolored it using Atelier Twiggy Brown, I love the shade you get with the brown as it resulted in a leathery kinda look.

To finish off her lips I used the ink from the Re-inker Marilyn Red because I wanted a deeper shade of red on her lips.

Hey Gorgeous, Colorful Birthday Card by Ilda | Coloring with Atelier Inks

Once the image was dry, I stamped out the black florals on the hat using JUICY INK and heat set it using the BLACK AS NIGHT EP. For the Gold Flower, I used GOLD RUSH EP and fussy cut it out to add to the hat.

I then finished off the card by stamping out the sentiments from the HEY GORGEOUS set and then used LIQUID PIXIE DUST to add sparkle to her lips and hair. If you are on Instagram watch my feed as I will try posting a clip of the sparkle this card has as pictures can never do it justice.

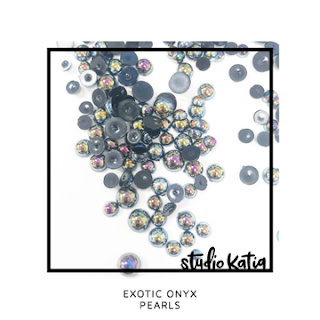
For more finishing touches, I added a pearl to the flower and glossy accents to her lips for additional shine!

I hope you found this Hey Gorgeous Colorful Birthday Card inspiring. Have a colorful day!

Thank you for stopping by 😊
Until next time... Happy Crafting 👋


SUPPLIES


HEY GORGEOUS
HEY GORGEOUS
Shop at:
IO3
BLACKOUT INK
BLACKOUT INK
Shop at:
 IO3
SMALL TIP WATER BRUSH PEN
Shop at:
 IO3
Re-inker Marilyn Red
Re-inker 
Marilyn Red
Shop at:
IO3
Atelier Marilyn Red
Atelier Marilyn Red
Shop at:
 IO3
Atelier Marigold Orange
Shop at:
 IO3
Atelier Bee Sting Yellow
Shop at:
 IO3
Atelier Goddess Green
Shop at:
 IO3
Atelier Peacock Blue
Shop at:
 IO3
Atelier My Jam Purple
Shop at:
IO3
Atelier Twiggy Brown
Shop at:
 IO3
JUICY INK
JUICY INK
Shop at:
 IO3
Gold Rush Embossing Powder
Shop at:
 IO3
Black As Night Embossing Powder
Black As Night EP
Shop at:
IO3
LIQUID PIXIE DUST
LIQUID PIXIE DUST
Shop at:
 IO3
Strathmore Bristol Pad
Shop at:
SSS | AMZ
MINI MISTI
MINI MISTI
Shop at:
SSS | AMZ | SBC | SK | HBS
EMBELLISHMENT WAND
Embellishment WAND
Shop at:
SSS | SK
EXOTIC ONYX PEARLS
EXOTIC ONYX 
PEARLS
Shop at:
SSS | SK
STUDIO KATIA GLUE
STUDIO KATIA GLUE
Shop at:
SSS | SK

Thursday, February 6, 2020

Birthday Candles with Atelier inks

Hello my fabulous friends!

Kassi here

I've had lots of birthday cards to make lately, because there are a bunch of birthdays in my family right near the beginning of the year. When I sat down to work on this card, I knew I wanted something colorful but simple  (I have some lovers of CAS designs in my family)...  and the rainbow Altelier inks sitting on my shelf became my inspiration!

Let's take a look at how I made this card, and I'll throw in a few little tips along the way!