Friday, April 22, 2011

Fun and Easy Basket Project for Kids!

This is a really fun and easy project you can do with your kids or a whole class.
kids really like to make things they they can be creative with and give as gifts!

Supplies:
12x12 card stock
Glue sticks
Grass (for inside baskets)
Markers
Easter Egg Treat Bags SVG Kit. By: SVG cuts.com

This will make a basket 6.5" H (including handle) x 5 1/4" in length x 2.5" wide. Great size for putting in a little grass, a plastic egg and a peep. Or whatever your favorite things are.

Decide your colors
Cut the basket shapes
Cut designs for them to glue on
(Do all of your cutting ahead of time, so you are ready to go)

I cut 2 basket shapes for each girl. One pink that they could basically copy the model I brought in and one out of plain white card stock that they could really be creative with.

I worked with about 15 girls all about 7 or 8 yrs. old, on these cute egg baskets the other day. They were all able to put them together themselves after I showed them the steps.

They loved using markers to give them a unique look.

They made some beautiful baskets and had a great time doing it.

I hope you will give this project a try. Show me some of yours on my facebook page! :)

Sunday, April 10, 2011

Monday, April 4, 2011

Create an Explosion Photo Album / Box

I just had a fun free gift giveaway and will have another one very soon! :)

(I created this box for a birthday gift for my friends Mother)
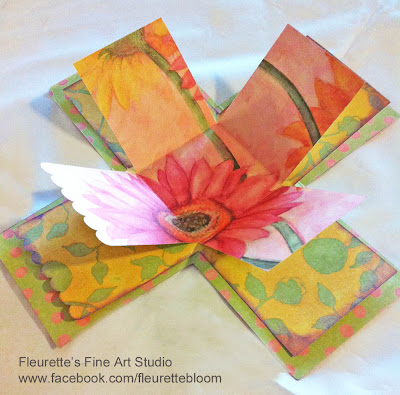
Open it up and it explodes with color

Explosion boxes are really fun, beautiful and useful. If you are not familiar with them, look closely at the above photo you will see framed areas where you can put your photos. Your friends and family will enjoy opening it and viewing all the photos inside. (Click on The last photo in this post for larger view)

Their really quite simple to make. Lets get started. :)

Supplies:
  • 4 or more 12 x 12 pieces of patterned paper
  • Glue
  • Scissors or cutting machine
  • Paper scorer
  • glitter, embellishments and ink (Optional)
SVGCuts Files Used:


Cut the first three papers in the shape of a plus (+) sign (cut each one a bit smaller than the rest if you like for added dimension). Score them and then glue them together in the area that will be the bottom of your box.

Next cut out squares, frame shapes, flowers, butterflies or any shape in the theme you are going for (you can also purchase embellishments and paper cut-outs at most craft stores). Next cut your box top. Start glueing all your frames and embellishments where you would like them to be. Now you are ready to add photos or give it as a gift!

Your friends and family will enjoy opening it just for fun and also looking at photos in a new way. Enjoy and be creative :)

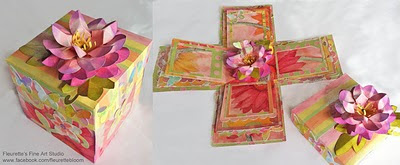
Click on this photo to see a larger view of all the details.

Sunday, April 3, 2011

Quick, Fast And Simple Card Using little treasures you already have


(Click on image to see larger view)
Here is a really simple yet elegant card I made using items I already had around. I had no plan and just whipped it up, and here is how I did it. :)

When I cut my images to make cards or other fun paper projects, I usually fill up my whole 12 x 12 or 8.5 x 11 piece of paper and cut out a bunch of extra shapes. I put those aside in a little box or baggie for later use.

I do this for two reasons:

First - I can't stand to throw away paper and I don't like to hang on to all kinds of odd shaped bits of paper. It drives me crazy lol.

Second - I then have all these fun little treasures (shapes) to rummage through when I want to make something. It makes it fun and spontaneous, I love adding things as I go along.

I also keep around some blank cards that are ready to be decorated at a moments notice.

Below you can see a few pieces I picked out of my little paper treasure box and arranged them on the pre-made blank card. I inked the sides of my shapes, for some added dimension, glued it together and sent it off in the mail. :) (See finished card at the top of this post)

(Click on image to see larger view)
With a few bits of beautifully shaped pieces of paper, a brad, a blank card, some glue and ink you have the makings for a fantastic card.

You will be ready for any occasion at a moments notice. :)

So have some fun, be spontaneous, make something with what you have around you.

Be sure to go to my Facebook page and hit the like button and post some of your projects there. :) Click here to like Fleurette's Fine Art Studio On Facebook