Monday, June 24, 2019

Feel Better Soon Card by Ilda

Hello, Ink On 3 Friends, Ilda here!

If you have been following me recently you may have noticed I have been a bit MIA from the Blog and Social Media this past week. I had my Gallbladder removed last Wednesday and have been slowly recovering since.  Thankfully, every day I feel a little better and am sure I will be back to normal soon!

So today's Feel Better Soon card couldn't be more appropriate. At the time made it, I thought of other people going through some tough times and now I kind of chuckle as the beat up hamster reminds me of me! So ironic now.


CARD DETAILS

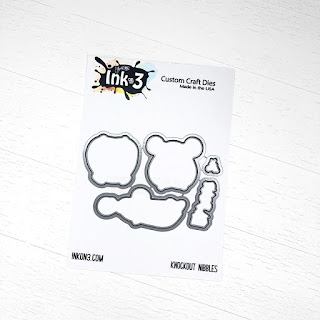
To begin I stamped out the beat up hamster from the KNOCKOUT NIBBLES set using Blackout Ink and then colored him in using Copic Markers. I then used the coordinating  KNOCKOUT NIBBLES die to die cut the critter.

I then picked a spot on the lower half of the card front where the Hamster would be and used the same coordinating die to cut the space for the image to peek through from the inside of the card. On to the black card front base, I stamped out some images using Juicy ink and used 3 different colors of embossing powders to set the different images in.  For the Ka-Pow I used Arctic White, the stars were done using Gold Rush and the starbursts were done using the Chrome Embossing powder.


Once the front embossing was complete, I added some foam tape behind the knocked out hamster and glued him into the die cut space.


Next, I stamped out the rest of the greeting on the inside of the card using Blackout Ink again and a stamp positioner to ensure it stamped well.


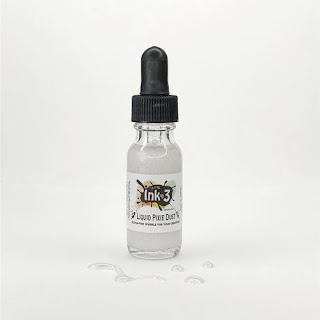
For some finishing details, I added some Liquid Pixie Dust to his bruised eye and also added some Glossy Accents and highlights to the gloves. 

I hope you are all having a better week than I am. I will be back on my feet soon... but for now, I'm taking it easy with lots of couch breaks.

If your feeling down or beat up for some reason I hope this card has brought a smile to your face. Thank you for stopping by and until next time... Happy Crafting!

Ilda


SUPPLIES
KNOCKOUT NIBBLES
KNOCKOUT NIBBLES
Shop at:
 IO3
KNOCKOUT NIBBLES Dies
Shop at:
 IO3
Blackout Ink
Blackout Ink
Shop at:
 IO3
Juicy  Ink
Juicy Ink
Shop at:
 IO3
Arctic White Ultra Powder
Shop at:
 IO3
Gold Rush Embossing Powder
Shop at:
 IO3
Chrome Ultra Fine Embossing Powder
Shop at:
 IO3
Liquid Pixie Dust
Liquid Pixie Dust
Shop at:
 IO3
Mini Misti Tool
Mini Misti Tool
Shop at:
SSS | AMZ | SB | SK
Neenah  80 LB SOLAR WHITE
Neenah 80 LB SOLAR WHITE
Shop at:
SSS | AMZ
Black Cardstock 110bs
Shop at:
AMZ
Gemini Jr Die Cutting/Embossing Machine
Shop at:
SSS | AMZ | SB
Double-Sided Foam Tape
Shop at:
SSS | AMZ
WHITE Gelly Roll Pens Set
Shop at:
SSS | AMZ
Glossy Accents
Glossy Accents
Shop at:
SSS | AMZ | SB | HBS

Tuesday, June 18, 2019

Heels to You - Reverse Image

Hello, my name is Jeannie and I'm a shoe addict.

So it's only fitting that I'm up on Inkon3 blog to share a card I created using the gorgeous Heels to You stamp set. When I first saw this set, I knew I had to have it because it is so, so pretty! Heels are something that I, now, wear when I'm going to a special event or want to feel extra girly and pretty! This particular shoe is just that especially with that flower!


However, I needed a pair of shoes, not just one and I thought that using the reverse image of it would be perfect in doing so. This stamp image is a rather large one and so I had to make sure both shoes would fit on an A2 card panel. Not only that, I'd have to create the reverse image of it!

I stamped out the first heel using Blackout hybrid ink and used a mask to cover the shoe since it'll be in the front. Then I decided where I was going to place the second shoe. Admittedly, I did this twice because the first time, I stamped the second shoe and the second heel was completely hidden and it looked so odd! To help me, I just marked off in pencil on the card where I wanted it to be.


To create the reverse image, I took a piece of scrap acetate to help. Using my Misti, I inked up my image and carefully stamped the image onto that piece of acetate. Note! Don't press too hard because the acetate is slippery. This method won't produce the clearest image, however,  you can go in with an alcohol friendly pen to outline it. It's a little extra work but totally worth it. It doesn't have to be perfect since the stamp will be pretty faint and when it's not perfect, I just use darker colors to cover up any imperfections.

Once I had the image of both heels, I was ready to color. This turned out exactly how I imaged in my head so I was pretty excited.

For the sentiment, I colored up a piece of white cardstock with the same red alcohol markers I used for the flowers and die cut the word "beautiful" from the coordinating Heels to You die set. To give it a little more dimension, I glued two additional white die cut words to it. Once I placed it on the card, I stamped the "You're" in the same Blackout hybrid ink.


To finish off the card, I added a little distress ink around the edges of the card and some Unicorn Tears embellishments from Trinity Stamps around the empty areas. It really completed the card!

I hope you enjoyed today's card and are inspired to create!

→ TO SEE MORE ←

Saturday, June 15, 2019

No-Line Coloring - Hollyhocks

Hi everyone! I hope you're having a fabulous start to the weekend! 

Today, I'm sharing a wonderful card by our Design Team member Dana Joy. She is just fantastic and created this gorgeous card with no-line coloring using Inkon3's Fadeout Ink along with the Hollyhocks stamp set. 


If you would like to see how this card came together, she did a Periscope for your viewing pleasure and a detailed blog post if you prefer to read. Don't you think this card came together so nicely? I love the details of the flowers, especially with that background! 


 Thanks for stopping by today and I hope you got some inspiration to create with this stamp set.

Wednesday, June 12, 2019

Snow Cool Card

Hi everyone! This is Jeannie, Design Team coordinator for Inkon3, and from time to time, I'll be popping in to share some of the Design Team members creations. I hope you enjoy all the fun posts and get inspired to create!

Today, Anthony will be sharing a "cool" card using a couple of the stamps & dies from Inkon3 along with his favorite, Liquid Pixie Dust, that is a must have in your crafty stash!

Here is how he created this card:

First, using some post it tape, he masked off an area on the cardstock and then he used a blending brush to add on some blue ink.


For the coloring, Anthony used Chameleon markers to color in the image from the Snow Cool stamp set. Using the Liquid Pixie Dust, he added it to the cute penguin to add the shine and glitter.


To create a sentiment, Anthony used the Phat Alphanumeric dies with Neenah solar white paper to cut out the word "Cool". Of course, there's never too much glitter so he added Liquid Pixie Dust to the words.


As a finishing touch to the card panel, he splattered some blue ink and Liquid Pixie Dust to the front of the card.


For the sentiment, he used the Juicy Clear Embossing & Watermark Ink to stamp out the "You Are" with Artic White embossing powder.


Don't you love how this card came together? If you're interested in seeing this card come together in action, check out his process video on YouTube below.


Thank you for joining us on the blog today and hope you come back soon!

Saturday, June 1, 2019

Best Dad Ever | Action Wobbles Card by Ilda

Happy weekend my friends, Ilda here!

Today I have a fun Action Wobbles Card to share with you for Father's Day. I can't believe it is already June and Father's day is just around the corner! 


 CARD DETAILS

So to begin this card I stamped out this cute little Hamster from the Knockout Nibbles stamp set using Blackout Ink and then colored him in using Copic Markers. I then used the Knockout Nibbles Coordinating Dies to cut out him out. To his little boxing gloves, I added a little Liquid Pixie Dust and them finished them off with glossy accents.

For the sentiment, I stamped out the words using Juicy Ink and then heat set the ink using Arctic White embossing powder. For the background, I die cut some stacked stars out of red, yellow and blue card stock and glued them to the card base. 

Once the stars were glued in place, I attached a wobble spring to the back of Knockout Nibbles and added him to the center of the star. I just love adding that little interactive element to a card.

I hope this card inspired you, it was such a fun card to make and it is even more fun to play with. I will share a clip of it in action on Instagram. So hop on over IG to check it out.

Thank you for stopping by. Wishing you all a great weekend 😊
Until next time... Happy Crafting 👋