Showing posts with label Liquid Pixie Dust. Show all posts

Saturday, October 16, 2021

Heat Embossed Poinsettia Card

I have a no coloring required card to share with you using the InkOn3 Poinsettia Stamp Set and coordinating dies! 


I stamped the flowers and leaves from the Poinsettia Stamp Set onto red and green cardstock using Juicy Watermark Embossing Ink and embossed them with Arctic White Fine Detail Embossing Powder. I stamped and heat embossed a bunch so that I would have enough to cover a full background and have some extras left over. I wanted to add a little bit of dimension so I blended a bit of Twiggy Brown Atelier Ink to the centers of the flowers and Trinity Teal on to the bottom of the leaves. I added some gold watercolor ink spatters onto the flowers and leaves and used the Poinsettia Coordinating Die Set to cut out the images. 


I arranged the poinsettias and the leaves all over my card base and adhered them with liquid adhesive. Check out my video for some quick tips for adhering multiple small images at once! 


I die cut a large sentiment from black cardstock and covered it with Liquid Pixie Dust for some super magical sparkle and added it to the card with foam tape. That's it! Have a great day! 

Tuesday, May 25, 2021

Rainbow Peony Friendship Card

Rainbow Peony Friendship Card,InkOn3,Atelier Inks,Re-inkers, here for you stamp set,Liquid Pixie Dust,Card Making, Stamping, Die Cutting, handmade card, ilovedoingallthingscrafty, Stamps, how to,

Hello, my crafty friends, and Happy Tuesday!

Ilda here from I Love Doing All things crafty with today's simple card featuring a bunch of goodies from InkOn3 plus one of the most recently released stamp sets, Here For You.

CARD RECIPE
  • On a piece of Watercolor Paper prepare the surface for heat embossing using an anti-static bag.
  • Stamp put Peony image from the Here For You Set multiple times onto the watercolor panel. Use a black pigment ink of choice and heat set it using Crystal Clear E.P.
Rainbow Peony Friendship Card,InkOn3,Atelier Inks,Re-inkers, here for you stamp set,Liquid Pixie Dust,Card Making, Stamping, Die Cutting, handmade card, ilovedoingallthingscrafty, Stamps, how to,
  • Brush Atelier Re-Inker Colors in Rainbow order across the panel (see linked inks below in supply list), blending previous colors together for a smooth transition.
  • Allow cardstock to dry.
  • Fussy cut the images out.
  • Used foam to pop up the flowers up onto a piece of white cardstock. Trim off any overhang pieces.
  • Use a stamping tool to stamp out the sentiments with Blackout Ink. I curved the sentiments around the flowers for some interest.
Rainbow Peony Friendship Card,InkOn3,Atelier Inks,Re-inkers, here for you stamp set,Liquid Pixie Dust,Card Making, Stamping, Die Cutting, handmade card, ilovedoingallthingscrafty, Stamps, how to,
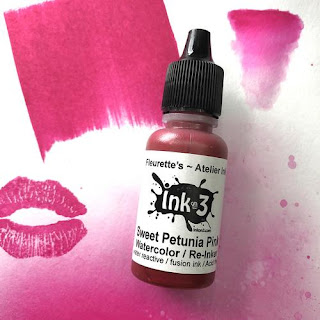
  • Finish by painting on a layer of Liquid Pixie Dust to the Peony blooms and adding a trail of rainbow pearls. (See supply list for pearls used).
  • To clean my stamps and make them look brand new again I use the most amazing stamp cleaner and Cloth that is now back in stock again!
⇊⇊

Thank you for stopping by and until next time... Happy Crafting!

SUPPLIES
HERE FOR YOU
HERE FOR YOU
Shop at:
IO3
ATELIER SWEET PETUNIA RE-INKER
Shop at:
IO3
Re-inker Marigold Orange
Shop at:
IO3
Re-inker Bee Sting Yellow
Shop at:
IO3
Re-inker Goddess Green
Shop at:
IO3
ATELIER TRINITY TEAL RE-INKER
Shop at:
IO3
CRYSTAL CLEAR Emb Pwd
Shop at:
IO3
BLACKOUT INK
BLACKOUT INK
Shop at:
IO3
LIQUID PIXIE DUST
LIQUID PIXIE DUST
Shop at:
IO3
MED. WATER BRUSH
MED. WATER BRUSH
Shop at:
IO3
STAMP CLEANER
STAMP CLEANER
Shop at:
IO3
INK OFF CLOTH
INK OFF CLOTH
Shop at:
IO3
MAGIC POWDER BAG
MAGIC POWDER BAG
Shop at:
SSS | AMZ
MINI MISTI
MINI MISTI
Shop at:
SSS | SB | HBS
Strathmore WATERCOLOR
Shop at:
SSS
VersaFine ONYX BLACK Ink
Shop at:
SSS | AMZ | SB | HBS
Black and Decker  Heat Gun
Black and Decker Heat Gun
Shop at:
AMZ
Majestic Royal and Langnickel Brush Set
Shop at:
AMZ
NEENAH SOLAR WHITE 110
Shop at:
SSS | AMZ | HBS
TRIANGLE TRAY
TRIANGLE TRAY
Shop at:
SSS | SK
EMBELLISHMENT WAND
EMBELLISHMENT WAND
Shop at:
SSS | SK
BEARLY ART PRECISION GLUE
Shop at:
AMZ
WINE BERRY PEARLS
WINE BERRY PEARLS
Shop at:
SSS | SK
BUBBLEGUM PEARLS
BUBBLEGUM PEARLS
Shop at:
SSS | SK
RIPE PERSIMMON PEARLS
Shop at:
SSS | SK
LEMON BURST PEARLS
LEMON BURST PEARLS
Shop at:
SSS | SK
SEAFOAM PEARLS
SEAFOAM PEARLS
Shop at:
SSS | SK
BLUEBELL PEARLS
BLUEBELL PEARLS
Shop at:
SSS | SK
FOAM SQUARES
FOAM SQUARES
Shop at:
SSS | HBS

Saturday, February 27, 2021

Rainbow Atelier Ink Watercolor

I just LOVE to watercolor with InkOn3 Atelier Inks! They are bright and vibrant and move so well in water! 


I used 8 colors of Atelier Ink on my rainbow background - all except Shark Tooth White, Twiggy Brown, and Paint it Black. I stamped a geometric background, but you could certainly use a ruler and a marker and draw your own background. I stamped first with Juicy Clear Embossing Ink and then with Blackout Hybrid Detail Ink and heat embossed with Crystal Clear Ultra Fine Embossing Powder


I smooshed my Atelier Ink Pads onto my work surface and used a wet brush to add color to each area of my background. I tried my best not to put the same color next to each other and to evenly space out each color. Once my background was painted and dry I took clean water and flicked it onto my background and picked it up with an Ink Off Cloth. I repeated this three times to intensify the lift effect. 


I didn't want to cover up a lot of my pretty background, so I added a few die cut sentiments and covered the large "hello" with Liquid Pixie Dust so that it would stand out. And that's it! I hope you give this technique a try! 

Sunday, January 31, 2021

Stolen Heart


Hello Everyone!
It's Ceal here to share with you a card using the Racoon Hugs set. I love this cute trash panda who is stealing hearts. 
To create ths card I started with a top folding card base and a stitched panel. I used a cloud stencil to create a background and then stamped the hearts and sentiment. The Racoon (Trash Panda) I stamped on a seperate piece of cardstock, colored it using alcohol markers and cut it out using the Coordinating die. I added some Liquid Pixie Dust to the balloon to give it some sparkle. 


Tuesday, December 22, 2020

Liquid Pixie Dust for Frosty Iced Flowers

  Hello and thanks for stopping by! Today I'm happy to share a project with you using the Blessed stamp set and Atelier Inks with a beautiful stencil from Ink on 3 to create a frosted ink blended look.


The Blessed stamp set is filled with wonderful sentiments as well as a large cross. My favorite saying from this set is "Jesus is the Reason for the Season", which is perfect to take the spotlight in a simple Christmas card.
 The floral area was so much fun to create! I started out with a piece of gray cardstock, which is the same color as the card base. Placing the Flora Stencil only over one end of the cardstock, it was taped in place with a bit of washi tape. First came the Shark Tooth White Atelier ink on a blending brush over the entire area, then I worked Trinity Teal Atelier ink from the center of the flower so it would lighten toward the petal's edge. You could totally stop there and use the image on your project but why not give it a frosty and iced look?
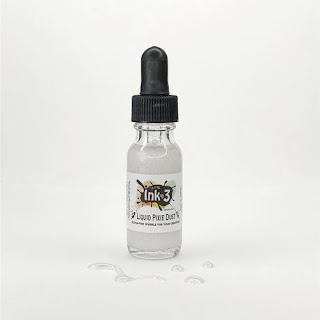
I was inspired by the look of frosted poinsettias I see during the holiday season and Ink on 3's Liquid Pixie Dust is perfect! Using a stiff paint brush, I "pounced" the Pixie Dust onto the stencil image while it was still secured in place. The Pixie Dust mixes with the ink and leaves behind a gorgeous frosty look.
 
 Be sure to check out the video tutorial for a full process on coloring this card.


Here is an easy step by step how-to video for creating this card.


SUPPLY LIST:

Blessings stamp set: https://inkon3.com/products/blessings-4x6-clear-stamp-set?_pos=2&_sid=1a98c9e34&_ss=r&aff=35

Blessings coordinating dies: https://inkon3.com/products/blessings-coordinating-die-cuts-with-word-dies?_pos=1&_sid=1a98c9e34&_ss=r&aff=35

Flora Stencil: https://inkon3.com/products/flora-6x6-stencil?_pos=1&_sid=f4c32f972&_ss=r&aff=35

Atelier Shark Tooth White- Artist Grade Fusion Ink: https://inkon3.com/collections/atelier-ink-pads/products/atelier-shark-tooth-white-artist-grade-fusion-ink-pad?aff=35

Atelier Trinity Teal- Artist Grade Fusion Ink: https://inkon3.com/collections/atelier-ink-pads/products/atelier-trinity-teal-artist-grade-fusion-ink-pad?aff=35

Juicy Clear Embossing & Watermark Ink: https://inkon3.com/collections/ink/products/juicy-embossing-watermark-ink?aff=35

Arctic White Ultra Fine Embossing Powder: https://inkon3.com/collections/ultra-fine-embossing-powder/products/arctic-white-ultra-fine-embossing-powder?aff=35

Liquid Pixie Dust: https://inkon3.com/products/liquid-pixie-dust?_pos=1&_sid=7b11563fd&_ss=r&aff=35 

Hero Arts Pebble cardstock 10 pack: https://shrsl.com/2oe67

Something New Embellishment Mix: https://shrsl.com/2oe5v

Trinity Stamps Blending Buddy Brush:   http://shrsl.com/23yyi

Blending Bar – Platform Base: https://shrsl.com/2f4qz

Blending Buddy and Blending Bar System w/accessories: https://shrsl.com/2f4r5

Hero Arts Precision glue tube: https://shrsl.com/2k42g

Darice Double Sided Foam Sticky Strips: https://shrsl.com/2951f

Marvy Double Sided Jewel Picker: https://shrsl.com/2b566

Trinity Stamps Tidy Tray: https://shrsl.com/2c4f6

MISTI Stamping Tool REDESIGNED: https://shrsl.com/2g8kw

MISTI Creative Corners: https://shrsl.com/2g8kz

MISTI Mouse Pad Cushion: https://shrsl.com/2g8l1

Teflon Burnishing Tool: https://shrsl.com/2g8md

Teflon Ergonomic Tool: https://shrsl.com/2g8me

Spellbinders Platinum 6 die cut and emboss machine:  https://www.ellenhutson.com/platinum-6-die-cutting-and-embossing-machine-spellbinders-tools/#_a_238

Scor-buddyMini Scoring Board:  https://www.ellenhutson.com/scor-buddy-mini-scoring-board-9x7-5/#_a_238

Tonic 8.5” Guillotine Paper Trimmer by Tim Holtz:  https://www.ellenhutson.com/tonic-comfort-8-5-inch-guillotine-paper-trimmer-by-tim-holtz/#_a_238

EK Success 5” Scissors: https://www.ellenhutson.com/ek-tools-precision-5-inch-scissors-with-sheath/#_a_238

Purple Tape ½”:  https://www.ellenhutson.com/icraft-purple-tape-1-2-in-x-15-yards/#_a_238

Tonic Nuvo Deluxe Adhesive: https://www.ellenhutson.com/tonic-nuvo-deluxe-adhesive/#_a_238

Post It Adhesive Roll: https://www.ellenhutson.com/3m-post-it-adhesive-roll-white-1x400-in/#_a_238

Pixie Spray: https://www.ellenhutson.com/icraft-pixie-spray/#_a_238

Scotch Foam Tape Roll:  https://www.ellenhutson.com/scotch-foam-mounting-tape/#_a_238


Does this project bring you lots of new ideas for creating? We would love to hear from you! Thank you for visiting us today and I look forward to sharing again with you soon!

Jenny Hall


Monday, November 23, 2020

Hugs, Kisses and Unicorn Wishes


Hey everybody! 
It's Ceal here to share a card with you today. I have been busy making Christmas cards and then I had someone order a birthday card with an unicorn so I immediately knew what set I was going to use.  
I started with a white top folding card base and a white panel cut to the same size. I stamped the unicorn from the set Magical Unicorn and colored it using Copic markers. I added some shimmer with Liquid Pixie Dust and added shine to her horn with glossy accents. 

Since I have been working on Christmas cards, I was thinking I may try coloring her in Christas colors. If I do, I will come back and show you. 


Saturday, November 14, 2020

Little Birdie Cardinal Card

There's a new stamp set in the InkOn3 shop and it covers all of your bases! There are flowers, twigs, lots of sentiments, and of course a little birdie! 


I saw the Little Birdie Stamp Set and immediately wanted to create a Christmas cardinal card! I wanted a simple background, so I grabbed the Leafy Forest Stencil and Goddess Green Atelier Ink. As I blended the ink over the stencil I realized that my background was looking too "spring." The Goddess Green Atelier Ink is a gorgeous green color, but a little too bright for my Christmas background. I added a little bit of Twiggy Brown Atelier Ink over the Goddess Green Atelier Ink and the result was a pretty olive green colored background. Perfect! 


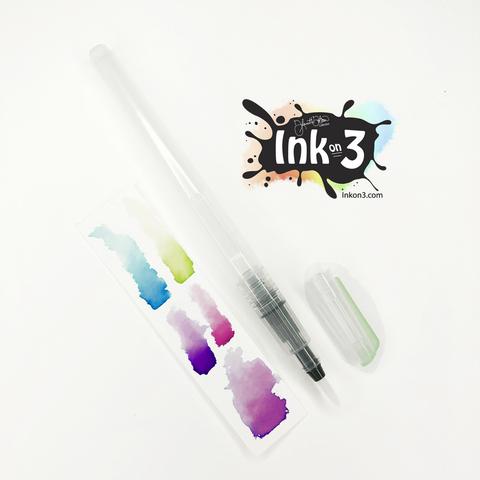
I used Blackout Hybrid Detail Ink to stamp the bird, branch, and berries from the Little Birdie Stamp Set and colored them with Copic Markers. I used scissors to trim them out and added them to the card with a mix of liquid adhesive and foam tape. I keep my Liquid Pixie Dust in a Small Fine Tip Water Brush Pen and added shimmer to all of the red areas of my coloring. 


I used Blackout Hybrid Detail Ink to stamp a sentiment from the Little Birdie Stamp Set at the bottom of my card - and that's it! I hope you check out the Little Birdie Stamp Set - it's in the shop NOW

Saturday, October 10, 2020

Knockout Nibbles Encouragement Card

 I needed a quick, easy, and cute encouragement card for a friend who needs a "pick me up," so I reached for the InkOn3 Knockout Nibbles Stamp Set


Since this card has to get mailed across the country I thought it would be best to stretch myself and create a one layer card. It was hard, but I did it! Haha! I stamped the little critter and sentiments from the Knockout Nibbles Stamp Set onto a piece of white cardstock using Blackout Hybrid Detail Ink - my FAVORITE ink for Copic coloring! I used just a few colors of Copic markers to color in the little critter. 


Just because this is a one layer card doesn't mean it has to be boring! I grabbed a couple of coordinating Copic colors - yellow and blue - and just started dotting around my image. I did a big dot and then a bunch of little dots, another big dot and a bunch more little dots, and repeated with both colors until I had the look I wanted. 


It's not a card from me if it doesn't shimmer! I keep a bit of Liquid Pixie Dust in a Small Fine Tip Water Brush and painted on some magical shimmer onto the critter to finish the card! I hope you're inspired!