Showing posts with label Little Birdie Stamp Set. Show all posts

Wednesday, December 23, 2020

Lovebirds Valentine's Day Card | Mirror Stamping using Fadeout Ink


Hello, my friends, Ilda here 👋

Can you believe Christmas Eve is tomorrow? Are you ready?! Ready or not, despite all the time we spent at home this year with the social distancing, and isolations, it still felt like this year flew by. Hopefully next Christmas this will all be over and we can return to our normal Holiday traditions with all our family and friends.

Well, let's get on with today's card... Is it too soon to start thinking about Valentine's? Personally, I was actually excited to work on something other than Christmas and the little bird from the latest LITTLE BIRDIE Set was the perfect inspiration for my first Valentine's Day card.

CARD DETAILS
To begin, I started by stamping out the birdie on the left onto a piece of Bristol paper. The stamp comes from the LITTLE BIRDIE set and the ink I used was FADEOUT INK. I then placed the MIRROR IMAGE STAMP in the MISTI tool and stamped the little birdie again, this time onto the MIRROR IMAGE STAMP using FADEOUT INK. I then picked up the image off the MIRROR STAMP by placing the paper face down to pick up and transfer a mirrored image onto the Bristol piece of paper. To get a good transfer I repeated the last step 3 times. 

The images were then watercolored in using all the Atelier inks linked below. 


For the top panel, I used the LEAFY FOREST STENCIL and blended out the leaves using ATELIER GODDESS GREEN and very light pressure with a blending brush. To the top half of the panel, I die cut a heart-shaped window opening to frame the lovebirds and then trimmed down the panel to attach over the lovebird image with some foam tape.


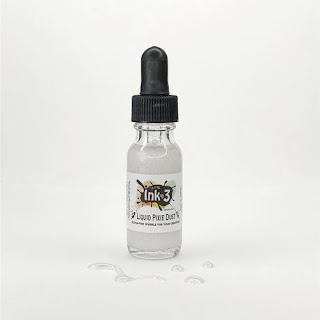
The sentiment on the card panel comes from the RACCOON HUGS set that I stamped out using ATELIER TWIGGY BROWN Ink. The little heart in the center of the birds also comes from the Raccoon Hugs set. Difficult to see from the photos but I added some LIQUID PIXIE DUST to the heart.


I hope loved my little Lovebirds Valentine's Day card and got some inspiration from it. Mirror stamping is a great way to stretch your supplies and create cute Valentine Scenes with any critter stamp you may already have. Now that you saw my no line results with Mirror Stamping, maybe you will give it a try.

Thank you for stopping by and until next time... Wishing you all a safe and very Merry Christmas!
Connect with me also on my Blog, Facebook Page, Instagram, and YouTube

SUPPLIES
LITTLE BIRDIE
LITTLE BIRDIE
Shop at:
IO3
MIRROR IMAGE STAMP
MIRROR IMAGE STAMP
Shop at:
IO3
RACCOON HUGS
RACCOON HUGS
Shop at:
IO3
LEAFY FOREST STENCIL
Shop at:
IO3
FADEOUT INK
FADEOUT INK
Shop at:
IO3
ATELIER GODDESS GREEN
Shop at:
IO3
ATELIER TRINITY TEAL
Shop at:
IO3
ATELIER SWEET PETUNIA
Shop at:
IO3
ATELIER MARIGOLD ORANGE
Shop at:
IO3
ATELIER TWIGGY BROWN
Shop at:
IO3
LIQUID PIXIE DUST
LIQUID PIXIE DUST
Shop at:
IO3
BRISTOL PAPER
BRISTOL PAPER
Shop at:
SSS | AMZ
MINI MISTI
MINI MISTI
Shop at:
SSS | AMZ |HBS
GEMINI JR. DIE CUTTER
Shop at:
SSS | AMZ | SB
SHAKER HEART
SHAKER HEART
Shop at:
SSS | SK
INK BLENDER BRUSHES
INK BLENDER BRUSHES
Shop at:
SSS | SK
STUDIO KATIA GLUE
STUDIO KATIA GLUE
Shop at:
SSS | SK
FOAM TAPE - WHITE
FOAM TAPE - WHITE
Shop at:
SSS | SK

Thursday, December 17, 2020

No line Coloring with Guest Designer Melinda

Hello everyone, Melinda here with, sadly my last post as guest designer for Inkon3. I really enjoyed sharing some ideas with you all and hope you found some inspiration.

For my last project I wanted to use Lil Birdie, it’s such a fun versatile set. I was inspired by some stamp sets I’ve seen with floral garlands on balloons and other various shapes. I decided on a heart shape for my garland and I was off and running!

I started by stamping the large flower with Fadeout ink. I watercolored the flowers with a mix of Marilyn Red and Marigold Orange, mix until you get the desired shade of peachy pink. Next paint the leaves with a mix of Goddess Green and a touch of Twiggy Brown to make the leaves a more olive green. Fussy cut the floral after it’s completely dry. Now I decided on a heart, but you can use whatever shape speaks to you. When you cut your shape out, take the flower and place it where you want it and use it as a guide for where to stamp a few extra leaves and some berries. Stamp the leaves and berries with your Fadeout ink and watercolor the leaves with the same combination of green and brown Atelier inks. Use Marilyn Red for the berries and leave a white highlight ( you can add it later with a gel pen also). Paint the berry stems with Twiggy Brown. After the berries and leaves dry take your water brush and wet the heart and add a bit of Trinity Teal. Allow everything to dry and adhere the flower using some dimensional tape. I added some die cut leaves with a bit of my green mixture. I glued some gold leaf to them for a little shine, but again, use what you’ve got in your stash. I’m big on using what bits and bobs I have around so I took the floral embossed piece and off set it on my grey A2 sized card base. I used some of the small sentiments in the Kit to make another birthday card. We can’t have enough birthday cards, right?

Thanks again to Inkon3 for the amazing opportunity to create and share with you all! Be safe and be well! Much love, Melinda

Friday, December 11, 2020

Little Birdie - No Line Coloring

Hi everyone! It’s Jeannie (InsideoutJeans) on the blog today with Ink on 3’s stamp set named Little Birdie stamp set. Last month, I used this stamp set in a non-wintery way; it ended up being more like a springtime card.

I stamped out the images using Fadeout Ink and did some no line coloring. I wanted a wintery scene for this card so I went with a red flower along with blue flowers. 


For the background, I mixed some My Jam Purple and Peacock Blue reinkers to create this darker blue color. I did an ombre watercolor wash on a piece of Canson XL watercolor paper with some Shark Tooth White splatter, which almost made the scene wintery. 


I just love how this card turned out! Thanks for stopping by today and I hope you get inspired to create. Come back again soon for more inspiration and ideas! Happy Crafting! 


Tuesday, December 8, 2020

Red and Gold card with Little Birdie stamps

  Hello and thanks for stopping by! Today I'm happy to share a project with you using the Little Birdie stamp set and Atelier Inks from Ink on 3 to create a bold ink blended look.


The Little Birdie stamp set is filled with gorgeous floral images in addition to a sweet little bird. I love the large and open images, which are perfect for creating many color tones.
 
The inked background is created on a piece of pink cardstock, then I added Sweet Petunia Pink, Marilyn Red and Paint it Black Atelier inks with a blending brush. The gradual deepening of colors to the lower area of the paper are very striking and perfect to add a gold embossed image! The splatters on the background are made from Nuvo Embellishment Mousse in the Mother of Pearl color and can you see the sparkle on the bird as well? I added some diluted mousse to the bird with a wet paintbrush to carry through the gold and red theme.
 
 Be sure to check out the video tutorial for a full process on coloring this card.


Here is an easy step by step how-to video for creating this card.


SUPPLY LIST:

Little Birdie stamp set: https://inkon3.com/products/little-birdie-4x6-clear-stamp-set-1?_pos=1&_sid=2a9aa4fcb&_ss=r&aff=35

Nuvo Embellishment Mousse- Mother of Pearl: https://www.ellenhutson.com/tonic-nuvo-embellishment-mousse-mother-of-pearl/#_a_238

Large Waterbrush Pen: https://inkon3.com/collections/paint-brushes/products/large-water-brush-pen?aff=35

Juicy Clear Embossing & Watermark Ink: https://inkon3.com/collections/ink/products/juicy-embossing-watermark-ink?aff=35

Atelier Sweet Petunia Pink- Artist Grade Fusion Ink: https://inkon3.com/collections/atelier-ink-pads/products/atelier-sweet-petunia-pink-artist-grade-fusion-ink-pad?aff=35

Atelier Marilyn Red- Artist Grade Fusion Ink: https://inkon3.com/collections/ink/products/atelier-artist-grade-fusion-ink?aff=35

Atelier Bee Sting Yellow- Artist Grade Fusion Ink: https://inkon3.com/collections/ink/products/bee-sting-yellow-atelier-artist-grade-fusion-ink?aff=35

Atelier Twiggy Brown- Artist Grade Fusion Ink: https://inkon3.com/collections/ink/products/atelier-twiggy-brown-artist-grade-fusion-ink?aff=35

Atelier Paint it Black- Artist Grade Fusion Ink: https://inkon3.com/collections/ink/products/atelier-paint-it-black-artist-grade-fusion-ink?aff=35

Gold Rush Ultra Fine Embossing Powder:

https://inkon3.com/collections/ultra-fine-embossing-powder/products/gold-rush-ultra-fine-embossing-powder?aff=35

Trinity Stamps Blending Buddy Brush:   http://shrsl.com/23yyi

Blending Bar – Platform Base: https://shrsl.com/2f4qz

Blending Buddy and Blending Bar System w/accessories: https://shrsl.com/2f4r5

Hero Arts Precision glue tube: https://shrsl.com/2k42g

Darice Double Sided Foam Sticky Strips: https://shrsl.com/2951f

Marvy Double Sided Jewel Picker: https://shrsl.com/2b566

Trinity Stamps Tidy Tray: https://shrsl.com/2c4f6

MISTI Stamping Tool REDESIGNED: https://shrsl.com/2g8kw

MISTI Creative Corners: https://shrsl.com/2g8kz

MISTI Mouse Pad Cushion: https://shrsl.com/2g8l1

Teflon Burnishing Tool: https://shrsl.com/2g8md

Teflon Ergonomic Tool: https://shrsl.com/2g8me

Dual Speed Heat Tool: https://www.ellenhutson.com/dual-speed-heat-tool-wow/#_a_238

EK Success Powder Tool for embossing:  https://www.ellenhutson.com/powder-tool-adhesive-deactivator/#_a_238

Strathmore Watercolor Paper Pad 9x12:  https://www.ellenhutson.com/strathmore-watercolor-paper-9x12/#_a_238 

Neenah Solar White 110 lb cardstock:  https://www.ellenhutson.com/neenah-cardstock-neenah-heavyweight-classic-crest-solar-white-110-lb-25-pk/#_a_238

Fairy Rocks Rhinestones:  https://shrsl.com/25fxg

Spellbinders Platinum 6 die cut and emboss machine:  https://www.ellenhutson.com/platinum-6-die-cutting-and-embossing-machine-spellbinders-tools/#_a_238

Scor-buddyMini Scoring Board:  https://www.ellenhutson.com/scor-buddy-mini-scoring-board-9x7-5/#_a_238

Tonic 8.5” Guillotine Paper Trimmer by Tim Holtz:  https://www.ellenhutson.com/tonic-comfort-8-5-inch-guillotine-paper-trimmer-by-tim-holtz/#_a_238

EK Success 5” Scissors: https://www.ellenhutson.com/ek-tools-precision-5-inch-scissors-with-sheath/#_a_238

Purple Tape ½”:  https://www.ellenhutson.com/icraft-purple-tape-1-2-in-x-15-yards/#_a_238

Tonic Nuvo Deluxe Adhesive: https://www.ellenhutson.com/tonic-nuvo-deluxe-adhesive/#_a_238

Post It Adhesive Roll: https://www.ellenhutson.com/3m-post-it-adhesive-roll-white-1x400-in/#_a_238

Pixie Spray: https://www.ellenhutson.com/icraft-pixie-spray/#_a_238

Scotch Foam Tape Roll:  https://www.ellenhutson.com/scotch-foam-mounting-tape/#_a_238


Does this project bring you lots of new ideas for creating? We would love to hear from you! Thank you for visiting us today and I look forward to sharing again with you soon!

Jenny Hall


Wednesday, December 2, 2020

Lil Birdie - No Line Watercoloring with Guest Designer Melinda

Hello everyone! I'm Melinda and I'm back guest designing for Ink on 3 with another watercolored card. I hope you all are settling into winter and getting some crafty time in. I have been really putting in the time myself trying to get those Christmas cards done.


I was really excited about getting to create with the set Lil Birdie because birds and florals are my two favorite things to paint. I started this card by taking all the little leaves, buds, berries and stamped them randomly on watercolor paper with Fadeout ink. I painted the background with my Karin markers and added some watery Peacock Blue here and there to make those florals really pop. I stamped the bird on a separate piece, I painted it with Trinity Teal and Paint It Black Atelier inks and the branch with Twiggy Brown. I cut the bird out with a circle die and cut a piece of vellum with a larger die. I put the vellum behind the bird and popped it up with dimensionals on to my back ground.


I was so happy with how this card came out! There was some bleeding of the inks, which I like, it gives it that loose floral look. I hope you’ll give this background stamping technique a try. It really is great for using small bits to make a big impact. 

Monday, November 30, 2020

Pretty Up Your Planner Pages with a Little Birdie and Atelier Inks


Hello Crafty Friends! It's Cheryl with the Inkon 3 creative team here to show you a quick and easy way to pretty up your planner pages! I was getting my 2021 planner ready and while I love my Year-On-One-Page Inserts, I wanted to pretty it up a bit.


First, stamp out some of the images from the Little Birdie Stamp set onto sticker paper and fussy cut the images, color with your choice of coloring medium. 


Next, create a soft teal background on your planner pages using a blender tool and the Trinity Teal Atelier Inks. I saw Fleurette work the ink on the Atelier Ink lid in one of her videos, and that really helps the Atelier Ink blend into the paper a lot smoother and I've done it since! 


Place the colored stamped images onto your planner pages, and if you'd like, you can add some coordinating washi tape on the bottom of the pages. 

Products Used:

Copics Used:
Greens: YG67, YG63, YG61
Browns: E35, E33, E31
Greys: W5, W3, W1
Pinks: R11, R00, R000
Beiges: E53, E51, E50


Friday, November 27, 2020

Warm Winter Wishes Holiday Card ft. Little Birdie

Warm Winter Wishes, Holiday Card,Ink On 3,Little Birdie Stamp Set, Christmas Card, Blackout ink, Card Making, Stamping, Die Cutting, handmade card, ilovedoingallthingscrafty, Stamps, how to,


Hey Friends and Happy Friday, Ilda here!

I am so excited to share this Warm Winter Wishes Holiday Card with you today. I absolutely love how it all came together. The design, the colors, the sparkle, and the texture..., it just may be one of my all-time favorite cards! The stamps I used come from Ink On 3's LITTLE BIRDIE Set. The images in this set are so pretty and perfect for so many occasions but I wanted to show you how it could be used for the Holidays.

CARD DETAILS

To begin, I stamped the Birdie using BLACKOUT INK and then colored it in using Prismacolor Pencils and fussy cut the image out. I actually had colored him for the first day of Kathy Raccosins latest coloring Coloring Challenge so that saved me some time when it came to putting this card together.

Warm Winter Wishes, Holiday Card,Ink On 3,Little Birdie Stamp Set, Christmas Card, Blackout ink, Card Making, Stamping, Die Cutting, handmade card, ilovedoingallthingscrafty, Stamps, how to,

The next thing I did was plan out the design using the branch stamp. Once I had it somewhat figured out, I then placed the panel in the MISTI and stamped the branch using BLACKOUT INK. I then rotated the panel 90 degrees and placed it back in the MISTI stamped the branch again to create the same design on the opposite side in reverse. I repeated the same steps for each of the leaves and then I freehand stamped the berries and extra leaves to create subtle differences. 

Warm Winter Wishes, Holiday Card,Ink On 3,Little Birdie Stamp Set, Christmas Card, Blackout ink, Card Making, Stamping, Die Cutting, handmade card, ilovedoingallthingscrafty, Stamps, how to,

The images were then colored in using Copic Markers and then to add a touch of sparkle I added a layer of LIQUID PIXIE DUST. I then trimmed down the panel that would then later be glued onto a red piece of cardstock.

Warm Winter Wishes, Holiday Card,Ink On 3,Little Birdie Stamp Set, Christmas Card, Blackout ink, Card Making, Stamping, Die Cutting, handmade card, ilovedoingallthingscrafty, Stamps, how to,

Next, I stamped out the Sending stamp on the right side of the card panel and also stamped out the warm winter wishes onto black cardstock using ATELIER SHARK TOOTH WHITE INK, to which I then trimmed down and glued in place with a bit of foam.

Warm Winter Wishes, Holiday Card,Ink On 3,Little Birdie Stamp Set, Christmas Card, Blackout ink, Card Making, Stamping, Die Cutting, handmade card, ilovedoingallthingscrafty, Stamps, how to,

To create the snow-like appearance on the branches and berries, I used Liquid Applique and puffed it up with the heat tool. Once it cooled off I added some glue on top of it and sprinkled some glitter on it for an added touch of sparkle. 

The last thing I did was to glue the Birdie in place using foam tape. 

I hope you have inspired by this Warm Winter Wishes Holiday Card of mine and I pray you and yours are staying warm and safe this Holiday season.

Thank you for stopping by and until next time... Happy Crafting!
Connect with me also on my Blog, Facebook Page, Instagram, and YouTube

SUPPLIES
LITTLE BIRDIE
LITTLE BIRDIE
Shop at:
IO3
BLACKOUT INK
BLACKOUT 
INK

Shop at:
IO3
ATELIER SHARK TOOTH
ATELIER SHARK TOOTH
Shop at:
IO3
LIQUID PIXIE DUST
LIQUID PIXIE DUST
Shop at:
IO3
SMALL TIP WATER BRUSH PEN
SMALL TIP 
WATER BRUSH PEN

Shop at:
IO3
INK OFF STAMP CLEANER
Shop at:
IO3
NEENAH SOLAR WHITE 110
Shop at:
SSS | AMZ | HBS
ORIGINAL MISTI
ORIGINAL MISTI 
Shop at:
SSS | AMZ | SB | HBS
PRISMACOLOR PENCILS
PRISMACOLOR PENCILS
Shop at:
SSS | AMZ
COPIC SKETCH
COPIC SKETCH
Shop at:
AMZ
LIQUID APPLIQUE
LIQUID APPLIQUE
Shop at:
SSS | AMZ
STUDIO KATIA GLUE
STUDIO KATIA GLUE
Shop at:
SSS | SK
SPARKLE GLITTER
SPARKLE GLITTER
Shop at:
SSS | SK
FOAM TAPE - WHITE
FOAM TAPE - WHITE
Shop at:
SSS | SK
GLOSSY ACCENTS
GLOSSY ACCENTS
Shop at:
SSS | AMZ | SB | HBS