Friday, November 29, 2019

Product Focus - Atelier Fusion Ink Demo + Video


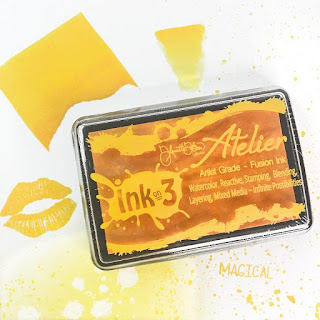
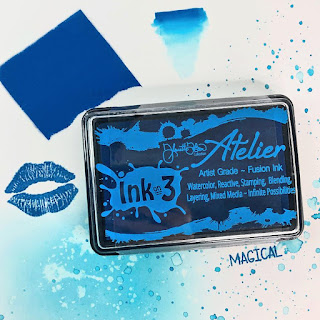
Hi everyone, welcome back to the Ink On 3 blog!  It's Jaycee Gaspar, and I just wanted to say I've FINALLY gotten a chance to play around with the NEW Artist Grade Atelier Fusion Inks!  If you're new to the Atelier Fusion Ink party, I've got a video below about what makes these inks so different.  I'm glad to have these in my ink collection and if you want to give these inks a try, I have a Black Friday Sale banner as well.


Promotion: Black Friday Sale Starts NOW! Everything is 35% off at INKON3.com by using code THANKS35.  This promotion is active between November 26 to December 3, while supplies last.  Click the banner above to head over to the Ink On 3 online shop!


For this first card, I used the Big Bold Magnolias Stamp Set from Ink On 3.  I stamped the image with Blackout Detail Hybrid Ink on watercolor paper and used the NEW Atelier Inks to color the flower image and leaves.  I was so shocked at how easy it was to build layers of color but also how vibrant the end result ended up turning.  As with student grade watercolors, mixing sometimes results in muddy colors.  These artist grade inks truly shine when adding dimension and create a beautifully soft but dimensional flower.


For my second card example, I solely used the NEW Atelier Fusion Ink Re-Inkers.  The beauty of these re-inkers is that you get full pigment potential and they act as concentrated watercolor.  The goal of my video was to show you all how easy it is to create your handmade card projects; and the re-inkers are no exception.  I created this blue/black gradient simply by applying washes of color and then adding white splatters with a white liquid watercolor.  I thought this starry night scene looked like a perfect backdrop for this sleeping raccoon image from Raccoon Hugs Stamp Set.


I got really inspired by the ink blending capabilities of these Atelier Inks.  You'll find more details of the ink colors I used in my video.  I played around with different combinations and used the water bleaching technique to give dreamy auras to two of the backgrounds.  I was able to stamp with water as well to give myself a dimensional wooden veneer background.  These inks blend beautifully--even for someone like me who tends to color blend really aggressively.

Hey thank you so much for checking out my video on how I made these cards!  Do you all have stamp sets from Ink On 3 that you would like me to use in a future project?  Let me know in the comments below!  If you like what you've seen from me, make sure you subscribe to my YouTube channel and give me a follow over on Instagram!  Talk to you all very soon!

Materials:
Ink On 3 - Atelier Fusion Ink Pads
Ink On 3 - Atelier Fusion Watercolor Re-Inkers
Ink On 3 - Water Brush Pen
Ink On 3 - Blackout Detail Ink
Ink On 3 - Juicy Clear Embossing Ink
Ink On 3 - Big Bold Magnolias Stamp Set
Ink On 3 - Big Bold Magnolias Die Set
Ink On 3 - Raccoon Hugs Stamp Set
Ink On 3 - Raccoon Hugs Die Set
Ink On 3 - Pumpkin Patch Stamp Set
Ink On 3 - Oh Deer Stamp Set
Ink On 3 - Oh Deer Die Set


Jaycee Gaspar

YouTube | Instagram | Blog

Friday, November 22, 2019

Rainbow Ombre Card using Atelier Inks

Hi Everyone, it's Cheryl here to show you how to make a cheerful card that's bound to brighten up anyone's day!


First I used the Inkon3 Atelier Inks to make a diagonal rainbow background! I just did this freehand so I can get a slight gradient effect when I transitioned to the next color. Look at how vibrant the colors are!


I cut out a scalloped rectangle and scalloped circle, then I embossed the scalloped rectangle using an embossing plate. I also cut out a small flag and used the Marilyn Red Atelier Ink to "dye" the paper. Next, I stamped and fussy cut some of the images from the Lil Chicks stamp set. I used the Atelier Inks as water-coloring inks to color the images! Even watered down a bit, the colors are so vibrant!


Once the red flag was dried, I stamped the "You're EGG-STRA-SPECIAL" sentiment using an embossing ink and then sprinkled some Arctic White Ultra Fine embossing powder over the stamped sentiment and heat set the embossing powder.

I assembled the card by first adhering the large scalloped rectangle to the rainbow card base, then added the little chickie and then the rest of the stamped images on the top and bottom of the circle. Lastly, I adhered the red flag on the bottom left of the card.


There you have it! A nice, clean, and simple card that's super duper adorable!

Products Used: 


Thursday, November 21, 2019

Stamping, Blending, No Line Water Coloring with Atelier Inks

Stamping, Blending, No Line Water Coloring with Atelier Inks | Ink On 3 by ilovedoingallthingscrafty.com

Hello friends, Ilda here!

Today I am sharing the cutest no line colored holiday card that I created while testing out the new Atelier Inks from Ink On 3. You all, these inks are like nothing you have used before, I can see why they took 2 years to develop. They are truly unique because of their versatility! They stamp, they blend, they are water-reactive, you can watercolor with them and just look how bright they are 😍 And of my favorite thing about them is that they work so well with Fadeout Ink for no-line coloring!

CARD DETAILS

I started off this card by stamping out and my images using Fadeout Ink and doing some masking to add a hat, mittens and the block of Ice from the Snow Buddies Stamp Set to the Ducky from Platy-rific Pondies.

I then watercolored the images in using the Atelier Inks. I loved how buttery smooth the inks felt when I blended them on to the paper and how well I could layer the colors. To add shadows to some of the areas I used Twiggy Brown and was pleasantly surprised at how well it blended with the previous colors.

Once I had finished water coloring I then stamped out some snowflakes from the Merry and Bright set using Juicy Ink and then heat set them using Arctic White Ultra Powder. Since the background was white this made it difficult to see the snowflakes, so using very light pressure I blended some of the Atelier Peacock Blue ink around the snowflakes to make them more visible. I first blended onto some scratch paper before blending it to the background and then I also used a dry paper towel to clean off any ink that was on the embossed snowflakes.

The sentiments I used also come from the Merry and Bright set that stamped using a stamping block, but I wished I had used the Misti so I could have stamped it twice to get more of a solid impression. To finish off the scene, I added water under the ice block also using the Atelier Peacock Blue ink and slightly touched the bottom of the sentiment to make it look like the letters were melting into the water. 

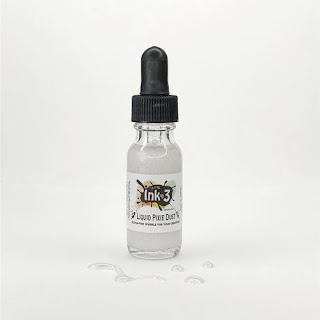
To finish off the image I used liquid pixie dust on the ice block to add some sparkle and added glossy accents to the ducky's beak. To darken the eyes I used a fine line marker and for highlights, I used a white gel pen.

Stamping, Blending, No Line Water Coloring with Atelier Inks | Ink On 3 by ilovedoingallthingscrafty.com

Here is a closer look at this cutie. Just look at all the different shades of blue I got using only Atelier Peacock Blue ink pad. Blended sky, watercolored the hat, mitts, ice, water, and stamped out the sentiment. Unreal right!? And I love how it goes from an aqua like color to a dark blue. This time I didn't use ink from the Reinkers but if I had you probably would have seen even more gradients in the colors.

Stamping, Blending, No Line Water Coloring with Atelier Inks | Ink On 3 by ilovedoingallthingscrafty.com

I hope you found this post informative. I highly recommend these inks if you are looking for versatile inks that are artist-grade, bright and very affordable. For more information on them please visit the Inkon3.com.

Thank you for stopping by 😊
Until next time... Happy Crafting 👋
SUPPLIES
Atelier Inks
Atelier Inks
Shop at:
IO3
Platy-rific Pondies
Platy-rific Pondies
Shop at:
IO3
Snow Buddies
Snow Buddies
Shop at:
 IO3
Merry and Bright
Merry and Bright
Shop at:
 IO3
Fadeout No Line Ink
Fadeout No Line Ink
Shop at:
 IO3
SMALL TIP WATER BRUSH PEN
Shop at:
 IO3
Atelier Marilyn Red
Atelier Marilyn Red
Shop at:
IO3
Atelier Marigold Orange
Shop at:
 IO3
Atelier Bee Sting Yellow
Shop at:
 IO3
Atelier Peacock Blue
Shop at:
 IO3
Atelier Twiggy Brown
Shop at:
 IO3
JUICY INK
JUICY INK
Shop at:
 IO3
LIQUID PIXIE DUST
LIQUID PIXIE DUST
Shop at:
 IO3
Arctic White Ultra Powder
Shop at:
IO3
Strathmore Bristol Pad
Shop at:
SSS | AMZ
MINI MISTI
MINI MISTI
Shop at:
SSS | AMZ | SBC | SK
Simon Says Stamp 2.5 Inch ACRYLIC BLOCK
SSS 2.5 Inch ACRYLIC BLOCK
Shop at:
SSS
STUDIO KATIA GLUE
STUDIO KATIA GLUE
Shop at:
SSS | SK
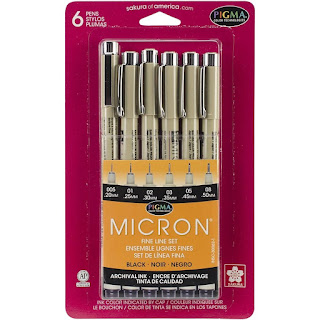
Micron Pens
Micron Pens
Shop at:
SSS
WHITE Gelly Roll Pens Set
Shop at:
SSS | AMZ | SBC
Glossy Accents
Glossy Accents
Shop at:
SSS | AMZ | SBC | HBS

Monday, November 18, 2019

Atelier Inks water colour backgrounds with Erica

Hi guys!

Today I have three cards to share with you. All of these are made with the re-inkers of the Atelier Inks, and I have used them as water colours, to create rainbow backgrounds.

These cards are a slightly different size, they are 6.5”x3.5”, so slimmer and longer than my usual card size. I thought this size might work better for the look I was after and I do like how they turned out!

The re-inkers I used are Peacock Blue, Goddess Green, Bee Sting Yellow, Marigold Orange and Marilyn Red. I used a palette tray and dropped a bit of each colour into a separate space to keep them from getting contaminated. After taping down each panel, I used a big paint brush and clean water to prep it. Once wet, I swished some colour into the wetness on the panel. Each colour had their own paintbrush for this too, again to avoid colour contamination.


Each panel was done slightly differently, and the one I thought I would like the least, is the one I ended up loving them most. Isn’t that funny? When I was doing it, I was thinking to myself ‘oh well, at least I’m having fun but this is not going to turn out very good’. Little did I know!

When the panels were all dry, I decided to use the ‘Thanks’ word diecut from the Pumpkin Patch coordinating diecut set. However, I wanted each card to be just a little bit different. On one panel I used the diecut directly, then added some height to these by layering two more cut of out white card stock.


As a final flourish I added Liquid Pixie Dust to the letters for sparkle.


Another one had grey and gold ‘Thanks’ cut out and layered up, slightly off-centre.


These were adhered to the card to make it relatively flat. The grey behind the gold highlights it beautifully, without the harshness black would have added. I tried, and it didn’t look quite right.


On the last one I used the diecut on five coloured pieces of card stock, similar to the ones on the panel, and layered these up. The effect is a rainbow when you look closely.


To make these stand out a bit more I added a final layer of black ‘Thanks’ on top.


I also have a video up on my YouTube channel showing the process if you want to see the whole thing in action.

Thanks for stopping by today, I hope you have enjoyed this post (and video if you watch that) If you are wondering whether to get these inks or not, I’m in the Yes camp for sure. I adore the colours and as you can see, the re-inkers works beautifully as water colours amongst other things!

Lots of love and happy crafting from Erica


Tuesday, November 12, 2019

Atelier Sand Dollar Tutorial

Hello my fabulous friends! 
It's Kassi here today!

I grew up hiking the mountains and and playing in the sands of Utah. It's a beautiful place, with lots natural diversity from the snow covered ski slopes in the north to Zion and Arches National Parks in the south.  And while I spent my summers boating on Lake Powell,  I was 17 years old before I saw an ocean for the first time. 

When I was in my mid 20's, I was able to spend some time touring the beaches, forests, and waterfalls of Oregon and Washington State with my parents and my camera... and I fell in LOVE.  I ended up moving to a rural town with beautiful ocean beaches less than an hour drive away. The beach is one of my happy places! 

The first year after moving near the ocean, I collected a bunch of sand dollars and made Christmas ornaments to send to my family.... and I've been altering sand dollars ever since!

Want to learn how? I promise, it's easy!


Paper: tissue paper
Stamps: Inkon3 Big Bold Magnolias
Ink: Inkon3 Blackout
Coloring: Inkon3 Atelier Watercolor Inks
Other: glitter, ribbon, twine, sand dollar

Let's get started!


Step 1: Stamp your image onto some white tissue paper (you know, that really thin, cheap paper you stuff in gift bags to make them look fancy) using Blackout ink. I suggest putting a scrap piece of paper under the tissue paper... The ink will bleed through, and you want something to absorb it so it doesn't smear anywhere. I also suggest using the MISTI since trying to stamp on thin tissue paper can be tricky. I'm using one of the flowers from Big Bold Magnolias set.

(yes, I know, I usually go with Fadeout and no line coloring... but because of the nature of this paper, lines are just better)


Step 2: Create a watercolor palette by smooshing various Atelier ink pads onto a non-porous surface (I'm using a piece of glass).  

Usually I use alcohol based markers to color on tissue paper, but I wanted to see if the new Atelier inks would work for this.
 What can I say... I like experimenting and seeing just how far I can stretch a product!


Step 3: CAREFULLY color your image by picking up some color using a damp paint and applying it to your image. Tissue paper is VERY thin, and NOT designed to be used with watercolors, so you don't want to over work things, or you might end up tearing it. This is why we want dark lines... It's really hard get any kind of detail or definition on paper that isn't meant to get wet. 


Note: You may have noticed that the blue on my palette is not the same blue as my flower. The Peacock Blue straight from the pad is a bright blue, and not what I wanted for this flower... However, just like other watercolor mediums, you can MIX colors to create new colors!

The swatch labeled "B" is what the blue ink looks like. The "B+o" is the blue with a LITTLE orange.  To get the "B+O", I added a bit more orange to the B+o.   The muted "G+r" is the green ink with a LITTLE red.  Currently there are only 8 colors in the Atelier line.. but you can get countless other colors by mixing! 


Step 4: Fussy cut. You can use the coordinating die if you want, but the more excess paper you have, the harder it is to hide. The idea is to make it look like the tissue paper isn't even there when we are done.. so I prefer fussy cutting. 


Step 5: Prep your sand dollar. If you are using a sand dollar you have picked up off the beach, you are going to want to wash it really well, and get all the sand out. Then let it dry COMPLETELY. If it hasn't sat on the beach long enough to bleach white, you can soak it in a mix of water and bleach for an hour or so, then rinse it in clean water and let it dry in the sun.

If you don't live near a beach, you can often find sand dollars in craft store, or online. 

Some types of sand dollars naturally have holes in them... Mine don't, so I use a hand drill to carefully drill a hole... Sand dollars are soft, and do best if you are gentle with them.


Step 6: Paint a layer of Mod Podge (or other decoupage glue) on the surface of the sand dollar, and quickly lay your image on it. The sand dollar will absorb the glue quickly, so work fast... if areas dry before they adhere to the paper, carefully lift the paper up a bit and get some glue under it and smooth the paper back down.. you want a good seal under the image and around all the edges. 

Once you have it glued on, gently cover the entire surface with a layer of Mod Podge.  Don't over work this... If you do, your colors might start to smear, and your paper will tear. I like to use a make-up edge to do this as bristles of a paint brush might snag or tear the fragile tissue paper. Let it dry completely.


If you are opposed to glitter, feel free to skip this step.... 

Step 7 (optional): Paint on another layer of Mod Podge, and cover in clear/iridescent glitter.  Allow to dry completely, then tap off any loose glitter.


Step 8: Finish by tying a loop of twine through the hole, and adding a bow (or any other embellishments you want)

These look beautiful on a tree, or hanging in a room! They make fabulous gifts, and are a fun way to preserve your travel souvenirs!

If you give this technique a try using Inkon3 products, please share your creation with us our Facebook group, or by using the hashtag #inkon3. We love seeing what you create!

Hugs!
~Kassi