Friday, July 10, 2020

Koi Pond Inspired Friendship Cards by Ilda

Atelier Inks, blending Fadeout Ink, Friendship, Ink On 3, Koi Pond Stamp Set, Pondie Stencil, Shaker Card, Water coloring, Wavy Stencil,

Happy Friday Peeps, Ilda here!

Today I am sharing a trio of cards inspired by the new KOI POND stamp set from Ink On 3.  I am in love with the latest release, which by the way I just received not too long ago because snail mail is really real right now people๐Ÿ˜ Thanks Covid!

CARD DETAILS

The first card I created was this shaker card. I first stamped out the fish using the FADEOUT INK onto Bristol Paper. I then colored them in using a variety of ATELIER INKS, I used every color on them listed below in the Supply section. 

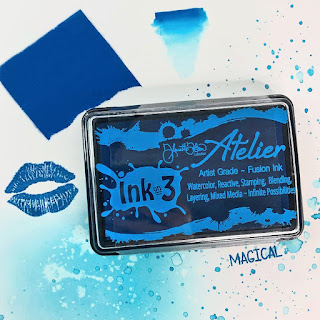
Next, I masked the fish and added a very light blend of blue using the new WAVY STENCIL and ATELIER PEACOCK BLUE ink.

I then stamped out the Lilly pads using ATELIER GODDESS GREEN by doing some second and third generation stamping to get the gradient shades. The ripples and bubbles were stamped using the ATELIER PEACOCK BLUE ink and just blurred and colored in with a water brush. 

The sentiment stamped in the center also comes from the KOI POND set that I stamped using BLACKOUT INK.

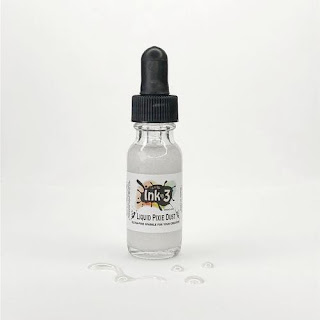
Before adding the shaker window,  I added a layer of LIQID PIXIE DUST to all the KOI fish for sparkle.

Atelier Inks, blending Fadeout Ink, Friendship, Ink On 3, Koi Pond Stamp Set, Pondie Stencil, Shaker Card, Water coloring, Wavy Stencil,

I then used a Rectangle Frame to create the window for the shaker panel that I filled with clear sequin bits to allow the colors to shine.

Atelier Inks, blending Fadeout Ink, Friendship, Ink On 3, Koi Pond Stamp Set, Pondie Stencil, Shaker Card, Water coloring, Wavy Stencil,

This next card was so simple to make and I love the results.

I began by adding a subtle green color of ATELIER GODDESS GREEN using the WAVY STENCIL. I then moved the stencil and repeated the process, this time using ATELIER PEACOCK BLUE. Before removing the stencil I added a layer of Glimmer Paste, removed the stencil, and allowed it to dry.
Atelier Inks, blending Fadeout Ink, Friendship, Ink On 3, Koi Pond Stamp Set, Pondie Stencil, Shaker Card, Water coloring, Wavy Stencil,

I then finished off this simple card by adding the stamped sentiment on the card from the KOI POND set and adding a few clear bubbles.

Atelier Inks, blending Fadeout Ink, Friendship, Ink On 3, Koi Pond Stamp Set, Pondie Stencil, Shaker Card, Water coloring, Wavy Stencil,

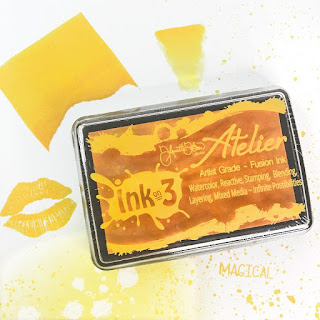
For this final card, I started by blending ATELIER BEE STING YELLOW, ATELIER MARILYN RED, and ATELIER PEACOCK BLUE together and overlapping them in areas to create the blended colors on the PONDIE STENCIL. Before removing the stencil I added a layer of glimmer paste and then set it aside to dry.

Atelier Inks, blending Fadeout Ink, Friendship, Ink On 3, Koi Pond Stamp Set, Pondie Stencil, Shaker Card, Water coloring, Wavy Stencil,

I then stamped out one of the KOI using JUICY INK, and then heat set it using GOLD RUSH EMB.PWD. I then used the same 3 colors that I used on the background to color the fish in. Once it was dry I fussy cut the fish out.

Atelier Inks, blending Fadeout Ink, Friendship, Ink On 3, Koi Pond Stamp Set, Pondie Stencil, Shaker Card, Water coloring, Wavy Stencil,

The sentiment comes from two older sets, the Hey from HEY GORGEOUS and the Friend from HEELS TO YOU set that were stamped again using JUICY INK, and then heat set it using GOLD RUSH EMB.PWD.

Atelier Inks, blending Fadeout Ink, Friendship, Ink On 3, Koi Pond Stamp Set, Pondie Stencil, Shaker Card, Water coloring, Wavy Stencil,

To finish this card, I popped the Koi onto a bed of coiled foil thread and added some iridescent bubbles.

Hope this trio of Koi Pond friendship cards inspired you today. 

Thank you for stopping by ๐Ÿ˜Š
Until next time... Happy Crafting ๐Ÿ‘‹


SUPPLIES
KOI POND
KOI POND
Shop at:
IO3
WAVY STENCIL
WAVY STENCIL
Shop at:
IO3
PONDIE STENCIL
PONDIE STENCIL
Shop at:
 IO3
HEY GORGEOUS
HEY GORGEOUS
Shop at:
IO3
Heels To You
Heels To You
Shop at:
IO3
FADEOUT INK
FADEOUT INK
Shop at:
IO3
Atelier Marilyn Red
Atelier Marilyn Red
Shop at:
 IO3
Atelier Marigold Orange
Shop at:
IO3
ATELIER BEE STING YELLOW
Shop at:
 IO3
ATELIER GODDESS GREEN
Shop at:
 IO3
ATELIER PEACOCK BLUE
Shop at:
IO3
ATELIER MY PURPLE JAM
Shop at:
IO3
Atelier Paint It Black
Shop at:
IO3
BLACKOUT INK
BLACKOUT INK
Shop at:
 IO3
JUICY INK
JUICY INK
Shop at:
 IO3
GOLD RUSH EMB. PWD.
GOLD RUSH EMB. PWD.
Shop at:
 IO3
SMALL TIP WATER BRUSH PEN
Shop at:
IO3
LIQUID PIXIE DUST
LIQUID PIXIE DUST
Shop at:
IO3
BRISTOL PAPER
BRISTOL PAPER
Shop at:
SSS | AMZ
INK BLENDER BRUSHES
INK BLENDER BRUSHES
Shop at:
SSS | SK
ORIGINAL MISTI
ORIGINAL MISTI
Shop at:
SSS | AMZ | SBC | HBS
GEMINI JR. DIE CUTTER
Shop at:
SSS | AMZ | SBC
NEENAH SOLAR WHITE 110
Shop at:
SSS | AMZ | HBS
CLEAR ACETATE SHEETS
Shop at:
SSS | SK
MEDIA SPATULAS
MEDIA SPATULAS
Shop at:
SSS | SBC | HBS
MOONSTONE GLIMMER PASTE
Shop at:
SSS | AMZ | HBS
SILVER DUST | SEED BEADS
Shop at:
SSS | SK
IRIDESCENT BUBBLES
IRIDESCENT BUBBLES
Shop at:
SSS | SK
MAJESTIC FUSION
MAJESTIC FUSION
Shop at:
SSS | SK
CLEAR DROPS MIX 1
CLEAR DROPS MIX 1
Shop at:
SSS | SK
EMBELLISHMENT WAND
EMBELLISHMENT WAND
Shop at:
SSS | SK
FOAM TAPE - WHITE
FOAM TAPE - WHITE
Shop at:
SSS | SK

Monday, July 6, 2020

Stencil Watercoloring - Guest Designer Judy

Hello, it's Judy here, and I'm so happy and honored to be guest designing for Ink On 3 today. I have a fun technique for you. It's watercoloring on a stencil. Here is my card.


I began by stenciling the image from the Floral Stencil with Ink On 3 Fadeout No-Line Coloring Ink. Then I watercolored over the image.


I used Ink On 3 Atelier Inks in My Jam Purple, Peacock Blue, Goddess Green, Bee Sting Yellow, Twiggy Brown and Marilyn Red. These inks lend themselves beautifully to watercoloring. The blending and reaction with water is amazing.


Next I used the Leafy Forest Stencil on some watercolor paper to create an accent for my card. I used the Atelier Inks in My Jam Purple and Peacock Blue. Then I cut the Floral Stencil image on an angle  and inserted the Leafy Forest Stencil strip between the 2 halves. The greeting is from the Dogwood Flower Stamp Set.


This is a super fun technique I hope you will try it. You can use almost any stencil, depending on whether you want a focal image or an over all background.

Until next time, here's celebrating your Creative Muse!!!

Saturday, July 4, 2020

Hey Gorgeous!

Hey gorgeous!

It's Erica back on the Ink On 3 blog today with a one-layer card. Which is not my forte at all, but it's good to stretch your creative muscles and step outside of your comfort zone. Ok, not all the time, but sometimes for sure. 


The stamp I have used for this card is a new-to-me, Hey Gorgeous. I stamped it up on Copic friendly card stock with Blackout Detail ink and then coloured it in with various Copic markers. My intent was to give the girl a nice tan, but the poor thing ended up looking like she's been cooking on a tanning bed far too long! 


Her hair I did a bit like mine, it's sort of a brown to light brown to some highlights and then a big blue hat on top. I do happen to have a big blue hat too... Did I just put myself on a card? Eh, it happens, right? While I had the Hey Gorgeous stamp out, I also stamped it up on masking paper. After fussy cutting this out, I placed it on top of the coloured image.


I have used a stencil for the background, and this I sprayed liberally with Pixie Spray first. To create a colourful backdrop to the card I ink blended Bee Sting Yellow, Goddess Green and Peacock Blue all over it. By going lightly over some of the yellow with the green, it created a lime green which was lovely. I did the same with the green going into the blue, but heavier, and the result was a teal colour. I used a different Life Changing Blender Brush for each colour so the going back and forth was easy peasy. 


When the ink blending was done, I simply stamped up the 'Gorgeous' from the Hey Gorgeous stamp with Blackout Detail Ink and the card was finished!


Well... unless I go back and add some sequins that is. You never know, with this sequin-oholic. 

Thanks for stopping by today, I hope you like the card and found some inspiration here today! 

Lots of love and happy crafting from Erica 


Tuesday, June 30, 2020

Video Tutorial: Create STUNNING Floral Bouquets Using this ONE Rule.


Hi everyone, welcome back to the Ink On 3 blog!  We often talk about coloring, inking techniques, coloring mediums, etc.  Color is just one part of the art equation.  Another element of art that is just as important is composition--or how elements are arranged on your canvas.  In the video tutorial below, I will show you a very basic introduction to floral composition that can be applied to other card themes such as animal scenes.


Hey thank you so much for checking out my video on how I made this cards!  Do you all have stamp sets from Ink On 3 that you would like me to use in a future project?  Let me know in the comments below!  If you like what you've seen from me, make sure you subscribe to my YouTube channel and give me a follow over on Instagram!  Talk to you all very soon!


Materials:


Jaycee Gaspar


Friday, June 26, 2020

Masculine Koi Pond Card

Hi Crafty Friends! It's Cheryl with the Creative Team here to show you how I made some cards for the important men in my life, the cards read "Happy Father's Day", but change up the sentiments and these cards can be used for any occasion!

I made the card in portrait and landscape orientation! Which one do you prefer?

First I created a 5.5"x 4.25" card base using white card stock. Then I used a rectangle die to cut out a panel that's slightly smaller than the card base. Next, I used distress oxide ink in Tumbled Glass and a blending tool to add a light blue background to the lower right hand corner of the card. Place the Wavy stencil over the light blue background and with a blending tool and Peacock Blue Atelier Ink, blend in the atelier ink concentrating on the lower right hand corner and lightly bring in the color towards the center of the card to create an ombre look.


From the Koi Pond stamp set, stamp out the Koi images of your choice using Blackout Hybrid Detail Ink, color with your choice of coloring medium and then fussy cut. For the Lily Pads, I first stamped the largest lily pad stamp using the Goddess Green Atelier Ink, then I used the Peacock Blue on the next layer, and Marigold Orange on the last layer. The Atelier Inks worked so well when layered! Fussy cut the lily pads.


Then I die cut some flags for the sentiments, for a perfectly coordinated sentiment flag, I die cut white card stock and applied Peacock Blue Atelier ink with a blending tool. I stamped the sentiments with embossing ink, used Arctic White Ultra Fine Embossing Powder and heat set.


Adhere the panel with the stenciled waves onto the card base. Then position the fussy cut images, and sentiment flags onto the card front as shown in the picture above. Trim off any excess of the sentiment flags that extends beyond the Koi. Adhere the fussy cut images and sentiment flags onto the card and there you have it!

Copic Colors Used: 
Reds: R29, R27, R24, R22
Oranges: YR27, YR68, YR14, YR12 

Products used: