Hey, there! It's hard to believe that Valentine's Day is in just 6 weeks, isn't it!? Here's a simple card with traditional colors that's perfect for using up scraps of cardstock. And the cute little raccoon from InkOn3 is just the cutest!
Wednesday, December 30, 2020
Raccoon Hugs Valentine's Day Card
Tuesday, December 29, 2020
Quick and Easy Thank You Cards using Sweet Petunia Atelier Ink
I masked the top and the bottom of an 4.25"x5.5" card base. Then I created a gradient effect using the Sweet Petunia Atelier Ink and a blending brush. To diffuse the color a bit, I tap my brush into the ink and swirl it on the ink cap. This helps from having concentrated in blotches. Gradually build the color concentrating on the left side of the card.
With the mask still on the card and using the Sweet Petunia Pink Atelier Ink, stamp out different sizes of flowers from the Shine Bright Stamp set to make a patterned background. Remove the mask, and apply washi tape on the top and bottom of the patterned panel.
Next, stamp out the medium sized flower from the Shine Bright stamp set using the Blackout Hyrbid detail ink. Color with your choice of coloring medium and fussy cut the image. Adhere to the lower left hand corner of the patterned panel.
Lastly, die cut or stamp the sentiment "Thank You" and adhere it to the bottom right hand corner of the card. I used gold metallic cardstock and a die for my card.
Shine Bright Clear Stamp Set
Atelier Ink - Sweet Petunia Pink
Blackout Hybrid Detail Ink
Wednesday, December 23, 2020
Lovebirds Valentine's Day Card | Mirror Stamping using Fadeout Ink
SUPPLIES
 LITTLE BIRDIE Shop at: IO3 |
 MIRROR IMAGE STAMP Shop at: IO3 |
 RACCOON HUGS Shop at: IO3 |
 LEAFY FOREST STENCIL Shop at: IO3 |
 FADEOUT INK Shop at: IO3 |
 ATELIER GODDESS GREEN Shop at: IO3 |
 ATELIER TRINITY TEAL Shop at: IO3 |
 ATELIER SWEET PETUNIA Shop at: IO3 |
 ATELIER MARIGOLD ORANGE Shop at: IO3 |
 ATELIER TWIGGY BROWN Shop at: IO3 |
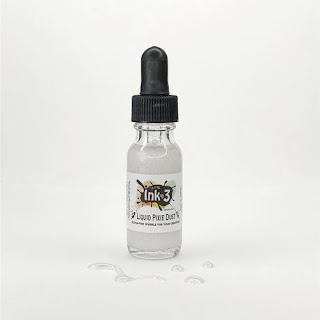
 LIQUID PIXIE DUST Shop at: IO3 |
 BRISTOL PAPER Shop at: SSS | AMZ |
 MINI MISTI Shop at: SSS | AMZ |HBS |
 GEMINI JR. DIE CUTTER Shop at: SSS | AMZ | SB |
 SHAKER HEART Shop at: SSS | SK |
 INK BLENDER BRUSHES Shop at: SSS | SK |
 STUDIO KATIA GLUE Shop at: SSS | SK |
 FOAM TAPE - WHITE Shop at: SSS | SK |
Tuesday, December 22, 2020
Liquid Pixie Dust for Frosty Iced Flowers
Hello and thanks for stopping by! Today I'm happy to share a project with you using the Blessed stamp set and Atelier Inks with a beautiful stencil from Ink on 3 to create a frosted ink blended look.
Blessings stamp set: https://inkon3.com/products/blessings-4x6-clear-stamp-set?_pos=2&_sid=1a98c9e34&_ss=r&aff=35
Blessings coordinating dies: https://inkon3.com/products/blessings-coordinating-die-cuts-with-word-dies?_pos=1&_sid=1a98c9e34&_ss=r&aff=35
Flora Stencil: https://inkon3.com/products/flora-6x6-stencil?_pos=1&_sid=f4c32f972&_ss=r&aff=35
Atelier Shark Tooth White- Artist Grade Fusion Ink: https://inkon3.com/collections/atelier-ink-pads/products/atelier-shark-tooth-white-artist-grade-fusion-ink-pad?aff=35
Atelier Trinity Teal- Artist Grade Fusion Ink: https://inkon3.com/collections/atelier-ink-pads/products/atelier-trinity-teal-artist-grade-fusion-ink-pad?aff=35
Juicy Clear Embossing & Watermark Ink: https://inkon3.com/collections/ink/products/juicy-embossing-watermark-ink?aff=35
Arctic White Ultra Fine Embossing Powder: https://inkon3.com/collections/ultra-fine-embossing-powder/products/arctic-white-ultra-fine-embossing-powder?aff=35
Liquid Pixie Dust: https://inkon3.com/products/liquid-pixie-dust?_pos=1&_sid=7b11563fd&_ss=r&aff=35
Hero Arts Pebble cardstock 10 pack: https://shrsl.com/2oe67
Something New Embellishment Mix: https://shrsl.com/2oe5v
Trinity Stamps Blending Buddy Brush: http://shrsl.com/23yyi
Blending Bar – Platform Base: https://shrsl.com/2f4qz
Blending Buddy and Blending Bar System w/accessories: https://shrsl.com/2f4r5
Hero Arts Precision glue tube: https://shrsl.com/2k42g
Darice Double Sided Foam Sticky Strips: https://shrsl.com/2951f
Marvy Double Sided Jewel Picker: https://shrsl.com/2b566
Trinity Stamps Tidy Tray: https://shrsl.com/2c4f6
MISTI Stamping Tool REDESIGNED: https://shrsl.com/2g8kw
MISTI Creative Corners: https://shrsl.com/2g8kz
MISTI Mouse Pad Cushion: https://shrsl.com/2g8l1
Teflon Burnishing Tool: https://shrsl.com/2g8md
Teflon Ergonomic Tool: https://shrsl.com/2g8me
Spellbinders Platinum 6 die cut and emboss machine: https://www.ellenhutson.com/platinum-6-die-cutting-and-embossing-machine-spellbinders-tools/#_a_238
Scor-buddyMini Scoring Board: https://www.ellenhutson.com/scor-buddy-mini-scoring-board-9x7-5/#_a_238
Tonic 8.5” Guillotine Paper Trimmer by Tim Holtz: https://www.ellenhutson.com/tonic-comfort-8-5-inch-guillotine-paper-trimmer-by-tim-holtz/#_a_238
EK Success 5” Scissors: https://www.ellenhutson.com/ek-tools-precision-5-inch-scissors-with-sheath/#_a_238
Purple Tape ½”: https://www.ellenhutson.com/icraft-purple-tape-1-2-in-x-15-yards/#_a_238
Tonic Nuvo Deluxe Adhesive: https://www.ellenhutson.com/tonic-nuvo-deluxe-adhesive/#_a_238
Post It Adhesive Roll: https://www.ellenhutson.com/3m-post-it-adhesive-roll-white-1x400-in/#_a_238
Pixie Spray: https://www.ellenhutson.com/icraft-pixie-spray/#_a_238
Scotch Foam Tape Roll: https://www.ellenhutson.com/scotch-foam-mounting-tape/#_a_238
Saturday, December 19, 2020
Little Birdie, Frosty Vines and a Rainbow Background, Oh My!
Hi everyone, it is Ricky on the blog today. Wow, can you believe it has been ten months since the coronavirus has uprooted our lives? I hope you have been safe during this time and have been able to see the positive side in all of this. More time with family (which actually, hum, maybe not so positive) and more time to do the things you love like card making.
 |
| Little Birdie, Frosty Vines, and a Rainbow Background, Oh My! This beauty was a pretty simple card to make. I took the bird from the Little Birdie Stamp Set, stamped it out on white cardstock, and fussy cut it out. Then I took the Mirror Image Stamp Set and then covered that in all the Atelier inks' colors, sprayed it with some water, and stamped it using my MISTI. |
Friday, December 18, 2020
Oh Deer
Thursday, December 17, 2020
No line Coloring with Guest Designer Melinda
Hello everyone, Melinda here with, sadly my last post as guest designer for Inkon3. I really enjoyed sharing some ideas with you all and hope you found some inspiration.
For my last project I wanted to use Lil Birdie, it’s such a fun versatile set. I was inspired by some stamp sets I’ve seen with floral garlands on balloons and other various shapes. I decided on a heart shape for my garland and I was off and running!
I started by stamping the large flower with Fadeout ink. I watercolored the flowers with a mix of Marilyn Red and Marigold Orange, mix until you get the desired shade of peachy pink. Next paint the leaves with a mix of Goddess Green and a touch of Twiggy Brown to make the leaves a more olive green. Fussy cut the floral after it’s completely dry. Now I decided on a heart, but you can use whatever shape speaks to you. When you cut your shape out, take the flower and place it where you want it and use it as a guide for where to stamp a few extra leaves and some berries. Stamp the leaves and berries with your Fadeout ink and watercolor the leaves with the same combination of green and brown Atelier inks. Use Marilyn Red for the berries and leave a white highlight ( you can add it later with a gel pen also). Paint the berry stems with Twiggy Brown. After the berries and leaves dry take your water brush and wet the heart and add a bit of Trinity Teal. Allow everything to dry and adhere the flower using some dimensional tape. I added some die cut leaves with a bit of my green mixture. I glued some gold leaf to them for a little shine, but again, use what you’ve got in your stash. I’m big on using what bits and bobs I have around so I took the floral embossed piece and off set it on my grey A2 sized card base. I used some of the small sentiments in the Kit to make another birthday card. We can’t have enough birthday cards, right?
Thanks again to Inkon3 for the amazing opportunity to create and share with you all! Be safe and be well! Much love, Melinda
Friday, December 11, 2020
Little Birdie - No Line Coloring
Hi everyone! It’s Jeannie (InsideoutJeans) on the blog today with Ink on 3’s stamp set named Little Birdie stamp set. Last month, I used this stamp set in a non-wintery way; it ended up being more like a springtime card.
I stamped out the images using Fadeout Ink and did some no line coloring. I wanted a wintery scene for this card so I went with a red flower along with blue flowers.For the background, I mixed some My Jam Purple and Peacock Blue reinkers to create this darker blue color. I did an ombre watercolor wash on a piece of Canson XL watercolor paper with some Shark Tooth White splatter, which almost made the scene wintery.
Wednesday, December 9, 2020
Basic Starter Watercoloring with Guest Designer Melinda
Happy hump day beautiful people! Today I’m going to share a card technique that I love because the painting is pretty quick and simple. This one will be great for those of you learning to watercolor.
* Cut card base 4x9 inches and top piece at 3 3/4x 8 3/4 inches
* Take the Pondie stencil and some texture paste and smear across the center of your top piece. Set aside to dry while you make the rest of the card.
* Cut 6 1/2 x 8 inch piece of watercolor paper and lay down the large floral and the leaves in the lower left corner of your paper. Stamp the flower with My Jam Purple and the leaves in Trinity Teal. The bud I stamped the top in purple and the lower part with the teal. Flip your paper and repeat the stamping. If you have a stamp positioner leave your stamps in position. If you don’t, no worries you’ll just skip a step.
* Smear some Peacock Blue, My Jam Purple, Trinity Teal and Goddess Green Atelier inks on your craft mat or a plate like I used. Wet the whole flower with your water brush, pick up bits of blue and purple, dab them randomly and just let the ink flow and do it’s thing. Paint the leaves with teal and green.
* After you color everything let it dry. Repeat the stamping process to bring back the detail. Skip this if you don’t have a positioner.
* Move your stamps to the lower right corner and repeat the above steps.
* Stamp the centers of the large flower in black and use a black pen for your bud. Add some white gel pen highlights.
* Fussy cut everything out and set aside the extra flower and bud. I used all my leaves.
* I used a slim line frame to frame my center and arranged the flowers and leaves until I was happy with the look. I popped one of the large flowers at each corner and glued everything else to the top panel. I needed a birthday card so I used this sentiment, that like the frame was kicking around on my desk.
I hope you’ll give this technique a try. It’s great for playing around with and getting a feel for watercolors. Have a great rest of the week and be well!
Tuesday, December 8, 2020
Red and Gold card with Little Birdie stamps
Hello and thanks for stopping by! Today I'm happy to share a project with you using the Little Birdie stamp set and Atelier Inks from Ink on 3 to create a bold ink blended look.
Little Birdie stamp set: https://inkon3.com/products/little-birdie-4x6-clear-stamp-set-1?_pos=1&_sid=2a9aa4fcb&_ss=r&aff=35
Nuvo Embellishment Mousse- Mother of Pearl: https://www.ellenhutson.com/tonic-nuvo-embellishment-mousse-mother-of-pearl/#_a_238
Large Waterbrush Pen: https://inkon3.com/collections/paint-brushes/products/large-water-brush-pen?aff=35
Juicy Clear Embossing & Watermark Ink: https://inkon3.com/collections/ink/products/juicy-embossing-watermark-ink?aff=35
Atelier Sweet Petunia Pink- Artist Grade Fusion Ink: https://inkon3.com/collections/atelier-ink-pads/products/atelier-sweet-petunia-pink-artist-grade-fusion-ink-pad?aff=35
Atelier Marilyn Red- Artist Grade Fusion Ink: https://inkon3.com/collections/ink/products/atelier-artist-grade-fusion-ink?aff=35
Atelier Bee Sting Yellow- Artist Grade Fusion Ink: https://inkon3.com/collections/ink/products/bee-sting-yellow-atelier-artist-grade-fusion-ink?aff=35
Atelier Twiggy Brown- Artist Grade Fusion Ink: https://inkon3.com/collections/ink/products/atelier-twiggy-brown-artist-grade-fusion-ink?aff=35
Atelier Paint it Black- Artist Grade Fusion Ink: https://inkon3.com/collections/ink/products/atelier-paint-it-black-artist-grade-fusion-ink?aff=35
Gold Rush Ultra Fine Embossing Powder:
Trinity Stamps Blending Buddy Brush: http://shrsl.com/23yyi
Blending Bar – Platform Base: https://shrsl.com/2f4qz
Blending Buddy and Blending Bar System w/accessories: https://shrsl.com/2f4r5
Hero Arts Precision glue tube: https://shrsl.com/2k42g
Darice Double Sided Foam Sticky Strips: https://shrsl.com/2951f
Marvy Double Sided Jewel Picker: https://shrsl.com/2b566
Trinity Stamps Tidy Tray: https://shrsl.com/2c4f6
MISTI Stamping Tool REDESIGNED: https://shrsl.com/2g8kw
MISTI Creative Corners: https://shrsl.com/2g8kz
MISTI Mouse Pad Cushion: https://shrsl.com/2g8l1
Teflon Burnishing Tool: https://shrsl.com/2g8md
Teflon Ergonomic Tool: https://shrsl.com/2g8me
Dual Speed Heat Tool: https://www.ellenhutson.com/dual-speed-heat-tool-wow/#_a_238
EK Success Powder Tool for embossing: https://www.ellenhutson.com/powder-tool-adhesive-deactivator/#_a_238
Strathmore Watercolor Paper Pad 9x12: https://www.ellenhutson.com/strathmore-watercolor-paper-9x12/#_a_238
Neenah Solar White 110 lb cardstock: https://www.ellenhutson.com/neenah-cardstock-neenah-heavyweight-classic-crest-solar-white-110-lb-25-pk/#_a_238
Fairy Rocks Rhinestones: https://shrsl.com/25fxg
Spellbinders Platinum 6 die cut and emboss machine: https://www.ellenhutson.com/platinum-6-die-cutting-and-embossing-machine-spellbinders-tools/#_a_238
Scor-buddyMini Scoring Board: https://www.ellenhutson.com/scor-buddy-mini-scoring-board-9x7-5/#_a_238
Tonic 8.5” Guillotine Paper Trimmer by Tim Holtz: https://www.ellenhutson.com/tonic-comfort-8-5-inch-guillotine-paper-trimmer-by-tim-holtz/#_a_238
EK Success 5” Scissors: https://www.ellenhutson.com/ek-tools-precision-5-inch-scissors-with-sheath/#_a_238
Purple Tape ½”: https://www.ellenhutson.com/icraft-purple-tape-1-2-in-x-15-yards/#_a_238
Tonic Nuvo Deluxe Adhesive: https://www.ellenhutson.com/tonic-nuvo-deluxe-adhesive/#_a_238
Post It Adhesive Roll: https://www.ellenhutson.com/3m-post-it-adhesive-roll-white-1x400-in/#_a_238
Pixie Spray: https://www.ellenhutson.com/icraft-pixie-spray/#_a_238
Scotch Foam Tape Roll: https://www.ellenhutson.com/scotch-foam-mounting-tape/#_a_238


