Monday, March 30, 2020

Masked Edible Watercolor Scene + Video


Hi everyone, welcome back to the Ink On 3 blog!  Sometimes I like to play around with the overall 'mood' or 'feeling' of a card scene.  Many of you love the adorable critter stamps and playful illustrations, and I wanted to share how I changed that feeling to more modern and sophisticated.  I used a freebie I got from a Heffy Doodle order to play around with this idea and paired this stamp set with my favorite Ink On 3 mediums.  I made a video tutorial of course, so keep scrolling to see how I made this card!


Here are a few take home points for your next edible scene using Ink On 3.  If your scene consists of one stamp, angle them or (if you can) rotate them to vary the image.  Add shadows and shading to give your scene some depth.  If you have a repeat scene, start in a place that is inconspicuous so that your best work can shine in the foreground.


Hey thank you so much for checking out my video on how I made these cards!  Do you all have stamp sets from Ink On 3 that you would like me to use in a future project?  Let me know in the comments below!  If you like what you've seen from me, make sure you subscribe to my YouTube channel and give me a follow over on Instagram!  Talk to you all very soon!


Materials:
Ink On 3 - Fadeout No-Line Ink
Ink On 3 - Atelier Fusion Ink
Ink On 3 - Blackout Ink
Heffy Doodle - Sweet Stuff Stamp Set


Jaycee Gaspar

Friday, March 27, 2020

Fun Biker Bunny Planner Notes Page

Hello Crafty Friends! I hope everyone is safe and healthy! It's Cheryl with the Inkon3 Creative Team here to show you how to make your notes pages in your planner super cute and fun! I love decorative notes pages, but when I buy them, sometimes I don't like being stuck with just one or two designs for all of my notes. SO I thought, how about taking a plain planner page and make it fun with stamps! 


 First I masked out a section of the page using post-it notes and then used orange distress oxide ink to make an orange rectangle. Then I stamped one of the bunnies and accessories from the Biker Bunnies Clear Stamp set using the Atelier Inks Marigold Orange onto the orange background.

Then I used a light blue distress ink to create a blue background on the bottom of the page. I stenciled in some rays using a slightly darker blue ink. 


Next, I used the Phat Alphanumeric Clear Stamp Set and Blackout Hybrid Detail ink to stamp out the word "NOTES" onto sticker paper. I also stamped out the motorcycle and the Biker Bunny that's sitting from the Biker Bunnies Clear Stamp Set onto sticker paper. I fussy cut the images and then colored them in with alcohol markers. 

Lastly, place the stamped images or "stickers" onto the planner page, and there you have it! A super fun Notes pages that you're going to love to keep open on your desk!


Products Used: 

Thursday, March 26, 2020

Hey Gorgeous!


Hey Yall ! 
It's Ceal, I am sharing a card today featuring the Hey Gorgeous set. This set is so fun to color and you can play dress up with her hats <3

To create my card I started with a top folding white card base and a white panel. I stamped the image using Blackout ink and then colored her using Copic markers. I masked her off except the hat and then used a stencil to create the flower pattern. I stamped a flower also from the Hey Gorgeous set, fussy cut it out and added it to the hat. To finish the card and tie in the pink I added a pink dress/shirt to her.


Friday, March 20, 2020

Easter Bunny Hugs Card with Ilda

Easter Bunny Hugs Card | Ink On 3

Hello, my friends, Ilda here. I hope you are all safe and getting lots of crafting done while you are stuck at home. 

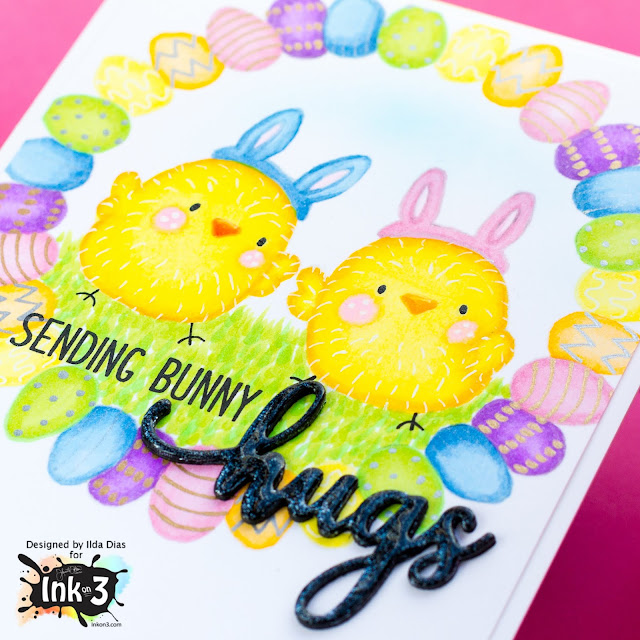
Easter will be here before you know it and I thought it would be fun to pull out one of my favorite sets from Ink On 3, Lil Chicks and have some fun with it! Plus if you have been following me on IG, I have been trying to play along this month with Kathy Raccosin's Daily Marker Challenge, so I challenged myself to some no-line coloring today.

CARD DETAILS

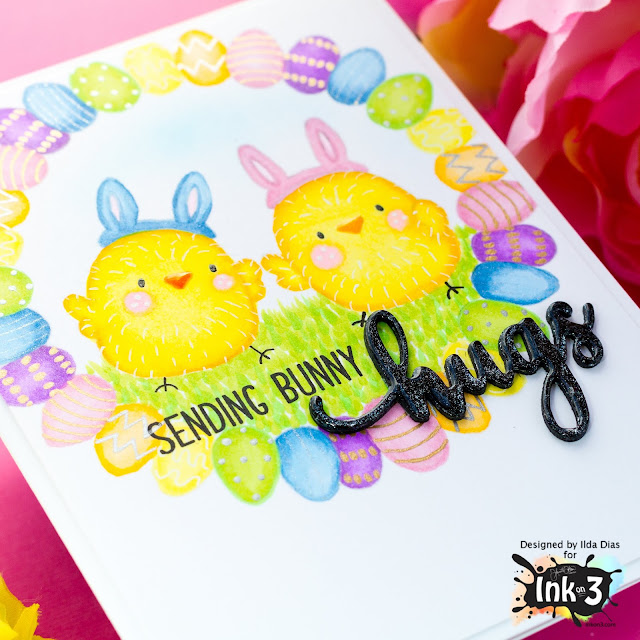
As I mentioned I used the Lil Chicks set from Ink On 3 for most of the card. To begin I drew a circle on the front of the card panel and used it as a guide to stamp out the Easter eggs into the shape of a wreath using Fadeout Ink. I then stamped the Lil Chicks wearing their bunny ears in the center of the wreath. I then used Copic markers to color the images in.

Easter Bunny Hugs Card | Ink On 3

I had the most fun adding the gell pen details to the images. To the chicks, I added white details to give them some fuzzy texture, or bunny fur. To the eggs, I used my metallic and gell pens to add designs and make them pop a bit more.

Easter Bunny Hugs Card | Ink On 3

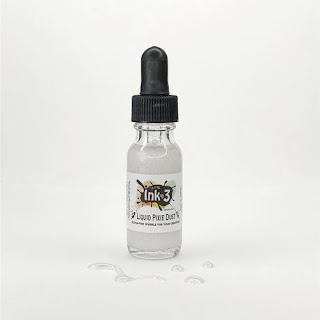
The sentiment comes from the Bunny Hugs stamp set that I stamped in Blackout Ink, and the Hugs die comes from the coordinating Bunny Hugs Die set. To give the Hugs word die cut more dimension, I stacked 3 layers and glued them together. I then added a layer of Liquid Pixie Dust to it and then heat embossed Crystal Clear embossing powder on top to give it a shiny finish.

Easter Bunny Hugs Card | Ink On 3

I think it turned out pretty cute, and I hope you enjoyed this bright Easter Bunny Hugs Card featuring the Lil Chicks from Ink On 3.

Thank you for stopping by 😊
Until next time... Happy Crafting and stay healthy👋


SUPPLIES 
 Affiliate Links
Lil Chicks
Lil Chicks
Shop at:
 IO3
Bunny Hugs
Bunny Hugs
Shop at:
IO3
Bunny Hugs Die Cuts
Bunny Hugs Die Cuts
Shop at:
 IO3
FADEOUT NO LINE INK
FADEOUT NO LINE INK
Shop at:
 IO3
BLACKOUT INK
BLACKOUT INK
Shop at:
IO3
JUICY INK
JUICY INK
Shop at:
 IO3
CRYSTAL CLEAR Emb Pwd
Shop at:
 IO3
LIQUID PIXIE DUST
LIQUID PIXIE DUST
Shop at:
 IO3
Neenah  80 LB SOLAR WHITE
Neenah 80 LB SOLAR WHITE
Shop at:
SSS | AMZ
MINI MISTI
MINI MISTI
Shop at:
SSS | AMZ | SB | SK | HBS
GEMINI JR. DIE CUTTER
Shop at:
SSS | AMZ | SB
WHITE GELLY ROLLER PEN SET
Shop at:
SSS | AMZ | SB
Gelly Roll Metallic Gel Pen Set
Shop at:
SSS | AMZ
Gelly Roll Stardust Pen
Shop at:
SSS | AMZ | SB
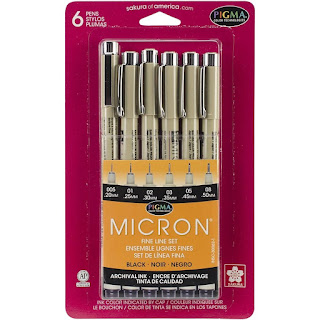
Micron Pens
Micron Pens
Shop at:
SSS
STUDIO KATIA GLUE
STUDIO KATIA GLUE
Shop at:
SSS | SK
GLOSSY ACCENTS
GLOSSY ACCENTS
Shop at:
SSS | AMZ | SB | HBS

Monday, March 16, 2020

Dogwood Flower No Line Colouring with Erica

Hey guys!

It’s Erica back on the InkOn3 blog. How are we all doing? Everyone staying safe and well with the Corona virus outbreak? I have been practically a hermit for the last couple of weeks due to a bad back, so I’ve been doing the social distance thing already. My hands are all chapped and dry from over-washing, but better safe than sorry.


Because I have had back issues I’ve not managed to do much crafting but I’ve tried to colour along with #thedailymarker30day challenge. One thing I have been practicing is my no-line colouring. Some has been more successful, than others but it’s all fun and educational. Sometimes your mistakes will teach you more than your successes so don’t be discouraged when it doesn't turn out they way you imagined it.

Here is an example: I started this no line colouring wreath on the left and wasn’t overly happy with how it was turning out. My attempts on the right side of the wreath look so much better!


For the card I have made today, I have used the Dogwood Flower stamp and the Fadeout Ink. I’ve coloured it, and the wreath above, with Daniel Smith water colours. 

I stamped the image with the Fadeout Ink three times to make the lines very visible, with the help of my Mini MISTI. The colouring is done both with a water colour brush and a refillable brush. 


This one isn’t one of my better results, but the next one is bound to be better. The leaves I’m quite pleased with though! 

To add some interest I added some splatters to the background. I mixed two drops of Liquid Pixie Dust with a drop of Paint It Black reinker in a little tray, and went to town. To protect the image I covered it up with a little piece of paper. Usually I cut out a mask but this worked in a pinch. 


Sentiment wise I kept it simple, ‘my favorite besties’ and stamped that in Blackout ink. I managed to smudge the splatters a little, so to cover it up, I added some more. As you do.


The whole thing was then adhered to a light gray card base. A white one was too harsh, and it need a little something softer and the light gray was just perfect. Oh and to fix the sentiment, I covered up the s on ‘Besties’ to make it say ‘My Forever Bestie’. 


With that, I’m done for today. Thanks for stopping by today and spending time with me.
Lots of love, wash your hands for your health and craft for your sanity! 

Erica 


Wednesday, March 11, 2020

Heels to You

Hi everyone! It’s Jeannie (InsideoutJeans) on the blog today with Ink on 3’s stamp set named, Heels to You. I previously had shared a blog post featuring this same set last month focusing on the floral images in this stamp set. I still had the shoe to create a card with and now, I put together a fun card using it!


Because this shoe is such a large image, I wanted it to be the focus of the card along with a funny sentiment. I also thought a background would need to be rather simple to not distract from the main image and sentiments. I stamped out the floral image from Heels to You using Juicy ink along with Crystal Clear embossing powder all over on a piece of light purple cardstock. 


To add a bit of interest to this background, I pulled out My Jam Purple and Paint It Black Atelier Inks to blend around the edges of the background panel. I think it created fun dimension and also made your eyes lead straight to the middle of the card. 


Once I had the background panel ready, I used this fun sentiment from my stash and stamped it with Blackout Ink. I trimmed it out and added it to fill up the rest of the card. To finish off this card, I added some embellishments and I really love this card! 


Thanks for stopping by today and I hope you get inspired to create. Come back again soon for more inspiration and ideas! Happy Crafting! 


Monday, March 9, 2020

Big Bold Magnolias Featuring Judy Woodland

Hi everyone! Today, we have Judy joining with us with a new card! She'll be with us every other month to share her designs! Please give her a follow over at her blog

---------------------------------

Hello, Judy Woodland here, and it's my great good pleasure to be guest designing for the blog post today. I have been in LOVE with the Big Bold Magnolias stamp set for awhile, and was so happy when I finally got a chance to color it up for a card. PLUS, I could use the Atelier Re-inkers to do it. BONUS!!!!

Here is my card:


I began by stamping the flowers on watercolor paper with Ink On 3 Blackout Detail Ink. I then used the re-inkers as watercolors and laid down the color. I used My Jam Purple, Marilyn Red, Peacock Blue, Goddess Green, Bee Sting Yellow and Twiggy Brown.


Then I fussy cut all the flowers out.


The greeting was stamped on a die cut panel which had been washed with My Jam Purple and Peacock Blue ink. I used a greeting from the Dogwood Flower Stamp Set and heat embossed it with Chrome Ultra Fine Embossing Powder. The background panel was stamped with a dragonfly image from the Water Lilies Stamp set on some nice gray card stock. I used Juicy Clear Embossing & Watermark Ink and heat embossed with a glitter embossing powder.

Finally I was ready to put the card all together.


Thanks for stopping by. I hope you have gotten some inspiration from my card. Those Atelier Inks are THE BOMB for watercoloring, I highly recommend you trying them out.

Until next time, here's celebrating your Creative Muse!!