Tuesday, July 28, 2020

Atelier Ink Stamped Kisses

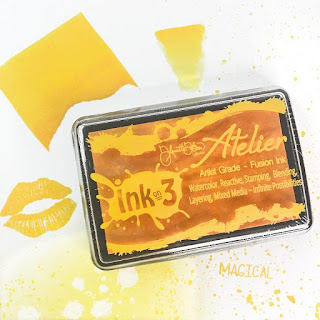
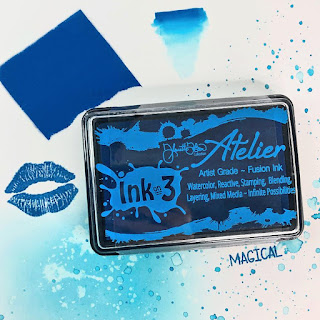
Have you tried the Atelier Inks from InkOn3? You neeeeed to! They are perfect for ink blending, and watercoloring - and even just to stamp! I've played around with a bunch of techniques, but today I decided to do some simple stamping with all the rainbow colors of Atelier Ink!


The Atelier Ink stamps so crisp and beautiful without repeat stamping! Each of the little lips was stamped only once! And they're PERFECT!


I made four cards using the Bad & Boujee Stamp Set - two of them are rainbow ( ooooh my favorite! ), one has the first half of the rainbow, and the last has the second half of the rainbow.


I used the six "traditional" colors of the rainbow - Marilyn Red, Marigold Orange, Bee Sting Yellow, Goddess Green, Peacock Blue, and My Jam Purple. When I stamp a background with smaller images I try to start in the center of my panel and work my way out. That way I don't have large gaps in the center of my panel. I stamped the lips from the Bad & Boujee Stamp Set all over my panels making sure to use my Ink Off Cloth and Ink Off Cleaner in between colors of Atelier Ink.


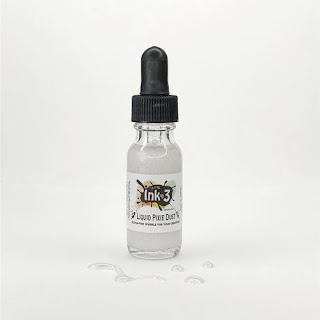
Let's make some sparkly die cut sentiments! I love my Liquid Pixie Dust for added sparkle on die cuts, but this time I cheated a bit! I took a piece of black cardstock and mixed a bit of water with Liquid Pixie Dust and used a flat paintbrush to paint my piece of cardstock. Boom! Magically glittery cardstock! Then I used the coordinating Bad & Boujee Die Set to cut out the sentiment and added it to each card.


I added flicks of black to each background and embellished with some gray or black pearls! And that's all! I hope you'll grab your Atelier Inks for some simple stamping! The results are gorgeous! See you soon!

Friday, July 24, 2020

Tone-on-Tone coloring - BeYOUtiful Floral Monthly Planner Layout

It's Cheryl with the Inkon 3 Creative Team here to show you how I made this BeYOUtiful monthly pages.


Did you know that the Atelier Inks are Copic Safe? This inspired me to do some tone-on-tone coloring. I think it looks super cool and it keeps the color palette simple which makes coloring super easy! 


I used a scalloped rectangle die and die cut some white card stock. On the white card stock, I stamped out the flowers from the BeYOUtiful Clear stamp set using the Peacock Blue Atelier Ink, then I stamped out the leaves from the same stamp set using the Goddess Green Atelier Ink. Next, I colored in the flower with blue copic markers and the leaves and stems with green copic markers. Then stamp the sentiment "Hello BeYOUtiful" on the lower left hand corner of the rectangle using Twiggy Brown Atelier Ink.


For my A6 planner, I cut a rectangle 6"x 4.25" out of white card stock, and punched holes on the side. Then I used the Leafy Forest Stencil, blender brushes and the Peacock Blue and Goddess Green Atelier Ink to create a beautiful background, you don't have to bring the background all the way to the center since you will cover it with the card stock with the flowers. Adhere the scalloped rectangle with the flowers onto the card stock with the Leafy Forest background.


On the monthly calendar side I stenciled in some more leafy backgrounds using Peacock Blue and Goddess Green Atelier Ink. Then I added some gold sparkly washi tape on the top of the page.


What do you think of the tone-on-tone coloring? It's not quite no-line coloring, but you get a nice softness to the image right?


Products Used:

Copics Used: 
Blues: BG05, BG02, B000
Greens: YG27, YG23, YG13

Wednesday, July 22, 2020

Just keep Swimming


Hello Everyone!
It's Ceal here to share with you today a card using one of our newest sets, Koi Pond. This set is so fun! 
To create my card I started with a white top folding card base and a panel of bristol card stock which is water friendly paper. I stamped the Koi using the Juicy Clear Embossing ink and embossed it with Gold Rush embossing powder. I watercolored them using the Karin markers and masked them off to create the background. To do that I used the new Wavy stencil and bending brushes, I also did a little ink smooshing to add some texture to it. 


Here's a little close up (above) that shows the shine of the Gold Rush embossing powder, it's my favorite!
To finish the card I added the "Just Keep Swimming" sentiment because that is what we are all having to do during this pandemic 

Thursday, July 16, 2020

BeYouTiful

Hi everyone! It’s Jeannie (InsideoutJeans) on the blog today with Ink on 3’s stamp set named BeYouTiful stamp set. I couldn't get enough and had to create another card using it. 


I know I love no line coloring, which is what I did previously in this post, but I wanted to color up this floral quickly using some alcohol markers. I stamped it out the largest floral from the BeYouTiful stamp set using Blackout Ink and colored it up using my favorite purple Copic Combo: V12, V15, V17

While using this set, I realized that there was a solid image for the stamen of the flower and it's an exact copy of the one in the floral image! This would be perfect for helping with no line coloring as well as adding a pop to the flower, which is what I did with today's card. I used Juicy ink and heat embossed the stamen using Chrome embossing powder in the middle. I kinda love it since I used the Blackout Ink for the image, it looked a bit harsh compared to the flower. 


I took a piece of white cardstock and inked it up using Peacock Blue and My Jam Purple Atelier inks. I wanted to try a technique I saw with stencils. I pulled out the Wavy stencil and a baby wipe. Using my normal sandwich for my die machine, I ran the card panel, stencil and baby wipe through my machine. It ended up being pretty cool! The stencil embossed itself to the card panel, while the baby wipe picked up the colors in the positive areas. 

To finish off the card, I wanted to tie in the Chrome embossed stamen. I stamped the sentiments using Juicy ink and then heat embossed with the same silver Chrome embossing powder. 


Thanks for stopping by today and I hope you get inspired to create. Come back again soon for more inspiration and ideas! Happy Crafting! 


Tuesday, July 14, 2020

No Coloring with Vibrant Stenciled Backgrounds

Have you heard my top secret-est secret of all time? I don't enjoy coloring! Gasp! I know I know! But it stresses me out! Good news for me - leaving an image completely uncolored seems to be all the rage right now! So you know I hopped on that train using the gorgeous large floral from the BeYOUtiful Stamp Set from InkOn3!


I quickly made a set of 4 cards using the Leafy Forest Stencil, the BeYOUtiful Stamp Set, and a rainbow of Atelier Inks! And of course some Liquid Pixie Dust!


I always try to bring interest to my cards in one way or another. Since I'm not doing any fancy coloring on this card I decided to use my vibrant Atelier Inks to make pretty backgrounds!


I made four backgrounds with the rainbow of Atelier Inks and I kept the inks darkest at the bottom and lighter towards the top for each background. I temporarily held the Leafy Forest Stencil in place on a piece of white cardstock and blended my inks with a blender brush. I mixed together colors next to each other in the rainbow to get pretty blends - Peacock Blue with My Jam Purple and Marilyn Red, Marigold Orange, and Bee Sting Yellow. Then I made two backgrounds with just a single color of Atelier Ink - Paint it Black for one and Goddess Green for the other.


Now let's add something on top of the pretty backgrounds! I used Blackout Hybrid Detail Ink to stamp the large flower and a few leaves from the BeYOUtiful Stamp Set and then trimmed them out with scissors. I added them with foam tape because every card needs a little pop, right?! I used Blackout Hybrid Detail Ink and stamped a couple of different buildable sentiments onto the cards.


It's so hard see in the photos ( so definitely watch the video! ), but I jazzed up the flowers and leaves with some Liquid Pixie Dust! I keep mine in a Small Fine Detail Waterbrush so I can easily brush some glitter on my images! I hope you enjoyed this pop of white! See you soon!

Monday, July 13, 2020

Trinity Stamps & Ink On 3 Are getting inky together IG Hop!


Hi Fleurette here, Join us today on a super fun IG Hop! So head on over to Instagram and join all the fun and inspiration!
Trinity Stamps and Ink On 3 design teams have come together to share some amazing inspiration, featuring Trinity Stamps and Ink On 3 products. Plus there are PRIZES!!! Trinity Stamps and Ink on 3 will be giving away $30 vouchers to their stores!
Winner will be chosen randomly and announced on Monday, July 22nd on the Trinity Stamps and Ink on 3’s blogs.
Please complete the following by July 21, 2020:⁠
1) Follow each designer
2) Follow @trinitystampsllc
3) Follow @inkon3
4) Leave a comment or tag one friend
*BONUS ENTRIES (OPTIONAL)*
For even MORE chances to win, follow the other designers on this hop and tag a friend in the comments of their posts.
Here is the full lineup:
@trinitystampsllc
@caffeinated.craftiness
@clmplans
@acarddayswork
@ilovedoingallthingscrafty
@ashleyhscrapstamp
@jaycee.gaspar
@lisaannmensing
@lynneahollendonner
@nicolemartel1978
@make_and_cher
@thejennyhalldesign
@inkon3
Disclaimer: This giveaway is not sponsored by Instagram. Must be 18 years or older to enter, open internationally. The random winners will be notified by visiting Trinity Stamps and Ink on 3’s blog on July 22. Prize must be claimed within one week after contact or an alternate winner will be chosen. Thanks!⁠

Friday, July 10, 2020

Koi Pond Inspired Friendship Cards by Ilda

Atelier Inks, blending Fadeout Ink, Friendship, Ink On 3, Koi Pond Stamp Set, Pondie Stencil, Shaker Card, Water coloring, Wavy Stencil,

Happy Friday Peeps, Ilda here!

Today I am sharing a trio of cards inspired by the new KOI POND stamp set from Ink On 3.  I am in love with the latest release, which by the way I just received not too long ago because snail mail is really real right now people😏 Thanks Covid!

CARD DETAILS

The first card I created was this shaker card. I first stamped out the fish using the FADEOUT INK onto Bristol Paper. I then colored them in using a variety of ATELIER INKS, I used every color on them listed below in the Supply section. 

Next, I masked the fish and added a very light blend of blue using the new WAVY STENCIL and ATELIER PEACOCK BLUE ink.

I then stamped out the Lilly pads using ATELIER GODDESS GREEN by doing some second and third generation stamping to get the gradient shades. The ripples and bubbles were stamped using the ATELIER PEACOCK BLUE ink and just blurred and colored in with a water brush. 

The sentiment stamped in the center also comes from the KOI POND set that I stamped using BLACKOUT INK.

Before adding the shaker window,  I added a layer of LIQID PIXIE DUST to all the KOI fish for sparkle.

Atelier Inks, blending Fadeout Ink, Friendship, Ink On 3, Koi Pond Stamp Set, Pondie Stencil, Shaker Card, Water coloring, Wavy Stencil,

I then used a Rectangle Frame to create the window for the shaker panel that I filled with clear sequin bits to allow the colors to shine.

Atelier Inks, blending Fadeout Ink, Friendship, Ink On 3, Koi Pond Stamp Set, Pondie Stencil, Shaker Card, Water coloring, Wavy Stencil,

This next card was so simple to make and I love the results.

I began by adding a subtle green color of ATELIER GODDESS GREEN using the WAVY STENCIL. I then moved the stencil and repeated the process, this time using ATELIER PEACOCK BLUE. Before removing the stencil I added a layer of Glimmer Paste, removed the stencil, and allowed it to dry.
Atelier Inks, blending Fadeout Ink, Friendship, Ink On 3, Koi Pond Stamp Set, Pondie Stencil, Shaker Card, Water coloring, Wavy Stencil,

I then finished off this simple card by adding the stamped sentiment on the card from the KOI POND set and adding a few clear bubbles.

Atelier Inks, blending Fadeout Ink, Friendship, Ink On 3, Koi Pond Stamp Set, Pondie Stencil, Shaker Card, Water coloring, Wavy Stencil,

For this final card, I started by blending ATELIER BEE STING YELLOWATELIER MARILYN RED, and ATELIER PEACOCK BLUE together and overlapping them in areas to create the blended colors on the PONDIE STENCIL. Before removing the stencil I added a layer of glimmer paste and then set it aside to dry.

Atelier Inks, blending Fadeout Ink, Friendship, Ink On 3, Koi Pond Stamp Set, Pondie Stencil, Shaker Card, Water coloring, Wavy Stencil,

I then stamped out one of the KOI using JUICY INK, and then heat set it using GOLD RUSH EMB.PWD. I then used the same 3 colors that I used on the background to color the fish in. Once it was dry I fussy cut the fish out.

Atelier Inks, blending Fadeout Ink, Friendship, Ink On 3, Koi Pond Stamp Set, Pondie Stencil, Shaker Card, Water coloring, Wavy Stencil,

The sentiment comes from two older sets, the Hey from HEY GORGEOUS and the Friend from HEELS TO YOU set that were stamped again using JUICY INK, and then heat set it using GOLD RUSH EMB.PWD.

Atelier Inks, blending Fadeout Ink, Friendship, Ink On 3, Koi Pond Stamp Set, Pondie Stencil, Shaker Card, Water coloring, Wavy Stencil,

To finish this card, I popped the Koi onto a bed of coiled foil thread and added some iridescent bubbles.

Hope this trio of Koi Pond friendship cards inspired you today. 

Thank you for stopping by 😊
Until next time... Happy Crafting 👋


SUPPLIES
KOI POND
KOI POND
Shop at:
IO3
WAVY STENCIL
WAVY STENCIL
Shop at:
IO3
PONDIE STENCIL
PONDIE STENCIL
Shop at:
 IO3
HEY GORGEOUS
HEY GORGEOUS
Shop at:
IO3
Heels To You
Heels To You
Shop at:
IO3
FADEOUT INK
FADEOUT INK
Shop at:
IO3
Atelier Marilyn Red
Atelier Marilyn Red
Shop at:
 IO3
Atelier Marigold Orange
Shop at:
IO3
ATELIER BEE STING YELLOW
Shop at:
 IO3
ATELIER GODDESS GREEN
Shop at:
 IO3
ATELIER PEACOCK BLUE
Shop at:
IO3
ATELIER MY PURPLE JAM
Shop at:
IO3
Atelier Paint It Black
Shop at:
IO3
BLACKOUT INK
BLACKOUT INK
Shop at:
 IO3
JUICY INK
JUICY INK
Shop at:
 IO3
GOLD RUSH EMB. PWD.
GOLD RUSH EMB. PWD.
Shop at:
 IO3
SMALL TIP WATER BRUSH PEN
Shop at:
IO3
LIQUID PIXIE DUST
LIQUID PIXIE DUST
Shop at:
IO3
BRISTOL PAPER
BRISTOL PAPER
Shop at:
SSS | AMZ
INK BLENDER BRUSHES
INK BLENDER BRUSHES
Shop at:
SSS | SK
ORIGINAL MISTI
ORIGINAL MISTI
Shop at:
SSS | AMZ | SBC | HBS
GEMINI JR. DIE CUTTER
Shop at:
SSS | AMZ | SBC
NEENAH SOLAR WHITE 110
Shop at:
SSS | AMZ | HBS
CLEAR ACETATE SHEETS
Shop at:
SSS | SK
MEDIA SPATULAS
MEDIA SPATULAS
Shop at:
SSS | SBC | HBS
MOONSTONE GLIMMER PASTE
Shop at:
SSS | AMZ | HBS
SILVER DUST | SEED BEADS
Shop at:
SSS | SK
IRIDESCENT BUBBLES
IRIDESCENT BUBBLES
Shop at:
SSS | SK
MAJESTIC FUSION
MAJESTIC FUSION
Shop at:
SSS | SK
CLEAR DROPS MIX 1
CLEAR DROPS MIX 1
Shop at:
SSS | SK
EMBELLISHMENT WAND
EMBELLISHMENT WAND
Shop at:
SSS | SK
FOAM TAPE - WHITE
FOAM TAPE - WHITE
Shop at:
SSS | SK