Showing posts with label dies. Show all posts

Wednesday, November 3, 2021

Just Breathe Encouragement Card - Rainbows with Atelier Inks

Just Breathe, Encouragement Card,Penguin Palace, Ink On 3,Collaboration Hop,Ink Blending,Coloring with Atelier Inks,Rainbow, Koi, Fadeout Ink, Card Making, Stamping, Die Cutting, handmade card, ilovedoingallthingscrafty, Stamps, how to,

Hello, again my friends, Ilda here πŸ‘‹

I am back with a card I created as part of a collaboration Hop between Inkon3 and Penguin Palace Stamps which is happening over onπŸ‘‰ Instagram. 

We teamed up to celebrate the Penguin Palace's 3rd Anniversary! Still plenty of time to join.  You can hop along with us on Instagram for your chance to win one of two $25 gift cards (one to the Ink on 3 store and one to the Penguin Palace store). The hop will end on November 7 @ 11:59 PM PDT.

Just Breathe, Encouragement Card,Penguin Palace, Ink On 3,Collaboration Hop,Ink Blending,Coloring with Atelier Inks,Rainbow, Koi, Fadeout Ink, Card Making, Stamping, Die Cutting, handmade card, ilovedoingallthingscrafty, Stamps, how to,

Here is how this card came together.
Just Breathe, Encouragement Card,Penguin Palace, Ink On 3,Collaboration Hop,Ink Blending,Coloring with Atelier Inks,Rainbow, Koi, Fadeout Ink, Card Making, Stamping, Die Cutting, handmade card, ilovedoingallthingscrafty, Stamps, how to,

Hope this Just Breathe Encouragement Card inspired you today and reminds you that it is ok to take a break, stop, relax, do nothing and just Breathe. Especially with all that is going on in the world right now, it's OK! People are more understanding than you realize because after all we all need and deserve a break from time to timeπŸ˜‰

If you want to watch a short video clip of how I colored in the Koi, click the play button below.
Thank you for stopping by and until next time... Happy Crafting!
Ilda 🌈🐟

Friday, July 24, 2020

Tone-on-Tone coloring - BeYOUtiful Floral Monthly Planner Layout

It's Cheryl with the Inkon 3 Creative Team here to show you how I made this BeYOUtiful monthly pages.


Did you know that the Atelier Inks are Copic Safe? This inspired me to do some tone-on-tone coloring. I think it looks super cool and it keeps the color palette simple which makes coloring super easy! 


I used a scalloped rectangle die and die cut some white card stock. On the white card stock, I stamped out the flowers from the BeYOUtiful Clear stamp set using the Peacock Blue Atelier Ink, then I stamped out the leaves from the same stamp set using the Goddess Green Atelier Ink. Next, I colored in the flower with blue copic markers and the leaves and stems with green copic markers. Then stamp the sentiment "Hello BeYOUtiful" on the lower left hand corner of the rectangle using Twiggy Brown Atelier Ink.


For my A6 planner, I cut a rectangle 6"x 4.25" out of white card stock, and punched holes on the side. Then I used the Leafy Forest Stencil, blender brushes and the Peacock Blue and Goddess Green Atelier Ink to create a beautiful background, you don't have to bring the background all the way to the center since you will cover it with the card stock with the flowers. Adhere the scalloped rectangle with the flowers onto the card stock with the Leafy Forest background.


On the monthly calendar side I stenciled in some more leafy backgrounds using Peacock Blue and Goddess Green Atelier Ink. Then I added some gold sparkly washi tape on the top of the page.


What do you think of the tone-on-tone coloring? It's not quite no-line coloring, but you get a nice softness to the image right?


Products Used:

Copics Used: 
Blues: BG05, BG02, B000
Greens: YG27, YG23, YG13

Monday, October 28, 2019

Simple Sweet Posies Card

Hello Crafty Friends! It's Cheryl with the Inkon3 creative team here to share a sweet and simple card using the Posies stamp set. 

I stamped the water pitcher, stem, and posies using the Fadeout No Line Coloring Detail ink onto white card stock. I love how the ink fades away, meaning no need to mask! I simply stamped where I wanted the flowers, and colored the flowers in! Once the image was colored, I fussy cut the stamped and colored image.
Copic Colors Used:
Pinks: R81, RV00, V0000
Blues: B0000, B000, B00
Blue-Greens: BG10, BG000
Greens: G43, G40, G24, G20
 

Next, I die-cut a few scalloped squares, one large square and two small ones. I used distress inks to add color to each of the squares. Then I used some water to activate the inks to give some subtle details to the background. 


Then I cut out a large scalloped rectangle using beige patterned paper. I chose beige so that it doesn't overpower the soft no-line colored image.

I then heat embossed the sentiment "You're the Best" onto the large square and then assembled the card. I adhered the large scalloped rectangle onto the base of the card. Then I adhered one small scalloped square on opposite corners of the larger rectangle. Next, I adhered the large square over the two smaller square. Once all the squares have been placed onto the card, I adhered the colored in image of the Posies in the glass pitcher.  Lastly I used some Nuvo jewel drops to add a few clear drops onto the card.


I hope you liked this tutorial! <3

Products Used: 


Thursday, October 17, 2019

Pumpkin tag tutorial

Hello my fabulous friends!

Welcome to the Inkon3 blog! Kassi here with a fun fall gift tag tutorial! 
As a kid, I was taught to say 'thank you' when people did something nice for me... I remember one time, while cooking dinner for an important event, our cheese grater broke... we didn't have time to go to the store, so I mom called our neighbor and asked if we could borrow theirs... It wasn't a big deal, and they were happy to lend it to us. However, before returning it the next day, my mom had me stick suckers into each of the grater holes, turning it into a candy bouquet... She wanted to make sure they knew that she was grateful... both for the borrowed cheese grater, and their friendship.  

That's why I make so many 'thank you' cards and treats...

Let's take a look at how to make this fabulous fall tag!

Friday, September 20, 2019

Fall Blessings


Hello Friends, Ilda here from I Love Doing All things crafty.

In a few days it will be Fall officially. Spring and Fall are definitely my favorite seasons of the year. I think it may have to do with how short the seasons are here in Canada and how quickly the leaves change everywhere. I love the warm colors of Fall and they are the inspiration for my card today.

CARD DETAILS

I began by stamping the images out using Blackout Ink and masking the beaver from the Platy-rific Pondies in the center of the card I then die cut a mask for it so that I could add the leaves around him using the die from Platy-rific Pondies Coordinating dies. Since the die cuts leave a white space around the stamp, I later will connect any lines afterward to finish the image.

For the pile of leaves, I used leaves from Heels To You and the Poinsettia set. I also die cut a few of each using the dies from the coordinating sets Heels To You and Poinsettia. Behind the beaver I also stamped out some pond greens that also come from the Platy-rific Pondies set.

To color these images in I used Copic markers. Under the pile of leaves, I stamped out the script blessings from the Blessings set using Blackout Ink.

Once the coloring was complete I die cut the panel using a Rectangle Stitched Die Frame and glued onto a Kraft Cardstock panel that I eventually glued on my card base.


Next, I die cut the letters out for "HAPPY FALL" using the Phat Alphanumeric Dies. To color them in I stuck them to the sticky side of a strip of washi tape to hold them in place while I colored them in using Copics.

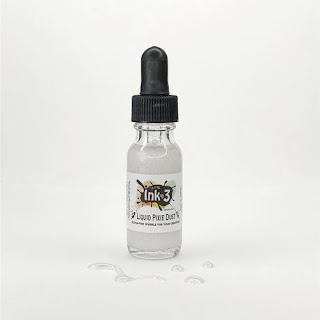
I then used foam tape to pop the letters onto the card front. Next, I used a water brush pen filled with Liquid Pixie Dust to paint the shine onto each letter. Once it was dry I added a layer of glossy accents to seal in the sparkly shine and make them look like bubble letters.


Hope this cute Fall Blessings card inspired you to stretch out your stamps by pulling elements as I have with this card to create a totally different scene other then what the stamp sets were initially designed for.

Thank you for stopping by 😊
Until next time... Happy Crafting πŸ‘‹

SUPPLIES
Platy-rific Pondies
Platy-rific Pondies
Shop at:
 IO3
Platy-rific Pondies Coordinating dies
Shop at:
 IO3
Phat Alphanumeric Dies
Shop at:
IO3
Heels To You
Heels To You
Shop at:
IO3
Heels To You Coordinating Dies
Shop at:
 IO3
Poinsettia
Poinsettia
Shop at:
 IO3
Poinsettia Coordinating Dies
Shop at:
IO3
Blessings
Blessings
Shop at:
IO3
Blackout Ink
Blackout Ink
Shop at:
IO3
Small Fine Tip Water Brush Pen
Shop at:
IO3
Liquid Pixie Dust
Liquid Pixie Dust
Shop at:
SSS | IO3
Neenah  80 LB SOLAR WHITE
Neenah 80 LB SOLAR WHITE
Shop at:
SSS | AMZ
Mini Misti Tool
Mini Misti Tool
Shop at:
SSS | AMZ | SB | SK
Gemini Jr Die Cutting/Embossing Machine
Shop at:
SSS | AMZ | SB
STITCHED RECTANGLES Dies
Shop at:
SSS
STUDIO KATIA GLUE
STUDIO KATIA GLUE
Shop at:
SSS | SK
Double-Sided Foam Tape
Shop at:
SSS | AMZ
Gelly Roll Gel Pen Set, Fine, Black
Shop at:
AMZ
WHITE Gelly Roll Pens Set
Shop at:
SSS | AMZ | SB
Glossy Accents
Glossy Accents
Shop at:
SSS | AMZ | SB | HBS

Tuesday, April 24, 2018

You're So Playti-rific Partial Shaker Card

Hello Friends, Ilda here!
The snow is all gone, there are puddles everywhere and the sun is shining... finally Spring has arrived here πŸ™Œ It feels almost as warm as today's card looks!

Today I have another card to share with you featuring the Playtirific Pondies Set from Ink On 3.
These little critters are so cute I had to use them again on another card. This time I wanted to create a shaker card.

You're So Playti-rific Partial Shaker Card by Ilovedoingallthingscrafty

For this card I had planned on creating a process video, but sadly lost some of the footage. So I will explain the process to you below. For now I have included a very short clip here so you can see it up close and in detail!


The first thing I did was stamp out the critters using Blackout Ink (my new favorite). I then colored them in using Spectrum Noir markers and die cut them out using their coordinating dies. Next, I moved on to the front panel.

To create the pond shaker area, first I used the second largest balloon die from Simon Says Stamp to die cut the pond shape on the right edge of the panel. I then lined up the die cut panel onto the card base to use as a guide and die cut the base. The balloon end will cleverly be hidden behind the duck so you would never know it was a balloon die you used to cut out the pond. I then used distress oxide inks to blend out the area along the pond. Once that was done blending,  I stamped out the pond plants along the edge of the water and colored them in.

To create the shaker pocket, I used a clear cello bag (the kind you use to store the finished cards in) trimmed it to size, and adhered it with the finished bottom edge of the bag along the open edge of the card base. I then filled the pocket with sequins and glued the opening of the bag shut. Next, used foam tape along the edge of the pond to create a rim for the top panel to adhere to and to keep the sequins in place. There still was some areas that the sequins snuck into under the panel, so if you want to avoid that I would trim the bag all the way around the pond and use some double sided tape to close it together.

Once the top panel was adhered to the card base I added the critters in place with some foam tape. For the sentiment tag, I stamped the words out with Salty Ocean distress oxide ink and heat set it with clear embossing powder. The last thing I did was add some blue cardstock to the inside of the card and adhered it under the front panel. This did not only add color to the pond but it also hid the balloon end from being seen on the inside of the card.

Here is a closer look at this cuties 😍
You're So Playti-rific Partial Shaker Card by Ilovedoingallthingscrafty

Make sure to check out the links here for the supplies I used in making this card.

Have a Platirific Week and hope this card inspired you today πŸ˜€
Even if it is to go outside and enjoy the Spring weather!

Thanks for stopping by!
Happy Crafting  :)

Thursday, March 8, 2018

Make a Wish Birthday Action Wobbles Card ft. Magic Dragons

Hello Friends!

Today I have a super cute card to share with you all featuring one of Ink On 3's newest Stamp sets, Magic Dragons. How cute is that little dragon?!
Even cuter when you see it move!


For this card I thought it would be fun to make it look like rainbow rays were shooting out from the candle's flames. To create the rays I made a stencil out of a plastic sleeve (cutting a long "V" like slit toward a center point that I had marked in the middle of the plastic sheet). I then used my plastic template to blend out each distress oxide ink onto some bristol paper. I wiped the plastic off after each color and rotated the template to line up with the previous color. Then I just repeated the process over again until the rainbow was complete.

Next, I die cut the panel using a square stitch frame. Then I stamped the candle, making sure the flame was centered over rainbow's vertex and also stamped out my sentiment. To the flame and the candle I added some sparkle pen and then added glossy accents. I then stamped out the dragon using Blackout ink and then colored it in with Spectrum Noir Markers. Once it was all colored, in I fussy cut the image out and mounted this cutie on a mini action wobbles spring. I finished it off by embellishing the card with some flat sequins and voila, done!

Make sure you follow me on Instagram so you can see this cutie in action πŸŽ₯


Hope this bright Make a Wish Birthday Action Wobbles Card has inspired you a little today!
Don't forget to check out the newest release from Ink On 3, cause you may want to take advantage of their awesome bundle SALE!

Bundle Special ~ 20% Off Plus FREE Shipping (no coupon needed)
* Free Ship US only - if not US you will still get 20% off the bundle.
A Savings of $19.29!!! 😲 How can you beat that!?!


Oh ya, and now they have DIES!!! Yes, Dies!!!

Thanks for stopping by!
Happy Crafting  :)

Tuesday, October 10, 2017

Thinking of You Card by Ilda ft. Waterlily Stamp Set

Hello, Ilda here... and I'm back again today with another DT project for Ink On 3. 

Today's card features the Waterlily Stamp set from the new release.
For this card I wanted to use my watercolors, as the scene I wanted to create was on water and I wanted a fluid feel to it. To create the scene I had to do a bit of masking for each image. I used versamark to stamp and then embossed each image and heat set it with a white embossing powder. Once I was done that, I pulled out my Jane Davenport Bright palette and had fun coloring the waterlilies and the background in.

Thinking of You Card - Ink On 3's Waterlily Stamp Set

To create the vellum strip overlay, I first stamped the sentiment with versamark and then heat set it with the same white embossing powder. Next, I ran the vellum strip through the sizzix machine using the scalloped edge die along the bottom and used my paper trimmer on the top. I then wrapped the strip around the bottom half of the finished waterlily panel securing the ends to the back with adhesive. Before I attached the panel to the A2 sized card base, I sandwiched a piece of  craft foam in between to add a little height and dimension. Lastly, I added my clear drops to the sentiment strip.

Don't you just love the Thinking of You Sentiment!? I'm in love with that beautiful font 😍
Here's a close up of it.

Thinking of You Card - Ink On 3's Waterlily Stamp Set

Hope you were inspired by today's Thinking of You Card featuring Ink On 3's Waterlily Stamp set. If you were and are looking to buy this set you can get it now on SALE for a limited time → HERE! For a look at all the products I used check out the links at the bottom of my post → HERE.

Thanks for stopping by!
Happy Crafting  :)