Monday, September 3, 2012

Let Them Blossom - Mixed Media On Canvas

The other day I did a tutorial on creating pretty little faces, so I thought I would share with you the piece I created using a few that I made.

It is titled "Let Them Blossom"  It's about watching and guiding our children as they grow.  You may have noticed my name is Fleurette F. Bloom well, the F in the middle stands for Flower.  Yes my parents were hippies and artists.

When I was a little girl my Father would always tell me, that I was their little flower and it was their job to help me grow.  He would say "a flower needs water, sunshine, tender loving care and protection, just like a child.  If you give them all those things then they will blossom into what they are meant to be."  So, this piece is a tribute to that sweet story my Dad would always tell me. (Thanks for being such a great Dad) :)

I added the time pieces in upper left hand corner to show, as time passes with the sun, so do the children grow.

I hope you enjoy this piece and that it inspires you to create something unique to you! :)


Click on photo to enlarge 

The captions in the piece are:

Plant the seeds
Nourish them
Protect them
Let them bloom
Watch them blossom

Sunday, September 2, 2012

Create some pretty little faces! With How-To Tutorial :)

Today I created some pretty little faces to use in future mixed media pieces. A fun little sketch project that can be done almost anywhere.

What you will need:
* Plain White Paper
* Regular and Colored Pencils
* Markers (I used Copic as I love the blend-ability and variety of soft and dark colors)
* scissors
* White Gell Pen (for highlights)

Just sit relax and have fun sketching :).

Here are some I created today.
The first photo is of my basic sketches, with colored pencil. The second is with the addition of markers, that I  cut out with scissors.

These faces are great for creating all sorts of things from mixed media paintings, cards to creating doll faces and so much more!

Can't wait to create something fun with them!!!


How-To, Step By Step Sketch Tutorial

If you want to create a pretty face, you will need to keep things symmetrical.
If you want a comical face you can draw the features off kilter.

This tutorial is on drawing fanciful faces, the process for drawing a realistic face
is similar but with a few more adjustments.  

The below steps show how to create a symmetrical pretty face. 
All faces turn out best by using this same method of dividing and using guidelines as shown below.


1. Draw a circle, find the center and draw one vertical line and one horizontal to divide your face. 
2. Create an even wave through the center (this will form your eyes)


3. Draw another wave line, connecting to your first (This will essentially give you 3 eyes)

* you will later erase the center eye, this is used for correct spacing.


4. Draw a small vertical eye shape below and centered benieth the center spacing eye.
5. Draw three circles at the bottom of this shape (this will create your nose)
6. Draw three more circles a bit below your nose shape (This will create your mouth)


7. Draw circles in your two side eyes and erase the center eye.
8. Create your nose and mouth by outlining your guide circles, then erase the unneeded extra lines that helped you form these features


9. Draw in smaller circles for your pupils (you can center these or position them where you want to look.  Just be sure to position each in the same location in each eye. 


10. Draw in eyelids from one corner to the next, it looks nice when you have it cut through the pupils.  
11.  Erase your extra lines (you can see I have erased the lines on the left, but left the ones on the right
so you can see how to draw your lines through the pupil)  
12.  Draw in eyebrows. 


13. Outline your face with a black or sepia fine tip marker/pen. 
14. Erase your pencil marks (if you want a rougher look you can leave some of your pencil marks to create a folk art or look, it's just a matter of choice.

Now you have a great face to color anyway you like! :)

Here is the one above, I colored it in just a bit and I will add more color and shading  later in the finished piece. 

Monday, August 20, 2012

Bingo Ball Drop - Aug. 20th 2012 Winner Announced
Good luck to everyone!!!


Monday, July 30, 2012

Let The Bingo Balls Bounce!!! It's GIVEAWAY TIME!!! WIN A $20.00 JO-Ann's Gift Card


Here is all you have to do to enter, to win a $20.00 JO-ANN's Gift Card.
  • Hit Like on my Face book page and Join my blog :)
  • Enter a comment in this thread or the FB thread!
  • Just for fun, in your comment, share what your favorite SVGcuts.com file is or which of my projects is your favorite! :)
  • If you have already joined both, post a comment and I will enter your name too!!! If you have joined one but not the other, join that one and enter a comment!
It's that easy to enter!!!

*Remember you must join both the FB page and my blog and leave a comment on one to quailfy. :)

That's it!

*Please Share this with your friends, the more the merrier!!!

One random winner will be selected and win, the $20.00 Jo-Ann's gift card!!!


It will be fun, a bingo ball will be pulled from the cage on camera and if your name/number gets pulled, you win!!! Be sure to watch :) Winner will be notified via this thread and on FB.


Winner will be announced in the evening, Monday August 20th!!! So, you have two weeks to enter!

* Just for fun in your comment let me know what your favorite SVGcuts.com file is! I would love to know!


Sometimes Their Are Good Accidents "Soar To New Hight's"


The other day, I grabbed my camera and snapped a few pics of a hot air balloon. Later when I was looking at the pictures I noticed not only did I get a picture of the hot air balloon, but there was a large hawk soaring in the sky as well! I thought it was kinda cool, so I gave it the title "Soar To New Hight's" I found it uplifting and motivational :) Have a great day!


Tuesday, July 24, 2012


So happy you stopped in!  Scroll down for a little peak into the CHA 2012 show.  I Had a wonderful time with the SVGCuts Design Team!!!!  So cool to finally meet Tamara of Happy Life, Crafty Wife and Thienly of Mod paperie in real life!!!  We walked the show all together and had a great time with Leo and Mary!!! All truly terrific, creative, fun people!!!  So happy to have had the opportunity to hang out with all of them! :)

Me coming out of the house that was created on the new TLC show Craft Wars with Tori Spelling, at CHA 2012.

Svgcuts getting ready to interview Tim Holtz

SVGcuts Leo and Mary interviewing Carta Bella at CHA.

Some pretty things and displays at CHA 2012

Meeting Dear Lizzy from American Crafts

Had fun with Mary, Thienly, Tamara and Leo walking the show! Here we are with Lizzy.

Entering CHA

Here is what it looks like when you enter the show :)
Here I am on my way to CHA! So excited to go with Mary, Leo and some of the SVGcuts.com Design Team!!! I also get to finally meet Thienly and Tamara in person!!! I know we will have fun seeing all the great new products :)

Thursday, March 22, 2012

Butterflies Delight, Spring Birdhouse


I really had fun putting this little birdhouse box together, I decided to repost it for this spring! This SVGcuts.com project makes a great gift or decoration for your home.

To create the butterfly decorated roof with butterflies, I created my own two sided paper, using card stock. I painted the colors on with watercolor paint. I just love how the watercolor paint gives such a soft, beautiful feel. I used chalk inks to create shadows and definition to the piece. I also hope this will inspire you to to create your own or one just like this one. :) Be sure to check out all the pictures below, there is something to look at on each side of this cute little bungalow. If you do create one, I would love to see yours! Post it on the SVGcuts.com wall and let them know you were inspired by Fleurette. :)

Svgcuts Collections used:
Below you can see how I wrapped the tree from the side around to the front. I think it gives it a nice flow from side to front. I love to wrap things around when I can, then when someone picks it up to look at it they, automatically begin to turn the piece to look at all sides.

    This is the back of my little bird house box. I used a gate design, chalk/inked it to give it a rusted look. Added some more butterflies and more of the fern at the bottom.

    On this side of the bird house I used a gate design, cut out what I needed, added chalk and ink to give it a rusted look. I also cut up a fern to give the grassy feel at the bottom.

    Below is the roof of the "Spring Birdhouse" it is completely covered in butterflies. I made my own two sided paper, by watercoloring the card stock on both sides. This gives a really soft and colorful butterfly. Im sure you could also find some pre-printed paper that would also give this effect if you did not want to paint your own.


Monday, March 19, 2012

Sneak Peek At A kids Art Project I am directing


I am having a great time working with some kids on a project for their school auction. The kids are all having a lot of fun, and learning some new skills! I will be showing you the finished pieces along with how you can do this too! Great home decor!

Hope you enjoy this sneak peak :)

Details coming soon!

Thursday, March 15, 2012

St. Patricks Day Banner


I created this fun and simple St. Patrick’s Day banner with just one SVGCuts collection! As the old Irish blessing goes, “may your blessings outnumber the shamrocks that grow, and may trouble avoid you wherever you go.” This banner design would also be great for many other holidays using different shapes, etc.

For full instructions, supplies and collections used click here: Designs By: Fleurette F. Bloom @ SVGcuts.com


Paris Locks Of Love - Valentines Day


Paris, the city of love, what better way to say I love you, than with a delicate Eiffel Tower box, filled with chocolates and ”Padlocks Of Love” cards. In Paris there is a romantic bridge where people place a padlock on the fence with their initials on it, then throw the key into the river to pledge eternal love. This story is what inspired me to create this fun project. I hope you enjoy it as much as I have.

For full instructions, supplies and collections used click here: Designs By: Fleurette F. Bloom @ SVGcuts.com

Chinese New Year SVGcuts Design Team Project

I have always been drawn to the beauty of Asia. That’s what compelled me to design this paper lantern that is fun to make for Chinese New Year, to beautify your home or give as a gift. I gave this lantern the delicacy of Cherry Blossoms and butterflies with the strength of the dragon and tiger (yin and yang). I also incorporated delicate Asian designs. It’s fun, simple and beautiful.

For full instructions, supplies and collections used click here: Designs By: Fleurette F. Bloom @ SVGcuts.com


Santa Clause is coming to town! Here is a fun way give some treats, ornaments or both. Hang this fun and whimsical treat cone on the wall, doorknob or on your tree! Also makes a great gift! It’s fun to make and share! I designed this for the SVGcuts Design Team.

For full instructions, supplies and collections used click here: Designs By: Fleurette F. Bloom @ SVGcuts.com


Thanks Giving Turkey Treat Centerpiece


Thanksgiving is a time for tradition, gathering with friends, great food and treats. I designed the “Thanksgiving Turkey Treat Centerpiece” as a fun new tradition to add to your holiday. Give your guests a treat to take home, create a fun game by adding a little prize inside one or all the treat cones. You can even put treats in the body of the turkey! When the holiday is over, fold the tail flat and tuck it all in a box for next year. This is a piece your family will enjoy for years to come and is easy to make!

For full instructions, supplies and collections used click here: Designs By: Fleurette F. Bloom @ SVGcuts.com


Friday, October 28, 2011

Masquerade Ball Masks


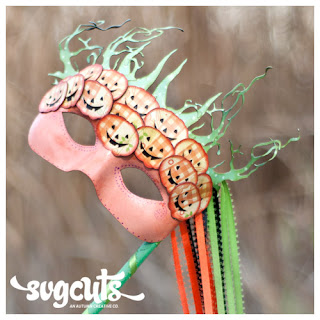
Who hasn’t dreamed of attending a Masquerade Ball! My daughter loves to play dress up and I have to admit I do too. That’s how I dreamed up these fun, fanciful and easy to create masks, using SVGcuts.com files and a few other items. Make them exactly as I have here with the full directions and files used or use these as a guide to come up with some new ones. Have a ball!

For full instructions, supplies and collections used click here: Designs By: Fleurette F. Bloom @ SVGcuts.com

Tuesday, October 18, 2011


When I think of Halloween the Headless Horseman and Count Dracula come to mind. I thought to myself, how fun it would be to make a project that incorporated both! That’s how I came up with “Count Dracula’s Coach” a table decoration that you can fill with treats, using just a few SVGcuts.com files.

Click on this link to see all the details on how you can create this fun project!

SVG COLLECTIONS USED - to creat this project
To help save you time, you can click on the links below for the SVGcuts.com collections below.

Bundle of Joy SVG Kit
Gothic Flourishes SVG Collection
Halloween SVG Collection
Monster Mash SVG Collection