Tuesday, March 30, 2021

 Hi everyone! 


It's Erica back on the Ink On 3 blog today, and I have finally got my yummy new goodies! I had to use the gorgeous Triple Rose stamp set, right away. 


Ambitiously, I decided to go for a no-line colouring look. I know, nuts, right? Especially while feeling a bit rusty, but apparently there was no stopping me, so I stamped up the image with Fadeout Ink on watercolour paper. 


I had some new watercolours to swatch and try out, these are Meeden 48 colour half pan, and in all honestly, I thought I was buying a 48 colour empty pan tin. I was more than a little surprised when they showed up and actually had colours in them, lol! Happy surprise, though. 


Using these colours, I coloured in the lovely floral image. The pinks were used for two of the roses, and I used a purple-ish pink on the middle rose. Green was the obvious choice for the leaves and buds. 


I did spend quite a lot of time on this as I was feeling slow and rusty, and left it overnight to dry properly, before going back to add some more details and depth. While I did spend lots of time on this, I am not 100% happy with the results but I guess that means I need more practice. 

Usually I fill out the background a little with a darker colour to bring the eye in to the image, but this time I didn't. I left it white and clean, but I did use a stitched rectangle die to add some interest around the edges. The only thing I added was a slim banner with a sentiment from the Here For You, this was stamped up with Dove ink from Concord & 9th. Ok, so I did add a lot of iridescent sequins too, but that was it. 


Thanks for stopping by today, I hope you enjoyed this card and will get the chance to watch the video as well. Lots of love and happy crafting from Erica 


Friday, March 26, 2021

Spring has Sprung with Gerbera Daisies!

Hello Friends! It's Cheryl with the Inkon3 Creative Team here to show you a fun Spring inspired card featuring the new Gerbera Daisies Stamp set!

First I stamped several daisies from the Gerbera Daisy Stamp Set using Blackout Hybrid Detail Ink, then I fussy cut the daisies and then colored with copic markers.

Next, I masked off the sides of the card using low-tack tape, and created a bright yellow background using Bee-Sting Yellow Atelier Ink, leaving the tape on, I used some Marigold Orange water color, and diluted it with water. I dipped a paintbrush into the water color and splattered the orange onto the yellow background. Let the water color dry.

Then I removed the tape and then created a border with a simple striped washi-tape.  Next, I adhered the daisies as shown in the picture above. 

For the sentiment, I die cut a rectangle and then I stamped "Hello BeYOUtiful" from the BeYOUtiful clear stamp set using juicy clear embossing ink. Next, I sprinkled some Arctic White Ultra Fine Embossing Powder onto the sentiment and tapped off any excess powder. Then I heat-set the embossing powder. 

Adhere the sentiment onto the card and frame with the striped washi tape!


Products Used:


Wednesday, March 24, 2021

You Are Never Alone Friendship Card by Ilda

 You Are Never Alone, Friendship Card,Ink On 3,No Line Coloring,Atelier Inks,Watercoloring,Card Making, Stamping, Die Cutting, handmade card, ilovedoingallthingscrafty, Stamps, how to,

Hello friends, Ilda here from I Love Doing All Things Crafty

My friendship card features one of the newest stamps sets from Ink On 3 called Here For You. If you like florals, this is such a pretty bloom to color and this set comes with 6 encouragement/friendship sentiments. 

CARD RECIPE
You Are Never Alone, Friendship Card,Ink On 3,No Line Coloring,Atelier Inks,Watercoloring,Card Making, Stamping, Die Cutting, handmade card, ilovedoingallthingscrafty, Stamps, how to,
  • Mask off the front panel using tape.
  • Ink blend the top of the rectangle area using TRINITY TEAL and the bottom using GODDESS GREEN ATELIER INK pads.
  • Layer on the leaves to the bottom half of the panel using the LEAFY FOREST STENCIL.
  • Spritz panel with water. Use a paper towel to absorb water.
  • Stamp sentiment using BLACKOUT INK.
  • Attach the Rose in place using foam tape.
  • Glue to the card base.
  • Embellish.
You Are Never Alone, Friendship Card,Ink On 3,No Line Coloring,Atelier Inks,Watercoloring,Card Making, Stamping, Die Cutting, handmade card, ilovedoingallthingscrafty, Stamps, how to,

Hope this simple encouragement You Are Never Alone Friendship Card inspired you today.

Thank you for stopping by and until next time... Happy Crafting!
SUPPLIES

HERE FOR YOU
HERE FOR YOU
Shop at:
IO3
FADEOUT INK
FADEOUT INK
Shop at:
IO3
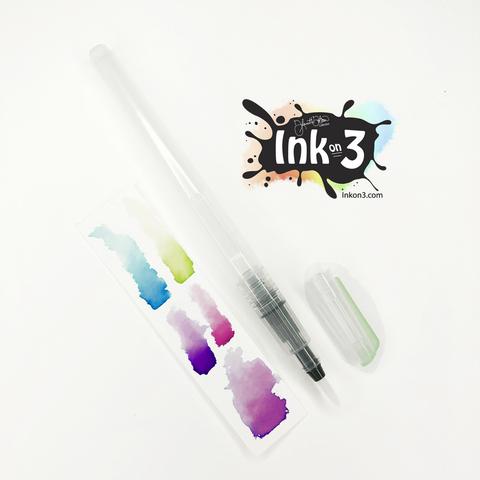
MED. WATER BRUSH
MED. WATER BRUSH
Shop at:
IO3
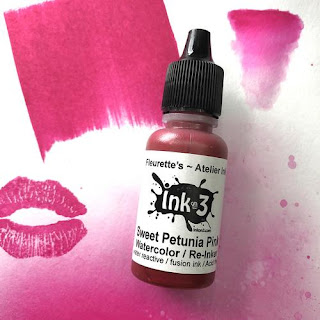
ATELIER SWEET PETUNIA RE-INKER
ATELIER
SWEET PETUNIA RE-INKER

Shop at:
IO3
ATELIER TRINITY TEAL RE-INKER
ATELIER
TRINITYTEAL
RE-INKER

Shop at:
IO3
Re-inker Goddess Green
Re-inker
Goddess Green

Shop at:
IO3
ATELIER SWEET PETUNIA
Shop at:
IO3
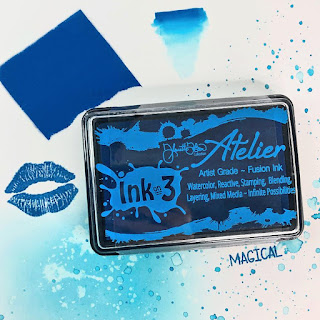
ATELIER TRINITY TEAL
Shop at:
IO3
ATELIER GODDESS GREEN
Shop at:
IO3
ATELIER PEACOCK BLUE
Shop at:
IO3
LEAFY FOREST STENCIL
Shop at:
IO3
BLACKOUT INK
BLACKOUT INK
Shop at:
IO3
NEENAH SOLAR WHITE 110
Shop at:
SSS | AMZ | HBS
MINI MISTI
MINI MISTI
Shop at:
SSS | SB | HBS
Strathmore 400 Series Watercolor Pad
Strathmore 
 Watercolor Pad

Shop at:
AMZ
RECTANGLE SPOTLIGHT STENCIL
Shop at:
HBS
BACKGROUND BLENDER BRUSHES
BACKGROUND BLENDER
BRUSHES

Shop at:
SSS | HBS
DISTRESS SPRAYER Ranger
Shop at:
SSS | SB | HBS
FOAM TAPE - WHITE
FOAM TAPE
WHITE

Shop at:
SSS | SK
IRIDESCENT BUBBLES
IRIDESCENT BUBBLES
Shop at:
SSS | SK

Saturday, March 20, 2021

Ink Smooshed Backgrounds with White Flowers

Hi it's Lynnea! I love to ink smoosh, don't you!? It gets a bit messy, but the results are so colorful and fun! Today I'm sharing ink smooshing with Atelier Inks and using the NEW Gerbera Daisy Stamp Set from InkOn3


Let's just dive right in to those gorgeous backgrounds! I ink smooshed two ways. I started by putting some Bee Sting Yellow, Sweet Petunia Pink, and Trinity Teal Atelier Inks onto my glass work surface. I spritzed them with water and picked up all three colors at once with a piece of plastic and smooshed it onto a piece of watercolor cardstock. I continued to pick up ink until my panel was full. I liked this background, but mixing all three colors together at once created some muddy areas, so I tried a second method to reduce the mud. Haha! 


I used the same three colors of Atelier Ink for my second background, but this time I used them one at a time. I added a bit of Bee Sting Yellow, dried the panel, then Sweet Petunia Pink, dried the panel, and Trinity Teal, and dried the panel. Allowing the colors to dry in between and adding them one at a time reduced the amount of mixing. There's definitely still some mixing of color, but I don't have muddy colors this time. I watered down some Paint it Black Atelier Ink and added ink spatters all over each background. 


I didn't want my images on top to take away from my pretty Atelier Ink backgrounds, so I decided to leave them white. I stamped some flowers and leaves from the Gerbera Daisy Stamp Set and trimmed them with my scissors. I mounted them with foam on my backgrounds. I stamped sentiments from the Here for You Stamp Set with Juicy Watermark Emboss Ink and heat set them with Arctic White Ultra Fine Embossing Powder. I trimmed them into strips and added them to the center of my floral cluster. 


I added a bit of glam to the sentiment strips with Liquid Pixie Dust to complete this card set. I hope you'll try this ink smooshing technique! 

Tuesday, March 9, 2021

Atelier Inks Two Ways with a VIDEO!

Hello and thanks for stopping by! Today I'm happy to share a project with you using the Phat Alphanumeric stamp set and Atelier Inks in two different ways.


Don't you just love a clever stamp set? The Phat Alphanumeric stamp set from Ink on 3 is clever in the way that is has many different looks. In my eye, the stamps look like bubbles! This gave me the idea to create a birthday card for my oldest son that would be customized to spell out exactly what I had in mind.

 The background panel was so much fun to create! First I stamped the letters in Juicy Embossing Ink and sprinkled on Arctic White Embossing Powder. This would be the part to really draw the attention to the theme of the card. After adding a blue watercolor wash with Atelier Ink Refills, I made sure the area with the embossed letter would be easy for a child to read.

My son is really fond of whales. I happened to have a retired whale stamp set in my supplies that would work out great. It's a color layering stamp set, so I grabbed my Atelier ink pads in two shades of blue to get that amazing look I get only from Atelier Inks. These ink pads work well for watercoloring but also stamp out beautifully! Here is the whale using Ink on 3's Trinity Teal, Peacock Blue and Paint it Black Atelier ink pads. Nice and crisp image, don't you think?
 
 Be sure to check out the video tutorial for a full process on coloring this card.


Here is an easy step by step how-to video for creating this card.


SUPPLY LIST:

Phat Alphanumeric stamp set: https://inkon3.com/products/phat-alphanumeric-4x6-clear-stamp-set?aff=35

Phat Alphanumeric coordinating dies: https://inkon3.com/products/phat-alphanumeric-die-cuts-stand-alone-dies?aff=35

Peacock Blue Ink Refill: https://inkon3.com/products/atelier-watercolor-re-inker-peacock-blue-artist-grade-fusion-ink?aff=35

Trinity Teal Ink Refill: https://inkon3.com/collections/atelier-watercolor-re-inkers/products/copy-of-atelier-watercolor-re-inker-sweet-petunia-pink-artist-grade-fusion-ink?aff=35

Paint it Black Ink Refill: https://inkon3.com/products/atelier-watercolor-re-inker-paint-it-black-artist-grade-fusion-ink?aff=35

Liquid Pixie Dust: https://inkon3.com/products/liquid-pixie-dust?_pos=1&_sid=7b11563fd&_ss=r&aff=35 

Large Waterbrush Pen: https://inkon3.com/collections/paint-brushes/products/large-water-brush-pen?aff=35

Juicy Clear Embossing & Watermark Ink: https://inkon3.com/collections/ink/products/juicy-embossing-watermark-ink?aff=35

Arctic White Ultra Fine Embossing Powder: https://inkon3.com/collections/ultra-fine-embossing-powder/products/arctic-white-ultra-fine-embossing-powder?aff=35

Ink Off Stamp Cleaner Pad: https://inkon3.com/products/ink-off?_pos=2&_sid=e797b1832&_ss=r&aff=35

Slimline Stitched Card Panels & Windows dies: https://shrsl.com/2oehd

Strathmore Watercolor Paper Pad 9x12:  https://www.ellenhutson.com/strathmore-watercolor-paper-9x12/#_a_238 

Color Layering Whale stamp set is retired, from Hero Arts

Atelier Trinity Teal- Artist Grade Fusion Ink: https://inkon3.com/collections/atelier-ink-pads/products/atelier-trinity-teal-artist-grade-fusion-ink-pad?aff=35

Atelier Peacock Blue- Artist Grade Fusion Ink: https://inkon3.com/collections/ink/products/atelier-peacock-blue-artist-grade-fusion-ink?aff=35

Atelier Paint it Black- Artist Grade Fusion Ink: https://inkon3.com/collections/ink/products/atelier-paint-it-black-artist-grade-fusion-ink?aff=35

Dual Speed Heat Tool: https://www.ellenhutson.com/dual-speed-heat-tool-wow/#_a_238

EK Success Powder Tool for embossing:  https://www.ellenhutson.com/powder-tool-adhesive-deactivator/#_a_238

Spellbinders Platinum 6 die cut and emboss machine:  https://www.ellenhutson.com/platinum-6-die-cutting-and-embossing-machine-spellbinders-tools/#_a_238

Scor-buddyMini Scoring Board:  https://www.ellenhutson.com/scor-buddy-mini-scoring-board-9x7-5/#_a_238

Tonic 8.5” Guillotine Paper Trimmer by Tim Holtz:  https://www.ellenhutson.com/tonic-comfort-8-5-inch-guillotine-paper-trimmer-by-tim-holtz/#_a_238

EK Success 5” Scissors: https://www.ellenhutson.com/ek-tools-precision-5-inch-scissors-with-sheath/#_a_238

Purple Tape ½”:  https://www.ellenhutson.com/icraft-purple-tape-1-2-in-x-15-yards/#_a_238

Tonic Nuvo Deluxe Adhesive: https://www.ellenhutson.com/tonic-nuvo-deluxe-adhesive/#_a_238

Post It Adhesive Roll: https://www.ellenhutson.com/3m-post-it-adhesive-roll-white-1x400-in/#_a_238

Pixie Spray: https://www.ellenhutson.com/icraft-pixie-spray/#_a_238

Scotch Foam Tape Roll:  https://www.ellenhutson.com/scotch-foam-mounting-tape/#_a_238


Does this project bring you lots of new ideas for creating? We would love to hear from you! Thank you for visiting us today and I look forward to sharing again with you soon!

Jenny Hall


Saturday, March 6, 2021

Using Atelier Inks with a Gel Press

Can you believe I've never used a Gel Press? I'm jumping on the band wagon and putting my Atelier Inks from InkOn3 to the test! 


I am ALL about easy cards and easy techniques - especially when techniques result in more than one card. I got THREE backgrounds out of one go with the Gel Press! That's a win in my book! 


Be sure to check out my video at the beginning of this post for a full tutorial. This was LITERALLY my first time using my Gel Press and I'm obsessed! I watched a few tutorials on YouTube and decided to give it a try with my Atelier Inks. I haven't seen it done with these inks and you NEED to try them! Look how colorful my backgrounds are! And you can mix and match ink colors to get any type of background you want! 


I inked up my Gel Press, gave it a quick once over with my brayer, placed a stencil on top, and then rubbed a piece of cardstock over the press. That gives me one impression! Then I removed the stencil and placed a second piece of cardstock on my press. That gives me TWO impressions! I realized my stencil still had so much Atelier inky goodness, so I gave it a spritz with water and pressed another piece of cardstock onto the stencil. That gives me THREE backgrounds total! 


I wanted to keep the focus on the pretty Atelier Ink background, so I trimmed down my panels, added a stamped sentiment with Blackout Hybrid Detail Ink, and matted the panel with black cardstock. Easy and simple! This is definitely a technique that I'm going to continue to practice. Thanks for joining me!