Showing posts with label No Line Coloring. Show all posts

Tuesday, March 30, 2021

 Hi everyone! 


It's Erica back on the Ink On 3 blog today, and I have finally got my yummy new goodies! I had to use the gorgeous Triple Rose stamp set, right away. 


Ambitiously, I decided to go for a no-line colouring look. I know, nuts, right? Especially while feeling a bit rusty, but apparently there was no stopping me, so I stamped up the image with Fadeout Ink on watercolour paper. 


I had some new watercolours to swatch and try out, these are Meeden 48 colour half pan, and in all honestly, I thought I was buying a 48 colour empty pan tin. I was more than a little surprised when they showed up and actually had colours in them, lol! Happy surprise, though. 


Using these colours, I coloured in the lovely floral image. The pinks were used for two of the roses, and I used a purple-ish pink on the middle rose. Green was the obvious choice for the leaves and buds. 


I did spend quite a lot of time on this as I was feeling slow and rusty, and left it overnight to dry properly, before going back to add some more details and depth. While I did spend lots of time on this, I am not 100% happy with the results but I guess that means I need more practice. 

Usually I fill out the background a little with a darker colour to bring the eye in to the image, but this time I didn't. I left it white and clean, but I did use a stitched rectangle die to add some interest around the edges. The only thing I added was a slim banner with a sentiment from the Here For You, this was stamped up with Dove ink from Concord & 9th. Ok, so I did add a lot of iridescent sequins too, but that was it. 


Thanks for stopping by today, I hope you enjoyed this card and will get the chance to watch the video as well. Lots of love and happy crafting from Erica 


Wednesday, March 24, 2021

You Are Never Alone Friendship Card by Ilda

 You Are Never Alone, Friendship Card,Ink On 3,No Line Coloring,Atelier Inks,Watercoloring,Card Making, Stamping, Die Cutting, handmade card, ilovedoingallthingscrafty, Stamps, how to,

Hello friends, Ilda here from I Love Doing All Things Crafty

My friendship card features one of the newest stamps sets from Ink On 3 called Here For You. If you like florals, this is such a pretty bloom to color and this set comes with 6 encouragement/friendship sentiments. 

CARD RECIPE
You Are Never Alone, Friendship Card,Ink On 3,No Line Coloring,Atelier Inks,Watercoloring,Card Making, Stamping, Die Cutting, handmade card, ilovedoingallthingscrafty, Stamps, how to,
  • Mask off the front panel using tape.
  • Ink blend the top of the rectangle area using TRINITY TEAL and the bottom using GODDESS GREEN ATELIER INK pads.
  • Layer on the leaves to the bottom half of the panel using the LEAFY FOREST STENCIL.
  • Spritz panel with water. Use a paper towel to absorb water.
  • Stamp sentiment using BLACKOUT INK.
  • Attach the Rose in place using foam tape.
  • Glue to the card base.
  • Embellish.
You Are Never Alone, Friendship Card,Ink On 3,No Line Coloring,Atelier Inks,Watercoloring,Card Making, Stamping, Die Cutting, handmade card, ilovedoingallthingscrafty, Stamps, how to,

Hope this simple encouragement You Are Never Alone Friendship Card inspired you today.

Thank you for stopping by and until next time... Happy Crafting!
SUPPLIES

HERE FOR YOU
HERE FOR YOU
Shop at:
IO3
FADEOUT INK
FADEOUT INK
Shop at:
IO3
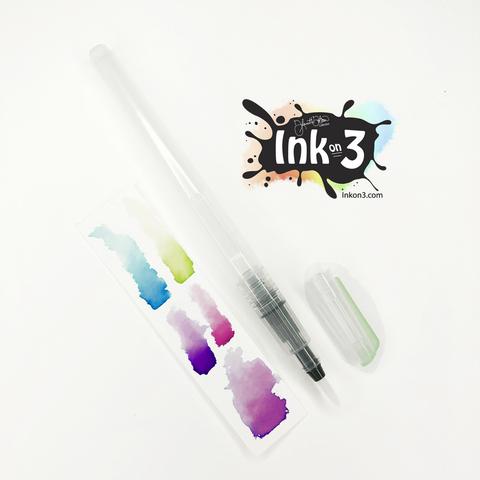
MED. WATER BRUSH
MED. WATER BRUSH
Shop at:
IO3
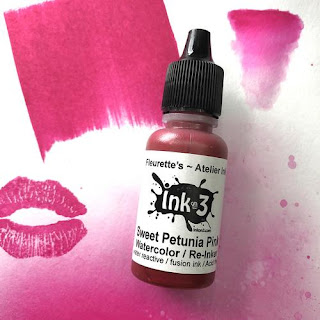
ATELIER SWEET PETUNIA RE-INKER
ATELIER
SWEET PETUNIA RE-INKER

Shop at:
IO3
ATELIER TRINITY TEAL RE-INKER
ATELIER
TRINITYTEAL
RE-INKER

Shop at:
IO3
Re-inker Goddess Green
Re-inker
Goddess Green

Shop at:
IO3
ATELIER SWEET PETUNIA
Shop at:
IO3
ATELIER TRINITY TEAL
Shop at:
IO3
ATELIER GODDESS GREEN
Shop at:
IO3
ATELIER PEACOCK BLUE
Shop at:
IO3
LEAFY FOREST STENCIL
Shop at:
IO3
BLACKOUT INK
BLACKOUT INK
Shop at:
IO3
NEENAH SOLAR WHITE 110
Shop at:
SSS | AMZ | HBS
MINI MISTI
MINI MISTI
Shop at:
SSS | SB | HBS
Strathmore 400 Series Watercolor Pad
Strathmore 
 Watercolor Pad

Shop at:
AMZ
RECTANGLE SPOTLIGHT STENCIL
Shop at:
HBS
BACKGROUND BLENDER BRUSHES
BACKGROUND BLENDER
BRUSHES

Shop at:
SSS | HBS
DISTRESS SPRAYER Ranger
Shop at:
SSS | SB | HBS
FOAM TAPE - WHITE
FOAM TAPE
WHITE

Shop at:
SSS | SK
IRIDESCENT BUBBLES
IRIDESCENT BUBBLES
Shop at:
SSS | SK

Monday, March 16, 2020

Dogwood Flower No Line Colouring with Erica

Hey guys!

It’s Erica back on the InkOn3 blog. How are we all doing? Everyone staying safe and well with the Corona virus outbreak? I have been practically a hermit for the last couple of weeks due to a bad back, so I’ve been doing the social distance thing already. My hands are all chapped and dry from over-washing, but better safe than sorry.


Because I have had back issues I’ve not managed to do much crafting but I’ve tried to colour along with #thedailymarker30day challenge. One thing I have been practicing is my no-line colouring. Some has been more successful, than others but it’s all fun and educational. Sometimes your mistakes will teach you more than your successes so don’t be discouraged when it doesn't turn out they way you imagined it.

Here is an example: I started this no line colouring wreath on the left and wasn’t overly happy with how it was turning out. My attempts on the right side of the wreath look so much better!


For the card I have made today, I have used the Dogwood Flower stamp and the Fadeout Ink. I’ve coloured it, and the wreath above, with Daniel Smith water colours. 

I stamped the image with the Fadeout Ink three times to make the lines very visible, with the help of my Mini MISTI. The colouring is done both with a water colour brush and a refillable brush. 


This one isn’t one of my better results, but the next one is bound to be better. The leaves I’m quite pleased with though! 

To add some interest I added some splatters to the background. I mixed two drops of Liquid Pixie Dust with a drop of Paint It Black reinker in a little tray, and went to town. To protect the image I covered it up with a little piece of paper. Usually I cut out a mask but this worked in a pinch. 


Sentiment wise I kept it simple, ‘my favorite besties’ and stamped that in Blackout ink. I managed to smudge the splatters a little, so to cover it up, I added some more. As you do.


The whole thing was then adhered to a light gray card base. A white one was too harsh, and it need a little something softer and the light gray was just perfect. Oh and to fix the sentiment, I covered up the s on ‘Besties’ to make it say ‘My Forever Bestie’. 


With that, I’m done for today. Thanks for stopping by today and spending time with me.
Lots of love, wash your hands for your health and craft for your sanity! 

Erica 


Saturday, February 29, 2020

Tips for Coloring White Flowers + Video


Hi everyone, welcome back to the Ink On 3 blog and Happy Leap Day!  The snow in my home state has reminded me of my love for white flowers.  Achieving the look and delicacy of white flowers is made possible with Ink On 3 Fadeout Ink.  In my video below, I did a little experiment showing you the difference using Fadeout makes and its necessity for beautifully soft white (or light) flowers.


My best advice for no-line white floral coloring--practice.  Mastering your crafting tools is essential to getting the outcome you're looking for.  Having Fadeout No-Line Ink has elevated my floral coloring, and I grab it again and again for my cards.

Hey thank you so much for checking out my video on how I made these cards!  Do you all have stamp sets from Ink On 3 that you would like me to use in a future project?  Let me know in the comments below!  If you like what you've seen from me, make sure you subscribe to my YouTube channel and give me a follow over on Instagram!  Talk to you all very soon!

Materials:
Ink On 3 - Fadeout No-Line Ink
Ink On 3 - Atelier Fusion Ink
Ink On 3 - Dogwood Flower Stamp Set
Ink On 3 - Dogwood Flower Die Set


Jaycee Gaspar

YouTube | Instagram | Blog

Wednesday, January 29, 2020

Ink On 3 Inks - What's the Difference? + Video


Hi everyone, welcome back to the Ink On 3 blog!  I hope your 2020 is off to a wonderful start!  Over on my insta, I have seen a few people making crafty resolutions or rekindling their love for card making.  I know not everyone understands the multitude of inks and mediums that Ink On 3 has to offer.  So I thought this would be a great opportunity to show you all; beginner or expert, the four families of inks that complete your crafty collection.


Which of the four ink families from Ink On 3 do YOU use most on your card projects?  I hope you found the video helpful in shopping your stash and trying new ways to color.  There are so many combinations when mixing the four ink families as well.  Try coloring your Blackout Detail Ink images with the Atelier Fusion Ink Watercolor Refills!  You will be surprised at how easy it is to blend the colors and achieve smooth results.  Speaking of Atelier Fusion Inks, make sure you follow the video on this blog post with THIS POST specific to Atelier Inks!

Hey thank you so much for checking out my video on how I made these cards!  Do you all have stamp sets from Ink On 3 that you would like me to use in a future project?  Let me know in the comments below!  If you like what you've seen from me, make sure you subscribe to my YouTube channel and give me a follow over on Instagram!  Talk to you all very soon!

Materials:
Ink On 3 - Blackout Detail Ink
Ink On 3 - Juicy Clear Embossing Ink
Ink On 3 - Fadeout No-Line Ink
Ink On 3 - Atelier Fusion Ink
Ink On 3 - Strawberry Champagne Embossing Powder
Ink On 3 - Gold Rush Embossing Powder
Ink On 3 - Water Lily Stamp Set
Ink On 3 - Bad & Boujee Stamp Set
Ink On 3 - Bad & Boujee Die Set
Ink On 3 - Dogwood Flower Die Set

Ink On 3 - Raccoon Hugs Stamp Set
Ink On 3 - Raccoon Hugs Die Set


Jaycee Gaspar

YouTube | Instagram | Blog

Thursday, January 23, 2020

Hey Gorgeous!


Hi everyone! It’s Jeannie (InsideoutJeans) on the blog today with Ink on 3’s newest stamp set debuted at Creativation called Hey Gorgeous. It's such a pretty stamp set that speaks to me! The main image from this set is obviously this gorgeous girl, which I decided to no-line color using Fadeout ink with copic markers.

There's no coordinating dies for this set but it's large enough for me to fussy cut quite easily. Then I had to figure out what to do with it. I pulled out the Atelier inks to help me create a fun background. First, I used three Atelier re-inkers to watercolor a card panel. I used Marilyn Red, Marigold Orange, and Bee Sting Yellow.


Once the watercolored panel was created, I splattered water all over since these inks are water-reactive. I also splattered some of the ink using all three colors: Marilyn Red, Marigold Orange, and Bee Sting Yellow

To finish off the background, I stamped out the floral images randomly using the Marilyn Red ink pad. 


For the sentiment, I stamped Hey Gorgeous using Blackout ink. I just quickly fussy cut out the larger sentiment and added the "hey" using a strip. 


I'm loving how this all came together and I'm so excited to use these inks more! They are so versatile and fun. Have you tried them? 

Thanks for stopping by today and I hope you get inspired to create. Come back again soon for more inspiration and ideas! Happy Crafting! 

- Jeannie 

Monday, October 28, 2019

Simple Sweet Posies Card

Hello Crafty Friends! It's Cheryl with the Inkon3 creative team here to share a sweet and simple card using the Posies stamp set. 

I stamped the water pitcher, stem, and posies using the Fadeout No Line Coloring Detail ink onto white card stock. I love how the ink fades away, meaning no need to mask! I simply stamped where I wanted the flowers, and colored the flowers in! Once the image was colored, I fussy cut the stamped and colored image.
Copic Colors Used:
Pinks: R81, RV00, V0000
Blues: B0000, B000, B00
Blue-Greens: BG10, BG000
Greens: G43, G40, G24, G20
 

Next, I die-cut a few scalloped squares, one large square and two small ones. I used distress inks to add color to each of the squares. Then I used some water to activate the inks to give some subtle details to the background. 


Then I cut out a large scalloped rectangle using beige patterned paper. I chose beige so that it doesn't overpower the soft no-line colored image.

I then heat embossed the sentiment "You're the Best" onto the large square and then assembled the card. I adhered the large scalloped rectangle onto the base of the card. Then I adhered one small scalloped square on opposite corners of the larger rectangle. Next, I adhered the large square over the two smaller square. Once all the squares have been placed onto the card, I adhered the colored in image of the Posies in the glass pitcher.  Lastly I used some Nuvo jewel drops to add a few clear drops onto the card.


I hope you liked this tutorial! <3

Products Used: