Showing posts with label embossing powders. Show all posts

Wednesday, January 29, 2020

Ink On 3 Inks - What's the Difference? + Video


Hi everyone, welcome back to the Ink On 3 blog!  I hope your 2020 is off to a wonderful start!  Over on my insta, I have seen a few people making crafty resolutions or rekindling their love for card making.  I know not everyone understands the multitude of inks and mediums that Ink On 3 has to offer.  So I thought this would be a great opportunity to show you all; beginner or expert, the four families of inks that complete your crafty collection.


Which of the four ink families from Ink On 3 do YOU use most on your card projects?  I hope you found the video helpful in shopping your stash and trying new ways to color.  There are so many combinations when mixing the four ink families as well.  Try coloring your Blackout Detail Ink images with the Atelier Fusion Ink Watercolor Refills!  You will be surprised at how easy it is to blend the colors and achieve smooth results.  Speaking of Atelier Fusion Inks, make sure you follow the video on this blog post with THIS POST specific to Atelier Inks!

Hey thank you so much for checking out my video on how I made these cards!  Do you all have stamp sets from Ink On 3 that you would like me to use in a future project?  Let me know in the comments below!  If you like what you've seen from me, make sure you subscribe to my YouTube channel and give me a follow over on Instagram!  Talk to you all very soon!

Materials:
Ink On 3 - Blackout Detail Ink
Ink On 3 - Juicy Clear Embossing Ink
Ink On 3 - Fadeout No-Line Ink
Ink On 3 - Atelier Fusion Ink
Ink On 3 - Strawberry Champagne Embossing Powder
Ink On 3 - Gold Rush Embossing Powder
Ink On 3 - Water Lily Stamp Set
Ink On 3 - Bad & Boujee Stamp Set
Ink On 3 - Bad & Boujee Die Set
Ink On 3 - Dogwood Flower Die Set

Ink On 3 - Raccoon Hugs Stamp Set
Ink On 3 - Raccoon Hugs Die Set


Jaycee Gaspar

YouTube | Instagram | Blog

Friday, July 12, 2019

Boujee and Kisses Shaker Card with Ilda


Hey Peeps, Ilda here!

I am back again today with another shaker card. This time featuring the newest sets from Ink On 3 BAD and BOUJEE and it's Coordinating Dies.


CARD DETAILS

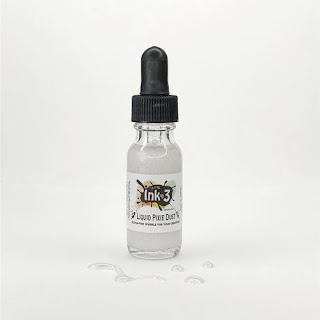
I began by stamping out the images for this card. I used Juicy Ink to stamp out the Perfume bottle and the large Diamond from the BAD AND BOUJEE set, and then heat set them using Chrome Embossing Powder. I then colored them in with a light blue zig brush and blended on some LIQUID PIXIE DUST to add sparkle. I then used the Coordinating Dies to cut out the pieces.


Next, I die cut the Black Rectangle Frame for the shaker as well as the scripted Boujee and Kisses from the Coordinating Die set. I then used JUICY INK to ink up the die cuts and heat set a few layers of the Black As Night Embossing Powder. I then glued the finished pieces to the top of the acetate piece that I had glued onto the frame.


The last thing I did, was to stamp the lips directly onto the card base using Worn Lipstick Oxide Ink and then heat set them using Crystal Clear Ultra Powder. I also stamped out the "&" onto the card base and added a tiny diamond to the perfume bottle using BLACKOUT INK.


To finish off this shaker card, I used foam tape under the frame and added a bunch of clear and iridescent shaker bits to the center of the card base before gluing the frame in place.

I think this card is pretty Bad and Boujee and hope it has inspired you today. Have a wonderful weekend.

Thank you for stopping by 😊
Until next time... Happy Crafting 👋

Ilda

SUPPLIES
Bad and Boujee Stamps
Shop at:
SSS | IO3
Bad and Boujee Die Set
Shop at:
SSS | IO3
Crystal Clear Ultra  Powder
Crystal Clear Ultra Powder
Shop at:
SSS | IO3
Blackout Ink
Blackout Ink
Shop at:
SSS | IO3
Juicy Ink
Juicy Ink
Shop at:
SSS | IO3
Chrome Ultra Fine Embossing Powder
Shop at:
SSS | IO3
Black As Night Embossing Powder
Shop at:
SSS | IO3
Liquid Pixie Dust
Liquid Pixie Dust
Shop at:
SSS | IO3
Small Fine Tip Water Brush Pen
Shop at:
IO3
Mini Misti Tool
Mini Misti Tool
Shop at:
SSS | AMZ | SB | SK
Strathmore Bristol Pad
Shop at:
SSS | AMZ
Oxide Ink Pad WORN LIPSTICK
Shop at:
SSS | SB
Zig CLEAN COLOR 60+ 80 SET
Shop at:
SSS | AMZ
Gemini Jr Die Cutting/Embossing Machine
Shop at:
SSS | AMZ | SB
Black Cardstock 110bs
Shop at:
AMZ
MFT STITCHED RECTANGLE FRAMES Die-Namics
Shop at:
SSS
ACETATE SHEETS
ACETATE SHEETS
Shop at:
SSS | SK
SPARKLING CRYSTALS MIX
Shop at:
SSS | SK
ONYX CRYSTALS
ONYX CRYSTALS
Shop at:
SSS | SK
MAJESTIC FUSION
MAJESTIC FUSION
Shop at:
SSS | SK
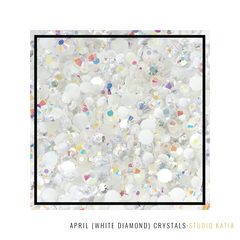
APRIL CRYSTALS
APRIL CRYSTALS
Shop at:
SSS | SK
JUST CHUNKY CONFETTI GLITTER
Shop at:
SSS | SK
Double-Sided Foam Tape
Shop at:
SSS | AMZ

Monday, August 27, 2018

Mermaid Cat Stamp Set, Card - Watercolor Embossing Techniques

Watercolor and Embossing Techniques, using the stamp set "My Little Catfish"


I had so much fun making this card as it is one of my favorite stamp sets. It always brings back sweet childhood memories for me.  When I was a little girl about 8 years old, I got my first pet cat and I named her Catfish.  Why Catfish?  Well, I had a big love for all creatures of the sea and lakes I guess, lol.  She turned out to be my very best friend growing up and I had her all the way though college.  So every time I use this set, a little piece of her comes back to life.   I hope you will get as much joy out of creating with this little mercat set as I do, after all who doesn't like mermaids and their pets of course. 

Here is quick video showing the watercolor and embossing techniques I used to create this card. 
Thanks for watching <3 


How I created this card:

  • First I used the seahorses and sea shells and Chrome Ultra-Fine Embossing Powders to create a fun background.  Then ink blended the blue over the top to give it that deep blue sea feel.
  • Then I die cut a stitched circle, inked it up with some Juicy Embossing Ink, and poured on the Chrome embossing powder.  The combination of this ink and ultra fine powder is amazing, it is such a smooth, shiny finish.  It truly looks like metal! :) 
  • For the Mercat or "Catfish" lol, I embossed it in the Arctic White Ultra-Fine Embossing powder then used watercolors to color it in. To add some deeper tones I accented it with some colored pencils. 
Happy Crafting!