Showing posts with label blackout ink. Show all posts

Friday, November 5, 2021

Thankful for You


Hello Everyone! 
It's Ceal, here. Today I am sharing a card using the Hey Gorgeous set and the Thankful for You set that just released. 

To create this card I started with a top folding white card base and a white panel. I stamped the image using Blackout ink and colored it using alcohol markers. I stamped the  image again on some patterned paper and fussy cut out the hat and then added some of the leaves from the Thankful for You set to the hat. 
To finish the card I added a sentiment. 


Until next time Happy Stamping!

Wednesday, April 14, 2021

Triple Rose Mini Slimline Friendship Card by Ilda

Triple Rose, Mini Slimline, Friendship Card,Ink On 3,Card Making, Stamping, Die Cutting, handmade card, ilovedoingallthingscrafty, Stamps, how to,

Hello friends, Ilda here 👋

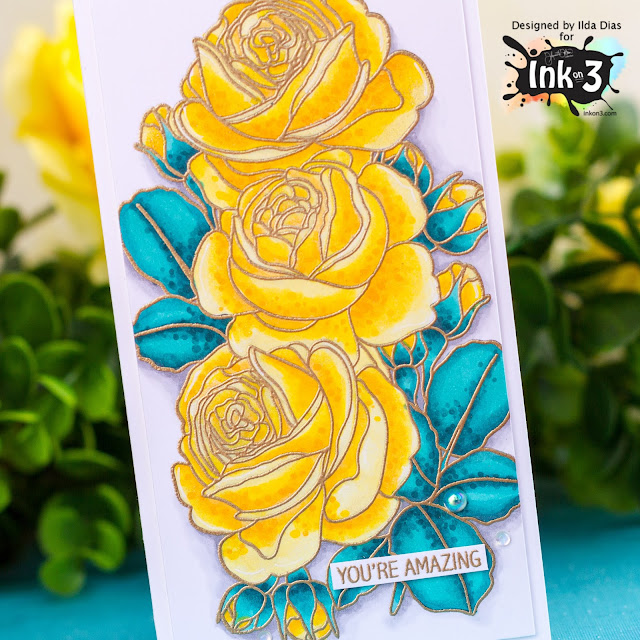
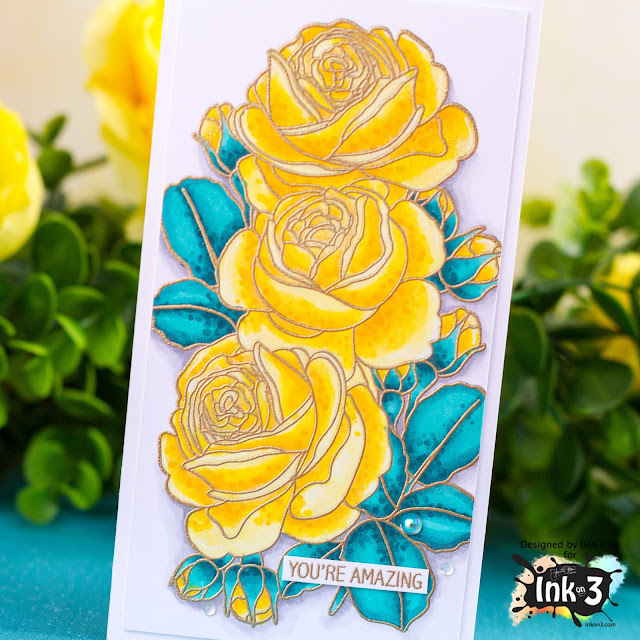
Today I have a cute Triple Rose Mini Slimline Friendship Card to share with you, featuring both of the latest stamp sets released from Inkon3. I think I may have a new obsession with mini Slimline's, they are so cute IRL and way easier to photograph!

CARD RECIPE
  • Stamp TRIPLE ROSE out onto Copic-friendly paper first using BLACKOUT INK. (This just makes it easier to see your lines and won't damage your Copics if you emboss first) Leave the stamp in the positioning tool as you be using it again later.
  • Color in Roses using Copic markers or desired medium.
Triple Rose, Mini Slimline, Friendship Card,Ink On 3,Card Making, Stamping, Die Cutting, handmade card, ilovedoingallthingscrafty, Stamps, how to,
  • Once the coloring is complete and Ink is dry, use an anti-static powder bag to ensure the static is removed from the image.
  • Place the colored image back into the stamping tool.
  • Ink up stamp this time with JUICY INK and stamp image again.
  • Use GOLD RUSH EMB. PWD. to add and heat set Gold Embossed details.
Triple Rose, Mini Slimline, Friendship Card,Ink On 3,Card Making, Stamping, Die Cutting, handmade card, ilovedoingallthingscrafty, Stamps, how to,
  • Stamp out and Gold heat emboss the sentiment from the HERE FOR YOU stamp set. Trim and add to the card front.
  • Embellish using Iridescent Bubbles.
Hope you got some inspiration from today's Triple Rose Mini Slimline Friendship Card. Thank you for stopping by and until next time... Happy Crafting!
SUPPLIES
TRIPLE ROSE
TRIPLE ROSE
Shop at:
IO3
HERE FOR YOU
HERE FOR YOU
Shop at:
IO3
BLACKOUT INK
BLACKOUT INK
Shop at:
IO3
JUICY INK
JUICY INK
Shop at:
IO3
GOLD RUSH EMB. PWD.
GOLD RUSH EMB. PWD.
Shop at:
IO3
MAGIC POWDER BAG
MAGIC POWDER BAG
Shop at:
SSS | AMZ
MINI MISTI
MINI MISTI
Shop at:
SSS | SB | HBS
NEENAH SOLAR WHITE 110
NEENAH SOLAR
WHITE 110

Shop at:
SSS | AMZ | HBS
COPIC SKETCH
COPIC SKETCH
Shop at:
SSS | AMZ
GUILLOTINE PAPER TRIMMER
GUILLOTINE PAPER
TRIMMER

Shop at:
SSS | AMZ | SB
BEE CREATIVE GLUE
BEE CREATIVE GLUE
Shop at:
SSS | SB | HBS
EMBELLISHMENT WAND
EMBELLISHMENT
WAND

Shop at:
SSS | SK
IRIDESCENT BUBBLES
IRIDESCENT BUBBLES
Shop at:
SSS | SK
IRIDESCENT BUBBLES TINY
IRIDESCENT BUBBLES
TINY

Shop at:
SSS | SK

Friday, December 18, 2020

Oh Deer


Hey Y'all!
It's Ceal, here to share with you today.  
Can you believe it's only 7 days until Christmas? This has been the fastest slowest year ever.
It's 7 days until Christmas and yes I am still making and mailing cards out. 
My card today uses the Oh Deer set and I turned him into a Christmas deer. I stamped the image using Blackout ink and then colored it using Copic markers. I love how with the blackout ink you do not have to heatset it or wait a while to color your image.  
To make him a little more festive I added the string of lights to his antlers. 

Friday, November 27, 2020

Warm Winter Wishes Holiday Card ft. Little Birdie

Warm Winter Wishes, Holiday Card,Ink On 3,Little Birdie Stamp Set, Christmas Card, Blackout ink, Card Making, Stamping, Die Cutting, handmade card, ilovedoingallthingscrafty, Stamps, how to,


Hey Friends and Happy Friday, Ilda here!

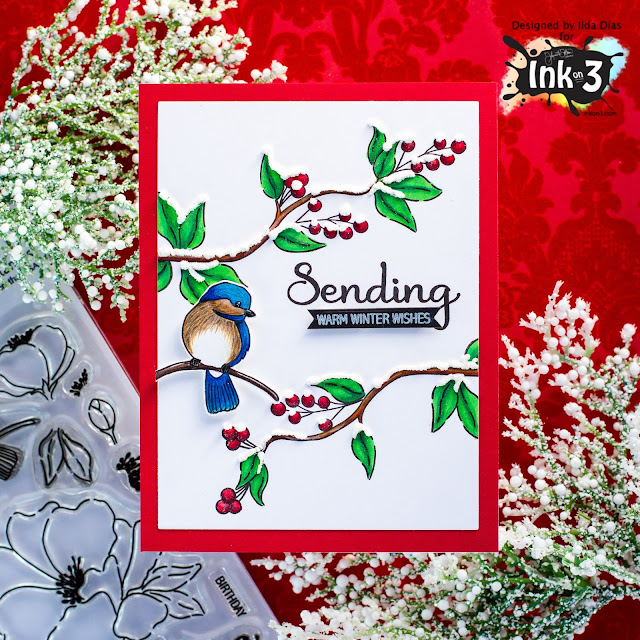
I am so excited to share this Warm Winter Wishes Holiday Card with you today. I absolutely love how it all came together. The design, the colors, the sparkle, and the texture..., it just may be one of my all-time favorite cards! The stamps I used come from Ink On 3's LITTLE BIRDIE Set. The images in this set are so pretty and perfect for so many occasions but I wanted to show you how it could be used for the Holidays.

CARD DETAILS

To begin, I stamped the Birdie using BLACKOUT INK and then colored it in using Prismacolor Pencils and fussy cut the image out. I actually had colored him for the first day of Kathy Raccosins latest coloring Coloring Challenge so that saved me some time when it came to putting this card together.

Warm Winter Wishes, Holiday Card,Ink On 3,Little Birdie Stamp Set, Christmas Card, Blackout ink, Card Making, Stamping, Die Cutting, handmade card, ilovedoingallthingscrafty, Stamps, how to,

The next thing I did was plan out the design using the branch stamp. Once I had it somewhat figured out, I then placed the panel in the MISTI and stamped the branch using BLACKOUT INK. I then rotated the panel 90 degrees and placed it back in the MISTI stamped the branch again to create the same design on the opposite side in reverse. I repeated the same steps for each of the leaves and then I freehand stamped the berries and extra leaves to create subtle differences. 

Warm Winter Wishes, Holiday Card,Ink On 3,Little Birdie Stamp Set, Christmas Card, Blackout ink, Card Making, Stamping, Die Cutting, handmade card, ilovedoingallthingscrafty, Stamps, how to,

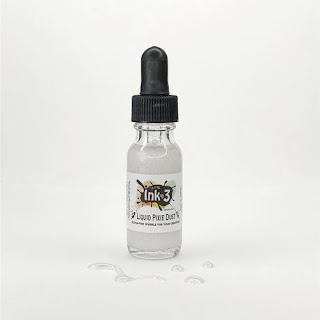
The images were then colored in using Copic Markers and then to add a touch of sparkle I added a layer of LIQUID PIXIE DUST. I then trimmed down the panel that would then later be glued onto a red piece of cardstock.

Warm Winter Wishes, Holiday Card,Ink On 3,Little Birdie Stamp Set, Christmas Card, Blackout ink, Card Making, Stamping, Die Cutting, handmade card, ilovedoingallthingscrafty, Stamps, how to,

Next, I stamped out the Sending stamp on the right side of the card panel and also stamped out the warm winter wishes onto black cardstock using ATELIER SHARK TOOTH WHITE INK, to which I then trimmed down and glued in place with a bit of foam.

Warm Winter Wishes, Holiday Card,Ink On 3,Little Birdie Stamp Set, Christmas Card, Blackout ink, Card Making, Stamping, Die Cutting, handmade card, ilovedoingallthingscrafty, Stamps, how to,

To create the snow-like appearance on the branches and berries, I used Liquid Applique and puffed it up with the heat tool. Once it cooled off I added some glue on top of it and sprinkled some glitter on it for an added touch of sparkle. 

The last thing I did was to glue the Birdie in place using foam tape. 

I hope you have inspired by this Warm Winter Wishes Holiday Card of mine and I pray you and yours are staying warm and safe this Holiday season.

Thank you for stopping by and until next time... Happy Crafting!
Connect with me also on my Blog, Facebook Page, Instagram, and YouTube

SUPPLIES
LITTLE BIRDIE
LITTLE BIRDIE
Shop at:
IO3
BLACKOUT INK
BLACKOUT 
INK

Shop at:
IO3
ATELIER SHARK TOOTH
ATELIER SHARK TOOTH
Shop at:
IO3
LIQUID PIXIE DUST
LIQUID PIXIE DUST
Shop at:
IO3
SMALL TIP WATER BRUSH PEN
SMALL TIP 
WATER BRUSH PEN

Shop at:
IO3
INK OFF STAMP CLEANER
Shop at:
IO3
NEENAH SOLAR WHITE 110
Shop at:
SSS | AMZ | HBS
ORIGINAL MISTI
ORIGINAL MISTI 
Shop at:
SSS | AMZ | SB | HBS
PRISMACOLOR PENCILS
PRISMACOLOR PENCILS
Shop at:
SSS | AMZ
COPIC SKETCH
COPIC SKETCH
Shop at:
AMZ
LIQUID APPLIQUE
LIQUID APPLIQUE
Shop at:
SSS | AMZ
STUDIO KATIA GLUE
STUDIO KATIA GLUE
Shop at:
SSS | SK
SPARKLE GLITTER
SPARKLE GLITTER
Shop at:
SSS | SK
FOAM TAPE - WHITE
FOAM TAPE - WHITE
Shop at:
SSS | SK
GLOSSY ACCENTS
GLOSSY ACCENTS
Shop at:
SSS | AMZ | SB | HBS

Saturday, July 4, 2020

Hey Gorgeous!

Hey gorgeous!

It's Erica back on the Ink On 3 blog today with a one-layer card. Which is not my forte at all, but it's good to stretch your creative muscles and step outside of your comfort zone. Ok, not all the time, but sometimes for sure. 


The stamp I have used for this card is a new-to-me, Hey Gorgeous. I stamped it up on Copic friendly card stock with Blackout Detail ink and then coloured it in with various Copic markers. My intent was to give the girl a nice tan, but the poor thing ended up looking like she's been cooking on a tanning bed far too long! 


Her hair I did a bit like mine, it's sort of a brown to light brown to some highlights and then a big blue hat on top. I do happen to have a big blue hat too... Did I just put myself on a card? Eh, it happens, right? While I had the Hey Gorgeous stamp out, I also stamped it up on masking paper. After fussy cutting this out, I placed it on top of the coloured image.


I have used a stencil for the background, and this I sprayed liberally with Pixie Spray first. To create a colourful backdrop to the card I ink blended Bee Sting Yellow, Goddess Green and Peacock Blue all over it. By going lightly over some of the yellow with the green, it created a lime green which was lovely. I did the same with the green going into the blue, but heavier, and the result was a teal colour. I used a different Life Changing Blender Brush for each colour so the going back and forth was easy peasy. 


When the ink blending was done, I simply stamped up the 'Gorgeous' from the Hey Gorgeous stamp with Blackout Detail Ink and the card was finished!


Well... unless I go back and add some sequins that is. You never know, with this sequin-oholic. 

Thanks for stopping by today, I hope you like the card and found some inspiration here today! 

Lots of love and happy crafting from Erica 


Tuesday, June 30, 2020

Video Tutorial: Create STUNNING Floral Bouquets Using this ONE Rule.


Hi everyone, welcome back to the Ink On 3 blog!  We often talk about coloring, inking techniques, coloring mediums, etc.  Color is just one part of the art equation.  Another element of art that is just as important is composition--or how elements are arranged on your canvas.  In the video tutorial below, I will show you a very basic introduction to floral composition that can be applied to other card themes such as animal scenes.


Hey thank you so much for checking out my video on how I made this cards!  Do you all have stamp sets from Ink On 3 that you would like me to use in a future project?  Let me know in the comments below!  If you like what you've seen from me, make sure you subscribe to my YouTube channel and give me a follow over on Instagram!  Talk to you all very soon!


Materials:


Jaycee Gaspar