Showing posts with label ink blending. Show all posts

Saturday, November 27, 2021

Easy Masking with Dies

I love easy techniques and I have an easy masked background to share with you! I used Atelier Inks and some Reverse Confetti stamps and dies for this wintery card. 


I stamped a bunch of snowflakes all over my card with Blackout Hybrid Detail Ink and then used the coordinating die set to cut masks for each image from masking paper. 


I placed the masks over the stamped images and then pulled out some Atelier Inks to blend over my background. I started with My Jam Purple at the bottom, Trinity Teal in the middle, and Sweet Petunia Pink at the top. I added some spatters of shimmer watercolor and removed the masks. I love the look! The masks leave a sort of 'halo' around the stamped images that's so fun! 


I planned to make this a one layer card, but I forgot to stamp a sentiment when I was stamping the snowflakes, so I stamped one onto white cardstock, trimmed it out, and popped it up onto my card. 


Thanks so much for joining me! I'll see you soon! 

Wednesday, November 3, 2021

Just Breathe Encouragement Card - Rainbows with Atelier Inks

Just Breathe, Encouragement Card,Penguin Palace, Ink On 3,Collaboration Hop,Ink Blending,Coloring with Atelier Inks,Rainbow, Koi, Fadeout Ink, Card Making, Stamping, Die Cutting, handmade card, ilovedoingallthingscrafty, Stamps, how to,

Hello, again my friends, Ilda here πŸ‘‹

I am back with a card I created as part of a collaboration Hop between Inkon3 and Penguin Palace Stamps which is happening over onπŸ‘‰ Instagram

We teamed up to celebrate the Penguin Palace's 3rd Anniversary! Still plenty of time to join.  You can hop along with us on Instagram for your chance to win one of two $25 gift cards (one to the Ink on 3 store and one to the Penguin Palace store). The hop will end on November 7 @ 11:59 PM PDT.

Just Breathe, Encouragement Card,Penguin Palace, Ink On 3,Collaboration Hop,Ink Blending,Coloring with Atelier Inks,Rainbow, Koi, Fadeout Ink, Card Making, Stamping, Die Cutting, handmade card, ilovedoingallthingscrafty, Stamps, how to,

Here is how this card came together.
Just Breathe, Encouragement Card,Penguin Palace, Ink On 3,Collaboration Hop,Ink Blending,Coloring with Atelier Inks,Rainbow, Koi, Fadeout Ink, Card Making, Stamping, Die Cutting, handmade card, ilovedoingallthingscrafty, Stamps, how to,

Hope this Just Breathe Encouragement Card inspired you today and reminds you that it is ok to take a break, stop, relax, do nothing and just Breathe. Especially with all that is going on in the world right now, it's OK! People are more understanding than you realize because after all we all need and deserve a break from time to timeπŸ˜‰

If you want to watch a short video clip of how I colored in the Koi, click the play button below.
Thank you for stopping by and until next time... Happy Crafting!
Ilda 🌈🐟

Saturday, October 30, 2021

Layered Ornaments Card Set with Atelier Inks

It may the end of October, but the Holidays will be here before you know it! I used a layering stencil set from Pretty Pink Posh along with my InkOn3 Atelier Inks and some ThermOWeb Glitz Glitter Gel and created a quick set of Holiday cards! 


This card set was really quick to pull together and I love that you can customize your backgrounds to make whatever colors you want!


I used the Pretty Pink Posh Layered Ornaments Stencil Set along with my Atelier Inks and created four backgrounds. I used Marilyn Red, Goddess Green, Sweet Petunia Pink, and Trinity Teal Atelier Inks to create my baubles. 


I moved on to the second layer of the stencil set and first blended Bee Sting Yellow Atelier Ink and then a bit of Twiggy Brown Atelier Ink over the yellow to create a golden yellow ornament topper. Perfect! 


You could stop here and you would have some really cute inked cards, but the Layered Ornaments Stencil Set comes with a detail layer! I debated adding ink over the top for a quicker set of cards, but I really wanted some glitter! I broke out my Silver Glitz Glitter Gel and added glitter accents to each of the baubles. I'm really happy with how the silver looks with the bold ink colors! 


I wanted simple but elegant sentiments for each of my cards, so I stamped the Pretty Pink Posh Holiday Scripts Stamp Set with Blackout Hybrid Detail Ink and used the coordinating dies to cut out the sentiments. I pieced together sentiments and added them to each of the cards with foam tape. 


I hope you enjoyed this quick and easy card set! The bold Atelier Inks were perfect for these ornaments! See you soon!

Saturday, September 11, 2021

Masked Ink Blending

Hi, it's Lynnea! Even simple masking gives your stencils new life! I masked off the edges of the InkOn3 Wonky Lines Stencil for a more focused background. 


Stencils are my favorite crafty tools and I love giving them new life. I'm a simple crafter, so I try to bring simplicity a bit of flare in my craft room! I used Purple Tape and masked off 3/4" on each side of an A2 piece of cardstock. I sprayed the back of the Wonky Lines Stencil with Pixie Spray so that the detailed lines wouldn't shift while I blended with Atelier Inks. Can you believe I only used two colors of ink on the background?! I started with a few blobs of Bee Sting Yellow and then finished off with Peacock Blue. I made sure that the inks overlapped to create varying shades of yellow, green, and blue. 


I removed the stencil, but left the masking tape in place and spattered on some black watercolor for extra texture. Then I removed the tape and set the background aside to dry. I stamped out all three dragons and some flames from the Magical Dragons Stamp Set with Blackout Hybrid Detail Ink and colored them with Copic Markers. I used the coordinating Magical Dragons Die Set to cut them out. 


I popped up the dragons and a sentiment onto my background with foam tape and then covered the dragons with Liquid Pixie Dust for some magical shimmer! Thanks so much for joining me! 

Saturday, August 14, 2021

Watercolored Lotus

I've got a pretty lotus card from InkOn3 to share with you today! I did more shimmer watercoloring - it's my current obsession! 


I planned to watercolor the new Lotus Stamp Set, so I knew I would do some heat embossing. I love having a black outline, so I stamped my lotus image with Blackout Hybrid Detail Ink onto watercolor cardstock and quickly sprinkled on Crystal Clear Embossing Powder and heat set the image. 


I watercolored the lotus using shimmer watercolors, but you can use whatever you have! Once my image was colored I trimmed it out with scissors. 


I wanted a background that would coordinate with my stamped image. I masked a quarter of an inch off of each side of a piece of white cardstock and placed the new Curls Stencil over the top. I used My Jam Purple and Peacock Blue Atelier Inks to ink up the stencil. 


I finished the card by stamping a sentiment from the Lotus Stamp Set with Blackout Hybrid Detail Ink and popped it up near the center of the card! Hope you have a great day! 

Saturday, July 24, 2021

Fruity Atelier Ink Blended Cards

My current obsession? Layering stencils! I used a few colors of InkOn3 Atelier Ink Pads and blended up some fruity backgrounds! 


I love the look of layering stencils! Such an easy way to create customized patterned paper! And I used Atelier Inks for effortless blending! 


My first card uses the Watermelon Slices Stencil Set. I blended Sweet Petunia Pink and Goddess Green Atelier Inks and used Blackout Hybrid Detail ink for the seeds. Blending with the Blackout Hybrid Detail Ink always gives such crisp black details! 


Lemons are my favorite thing about summer! They're so bright and happy! I used the Lemon Squeeze Stencil Set with Bee Sting Yellow and Goddess Green Atelier Inks and again used Blackout Hybrid Detail Ink for the detail layer. 


This last card reminds me of fruit salad! I used the Mixed Fruit Stencil Set and blended Sweet Petunia Pink, Bee Sting Yellow, and Goddess Green Atelier Inks and used Blackout Hybrid Detail Ink for the final layer. 


I finished off all three of the cards by cutting down the panels with a Stitched Rectangle Die and adding the Oh Happy Day Word Die cut from Gold Holographic Cardstock. This set of cards makes me so happy and I hope it brightens your day as well! 

Saturday, May 8, 2021

Dogwood Flower Copic Coloring

Hi, everyone it's Lynnea! I combined a couple of my favorite stamp sets from InkOn3 on this easy card! Dogwood flowers are just so gorgeous! 


The Posies Stamp Set has the most gorgeous vase image and I have used it multiple times in InkOn3 projects - I just love it! I decided to slightly alter the Dogwood Flower image to make it a bouquet of flowers fit for the vase! I stamped my images using Blackout Hybrid Detail Ink, but was careful to avoid inking the bottom portion of the dogwood stem so that I could extend the lines a bit. I colored the images with Copic Markers and cut them out. 


I wanted to create a simple background so I adhered a stencil from my stash onto a white card base and mixed together Bee Sting Yellow and Marigold Orange Atelier Inks to create a pretty honey color. It's very subtle, but you can see areas of darker and lighter color across the background. SO pretty in real life! 


I added a white heat embossed sentiment strip using a sentiment from the new Here for You Stamp Set and finished off the card with a white border and some gems. Thanks for joining me! 

Tuesday, January 26, 2021

Thinking Of You, BeYOUtiful!

  Hi and Happy 2021! 

It’s Erica back on the Ink On 3 blog, for the first time in 2021. It’s been a bit of a rough start to the year to be honest, so I decided to make a ‘thinking of you’ card, as I figured I am not the only one who’s feeling like 2021 is saying ‘hold my beer’.

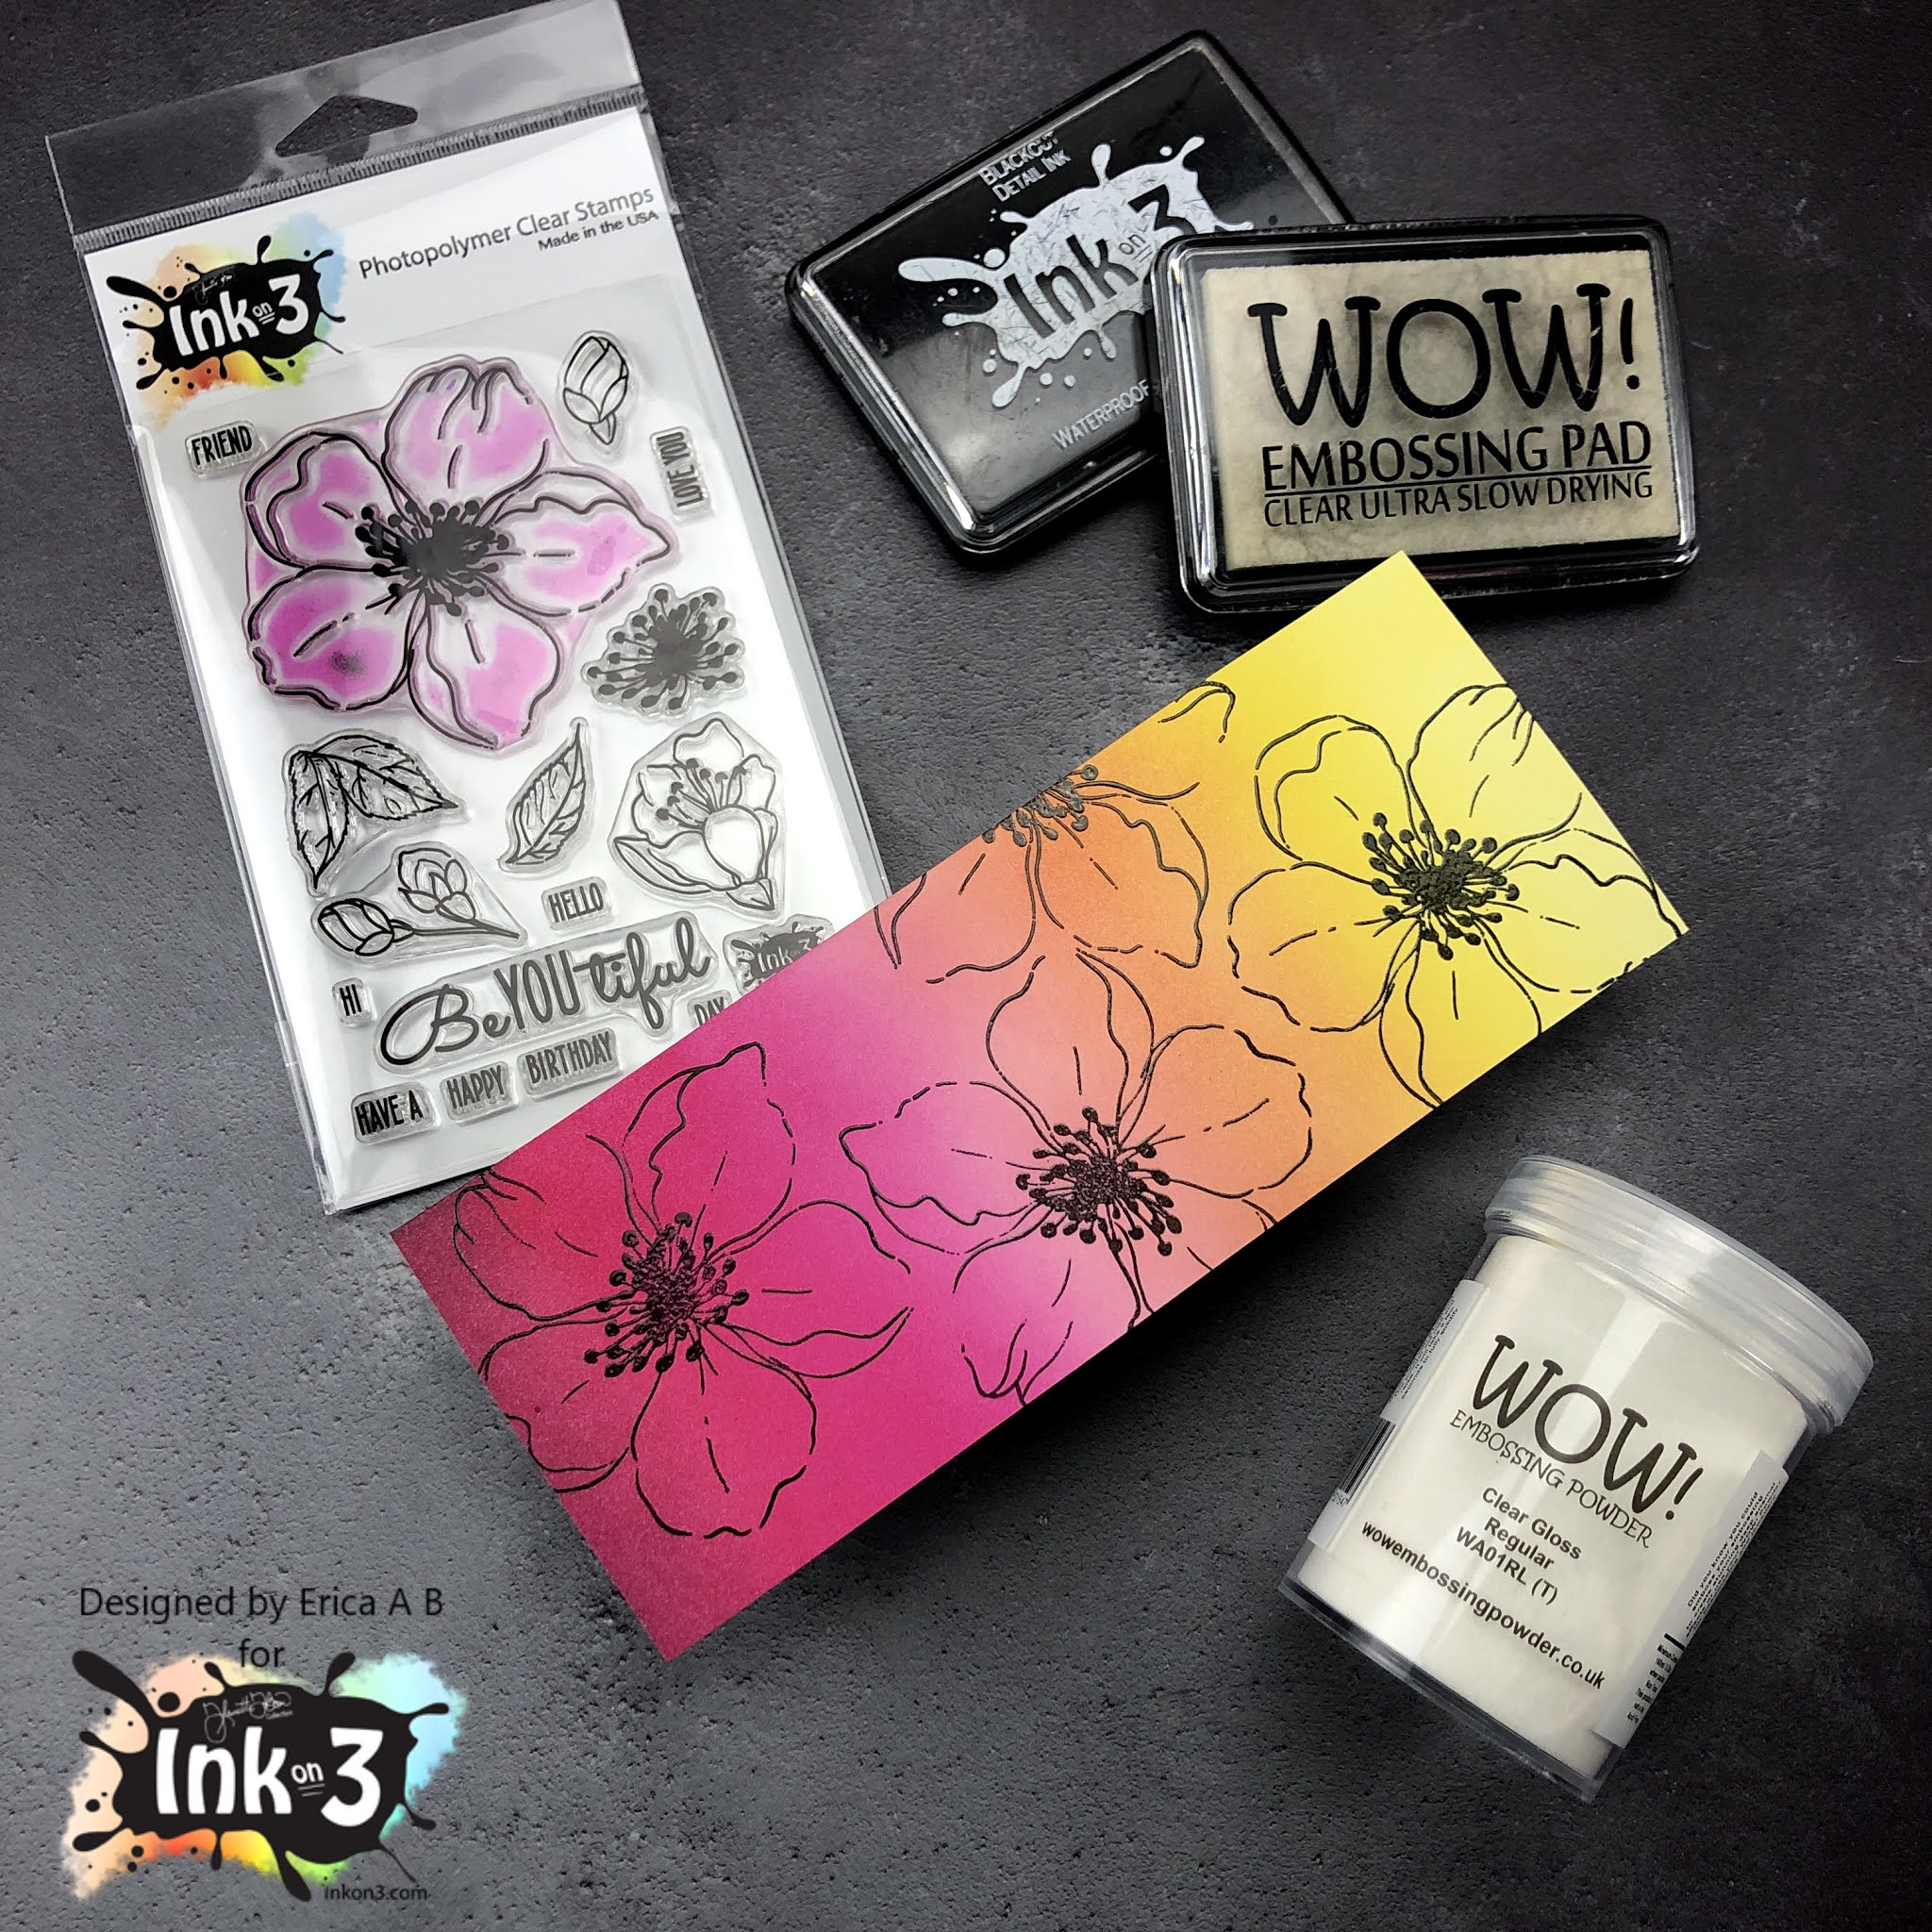
First off I did some ink blending with the goooooorgeou Atelier inks in Bee Sting Yellow, Marigold Orange, Sweet Petunia Pink and Marilyn Red using Life Changing Blender Brushes on Bristol Smooth paper. This combo has become quite a fave of mine for a variety of reasons, the main one being that it’s absolutely beautiful. I love it! 


These panels are actually one big piece that I cut up after ink blending over the whole thing. I love ink blending, and it’s always good to have some background panels done for when you need to make a card quickly! 


On the slightly smaller panel, I stamped up the big flower from the BeYOUtiful set with Blackout Detail ink and then Embossing ink. On top of these I sprinkled Clear Gloss embossing powder and set that with the heat gun. I did use a MISTI for the stamping to make sure the flower images were really solid. 

This panel I then layered up with the other one, but in different colour order. The reason I did this was to create some contrast and interest. 


To finish off this card I ended up using a diecut from Hero Arts that says Thinking Of You. I cut it out of white card stock three times, and then a fourth time in black card stock, and I layered these up to give the card some dimension. On top of this I heat embossed it with clear gloss embossing powder to give it a puffy sticker look. 


This word die I then glued down on the card with liquid glue and with that, the card was done. I contemplated adding some black gem stones or sequins, but if you can believe it, I decided against it. *GASP* I know.. 


That’s it from me for today! I hope you were inspired by this post, and will try this design for yourself. 


Lot of love and happy crafting from Erica


Thursday, November 26, 2020

Two-for-One Ink Technique with Erica

 Hi guys! 

Erica here on the Ink On 3 blog today with a couple of cards, using the same basic supplies but with VERY different looks! Like an utter nutter though, I didn’t get a photo of the backgrounds before I cut them up... Ay, mama! 


Oh well, hopefully I can explain it well enough so you get what I’ve done. If not, I can always make a video and show you! 

Right, let’s get to it: Before I did anything else, I took the Leafy Forest stencil and sprayed it with a very generous layer of Pixie Spray and let that cure for a few minutes. While that was doing its thing, I got some card stock out for ink blending and also water colouring. Oh and ALL THE ATELIER INKS! 

Oh yes, I used pretty much all of them: Bee Sting Yellow, Marigold Orange, Sweet Petunia Pink, Marilyn Red, My Jam Purple, Peacock Blue, Trinity Teal and Goddess Green. The only two I didn’t use for the ink blending were Paint It Black and Twiggy Brown. Using a different Life Changing Blender Brush for each colour, I blended the colours on the diagonal, and vividly, for the first panel. 

Then to get a two-for-one and not wasting all that ink, I got a water spritzer out and misted the stencil. It’s important to give the water a bit of time to activate the ink though. Then, in quick and firm moves, place a panel of water colour card stock on top of the stencil, trying not to move it too much. Press down, again, without moving the paper too much and turn it over quickly. Set aside to dry, or use a heat tool to speed this step up. 

This technique gives a lovely soft, water coloured look with very little hassle. I absolutely love doing this, and do it practically every time I ink blend as it makes me feel like I get the most out of my supplies. 

So, back to the first panel. This one I used a scalloped rectangular die on to trim it down, as well as a celebrate word die in the middle, before adding it to a white card base. The celebrate word die I cut out of black card stock three times and layered up with liquid glue. To make the top layer, with the ink blended pattern, pop a little bit more, I heat embossed it with Clear Gloss embossing powder before adding it to the card. That’s it! 

With the second panel, I did a similar thing: I used a rectangular stitched die to trim it down. This one I added to a black panel, before adding that to a card base. The black really made the stencil print pattern stand out. 

I wanted to add more to this, so I grabbed my Mini MISTI and the flower from the BeYOUtiful stamp. This I stamped up with Paint It Black Atelier ink, all over the panel. I really love how this turned out! To finish this card off, I simply cut a ‘hello’ diecut out of black card stock three times and layered these up. This I added to the card and with that, the second card was done too. 


I hope you like these cards and will give this stencil printing technique a go! If you prefer, you can skip the ink blending and just dab your ink pads on the stencil, mist it and then place your paper on top. 


Lots of love and happy crafting from Erica 

Saturday, November 14, 2020

Little Birdie Cardinal Card

There's a new stamp set in the InkOn3 shop and it covers all of your bases! There are flowers, twigs, lots of sentiments, and of course a little birdie! 


I saw the Little Birdie Stamp Set and immediately wanted to create a Christmas cardinal card! I wanted a simple background, so I grabbed the Leafy Forest Stencil and Goddess Green Atelier Ink. As I blended the ink over the stencil I realized that my background was looking too "spring." The Goddess Green Atelier Ink is a gorgeous green color, but a little too bright for my Christmas background. I added a little bit of Twiggy Brown Atelier Ink over the Goddess Green Atelier Ink and the result was a pretty olive green colored background. Perfect! 


I used Blackout Hybrid Detail Ink to stamp the bird, branch, and berries from the Little Birdie Stamp Set and colored them with Copic Markers. I used scissors to trim them out and added them to the card with a mix of liquid adhesive and foam tape. I keep my Liquid Pixie Dust in a Small Fine Tip Water Brush Pen and added shimmer to all of the red areas of my coloring. 


I used Blackout Hybrid Detail Ink to stamp a sentiment from the Little Birdie Stamp Set at the bottom of my card - and that's it! I hope you check out the Little Birdie Stamp Set - it's in the shop NOW

Tuesday, September 15, 2020

Black and White with a Pop of Color

One of my favorite colors combos is black and white ... with a pop of color! Any color will do - but why not go with a happy pink!?  


This background is so easy to make! And I used my most used crisp black ink - Blackout Hybrid Detail Ink! I took two strips of masking tape and spaced them about a quarter of an inch apart. I find that a grid mat makes life easy! I positioned my tape, used a blending brush (specially designated for Blackout Ink) and blended on some Blackout Hybrid Detail Ink, wiped off my tape with an Ink Off Cleaning Cloth, and moved the tape pieces up a half an inch. This leaves me with quarter inch black and white stripes! This takes a bit of time, but seriously look at that background! 


I stamped the flowers, bud, and leaves from the Big Bold Magnolias Stamp Set onto cardstock with Blackout Hybrid Detail Ink and colored them with Copic Markers. I kept the coloring simple and used just a few pink, green, and yellow markers. I cut each of them out with the coordinating Big Bold Magnolias Dies and arranged them onto my black and white striped background. This took a bit of fussing, but I have a handy trick that I share in my video that makes things easier for me! 


I stamped a sentiment from the Dogwood Flower Stamp Set onto a strip of white cardstock and added all of my elements to the card with foam tape. That's it! So easy, but so classy!