Showing posts with label Sweet Petunia Pink. Show all posts

Saturday, November 27, 2021

Easy Masking with Dies

I love easy techniques and I have an easy masked background to share with you! I used Atelier Inks and some Reverse Confetti stamps and dies for this wintery card. 


I stamped a bunch of snowflakes all over my card with Blackout Hybrid Detail Ink and then used the coordinating die set to cut masks for each image from masking paper. 


I placed the masks over the stamped images and then pulled out some Atelier Inks to blend over my background. I started with My Jam Purple at the bottom, Trinity Teal in the middle, and Sweet Petunia Pink at the top. I added some spatters of shimmer watercolor and removed the masks. I love the look! The masks leave a sort of 'halo' around the stamped images that's so fun! 


I planned to make this a one layer card, but I forgot to stamp a sentiment when I was stamping the snowflakes, so I stamped one onto white cardstock, trimmed it out, and popped it up onto my card. 


Thanks so much for joining me! I'll see you soon! 

Sunday, July 25, 2021

Making Cards and Mistakes with Erica

 Hi guys! 

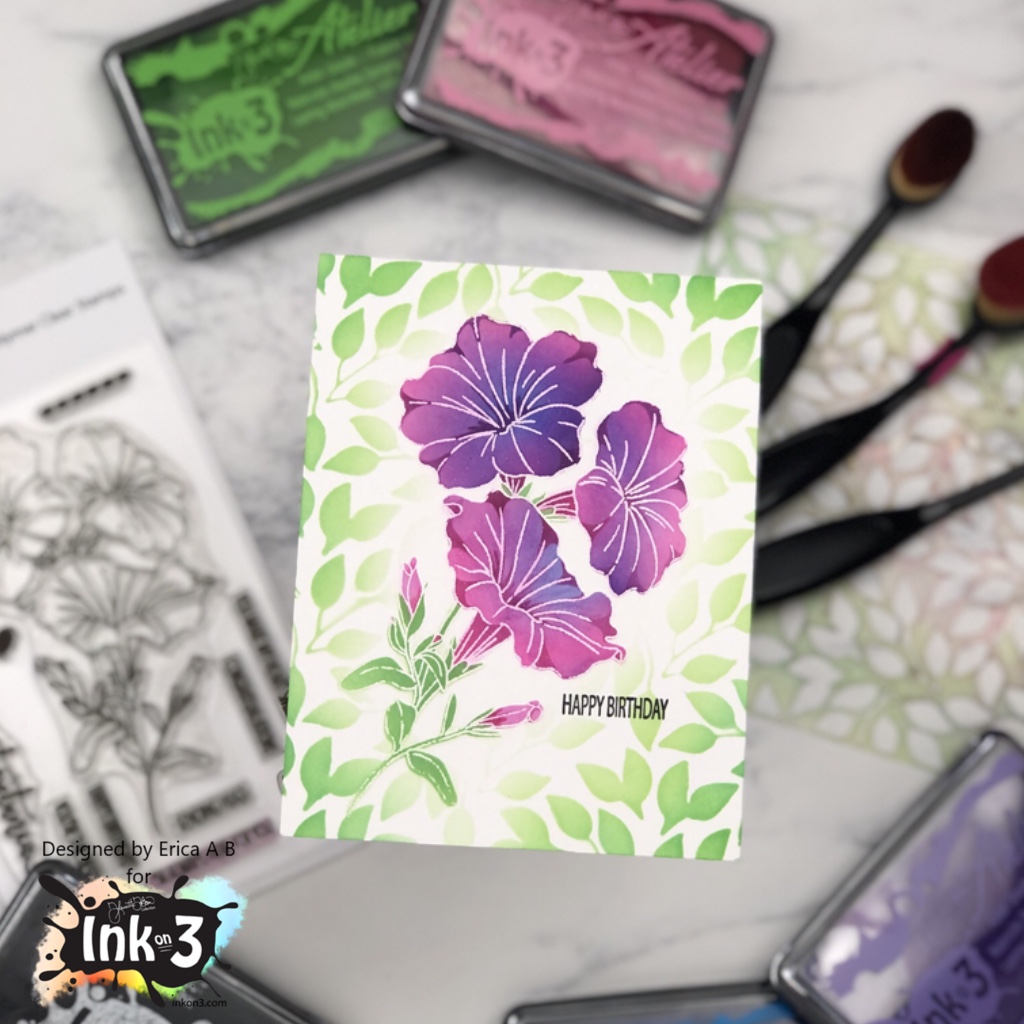
It’s Erica back on the Ink On 3 blog with another card using the My Sweet Petunia stamp and layering stencil set. On this one I made a big mistake, and thought I’d share it with you so you can avoid it yourself. 

If you saw my last blog post, I used this set for those cards too, but on those I ink blended first and then heat embossed the outline stamp on top. For this card, I did not do that.. and it ended up a bit meh… not going to lie. Take it from me, if you want a white heat embossed outline, do that last. 

So I started out by heat embossing the gorgeous My Sweet Petunia stamp on white card stock. I’m not sure why I did it this way, I should know better by now, really. Anyway, I grabbed Sweet Petunia Pink, My Jam Purple and Peacock Blue Atelier Inks, some Life Changing Blender Brushes and the My Sweet Petunia layering stencils. 

Right off the bat, I realised what a mistake I had done as the inks are so pigmented and vibrant, they instantly discoloured the white embossed lines. I SHOULD know better by now! And yeah, I said it again, because I really don’t know what I was thinking here. 

Anyway, onward and upwards. I ink blended the My Jam Purple and Peacock Blue to create a deep, vivid look for the flowers and then went softly with Goddess Green for the stem and leaves layer. I tried cleaning up a little, but it’s very easy to smudge and leave marks on the project when doing this, so I did what I felt I could do safely without making too much of a mess. 

Around the flower I also ink blended more Goddess Green using the Leafy Forest Stencil, just to add some softness to the card, which is a true one-layer card if you can believe it! A quick Happy Birthday was stamped up with Blackout Ink and that was it. 

Super simple, and it can work for so many occasions. Just change up the colour scheme and sentiment, and you are good to go! Oh, and ink blend FIRST, and heat emboss when all the ink is dry. Maybe best to leave it overnight to make sure. Take it from me, don’t do it my way, because that did not work out very clean. Having said that, that’s only with white embossing powder, I guess? Maybe gold will be fine? Ok, I’m off to best that theory! See you next time! 

Lots of love and happy crafting from Erica 

Wednesday, April 28, 2021

Smile


Hello Everyone!
It's Ceal here today sharing a card using the Gerbera Daisy set along with the Atelier inks. 
To create this card I started with a top folding white card base and a panel of Tim Holtz white Heavystock.   
I randomly stamped the different sized daisies from the Gerbera Daisy set with embossing ink and embossed them with white powder to create a background. 
I put down come Bee Sting Yellow and Sweet Petunia Pink Atelier ink on a craft sheet, spritzed with water and then smooshed the background panel in them, dried it and smooshed again until I got the look I wanted. 
To finish the card I added a smile die cut. 


Tuesday, January 26, 2021

Thinking Of You, BeYOUtiful!

  Hi and Happy 2021! 

It’s Erica back on the Ink On 3 blog, for the first time in 2021. It’s been a bit of a rough start to the year to be honest, so I decided to make a ‘thinking of you’ card, as I figured I am not the only one who’s feeling like 2021 is saying ‘hold my beer’.

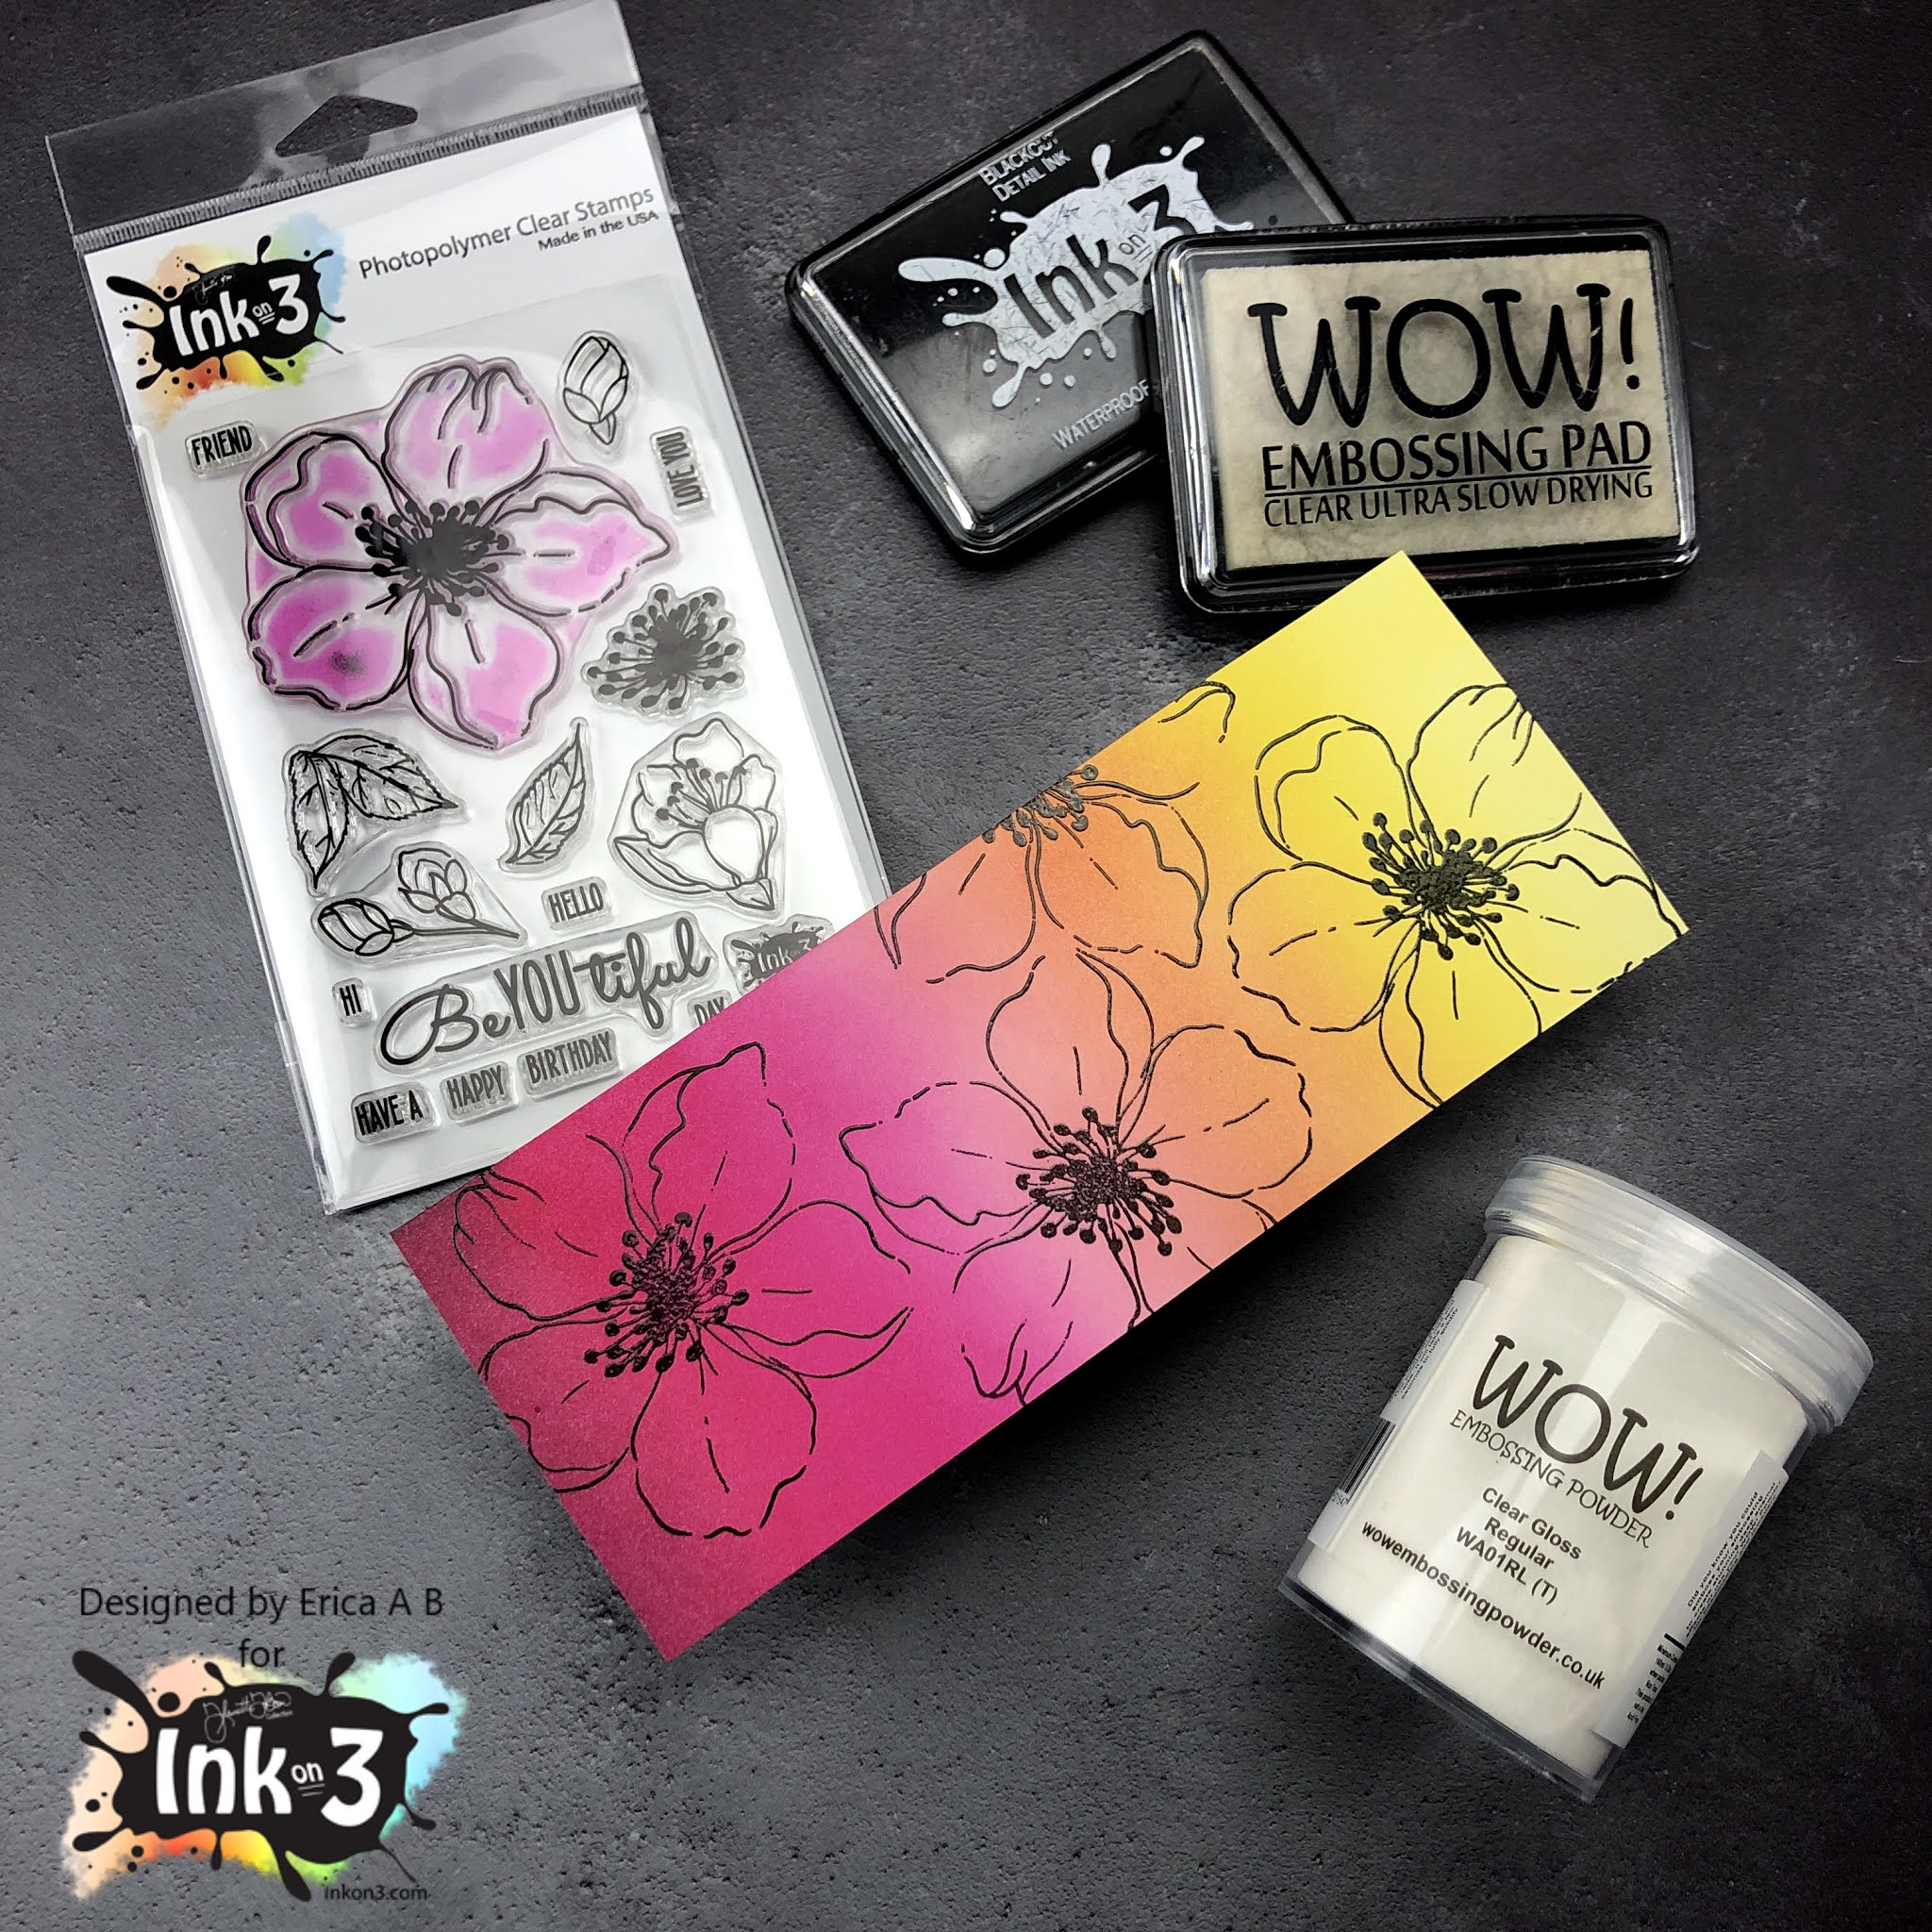
First off I did some ink blending with the goooooorgeou Atelier inks in Bee Sting Yellow, Marigold Orange, Sweet Petunia Pink and Marilyn Red using Life Changing Blender Brushes on Bristol Smooth paper. This combo has become quite a fave of mine for a variety of reasons, the main one being that it’s absolutely beautiful. I love it! 


These panels are actually one big piece that I cut up after ink blending over the whole thing. I love ink blending, and it’s always good to have some background panels done for when you need to make a card quickly! 


On the slightly smaller panel, I stamped up the big flower from the BeYOUtiful set with Blackout Detail ink and then Embossing ink. On top of these I sprinkled Clear Gloss embossing powder and set that with the heat gun. I did use a MISTI for the stamping to make sure the flower images were really solid. 

This panel I then layered up with the other one, but in different colour order. The reason I did this was to create some contrast and interest. 


To finish off this card I ended up using a diecut from Hero Arts that says Thinking Of You. I cut it out of white card stock three times, and then a fourth time in black card stock, and I layered these up to give the card some dimension. On top of this I heat embossed it with clear gloss embossing powder to give it a puffy sticker look. 


This word die I then glued down on the card with liquid glue and with that, the card was done. I contemplated adding some black gem stones or sequins, but if you can believe it, I decided against it. *GASP* I know.. 


That’s it from me for today! I hope you were inspired by this post, and will try this design for yourself. 


Lot of love and happy crafting from Erica


Saturday, January 23, 2021

Atelier Ink Chevron Valentine's Day Card

Hi, it's Lynnea! Sometimes I focus so much on fun techniques that I forget the amazingness of simple solid stamping! I love the smoothness of the InkOn3 Atelier Inks! I used the two new colors to stamp a pretty chevron background. 


Let's start with that pretty, colorful background! The InkOn3 Atelier Inks are great for all kinds of stamping - detail, sentiments, etc - but I really love to show them off with solid stamping! They are gorgeous and smooth from the first impression! I used the Pinkfresh Studio Nested Chevron Background Stamp to build my background. I alternated the chevrons between the new Sweet Petunia Pink and Trinity Teal Atelier Inks. I just LOVE this color combo! 


I used Blackout Hybrid Detail Ink to stamp a cute little gnome image as well as a sentiment from the Whimsy Stamps Gnome One Like You Stamp Set and colored him with Copic Markers. I covered the image with some Liquid Pixie Dust for all kinds of shimmer! I keep a little bit in a Small Fine Tip Water Brush Pen so that I can easily paint shimmer onto my colored images. 


I trimmed down my background panel to be slightly smaller than my card base and popped it up with foam and added my cute colored image in the center of the card. That's it! Cute and simple! I love that multicolored stamped background! 

Saturday, January 9, 2021

Boujee Kisses Card

Big, bold, boujee kisses to you! The Bad & Boujee Stamp Set from InkOn3 is definitely one of my favorites for Valentine's Day! 


I love the two new colors of Atelier Ink from InkOn3 - Sweet Petunia Pink and Trinity Teal. They pair together beautifully! And who doesn't love a nice bright pink lip?! I used the solid lip image from the Bad & Boujee Stamp Set and stamped a cascading line of lips using Sweet Petunia Pink Atelier Ink from the top right to the bottom left. 


I stamped the perfume bottle from the Bad & Boujee Stamp Set using Blackout Hybrid Detail Ink onto white cardstock. I chose my Copic markers to match the Trinity Teal Atelier Ink and colored in the bottle and used the coordinating Bad & Boujee Die Set to cut it out. I stamped the lips once more with Juicy Clear Embossing and Watermark Ink and heat embossed it with Gold Rush Ultra Fine Embossing Powder then cut it out. 


I die cut the kisses word die from the Bad & Boujee Die Set and added some color to the bottom with Trinity Teal Atelier Ink. I used a blender brush and kept the color concentrated towards the bottom and lighter at the middle, fading to white at the top of the die cut sentiment. I arranged all three elements onto my cascading lips card front. 


No boujee card is complete without some Liquid Pixie Dust! I covered the perfume bottle as well as the sentiment with a coating of the magical shimmer to finish the card. Thanks for peeking at my card! I hope this inspires you to be a bit boujee today! 

Tuesday, December 29, 2020

Quick and Easy Thank You Cards using Sweet Petunia Atelier Ink


Hello Crafty Friends! With Christmas over and done with, it's time to start sending out "Thank You" cards to those that had sent us gifts! Here's a quick and easy, yet very pretty card to show your gratitude!


I masked the top and the bottom of an 4.25"x5.5" card base. Then I created a gradient effect using the Sweet Petunia Atelier Ink and a blending brush. To diffuse the color a bit, I tap my brush into the ink and swirl it on the ink cap. This helps from having concentrated in blotches. Gradually build the color concentrating on the left side of the card. 

With the mask still on the card and using the Sweet Petunia Pink Atelier Ink, stamp out different sizes of flowers from the Shine Bright Stamp set to make a patterned background. Remove the mask, and apply washi tape on the top and bottom of the patterned panel.

Next, stamp out the medium sized flower from the Shine Bright stamp set using the Blackout Hyrbid detail ink. Color with your choice of coloring medium and fussy cut the image. Adhere to the lower left hand corner of the patterned panel.

Lastly, die cut or stamp the sentiment "Thank You" and adhere it to the bottom right hand corner of the card. I used gold metallic cardstock and a die for my card. 


Thursday, October 29, 2020

New Atelier Inks - Inspiration Week, Day 6: 3 Different Cards

Welcome to Ink on 3's new ink inspiration week! Every day, we'll be sharing projects here on the blog so make sure you visit us daily for new projects and inspiration. Also, if you leave a comment on this blog post, you'll have a chance to win a $25 gift card. We will announce the winner between November 7-10. 

At the end of the week, we will be having an instagram hop on October 30, 2020 and we'll be giving away THREE $25 gift cards. Keep your eyes peeled! Be sure to visit us over on Instagram to leave a comment for a chance to win. 


For today's blog post, we have Ilda and Ceal each sharing a fun project. 

For my card today, Ilda wanted to showcase how these colors blended and fit into the rainbow. So of course she had to make a rainbow card (my favorite kind). She began by blending out SWEET PETUNIAMARILYN REDMARIGOLD ORANGEBEE STING YELLOWGODDESS GREENTRINITY TEALPEACOCK BLUE, and MY PURPLE JAM Atelier Inks onto a piece of Bristol paper. She then sprayed the background with water and picked up the water droplets with a paper towel.


Once the paper was dry, she used an antistatic powder bag to prepare the paper for embossing. Then she stamped out the inside details of the butterfly wings from the SHINE BRIGHT set using the ATELIER SHARK TOOTH White ink, and heat set it by adding some ARCTIC WHITE POWDER

Next, she stamped the outer image of the butterfly using BLACKOUT INK. To the inside of each butterfly, she then painted on some LIQUID PIXIE DUST.


To finish off this colorful card, she stamped the sentiment onto a black banner once again using the ATELIER SHARK TOOTH White ink, and heat set it using some ARCTIC WHITE POWDER

------- 

For Ceal's project, she used the BeYoutiful stamp set along with the new inks. She ink blended the background and then used some water to splatter. Atelier Inks are water reactive, so you can create a fun textured background. 

Don't you love when the colors blend together? It creates such a nice hue! 

--------------------------

We also have Erica on the blog sharing TWO last gorgeous cards. Here's here thoughts! 

It's Erica on the Ink On 3 blog today with a couple of cards made with the stunning new Atelier Ink colours Trinity Teal and Sweet Petunia Pink. If you haven't seen any of the other posts this week, with all the projects from the DT, make sure you check them out too! 

I love water colouring with my re-inkers so I decided to do some ombre backgrounds to really let each colour be the star of the card.


Each piece was done by simply swooshing the colours back and forth on water colour paper, starting with clean water first. Then going from bottom towards the top, letting the colour fade to get that ombre look. I'm such a fan of ombre, it's such a fab way to see the different shades you can get from one single colour. 


I did use my heat tool to speed up the drying, as I did several layers of the colours to get a really deep colour at the bottom. To adhere these to white card bases I used LOTS of glue, and I also let them dry with a MISTI on top, to keep them flat. When they were totally dry, I splattered them both with gold water colours to add a bit of extra pizzazz! 


To finish off the cards I used the light string from the brand new Crafty Meriaki collaboration set, Shine Bright, as well as a sentiment from it. The lights were coloured in with yellow Copics and then I added some Glossy Accents to make them look more 3D. 


The pink card I thought would look cute as a love note, so I stamped 'You stole my heart' in Blackout Detail ink, from the Racoon Hugs. It needed a little something extra, which was solved by die cutting the 'kisses' from Bad & Boujee diecuts four times in white card stock. These were layered up and then simply added to the card at the bottom. 


I love the fact that with a gorgeous background, you don't need a ton of other stuff to make a card full of impact. 


That's it from me but I hope you like the cards and found some inspiration here with me today!

Lots of love and happy crafting from Erica 

Be sure to stop by tomorrow over on our Instagram to join in on our instagram hop. We'll also be sharing the lineup tomorrow so you can take a peek as well! 

Wednesday, October 28, 2020

New Atelier Inks - Inspiration Week, Day 5: Ink Blending


 Welcome to Ink on 3's new ink inspiration week! Every day, we'll be sharing projects here on the blog so make sure you visit us daily for new projects and inspiration. Also, if you leave a comment on this blog post, you'll have a chance to win a $25 gift card. We will announce the winner between November 7-10. 

At the end of the week, we will be having an instagram hop on October 30, 2020 and we'll be giving away THREE $25 gift cards. Keep your eyes peeled! Be sure to visit us over on Instagram to leave a comment for a chance to win. 


For today's blog post, we have Lynnea and Ricky sharing a fun project. 


Check out Ricky's video he made using the new Atelier inks: 

Lynnea is also here to share her fabulous card using the new inks. 

Her card today features some pretty ink blending with the new Sweet Petunia Pink and Trinity Teal Atelier Inks. Her thoughts: 

I just love the new colors of Atelier Ink! I wanted to show both of them off since they pair so well. I masked off the top portion of my card and blended on Sweet Petunia Pink Atelier Ink onto the bottom portion of my card. These Atelier Inks blend so smoothly! They're just gorgeous. I moved my masking tape to cover the bottom of my card and started working on the top portion. I blended the Trinity Teal Atelier Ink in quarter of an inch strips with half an inch of white space separating them. This is such a simple masked design, but I just love it! I kept the masking tape in place over the pink bottom and added some black ink spatters to the top for more texture. 


I used Blackout Hybrid Detail Ink to stamp the cute little peeking kitty and party hat from the Purr-ific Kitty Cats Stamp Set and colored them with Copic Markers. I trimmed around the outside of the images with my scissors leaving a small white border. I adhered them onto my card with foam tape so that he would be peeking over the pink "edge" of my card and added a stamped sentiment below the image. 


I thought I had a bit too much Sweet Petunia Pink blended at the bottom of my card and the balance was off, so I trimmed down my panel and added it onto a white card base. A bit of Liquid Pixie Dust on my little kitty finishes the card! 

She also has a video for you today as well:

Be sure to stop by tomorrow for more inspiration using the new inks! 

Tuesday, October 27, 2020

New Atelier Inks - Inspiration Week, Day 4: Watercolor Coloring

 Welcome to Ink on 3's new ink inspiration week! Every day, we'll be sharing projects here on the blog so make sure you visit us daily for new projects and inspiration. Also, if you leave a comment on this blog post, you'll have a chance to win a $25 gift card. We will announce the winner between November 7-10. 

At the end of the week, we will be having an instagram hop on October 30, 2020 and we'll be giving away THREE $25 gift cards. Keep your eyes peeled! Be sure to visit us over on Instagram to leave a comment for a chance to win. 


For today's blog post, we have Jenny sharing an awesome project, using the Ink on 3 Reinkers to watercolor. These Atelier inks are formulated so that you can use them in an ink pad for various purposes. But also use the reinkers as standalone watercolors. Jenny uses them today to watercolor these gorgeous florals. 


Be sure to stop by tomorrow for one more day of inspiration using the new inks! 

Monday, October 26, 2020

New Atelier Inks - Inspiration Week, Day 3: How to use Atelier Inks in your Planner

 Welcome to Ink on 3's new ink inspiration week! Every day, we'll be sharing projects here on the blog so make sure you visit us daily for new projects and inspiration. Also, if you leave a comment on this blog post, you'll have a chance to win a $25 gift card. We will announce the winner between November 7-10. 

At the end of the week, we will be having an instagram hop on October 30, 2020 and we'll be giving away THREE $25 gift cards. Keep your eyes peeled! Be sure to visit us over on Instagram to leave a comment for a chance to win. 


For today's blog post, we have Cheryl switching this up and sharing how to use these inks in your planner. 


There are very subtle details here but she did some ink blending using Trinity Teal and Sweet Petunia Pink on the side of the planner. She also used the colors with Shark Tooth White to create a subtle ombre look on the two sides. For all the dates and month, she stamped directly using the inks. 


If you want to watch the process, stop by her YouTube channel: https://youtu.be/3H2Bqm3NDBo


Be sure to stop by tomorrow for more inspiration using the new inks! 

Sunday, October 25, 2020

New Atelier Inks - Inspiration Week, Day 2: Watercolored Backgrounds - 2 Ways

Welcome to Ink on 3's new ink inspiration week! Every day, we'll be sharing projects here on the blog so make sure you visit us daily for new projects and inspiration. Also, if you leave a comment on this blog post, you'll have a chance to win a $25 gift card. We will announce the winner between November 7-10. 

At the end of the week, we will be having an instagram hop on October 30, 2020 and we'll be giving away THREE $25 gift cards. Keep your eyes peeled! Be sure to visit us over on Instagram to leave a comment for a chance to win. 


For today's blog post, we have Jeannie sharing these two cards and showing you how to use the new re-inkers colors to create two different background colors. 


If you want to see how these two cards were put together, we have a YouTube video for the entire process: 


Be sure to stop by tomorrow for more inspiration using the new inks! 

Saturday, October 24, 2020

New Atelier Inks - Inspiration Week, Day 1: Mini Slimline Watercolor

Welcome to Ink on 3's new ink inspiration week! Yesterday, we revealed three new ink colors to our Atelier Ink line over on our instagram and we're so excited to share our projects using them here today. Make sure you visit us daily for new projects and inspiration. Also, if you leave a comment on this blog post, you'll have a chance to win a $25 gift card. We will announce the winner between November 7-10. 

At the end of the week, we will be having an instagram hop on October 30, 2020 and we'll be giving away THREE $25 gift cards. Keep your eyes peeled! Be sure to visit us over on Instagram to leave a comment for a chance to win. 


For today's blog post, we have Fleurette, the owner of Ink on 3, sharing a wonderful project who is also giving you a sneak peek into a new stamp set releasing alongside the new inks this Friday. 

Plus in the video below she shows you how to easily no-line color, step by step with these fun new ink colors!


She did some ink blending with the new Trinity Teal color along with some water splatter since the Atelier Ink line is water reactive. To finish it off, she added some splatter using Shark Tooth Ink as well. For the flower image, she used Fadeout Ink alongside Sweet Petunia Pink for no line coloring watercoloring. Isn't it gorgeous? 


Be sure to stop by tomorrow for more inspiration using the new inks!