Showing posts with label background stamping. Show all posts

Saturday, January 23, 2021

Atelier Ink Chevron Valentine's Day Card

Hi, it's Lynnea! Sometimes I focus so much on fun techniques that I forget the amazingness of simple solid stamping! I love the smoothness of the InkOn3 Atelier Inks! I used the two new colors to stamp a pretty chevron background. 


Let's start with that pretty, colorful background! The InkOn3 Atelier Inks are great for all kinds of stamping - detail, sentiments, etc - but I really love to show them off with solid stamping! They are gorgeous and smooth from the first impression! I used the Pinkfresh Studio Nested Chevron Background Stamp to build my background. I alternated the chevrons between the new Sweet Petunia Pink and Trinity Teal Atelier Inks. I just LOVE this color combo! 


I used Blackout Hybrid Detail Ink to stamp a cute little gnome image as well as a sentiment from the Whimsy Stamps Gnome One Like You Stamp Set and colored him with Copic Markers. I covered the image with some Liquid Pixie Dust for all kinds of shimmer! I keep a little bit in a Small Fine Tip Water Brush Pen so that I can easily paint shimmer onto my colored images. 


I trimmed down my background panel to be slightly smaller than my card base and popped it up with foam and added my cute colored image in the center of the card. That's it! Cute and simple! I love that multicolored stamped background! 

Thursday, May 28, 2020

Hey Gorgeous - Spring Planner Pages

Hi Friends, it's Cheryl with the Inkon3 Creative Team here to show you a simple way to dress up your planner pages with the "Hey Gorgeous" Clear stamp set. Nothing says Spring like a big fashionable hat and lovely flowers right? And this is all in one awesome stamp set!

I stamped and colored the pretty gal in the Hey Gorgeous stamp set on cardstock. Then I fussy cut the image. Then I picked different sizes of flowers from the same stamp set and stamped out a pretty flower border. I picked the Marilyn Red, Marigold Orange, and Bee Sting Yellow colors because those colors would overlap beautifully, which means no need to mask!


Then I stamped some leaves using the Goddess Green Atelier Inks, and added a few small circles for a little more special accents. I really love how many stamps comes with this stamp set! I used the Blackout Hybrid Detail ink to stamp the sentiment "Hey Gorgeous" on the lower left hand corner of the left planner page, and adhered the image approximately in the center of the left page.


Products Used:

Monday, January 27, 2020

Big Bold Magnolias Ombre Card with Atelier Inks

Hello Crafty Friends! It's Cheryl here to show you a quick and easy card using Atelier Inks and the Big Bold Magnolias Stamp set!


Preparations:
- Cut white card stock 4.5"x 9" and then score at 4.5" to create a card base.
- Cut white card stock 4" x 4" for front panel of the card.


Around the perimeter of the card base, use the Marilyn Red Atelier Ink and a blender tool to add color to the border, you'll only need about .25" of a colored border.

Next, stamp out three to four flowers from the Big Bold Magnolia Stamp set with Juicy Clear Embossing and Watermark ink, then sprinkle some Arctic White ultra fine embossing powder over the embossing ink, tap off any excess powder, then heat set. Use the Marilyn Red and Marigold Orange Atelier Inks with a blender tool to create an ombre effect on the flowers. Fussy cut the flowers.

On the white card panel, stamp the "You're Beautiful" sentiment from the Heels to You Stamp set. I created an ombre effect by tapping Marigold Orange ink on the middle of the sentiment, then I tapped the Marilyn Red ink on the remaining un-inked portion of the stamp.


Now it's time to put the card all together! Adhere the white front panel centered on card base. Then adhere the flowers as you'd like. I put a large flower on the left, then a medium flower on the far right. I put a small magnolia bud behind the flower on the right. Then I used some foam tape to adhere the medium sized Magnolia between the other two flowers for added dimension.


Inkon3 Products Used: 

Thursday, March 21, 2019

Simple Easter Shaker Card Using Small Stamps to Create a Background by Ilda

Hello, my sweet friends Ilda here with you today from I Love Doing All things crafty 👋

YAY! Finally, it actually feels like Spring has arrived here in our city of Edmonton.  All the snow is melting, there are water puddles everywhere and we have even enjoyed a few muddy bike rides! 

Now that Spring has arrived, Easter is just around the corner. So today I have a simple Easter Shaker card to share with you all and I even filmed the process video for you to watch. It's been so long that I really had to relearn the process of making, editing and just uploading it to YouTube all over again. I'm hoping I will be a little more regular with sharing videos so that I don't forget the process again.


So for those of you that would rather watch the process, this is for you and don't forget to →Subscribe for future inspiration!


CARD DETAILS

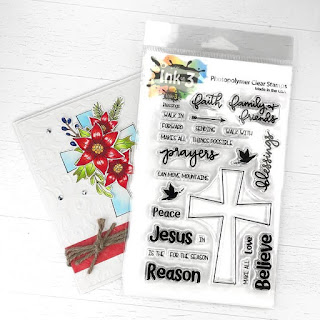
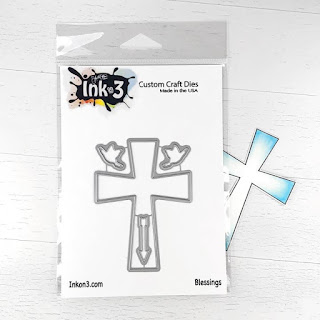
For this card today I began by die cutting the top panel to create the heart-shaped window and the Cross from the Blessing Coordinating Die set. I then took a bunch of Spring/Easter small stamps from a variety of Ink On 3 sets and stamped out using Blackout Ink to create the background on to the front of the card base and colored them in using Copic Markers. (All the Ink On 3 Sets I used will be listed below in the thumbnail links below).


Next, I glued the acetate to the back of the heart panel opening and added the foam tape along the heart to create the well for the shaker pieces and also added foam to the edges of the card.

On the card base, where the middle of the shaker window will be, I added a little pile of the butterfly glitter and then closed up the shaker by adhering the top panel to the card base. 


To finish I stamped the Easter and Blessing on the card front pieces and glued the cross onto the heart. To the cross, I added some color by blending on some squeezed lemonade distress oxide ink. And that is pretty much it for this simple shaker card.

SUPPLIES
To make supplies easy to find, I have linked them below. If something I used is no longer available I will link to a similar product.
Affiliate links may be used depending on the product. Your purchases help keep my blog running at no extra cost to you, so thanks in advance for the support!
Bunny Hugs
Bunny Hugs
Shop at:
IO3
Magical Unicorn
Magical Unicorn
Shop at:
 IO3
Biker Bunnies
Biker Bunnies
Shop at:
IO3
Lil Chicks
Lil Chicks
Shop at:
 IO3
Hollyhocks
Hollyhocks
Shop at:
IO3
Blessings
Blessings
Shop at:
 IO3
Blessings Coordinating Die
Shop at:
IO3
Liquid Pixie Dust
Liquid Pixie Dust
Shop at:
 IO3
Blackout Ink
Blackout Ink
Shop at:
IO3
Mini Misti Tool
Mini Misti Tool
Shop at:
SSS | AMZ | SB 
Neenah  80 LB SOLAR WHITE
Neenah 80 LB SOLAR WHITE
Shop at:
SSS | AMZ
Inkadinkado Embossing Magic
Shop at:
SSS | AMZ
Grafix Acetate 9x12-Inch, 25 Sheets, 003 Clear
Shop at:
AMZ
Oxide Ink Pad SQUEEZED LEMONADE
Shop at:
SSS
BLENDER BRUSH Set
BLENDER BRUSH Set
Shop at:
SSS | AMZ
Sparkling Butterflies | Confetti Glitter
Shop at:
SSS | SK
STUDIO KATIA GLUE
STUDIO KATIA GLUE
Shop at:
SSS | SK
Stacking Hearts Dies
Shop at:
HBS
SCALLOP A2 FRAME HONEY CUTS
Shop at:
SSS | SB | HBS
Double-Sided Foam Tape
Shop at:
SSS | AMZ

For more inspiration and Ink On 3 products visit Inkon3.com

Thank you all for stopping by 😊
Until next time... Happy Crafting 👋