Friday, November 11, 2022

Fall | Winter Coffee Lover's Blog Hop


Hello everyone and welcome!!  We are so very excited to be participating as a sponsor for the 2022 Fall | Winter Coffee Loving Cardmaker's Blog Hop!  We are sponsoring a $25 gift card! 

Our team wanted to share some inspiration with you using some of the Ink on 3 coffee sets in the shop! 

-----------------------

Fleurette, the owner of Ink on 3, is sharing this really fun coffee card featuring Coffee House Cuties with such fun pops of colors as well as incorporating smaller images as embellishments. She also uses Twiggy Brown Atelier Ink to create a coffee background! 


Next up, Melinda uses a paper piecing technique for this elegant and simple coffee card using the coffee cups from Build a Coffee House Cutie. It's the perfect card to create if you don't want to color and have a bunch of scraps laying around.  


Jeannie used both coffee sets, Build a Coffee House Cuties and Coffee House Cuties, featured in the two previous projects. Using the Build a Coffee House Cuties, they are the main characters for this card. For the top and bottom portion, she used both sets to create a coffee bean pattern. 


Lastly Shanna has a soft watercolored card using Fadeout Ink for some no line coloring and the Atelier Mini Ink cubes paired with the Thankful for You stamps and the coffee cup from the Build a Coffee House stamps!


-----------------------

Thank you so much for hopping along.  Be sure to check out the other stops too---so much goodness all in one hop! The full current lineup is found on the Coffee Loving Cardmaker's Blog--head back there to find your way to the next stop!

Friday, October 21, 2022

October Release + Inspiration + GIVEAWAY

Hi crafty friends! Today, we're sharing a ton of inspiration featuring a couple new products to the Ink on 3 store. We have two new stamp sets, Squirreling Around and Hey Squirrelly and a fun stencil, Elliptical Leaf

But first, our creative team is having an instagram hop to share a lot of inspiration as well giving away a $25 gift certificate to the store, so if you want a chance to win, stop by and leave a comment while enjoying all the crafty inspiration. You can start at our instagram here


Here's some inspiration using the new products from our creative team! 

First up, Cheryl used the Hey Squirrelly along with the Elliptical Leaf stencil together beautifully, really showing off that stencil with its crisp lines. 


Jenny used the same products but used them for a horizontal card and achieved a completely different look. The squirrel pops against that yellow stenciled background. 


She also used the Squirreling Around stamp set for a simple card featuring all three squirrels and used the remaining ink on her stencil to create a more subtle, inky background. 


Melinda stunned us with us her watercoloring skills for this mini slimline card featuring Squirreling Around and flipped the set around to add additional leaves at the bottom of the card. 


Shanna took advantage of the layering stamps for the Squirreling Around stamp set and used it along the outline stamps, which she heat embossed in gold for that fall look. 


Ceal put some fall colors into the leaves which really make the little squirrel stand out against her blue sky. 


Jeannie used the stencil for an ombre look and added the sentiments to ground the little squirrels. She stamped the solid leaves with a mix of atelier inks for a fun pop of color. 


Fleurette shows off some Atelier watercolor techniques in her cards for some colorful squirrels. Funny enough there are only three squirrels in the set but it looks like there's so many different ones. 

She does the same with this fun colorful squirrel, reminding all of us that as cardmakers, we can see anything in color and step outside our comfort zones. 


We hope you enjoy the inspiration from the design team and we can't wait to see how you use the new sets. Remember to tag our instagram or use #inkon3 if you share you photos for a chance to be featured on the Ink on 3 instagram page. If you're on facebook, we have a fun facebook group to share crafty creations and any upcoming news! 


Thanks for joining us here today and we hope you enjoyed all the projects. Be sure to stop by our instagram hop for a chance to win a giftcard! 

Friday, July 29, 2022

NEW PRODUCT ALERT: Sweet Peach Stamp & Stencil Combo & Pitch Black Atelier Ink

Hi crafty friends! Today, we're sharing a ton of inspiration featuring a couple new products to the Ink on 3 store, Sweet Peach stamp & coordinating Sweet Peach stencil along with the newest addition to the Atelier Ink, Pitch Black

But first, our creative team is having an instagram hop to share a lot of inspiration as well giving away a $25 gift certificate to the store, so if you want a chance to win, stop by and leave a comment while enjoying all the crafty inspiration. You can start at our instagram here


Here's some inspiration using the Sweet Peach stamp and stencil from our creative team! 

Shanna cleverly used the Sweet Peach stamp and stencil to create a plum instead of a peach using the Atelier Ink link featuring My Jam Purple, Peacock Blue and the newest Pitch Black ink for a night time sky in the background and stenciled the Leafy Forest stencil right on top. 


Jeannie used the Sweet Peach stamp and stencil with deeper colors to create more of a pop art look using almost all the Atelier Ink colors to create this card. She also used Ink on 3's Pixie Dust to splatter onto her background as well as heat embossing the sentiment in Strawberry Champagne 


If you're not familiar, Ink on 3 has an Atelier line of inks, which are artist grade quality inks. They are water reactive, fusion inks (pigment & dye based), acid free, archival, fade resistant. You can use these inks to stamp (alcohol marker friendly when dried completely), watercoloring, ink blending, layering. They provide a bright, crisp detailed image when stamping and provides full coverage on solid stamped images. 

Pitch Black is the newest ink color to the Atelier line, which is named after exactly what it is, Pitch Black. Of course, we're also sharing examples of cards using the new ink color. 


Shanna used Pitch Black to ink blend the Curls stencil and as you can see it's super dark, making the Sweet Peach stamp and stencil


Jeannie used Juicy Ink to stencil the Leafy Forest Stencil on a dark green cardstock and then embossed it using Crystal Clear embossing powder for an emboss resist technique. She then used Pitch Black all over for her background. If you're curious, she did no line coloring for the Sweet Peach stamp using Fadeout Ink


Saturday, June 18, 2022

I Believe In You!


Hey friends!
It's Ceal, here to share a card with you today.
This Magical Unicorn set has always been one of my favorites. 
Too make this card I started with a white top folding card base, a watercolor paper panel and another panel of white cardstock for the image.  
I created the background for the unicorn by using the Curls stencil with some Atelier inks in Bee Sting YellowMarigold Orange, and My Jam Purple.
I stamped the Unicorn and colored it using Copic markers in rainbow order, cut it out with the coordinating die and popped it up on the colorful panel. 


Friday, May 6, 2022

2022 Spring | Summer Coffee Lover's Hop


Hello everyone and welcome!!  We are so very excited to be participating as a BRAND NEW sponsor for this year's 2022 Spring | Summer Coffee Loving Cardmaker's Blog Hop!  We are sponsoring a 

Ink on 3 has a brand new release featuring 2 different coffee themed stamp sets and a brand new coffee themed stencil.  Take a peek at them below!


Ink on 3 Coffee House Cute 4x6 Stamp Set
Shop at:
Io3
Ink on 3 Build A Coffee House 4x6 Stamp Set
Shop at:
Io3
Ink on 3 Coffee Bean Flower Stencil
Shop at:
Io3


The design team had a lot of fun creating with these--You can spot them all over on the team's Instagrams!
The team is hopping over on Instagram today (starting at 7am PST) and that will DOUBLE your chance at a prize!  Be sure to comment here and then head over to Instagram to see all the Caffeinated Cutie inspiration! You can click on the hop graphic below or HERE to head over to the official Ink on 3 Instagram page.


Thank you so much for hopping along.  Linked below is the Inlinkz party lineup---so much goodness all in one hop!  We are the last official stop on the hop, so if you started in the middle be sure to head back over to the Coffee Loving Cardmaker's Blog to start at the top!

You are invited to the Inlinkz link party!

Click here to enter

Friday, March 25, 2022

Sending BeYOUtiful Hugs


Hello friends!
It's Ceal, here. 
Today I a sharing a card I made using the BeYOUtiful set.  I love creating backgrounds with stamps and the large flower in this set makes it super easy. 

To create this card I started with a with a white top folding card base, a black panel and a panel of watercolor paper.  I randomly stamped the large flower with our Juicy Embossing ink and embossed them with clear powder.
 Next I used our Atelier re-inkers which are awesome to watercolor with to loosely watercolor them.  The colors I used are Sweet Petunia Pink, Marigold Orange, Bee Sting Yellow, My Jam Purple and Trinity Teal. 
I love how vibrant they are!


Monday, February 28, 2022

Monochrome Roses Card

 Hi everyone! It's Cheryl with the Inkon 3 creative team here to show you a quick and simple monochrome card! Not only do I love the look of monochromatic cards, but because the color palette is so simple, it's a pretty quick color!


First, I stamped out the Triple Rose Clear Stamp onto white card stock and then fussy cut it out. Then using a paper trimmer, I cut the image in half. 

Next, I cut out a sheet of black card stock down to 4"x5.5" and then die cut the sentiment "THANKS" out of the center. Then I adhered the black card stock onto a 4"x5.5" card base, I also glued the small "triangle" piece of the letter A onto the card base. Adhere one half of the roses on the top of the card, and the other half on the bottom of the card. I added a strip of Washi tape on the bottom for a little extra accent.

Lastly, color the roses with copic markers as listed below, or your choice of coloring medium.

C5, C3, N2, C1, C0


Tuesday, February 15, 2022

Embossing Elegance


Hello Friends! 
It's Ceal, here. Today I am sharing a card using the Holiday Wreath set.  I stamped it using the Juicy Embossing ink and then heat embossed it using the Gold Rush embossing powder.  I love her embossing powders, they melt so evenly. 
I used Copic markers to color the berries and the leaves. 


Saturday, February 12, 2022

Coloring With Ink Blending

 Ink blending with Atelier Inks is such a quick way to add color to images! 


I love when small stamp sets go a long way! The Here for You Stamp Set is a mini set with the most gorgeous floral image and small sentiments. I stamped the image with Blackout Hybrid Detail Ink and heat embossed it with Crystal Clear Fine Detail Embossing Powder. I used Marilyn Red Atelier Ink and Goddess Green Atelier Inks to blend color onto the image and cut it out with my scissors. I masked off the edges of a card and added a bit of Black Glitz Glitter Gel over a polka dot stencil and popped up my flower on top. 


I stamped a sentiment from the Here for You Stamp Set with Juicy Watermark Embossing Ink and heat embossed it with Arctic White Fine Detail Embossing Powder. I trimmed the sentiment out into a strip and added it to the card with foam tape. That's it! Thanks for joining me!

Monday, January 31, 2022

Spring Bucket List Planner Layout

 Hello Crafty Friends! It's Cheryl with the Inkon3 Creative team here to show you how I made this fun Spring bucket list pages in my bullet journal! I find that making these kinds of lists helps you from feeling like you're in a rut, and it definitely helps if the pages are adorable!


First I stamped the images from the Lil Chicks Clear stamp set onto my page as shown in the pictures. Then I stamped the word "Spring", from the Phat Alphanumeric Clear Stamp Set, onto the page. Next, I used a ruler to frame/box the text and the page.

Once all the images are dry, mask off all of the stamped images and frames/boxes. Stencil in a background with your choice of stencils and ink.

Remove the masks, and color in the stamped images with your choice of coloring medium. (Tip: If you'd like to color with alcohol markers, it is best to stamp and color onto sticker pages and then fussy cut the images. Then add to your planner pages!)

Lastly, stamp in or doodle your bucket list items into the white space of the page and color the icons with your choice of coloring mediums. Isn't this bucket list so cute?!


Saturday, January 29, 2022

Easy Atelier Ink Watercolor Background

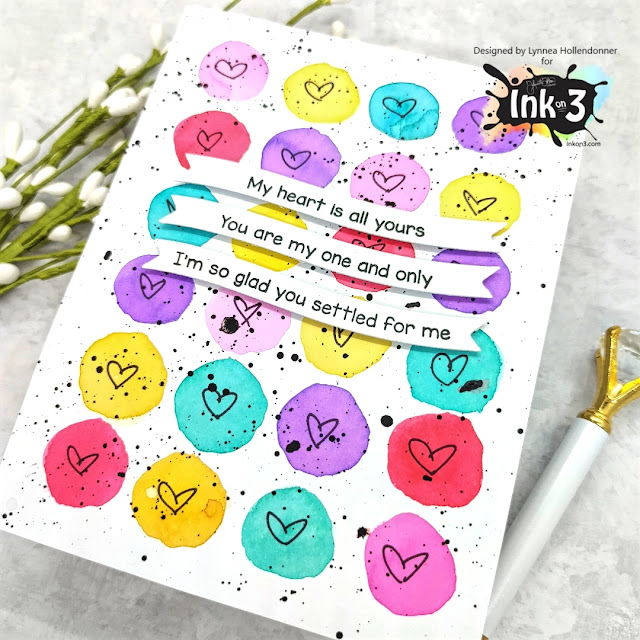
Easy peasy, lemon squeezy! Here's a simple Atelier Ink watercolored background for you! 


I started by smooshing a few different colors of Atelier Ink onto my glass work surface and then watercolored small hearts all over my background. I kept the circles loose and easy without any real shading. Just a simple and colorful background! 


I used a fine tip Sharpie and drew small hearts into each circle and then spattered the background with black watercolor. 


I finished the card by adding a few sentiment strips from the LDRS Creative Love Wave Stack with Blackout Hybrid Detail Ink!

Saturday, January 22, 2022

Stolen My Heart
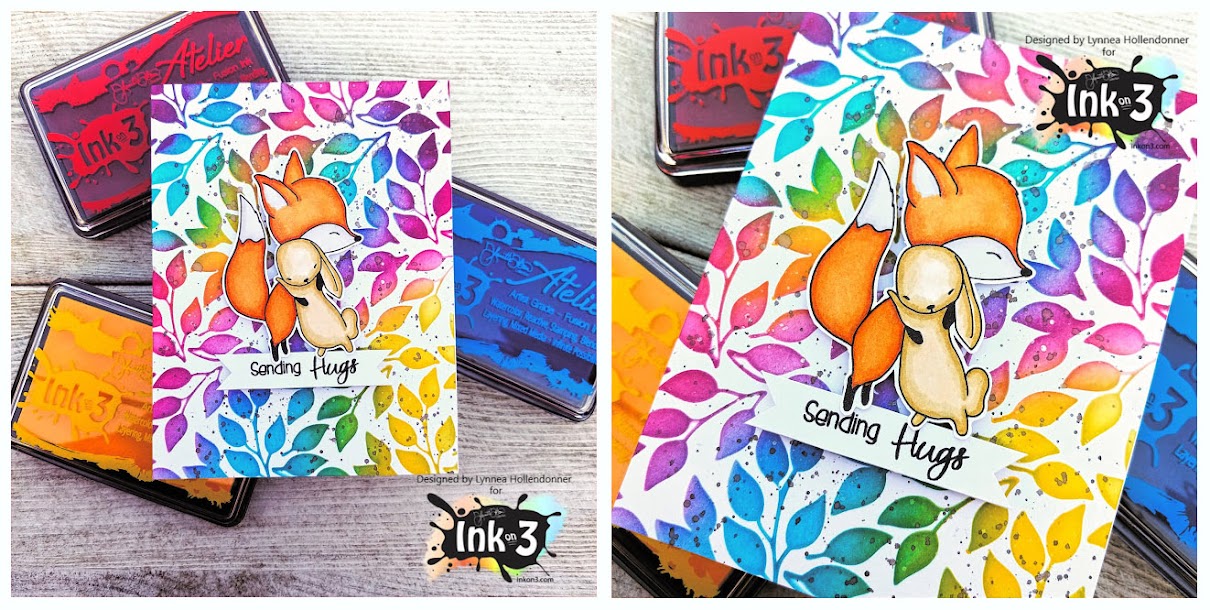


Hello Friends!
It's Ceal, here. Today I am sharing a valentines card with you using the Raccoon Hugs set. 

To create this card, I started with a top folding white card base and a white Heavystock distress panel. 
To create the background I put down some Sweet Petunia Pink ink on a craft mat, spritzed with water and then smooshed the panel of heavystock in it until I achieved a look I was pleased with. 
I stamped the raccoon aka trash panda on a piece of white cardstock, colored him and then cut him out with the coordinating dies and popped him up on the pink panel. 


Saturday, January 8, 2022

Holiday Wreath Bird Card

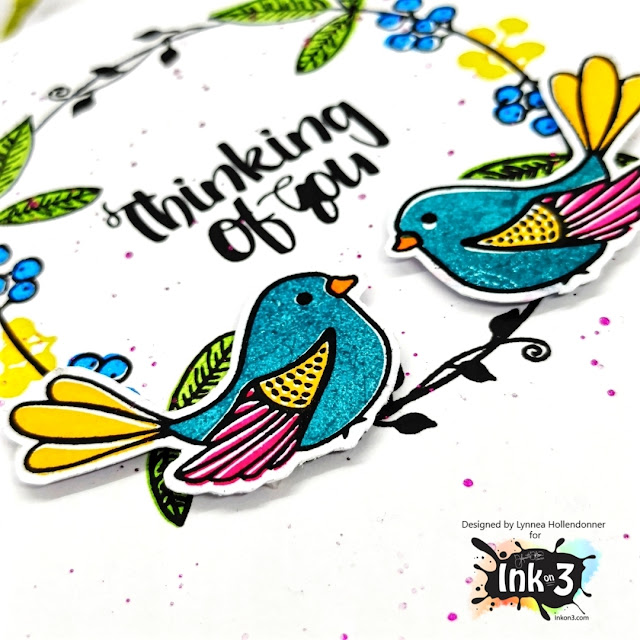
I love versatile stamps! The Holiday Wreath Stamp Set from InkOn3 is great for all kinds of cards and occasions! 


This card is so simple, but I love the colors and how it turned out! I stamped the wreath from the Holiday Wreath with Blackout Hybrid Detail Ink and used the layering stamps to fill in the leaves and berries of the wreath. I used Goddess Green Atelier Ink, Bee Sting Yellow Atelier Ink, and Peacock Blue Atelier Inks to create a spring/summertime wreath. 


I wanted to keep that springy feel with the Love Birds Stamp Set, so I stamped the outlines with Blackout Hybrid Detail Ink and used the layering images with Trinity Teal, Bee Sting Yellow, and Sweet Petunia Pink Atelier Inks. I love how quick it is to add color to these birds! I added the sentiment to the center of my wreath and spattered some pink shimmer watercolor all over my background for texture. 


I trimmed out my birds and popped them up with foam tape near the bottom of the wreath for some dimension. And that's it! Thanks for joining me!