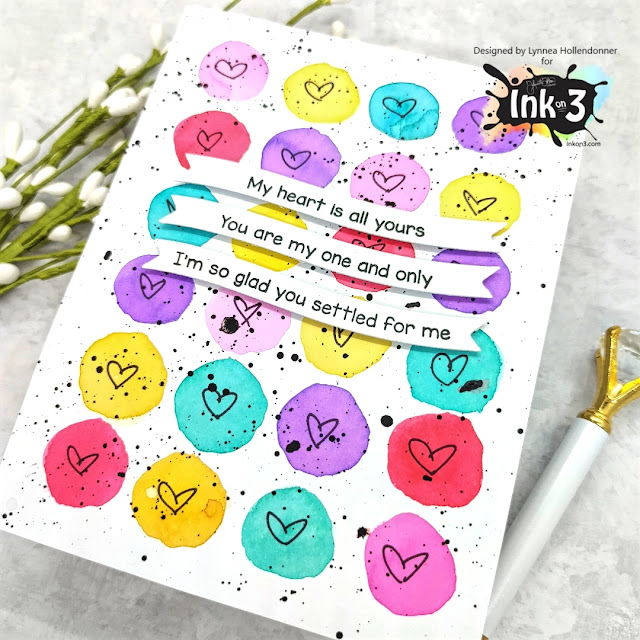
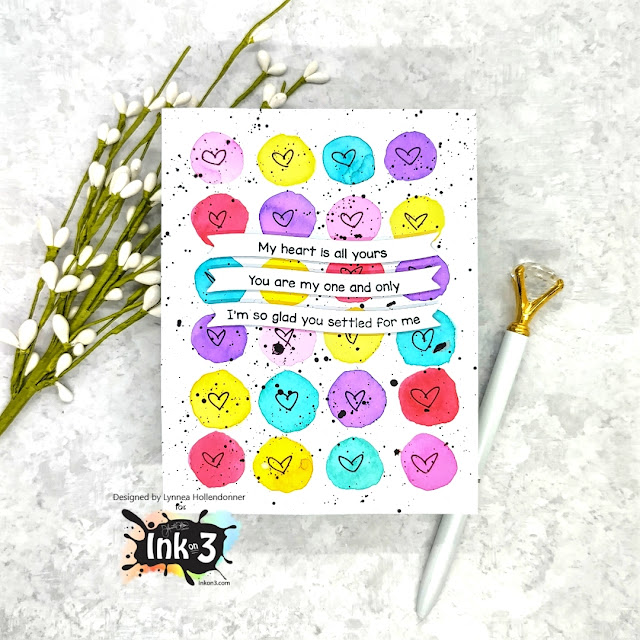
I started by smooshing a few different colors of Atelier Ink onto my glass work surface and then watercolored small hearts all over my background. I kept the circles loose and easy without any real shading. Just a simple and colorful background!
Showing posts with label Atelier Ink Cube. Show all posts
Saturday, January 29, 2022
Easy Atelier Ink Watercolor Background
Easy peasy, lemon squeezy! Here's a simple Atelier Ink watercolored background for you!
I used a fine tip Sharpie and drew small hearts into each circle and then spattered the background with black watercolor.
I finished the card by adding a few sentiment strips from the LDRS Creative Love Wave Stack with Blackout Hybrid Detail Ink!
Labels:
Atelier Ink,
Atelier Ink Cube,
Atelier Ink Watercolor,
Lynnea Hollendonner,
process video,
Valentine's Day,
Video,
Video Tutorial,
Water coloring,
YouTube video
Saturday, January 22, 2022
Stolen My Heart
Hello Friends!
It's Ceal, here. Today I am sharing a valentines card with you using the Raccoon Hugs set.
To create this card, I started with a top folding white card base and a white Heavystock distress panel.
To create the background I put down some Sweet Petunia Pink ink on a craft mat, spritzed with water and then smooshed the panel of heavystock in it until I achieved a look I was pleased with.
I stamped the raccoon aka trash panda on a piece of white cardstock, colored him and then cut him out with the coordinating dies and popped him up on the pink panel.
Saturday, December 11, 2021
Shimmery Christmas Card
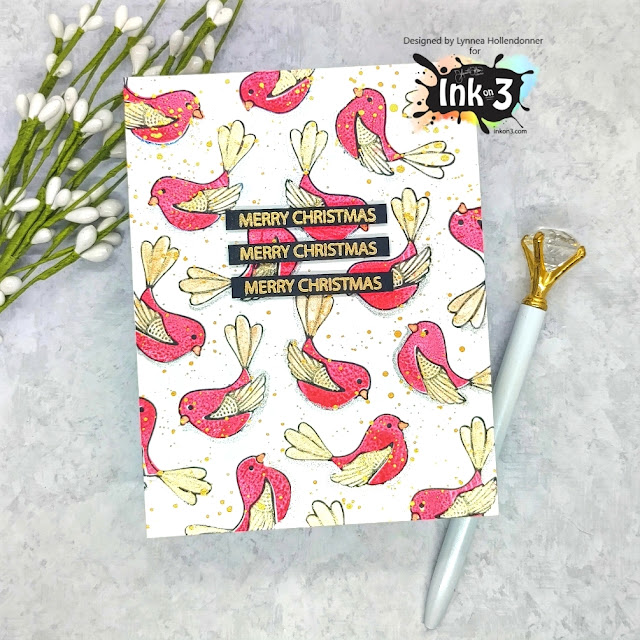
A little stamp layering with InkOn3 stamps and Atelier Inks and shimmer watercolors make a quick and easy Christmas card!
I stamped a greeting from the Holiday Wreath Stamp Set three times with Juicy Watermark Embossing Ink and heat embossed with Gold Rush Fine Detail Embossing Powder. I trimmed each of the sentiments into small strips and popped them up near the top center of my card.
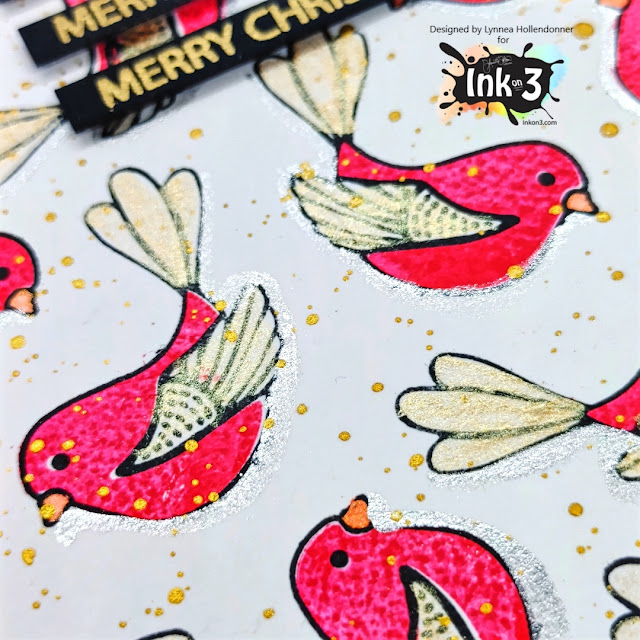
I stamped the outlines of the birds from the Love Birds Stamp Set with Blackout Hybrid Detail Ink repeatedly on my background until my cardstock was full of little birdies. I used the layering images for the birds and stamped them with Marilyn Red Atelier Ink to mimic the look of cardinals. There are layering stamps to fill in the tails and wings as well, but I decided to use some shimmer watercolor for a bit of sparkle. I added some gold watercolor spatters to finish off the background.
Labels:
Atelier Ink,
Atelier Ink Cube,
Christmas Card,
Gold Rush Ultra Fine Embossing Powder,
Holiday Wreath StampSet,
love birds Clear stamps,
Lynnea Hollendonner,
process video,
Video,
Video Tutorial
Tuesday, November 30, 2021
Love Birds Planner Pages
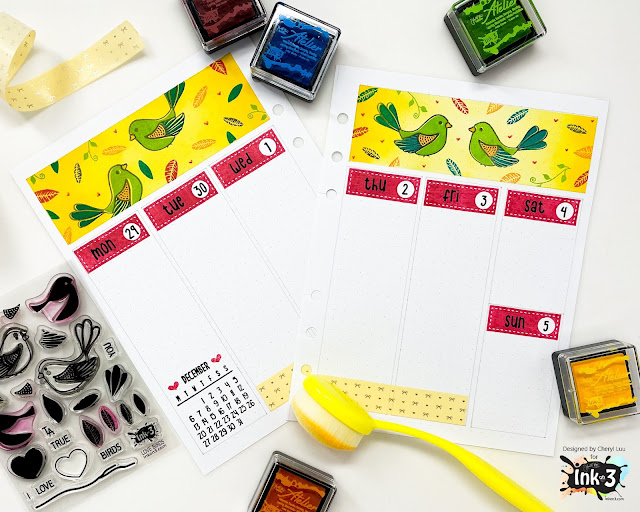
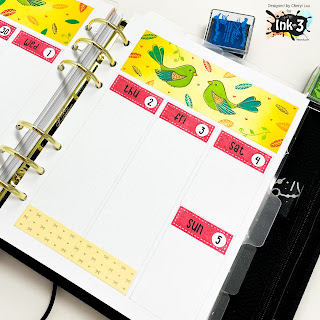
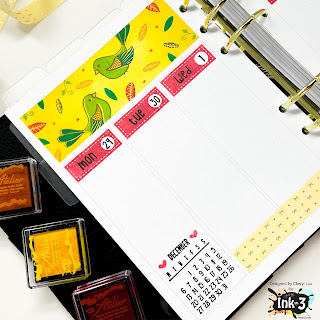
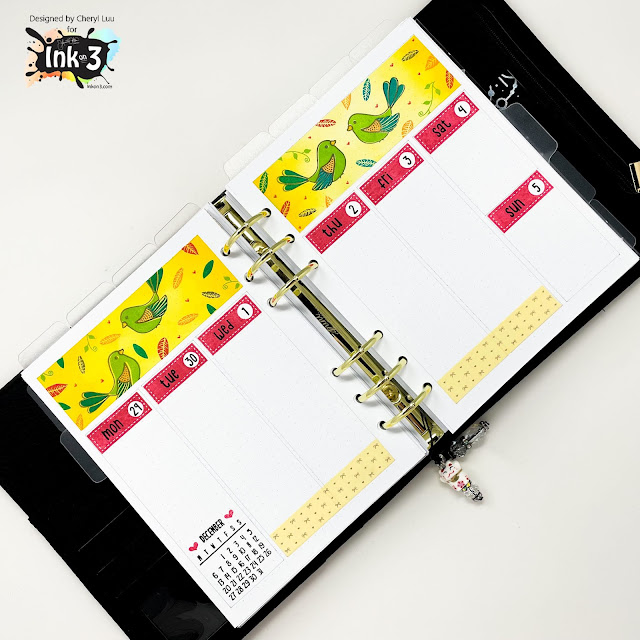
Hello Crafty Friends! I'm going to go back to my roots and start creating planner layouts from scratch again! I like starting off with some dot grid pages because it provides some points of references, but from a distance, you can hardly notice that the pages has a grid at all! The planner layout below is for a B6 ring planner, but you can adjust the boxes to whatever planner you like to use!
The daily boxes are 1.5" wide, which is standard for most planners, the top rectangle is 1.5" high and the width to match the three daily boxes.
First, I masked off around the large top rectangle. Then I used a blender brush and applied the Bee-Sting Yellow Atelier Ink to create a background. You can saturate the color on the sides to create an ombre look. Leaving the mask on, stamp the birds, and feathers from the Love Birds Clear Stamp Set. I also used a vine from the Holiday Wreath Clear Stamp Set. With a red pen, draw little hearts in random open spaces.
Remove the mask, and then use date stamps or stickers for each day of the week. Stamp a calendar on the lower left hand corner of the left planner page. Then add some washi tape to the bottom for a little more deco!
Isn't this such a fun and pretty layout!?
Inkon3 Products used:
Saturday, November 13, 2021
NEW RELEASE! | Faux Watercolor with Atelier Ink Cubes
There's a new release from InkOn3 and I used one of the new stamp sets and some Atelier Ink Cubes to create an Autumn themed faux watercolored card.
I stamped the outlines with Blackout Hybrid Detail Ink but I offset them to add to the whimsy of the background. I added some flicks of gold watercolor to fill in any empty spaces.
I used Blackout Hybrid Detail Ink to stamp a sentiment from the Thankful For You Stamp Set, cut it into strips, and lined the bottom with red cardstock and popped up the strips with foam tape to finish the card. Thanks for joining me!
The new Thankful For You Stamp Set has solid and outline leaves that you can use together or separately. I lined up the solid images on my card using my Misti and inked them up with Marilyn Red, Marigold Orange, and Bee Sting Yellow Atelier Ink Cubes. I spritzed them with a bit of water and stamped them onto my card giving me a faux watercolor look.
Labels:
Atelier Ink,
Atelier Ink Cube,
Autumn,
Blackout Hybrid Detail Ink,
card,
card making,
Lynnea Hollendonner,
process video,
Thankful For You Stamp Set,
Video,
Video Tutorial,
YouTube video
Subscribe to:
Posts (Atom)