Showing posts with label Atelier Ink Watercolor. Show all posts

Saturday, January 29, 2022

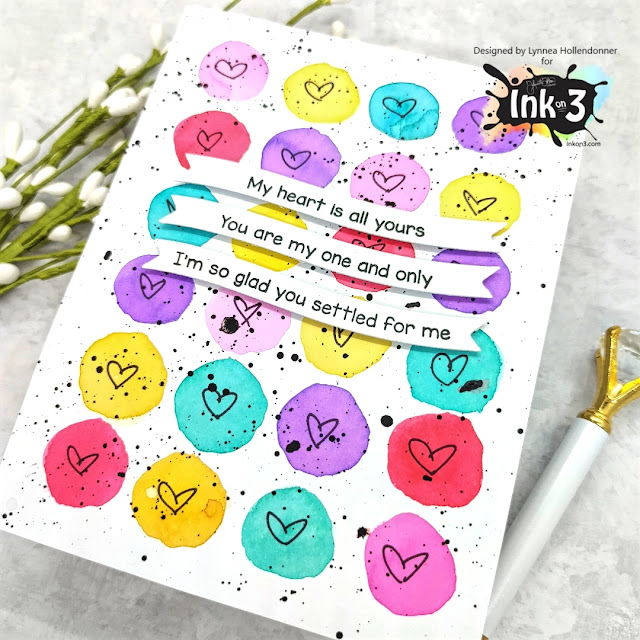
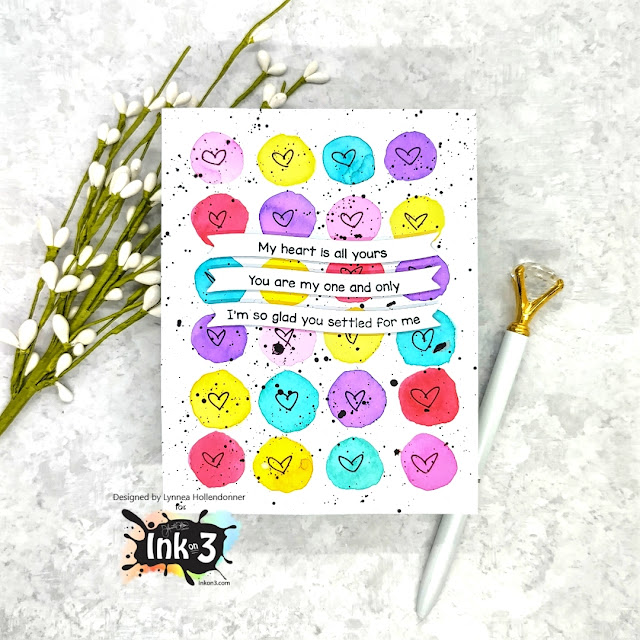
Easy Atelier Ink Watercolor Background

Easy peasy, lemon squeezy! Here's a simple Atelier Ink watercolored background for you! 


I started by smooshing a few different colors of Atelier Ink onto my glass work surface and then watercolored small hearts all over my background. I kept the circles loose and easy without any real shading. Just a simple and colorful background! 


I used a fine tip Sharpie and drew small hearts into each circle and then spattered the background with black watercolor. 


I finished the card by adding a few sentiment strips from the LDRS Creative Love Wave Stack with Blackout Hybrid Detail Ink!

Saturday, August 28, 2021

Floral Atelier Ink Watercolor

This card was so easy to make and it's one of my favorites I've made in a long time! I watercolored these gorgeous florals with InkOn3 Atelier Inks and they're just gorgeous! 


Atelier Inks are great for stamping and ink blending ... but I really LOVE the way they work as watercolors! They are so vibrant! I stamped the Concord & 9th Heartfelt Blossoms Stamp Set with Blackout Hybrid Detail Ink and heat embossed with Crystal Clear Fine Detail Embossing Powder. The embossing helps to keep the watercolor in the lines - which is something I definitely need! I used Goddess Green, Bee Sting Yellow, Sweet Petunia Pink, and Trinity Teal Atelier Inks to watercolor my background and then used the coordinating die to cut it out. 


I created a peek through background by stamping the Altenew Pinstripe Stamp with Blackout Hybrid Detail Ink and popped up my watercolored image on top with foam tape. I wanted a sentiment that would perfectly match my background, so I blended Trinity Teal Atelier Ink onto white cardstock and then die cut the sentiment. The color of the sentiment perfectly matches my watercolored frame! 


I finished off this pretty Atelier Ink watercolored card with some pastel pearls. Thanks for joining me! 

Saturday, May 1, 2021

Triple Roses

Hi everyone! It’s Jeannie (InsideoutJeans) on the blog today with Ink on 3’s stamp set named Triple Roses stamp set.

I thought for this card I'd play around with watercoloring but I'm not the best at it, so I decided to heat emboss my image. I stamped the Triple Roses with Juicy Ink and used Black as Night embossing powder to heat emboss so watercoloring would be a bit easier. 


For this card, I decided to use the re-inkers to do the watercolor. I used Trinity Teal and Goddess Green for the leaves and then Marilyn Red, Marigold Orange, Bee Sting Yellow, and My Jam Purple for the roses and the small blooms. I just added water to some certain areas first and then added drops of each color and let them naturally blend. 


I used the sentiments from Here for You stamp set, which I stamped on black cardstock with Juicy Ink and then added Artic White embossing powder. 


Thanks for stopping by today and I hope you get inspired to create. Come back again soon for more inspiration and ideas! Happy Crafting! 


Saturday, February 27, 2021

Rainbow Atelier Ink Watercolor

I just LOVE to watercolor with InkOn3 Atelier Inks! They are bright and vibrant and move so well in water! 


I used 8 colors of Atelier Ink on my rainbow background - all except Shark Tooth White, Twiggy Brown, and Paint it Black. I stamped a geometric background, but you could certainly use a ruler and a marker and draw your own background. I stamped first with Juicy Clear Embossing Ink and then with Blackout Hybrid Detail Ink and heat embossed with Crystal Clear Ultra Fine Embossing Powder


I smooshed my Atelier Ink Pads onto my work surface and used a wet brush to add color to each area of my background. I tried my best not to put the same color next to each other and to evenly space out each color. Once my background was painted and dry I took clean water and flicked it onto my background and picked it up with an Ink Off Cloth. I repeated this three times to intensify the lift effect. 


I didn't want to cover up a lot of my pretty background, so I added a few die cut sentiments and covered the large "hello" with Liquid Pixie Dust so that it would stand out. And that's it! I hope you give this technique a try!