Showing posts with label Die cutting. Show all posts

Saturday, October 16, 2021

Heat Embossed Poinsettia Card

I have a no coloring required card to share with you using the InkOn3 Poinsettia Stamp Set and coordinating dies! 


I stamped the flowers and leaves from the Poinsettia Stamp Set onto red and green cardstock using Juicy Watermark Embossing Ink and embossed them with Arctic White Fine Detail Embossing Powder. I stamped and heat embossed a bunch so that I would have enough to cover a full background and have some extras left over. I wanted to add a little bit of dimension so I blended a bit of Twiggy Brown Atelier Ink to the centers of the flowers and Trinity Teal on to the bottom of the leaves. I added some gold watercolor ink spatters onto the flowers and leaves and used the Poinsettia Coordinating Die Set to cut out the images. 


I arranged the poinsettias and the leaves all over my card base and adhered them with liquid adhesive. Check out my video for some quick tips for adhering multiple small images at once! 


I die cut a large sentiment from black cardstock and covered it with Liquid Pixie Dust for some super magical sparkle and added it to the card with foam tape. That's it! Have a great day! 

Saturday, August 28, 2021

Floral Atelier Ink Watercolor

This card was so easy to make and it's one of my favorites I've made in a long time! I watercolored these gorgeous florals with InkOn3 Atelier Inks and they're just gorgeous! 


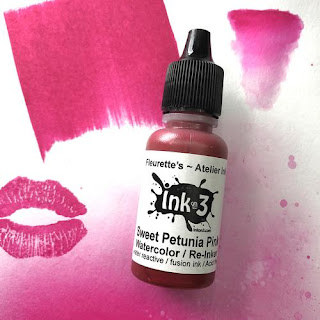
Atelier Inks are great for stamping and ink blending ... but I really LOVE the way they work as watercolors! They are so vibrant! I stamped the Concord & 9th Heartfelt Blossoms Stamp Set with Blackout Hybrid Detail Ink and heat embossed with Crystal Clear Fine Detail Embossing Powder. The embossing helps to keep the watercolor in the lines - which is something I definitely need! I used Goddess Green, Bee Sting Yellow, Sweet Petunia Pink, and Trinity Teal Atelier Inks to watercolor my background and then used the coordinating die to cut it out. 


I created a peek through background by stamping the Altenew Pinstripe Stamp with Blackout Hybrid Detail Ink and popped up my watercolored image on top with foam tape. I wanted a sentiment that would perfectly match my background, so I blended Trinity Teal Atelier Ink onto white cardstock and then die cut the sentiment. The color of the sentiment perfectly matches my watercolored frame! 


I finished off this pretty Atelier Ink watercolored card with some pastel pearls. Thanks for joining me! 

Wednesday, July 7, 2021

Squiggles Birthday Wishes Rainbow Card

Simple, Squiggles Stencil,  Birthday Wishes, Rainbow, Card,Inkon3,Card Making, Stamping, Die Cutting, handmade card, ilovedoingallthingscrafty, Stamps, how to,Sweet Petunia,

Hello friends!

I hope you are having a wonderful week. My week has been crazy busy here at home and as well as work, but I managed to squeeze a little time for this sweet and simple birthday card featuring goodies from Inkon3. 

CARD RECIPE
  • Using the Squiggles Stencil Ink blend in rainbow order using Atelier Inks linked below. Overlapping a few of the inks will give you the rainbow gradient colors.
  • Using a stamping tool, line up sentiments from the Sweet Petunia Stamp Set and stamp them using Blackout Ink.
  • Trim panel and glue onto the card base.
  • Add coordinating colored pearls to the blended background for embellishments.
Simple, Squiggles Stencil,  Birthday Wishes, Rainbow, Card,Inkon3,Card Making, Stamping, Die Cutting, handmade card, ilovedoingallthingscrafty, Stamps, how to,Sweet Petunia,

This was a super simple card to make and came together fairly quickly. I hope this rainbow Squiggles Birthday Wishes Card inspired you today.

Thank you for stopping by and until next time... Happy Crafting!
Ilda 👋

SUPPLIES
Squiggles Stencil
Squiggles Stencil
Shop at:
IO3
Sweet Petunia Stamp Set
Shop at:
IO3
ATELIER SWEET PETUNIA
Shop at:
 IO3
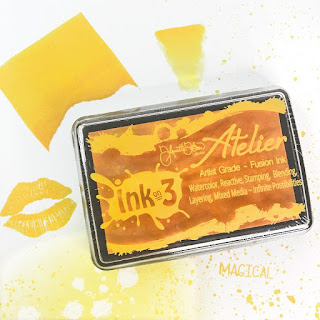
ATELIER BEE STING YELLOW
Shop at:
IO3
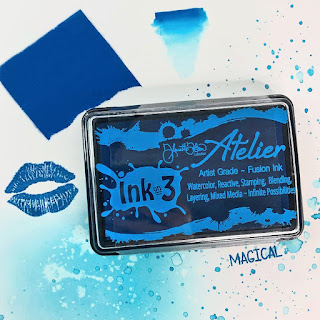
ATELIER PEACOCK BLUE
Shop at:
IO3
ATELIER MY PURPLE JAM
Shop at:
IO3
BLACKOUT INK
BLACKOUT INK
Shop at:
IO3
NEENAH SOLAR WHITE 110
Shop at:
SSS | AMZ | HBS
INK BLENDER BRUSHES
INK BLENDER BRUSHES
Shop at:
SSS | SK
New Mini Misti
New Mini Misti
Shop at:
SSS | SB
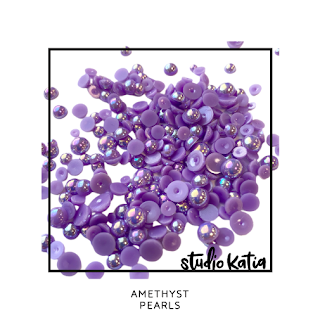
AMETHYST PEARLS
AMETHYST PEARLS
Shop at:
SSS | SK
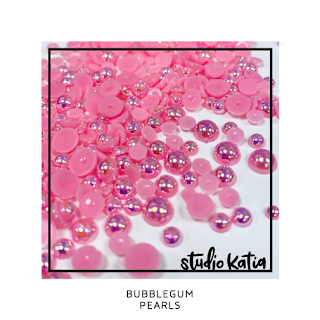
BUBBLEGUM PEARLS
BUBBLEGUM PEARLS
Shop at:
SSS | SK
RIPE PERSIMMON PEARLS
Shop at:
SSS | SK
LEMON BURST PEARLS
LEMON BURST PEARLS
Shop at:
SSS | SK
SEAFOAM PEARLS
SEAFOAM PEARLS
Shop at:
SSS | SK
BEARLY ART PRECISION GLUE
Shop at:
SSS | AMZ
Tim Holtz 8.5 Inch Trimmer
Shop at:
SSS | SB | TS UK
To make supplies easy for you to find, I have linked them above. If something is no longer available I will link to a similar product. Affiliate links may be used depending on the product linked. Please help support my blog by using these links while shopping at no additional cost to you. For more information about the affiliates I use, please visit my disclaimer here. Thanks so much for all your support!

Saturday, June 12, 2021

Wonky Lines and Lilac Dreams

I went bold with the new Wonky Lines Stencil from InkOn3! I did a bit of easy masking and Copic coloring and you can catch it all on YouTube! 


I stamped the large floral cluster from the Lilac Dreams Stamp Set onto the middle of a piece of white cardstock and did some quick Copic coloring. I have white lilacs in my backyard, so I colored the image like them - white with pale purple centers! Once the image was colored I stamped the same image onto masking paper and trimmed it out and placed the mask over the stamped and colored image. 


I placed the new Wonky Lines Stencil over the card and used Blackout Hybrid Detail Ink over the stencil. I went back and forth between purple and black, but I am SO happy I went with black! It's so bold and beautiful! When I peeled off my mask I had a nice white border around my stamped image which makes it pop off the background! 


I wanted to keep the card simple, so I die cut a sentiment from white and black cardstock and offset them and covered them and the lilac with Liquid Pixie Dust for shine. That's it! Thanks for stopping by! 

Tuesday, May 25, 2021

Rainbow Peony Friendship Card

Rainbow Peony Friendship Card,InkOn3,Atelier Inks,Re-inkers, here for you stamp set,Liquid Pixie Dust,Card Making, Stamping, Die Cutting, handmade card, ilovedoingallthingscrafty, Stamps, how to,

Hello, my crafty friends, and Happy Tuesday!

Ilda here from I Love Doing All things crafty with today's simple card featuring a bunch of goodies from InkOn3 plus one of the most recently released stamp sets, Here For You.

CARD RECIPE
  • On a piece of Watercolor Paper prepare the surface for heat embossing using an anti-static bag.
  • Stamp put Peony image from the Here For You Set multiple times onto the watercolor panel. Use a black pigment ink of choice and heat set it using Crystal Clear E.P.
Rainbow Peony Friendship Card,InkOn3,Atelier Inks,Re-inkers, here for you stamp set,Liquid Pixie Dust,Card Making, Stamping, Die Cutting, handmade card, ilovedoingallthingscrafty, Stamps, how to,
  • Brush Atelier Re-Inker Colors in Rainbow order across the panel (see linked inks below in supply list), blending previous colors together for a smooth transition.
  • Allow cardstock to dry.
  • Fussy cut the images out.
  • Used foam to pop up the flowers up onto a piece of white cardstock. Trim off any overhang pieces.
  • Use a stamping tool to stamp out the sentiments with Blackout Ink. I curved the sentiments around the flowers for some interest.
Rainbow Peony Friendship Card,InkOn3,Atelier Inks,Re-inkers, here for you stamp set,Liquid Pixie Dust,Card Making, Stamping, Die Cutting, handmade card, ilovedoingallthingscrafty, Stamps, how to,
  • Finish by painting on a layer of Liquid Pixie Dust to the Peony blooms and adding a trail of rainbow pearls. (See supply list for pearls used).
  • To clean my stamps and make them look brand new again I use the most amazing stamp cleaner and Cloth that is now back in stock again!
⇊⇊

Thank you for stopping by and until next time... Happy Crafting!

SUPPLIES
HERE FOR YOU
HERE FOR YOU
Shop at:
IO3
ATELIER SWEET PETUNIA RE-INKER
Shop at:
IO3
Re-inker Marigold Orange
Shop at:
IO3
Re-inker Bee Sting Yellow
Shop at:
IO3
Re-inker Goddess Green
Shop at:
IO3
ATELIER TRINITY TEAL RE-INKER
Shop at:
IO3
CRYSTAL CLEAR Emb Pwd
Shop at:
IO3
BLACKOUT INK
BLACKOUT INK
Shop at:
IO3
LIQUID PIXIE DUST
LIQUID PIXIE DUST
Shop at:
IO3
MED. WATER BRUSH
MED. WATER BRUSH
Shop at:
IO3
STAMP CLEANER
STAMP CLEANER
Shop at:
IO3
INK OFF CLOTH
INK OFF CLOTH
Shop at:
IO3
MAGIC POWDER BAG
MAGIC POWDER BAG
Shop at:
SSS | AMZ
MINI MISTI
MINI MISTI
Shop at:
SSS | SB | HBS
Strathmore WATERCOLOR
Shop at:
SSS
VersaFine ONYX BLACK Ink
Shop at:
SSS | AMZ | SB | HBS
Black and Decker  Heat Gun
Black and Decker Heat Gun
Shop at:
AMZ
Majestic Royal and Langnickel Brush Set
Shop at:
AMZ
NEENAH SOLAR WHITE 110
Shop at:
SSS | AMZ | HBS
TRIANGLE TRAY
TRIANGLE TRAY
Shop at:
SSS | SK
EMBELLISHMENT WAND
EMBELLISHMENT WAND
Shop at:
SSS | SK
BEARLY ART PRECISION GLUE
Shop at:
AMZ
WINE BERRY PEARLS
WINE BERRY PEARLS
Shop at:
SSS | SK
BUBBLEGUM PEARLS
BUBBLEGUM PEARLS
Shop at:
SSS | SK
RIPE PERSIMMON PEARLS
Shop at:
SSS | SK
LEMON BURST PEARLS
LEMON BURST PEARLS
Shop at:
SSS | SK
SEAFOAM PEARLS
SEAFOAM PEARLS
Shop at:
SSS | SK
BLUEBELL PEARLS
BLUEBELL PEARLS
Shop at:
SSS | SK
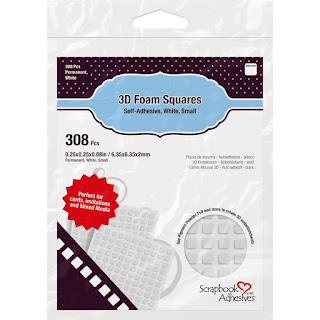
FOAM SQUARES
FOAM SQUARES
Shop at:
SSS | HBS