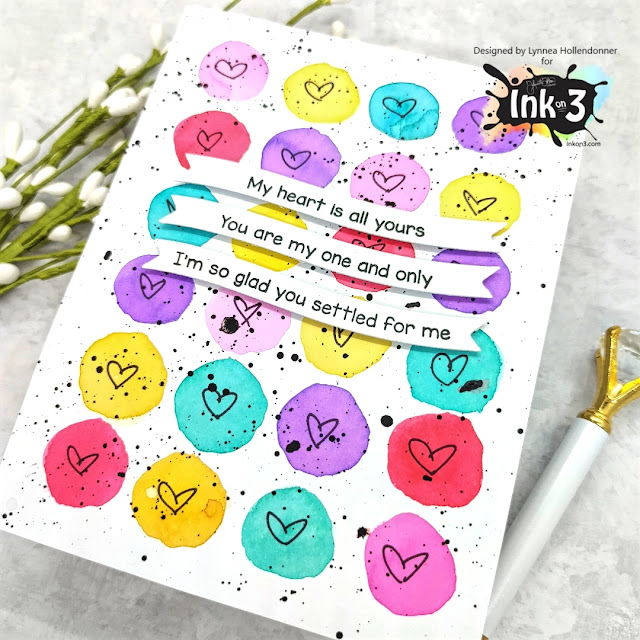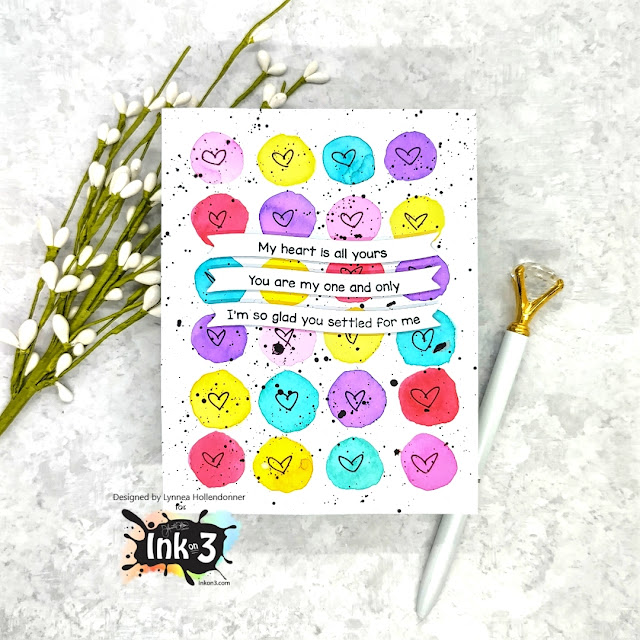
I started by smooshing a few different colors of Atelier Ink onto my glass work surface and then watercolored small hearts all over my background. I kept the circles loose and easy without any real shading. Just a simple and colorful background!
Showing posts with label Valentine's Day. Show all posts
Saturday, January 29, 2022
Easy Atelier Ink Watercolor Background
Easy peasy, lemon squeezy! Here's a simple Atelier Ink watercolored background for you!
I used a fine tip Sharpie and drew small hearts into each circle and then spattered the background with black watercolor.
I finished the card by adding a few sentiment strips from the LDRS Creative Love Wave Stack with Blackout Hybrid Detail Ink!
Labels:
Atelier Ink,
Atelier Ink Cube,
Atelier Ink Watercolor,
Lynnea Hollendonner,
process video,
Valentine's Day,
Video,
Video Tutorial,
Water coloring,
YouTube video
Saturday, January 23, 2021
Atelier Ink Chevron Valentine's Day Card
Hi, it's Lynnea! Sometimes I focus so much on fun techniques that I forget the amazingness of simple solid stamping! I love the smoothness of the InkOn3 Atelier Inks! I used the two new colors to stamp a pretty chevron background.
Let's start with that pretty, colorful background! The InkOn3 Atelier Inks are great for all kinds of stamping - detail, sentiments, etc - but I really love to show them off with solid stamping! They are gorgeous and smooth from the first impression! I used the Pinkfresh Studio Nested Chevron Background Stamp to build my background. I alternated the chevrons between the new Sweet Petunia Pink and Trinity Teal Atelier Inks. I just LOVE this color combo!
I used Blackout Hybrid Detail Ink to stamp a cute little gnome image as well as a sentiment from the Whimsy Stamps Gnome One Like You Stamp Set and colored him with Copic Markers. I covered the image with some Liquid Pixie Dust for all kinds of shimmer! I keep a little bit in a Small Fine Tip Water Brush Pen so that I can easily paint shimmer onto my colored images.
I trimmed down my background panel to be slightly smaller than my card base and popped it up with foam and added my cute colored image in the center of the card. That's it! Cute and simple! I love that multicolored stamped background!
Labels:
Atelier Ink,
background stamping,
card,
Lynnea Hollendonner,
process video,
Sweet Petunia Pink,
Trinity Teal,
Valentine's Day,
Valentine's Day Card,
Video,
Video Tutorial
Wednesday, December 23, 2020
Lovebirds Valentine's Day Card | Mirror Stamping using Fadeout Ink
Hello, my friends, Ilda here 👋
Can you believe Christmas Eve is tomorrow? Are you ready?! Ready or not, despite all the time we spent at home this year with the social distancing, and isolations, it still felt like this year flew by. Hopefully next Christmas this will all be over and we can return to our normal Holiday traditions with all our family and friends.
Well, let's get on with today's card... Is it too soon to start thinking about Valentine's? Personally, I was actually excited to work on something other than Christmas and the little bird from the latest LITTLE BIRDIE Set was the perfect inspiration for my first Valentine's Day card.
CARD DETAILS
To begin, I started by stamping out the birdie on the left onto a piece of Bristol paper. The stamp comes from the LITTLE BIRDIE set and the ink I used was FADEOUT INK. I then placed the MIRROR IMAGE STAMP in the MISTI tool and stamped the little birdie again, this time onto the MIRROR IMAGE STAMP using FADEOUT INK. I then picked up the image off the MIRROR STAMP by placing the paper face down to pick up and transfer a mirrored image onto the Bristol piece of paper. To get a good transfer I repeated the last step 3 times.
The images were then watercolored in using all the Atelier inks linked below.
For the top panel, I used the LEAFY FOREST STENCIL and blended out the leaves using ATELIER GODDESS GREEN and very light pressure with a blending brush. To the top half of the panel, I die cut a heart-shaped window opening to frame the lovebirds and then trimmed down the panel to attach over the lovebird image with some foam tape.
The sentiment on the card panel comes from the RACCOON HUGS set that I stamped out using ATELIER TWIGGY BROWN Ink. The little heart in the center of the birds also comes from the Raccoon Hugs set. Difficult to see from the photos but I added some LIQUID PIXIE DUST to the heart.
I hope loved my little Lovebirds Valentine's Day card and got some inspiration from it. Mirror stamping is a great way to stretch your supplies and create cute Valentine Scenes with any critter stamp you may already have. Now that you saw my no line results with Mirror Stamping, maybe you will give it a try.
Thank you for stopping by and until next time... Wishing you all a safe and very Merry Christmas!
Connect with me also on my Blog, Facebook Page, Instagram, and YouTube
SUPPLIES
![]() LITTLE BIRDIE Shop at: IO3 |
![]() MIRROR IMAGE STAMP Shop at: IO3 |
![]() RACCOON HUGS Shop at: IO3 |
![]() LEAFY FOREST STENCIL Shop at: IO3 |
![]() FADEOUT INK Shop at: IO3 |
![]() ATELIER GODDESS GREEN Shop at: IO3 |
![]() ATELIER TRINITY TEAL Shop at: IO3 |
![]() ATELIER SWEET PETUNIA Shop at: IO3 |
![]() ATELIER MARIGOLD ORANGE Shop at: IO3 |
![]() ATELIER TWIGGY BROWN Shop at: IO3 |
![]() LIQUID PIXIE DUST Shop at: IO3 |
![]() BRISTOL PAPER Shop at: SSS | AMZ |
MINI MISTI Shop at: SSS | AMZ |HBS |
![]() GEMINI JR. DIE CUTTER Shop at: SSS | AMZ | SB |
![]() SHAKER HEART Shop at: SSS | SK |
![]() INK BLENDER BRUSHES Shop at: SSS | SK |
![]() STUDIO KATIA GLUE Shop at: SSS | SK |
![]() FOAM TAPE - WHITE Shop at: SSS | SK |
Wednesday, February 8, 2017
Hugs & Kisses
Hello Crafty Friends... Mitsyana Wright here!!
And I'm back again with Fleurette Bloom Stamps... whom has just asked me to be a part of their Design Team!!! Eeeeeek!! How cool is that??!!
I don't know about you but hearing great news like that always make me feel loved! And I've been in a very lovey-dovey type of mood lately... lots of warm fuzzies!
And what says love better than red roses...I think roses are very romantic, by the way!
So, I made this simple, elegant, and "tres romantique" card using Fleurettes new Roses in Bloom set.
I started by stamping my image a total of three times.
Next, I colored them and I added highlights using a white gel pen.
I cut out two of the images by hand, and the third I die cut using a stitched circle die. Then embossed the die cut with an embossing folder.
I added foam adhesive to the back of the flowers and layered them onto each other for more dimension and removed one of the flowers for the very top layer.
I used this light green paper and created a A7 (5"x 7" folded) sized card base.
Then die cut printed text paper using a stitched rectangle die.
I used a tape runner to attach my rectangle to the front of my card base.
I used the same circle die from earlier and traced around the outside diameter of the die as a template. Then hand cut out the traced shape and layered it under my paper pieced roses.
I added foam tape under the circle for more dimension then adhered it to my card front.
I die cut a pennant and the letters XOXO and adhered the little flag to the card, slightly tucking it behind the circle.
Lastly, I added a heart shaped cabochon using a clear quick dry adhesive.
You can really see all the added dimension with all the different layers (above picture).
Finished Card
I really hope you enjoyed my project for today and that it filled you with
a bit of love, a little romance, or even some heartfelt inspiration.
Wishing you lots of hugs, kisses, & Valentine Wishes,
Mitsy
For a full list of supplies for this project please visit my personal blog here.
Subscribe to:
Posts (Atom)