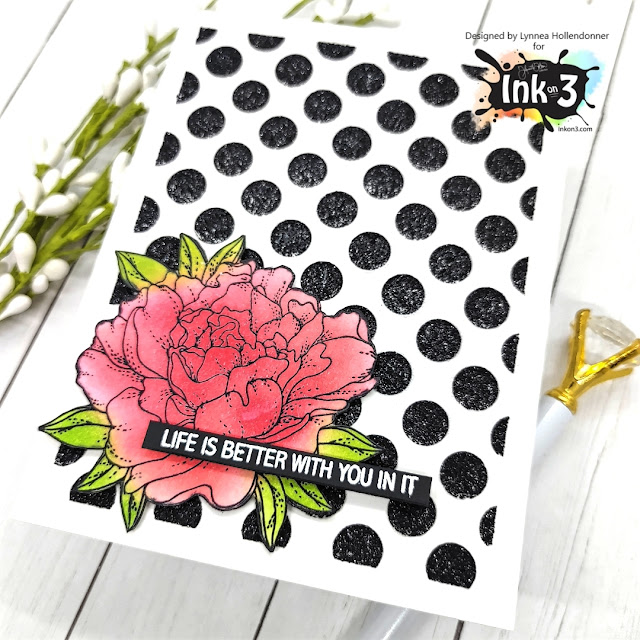
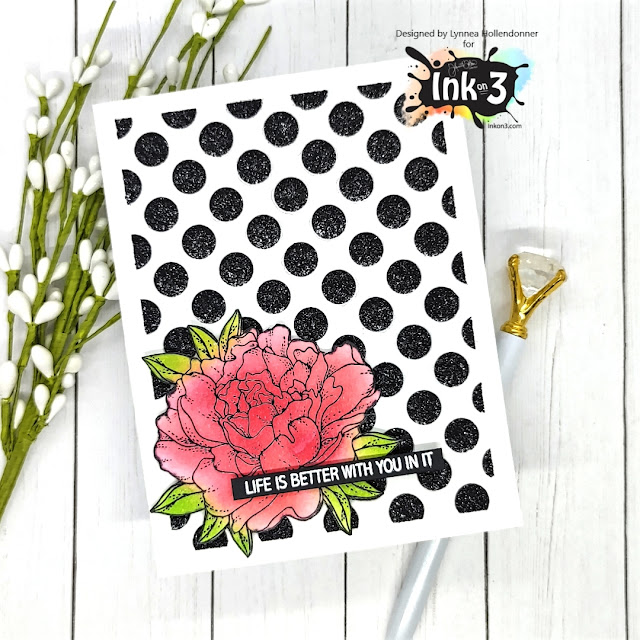
I love when small stamp sets go a long way! The Here for You Stamp Set is a mini set with the most gorgeous floral image and small sentiments. I stamped the image with Blackout Hybrid Detail Ink and heat embossed it with Crystal Clear Fine Detail Embossing Powder. I used Marilyn Red Atelier Ink and Goddess Green Atelier Inks to blend color onto the image and cut it out with my scissors. I masked off the edges of a card and added a bit of Black Glitz Glitter Gel over a polka dot stencil and popped up my flower on top.
Showing posts with label Marilyn Red Atelier Ink. Show all posts
Saturday, February 12, 2022
Coloring With Ink Blending
Ink blending with Atelier Inks is such a quick way to add color to images!
I stamped a sentiment from the Here for You Stamp Set with Juicy Watermark Embossing Ink and heat embossed it with Arctic White Fine Detail Embossing Powder. I trimmed the sentiment out into a strip and added it to the card with foam tape. That's it! Thanks for joining me!
Labels:
Atelier Ink,
Glitz Glitter Gel,
Goddess Green Atelier Ink,
Heat Embossing,
Here For You,
Lynnea Hollendonner,
Marilyn Red Atelier Ink,
process video,
stencil,
Video,
Video Tutorial,
YouTube video
Thursday, August 20, 2020
Autumn Pumpkin Patch Card
August is coming to a close ... and that means it's my time to shine! Haha! We're coming in to my FAVORITE time of the year and I'm excited to bust out the Pumpkin Patch Stamp Set from InkOn3!
I wanted to go full throttle Autumn with this card - so I started with some Autumn colored Atelier Inks - Marilyn Red, Marigold Orange, Bee Sting Yellow, and Twiggy Brown. I used Purple Tape and masked off 1/2 inch diagonal stripes and used blending brushes to add stripes of color. I love the variety of colors you can get from the Atelier Inks - particularly the Marilyn Red. I love how if you blend lightly you get a gorgeous pink, but if you really ink up your brush and add a few layers of color you get this beautiful deep red!
Once my blending was complete I decided to add some shimmer! I keep a little bit of Liquid Pixie Dust in a Small Watercolor Brush and simply painted over my ink blended stripes to add shimmer!
I stamped the pretty pumpkins from the Pumpkin Patch Stamp Set with Blackout Hybrid Detail Ink and colored them with Copic Markers. I had to include a white pumpkin - they're my FAVORITE!
I adhered the Pumpkin Patch image with foam tape on top of the ink blended stripes and trimmed off the excess. I added a stamped image from the Pumpkin Patch Stamp Set to finish the card!
I wanted to go full throttle Autumn with this card - so I started with some Autumn colored Atelier Inks - Marilyn Red, Marigold Orange, Bee Sting Yellow, and Twiggy Brown. I used Purple Tape and masked off 1/2 inch diagonal stripes and used blending brushes to add stripes of color. I love the variety of colors you can get from the Atelier Inks - particularly the Marilyn Red. I love how if you blend lightly you get a gorgeous pink, but if you really ink up your brush and add a few layers of color you get this beautiful deep red!
Once my blending was complete I decided to add some shimmer! I keep a little bit of Liquid Pixie Dust in a Small Watercolor Brush and simply painted over my ink blended stripes to add shimmer!
I stamped the pretty pumpkins from the Pumpkin Patch Stamp Set with Blackout Hybrid Detail Ink and colored them with Copic Markers. I had to include a white pumpkin - they're my FAVORITE!
I adhered the Pumpkin Patch image with foam tape on top of the ink blended stripes and trimmed off the excess. I added a stamped image from the Pumpkin Patch Stamp Set to finish the card!
Labels:
Atelier Ink,
Bee Sting Yellow Atelier Ink,
card,
Lynnea Hollendonner,
Marigold Orange Atelier Ink,
Marilyn Red Atelier Ink,
Pumpkin Patch Stamp Set,
Twiggy Brown Atelier Ink,
Video,
Video Tutorial
Monday, July 6, 2020
Stencil Watercoloring - Guest Designer Judy
Hello, it's Judy here, and I'm so happy and honored to be guest designing for Ink On 3 today. I have a fun technique for you. It's watercoloring on a stencil. Here is my card.
I began by stenciling the image from the Floral Stencil with Ink On 3 Fadeout No-Line Coloring Ink. Then I watercolored over the image.
I used Ink On 3 Atelier Inks in My Jam Purple, Peacock Blue, Goddess Green, Bee Sting Yellow, Twiggy Brown and Marilyn Red. These inks lend themselves beautifully to watercoloring. The blending and reaction with water is amazing.
Next I used the Leafy Forest Stencil on some watercolor paper to create an accent for my card. I used the Atelier Inks in My Jam Purple and Peacock Blue. Then I cut the Floral Stencil image on an angle and inserted the Leafy Forest Stencil strip between the 2 halves. The greeting is from the Dogwood Flower Stamp Set.
This is a super fun technique I hope you will try it. You can use almost any stencil, depending on whether you want a focal image or an over all background.
Until next time, here's celebrating your Creative Muse!!!
Monday, May 18, 2020
Quick & Easy Stenciled card
Hi everyone! It’s Jeannie (InsideoutJeans) on the blog today focusing on Ink on 3’s stencil set named Flora. This is a large floral and perfect to create a quick card along with the Atelier Inks.
I started out with two pieces of cardstock. For my first one and my main card panel, I used Bee Sting Yellow and Goddess Green to ink up the leafy areas. For my second piece of cardstock, I used Bee Sting Yellow for the middle of the flower, Marigold Orange for the middle part of the flower, and then Marilyn Red for the outer part of the flower. I actually quickly trimmed the floral portion out because I wanted to add dimension and pop it up. If you wanted to skip this step, you could.
For the card panel, I wanted to add color the panel so I blended some Peacock Blue on the edges. Even after this, I felt like something was still missing.
I took a scrap piece of white cardstock and blended Marilyn Red, Marigold Orange, and Bee Sting Yellow together. I then trimmed two quarter inch strips from this blended piece and added it to the top and bottom.
For my sentiment, I pulled out Lilac Dreams because there's such pretty sentiments in this stamp set. I used the Best Wishes sentiment and stamped it on black cardstock using Juicy ink. I added Arctic White embossing powder and heat set it.
This card was so simple and easy to put together. The new stencils have been so fun to work with so I hope you're enjoying them!
Thanks for stopping by today and I hope you get inspired to create. Come back again soon for more inspiration and ideas! Happy Crafting!
Thursday, January 23, 2020
Hey Gorgeous!
Hi everyone! It’s Jeannie (InsideoutJeans) on the blog today with Ink on 3’s newest stamp set debuted at Creativation called Hey Gorgeous. It's such a pretty stamp set that speaks to me! The main image from this set is obviously this gorgeous girl, which I decided to no-line color using Fadeout ink with copic markers.
There's no coordinating dies for this set but it's large enough for me to fussy cut quite easily. Then I had to figure out what to do with it. I pulled out the Atelier inks to help me create a fun background. First, I used three Atelier re-inkers to watercolor a card panel. I used Marilyn Red, Marigold Orange, and Bee Sting Yellow.
Once the watercolored panel was created, I splattered water all over since these inks are water-reactive. I also splattered some of the ink using all three colors: Marilyn Red, Marigold Orange, and Bee Sting Yellow.
To finish off the background, I stamped out the floral images randomly using the Marilyn Red ink pad.
For the sentiment, I stamped Hey Gorgeous using Blackout ink. I just quickly fussy cut out the larger sentiment and added the "hey" using a strip.
I'm loving how this all came together and I'm so excited to use these inks more! They are so versatile and fun. Have you tried them?
Thanks for stopping by today and I hope you get inspired to create. Come back again soon for more inspiration and ideas! Happy Crafting!
- Jeannie
Thursday, January 16, 2020
Quick But Bright You're Special card with Erica
Hi guys!
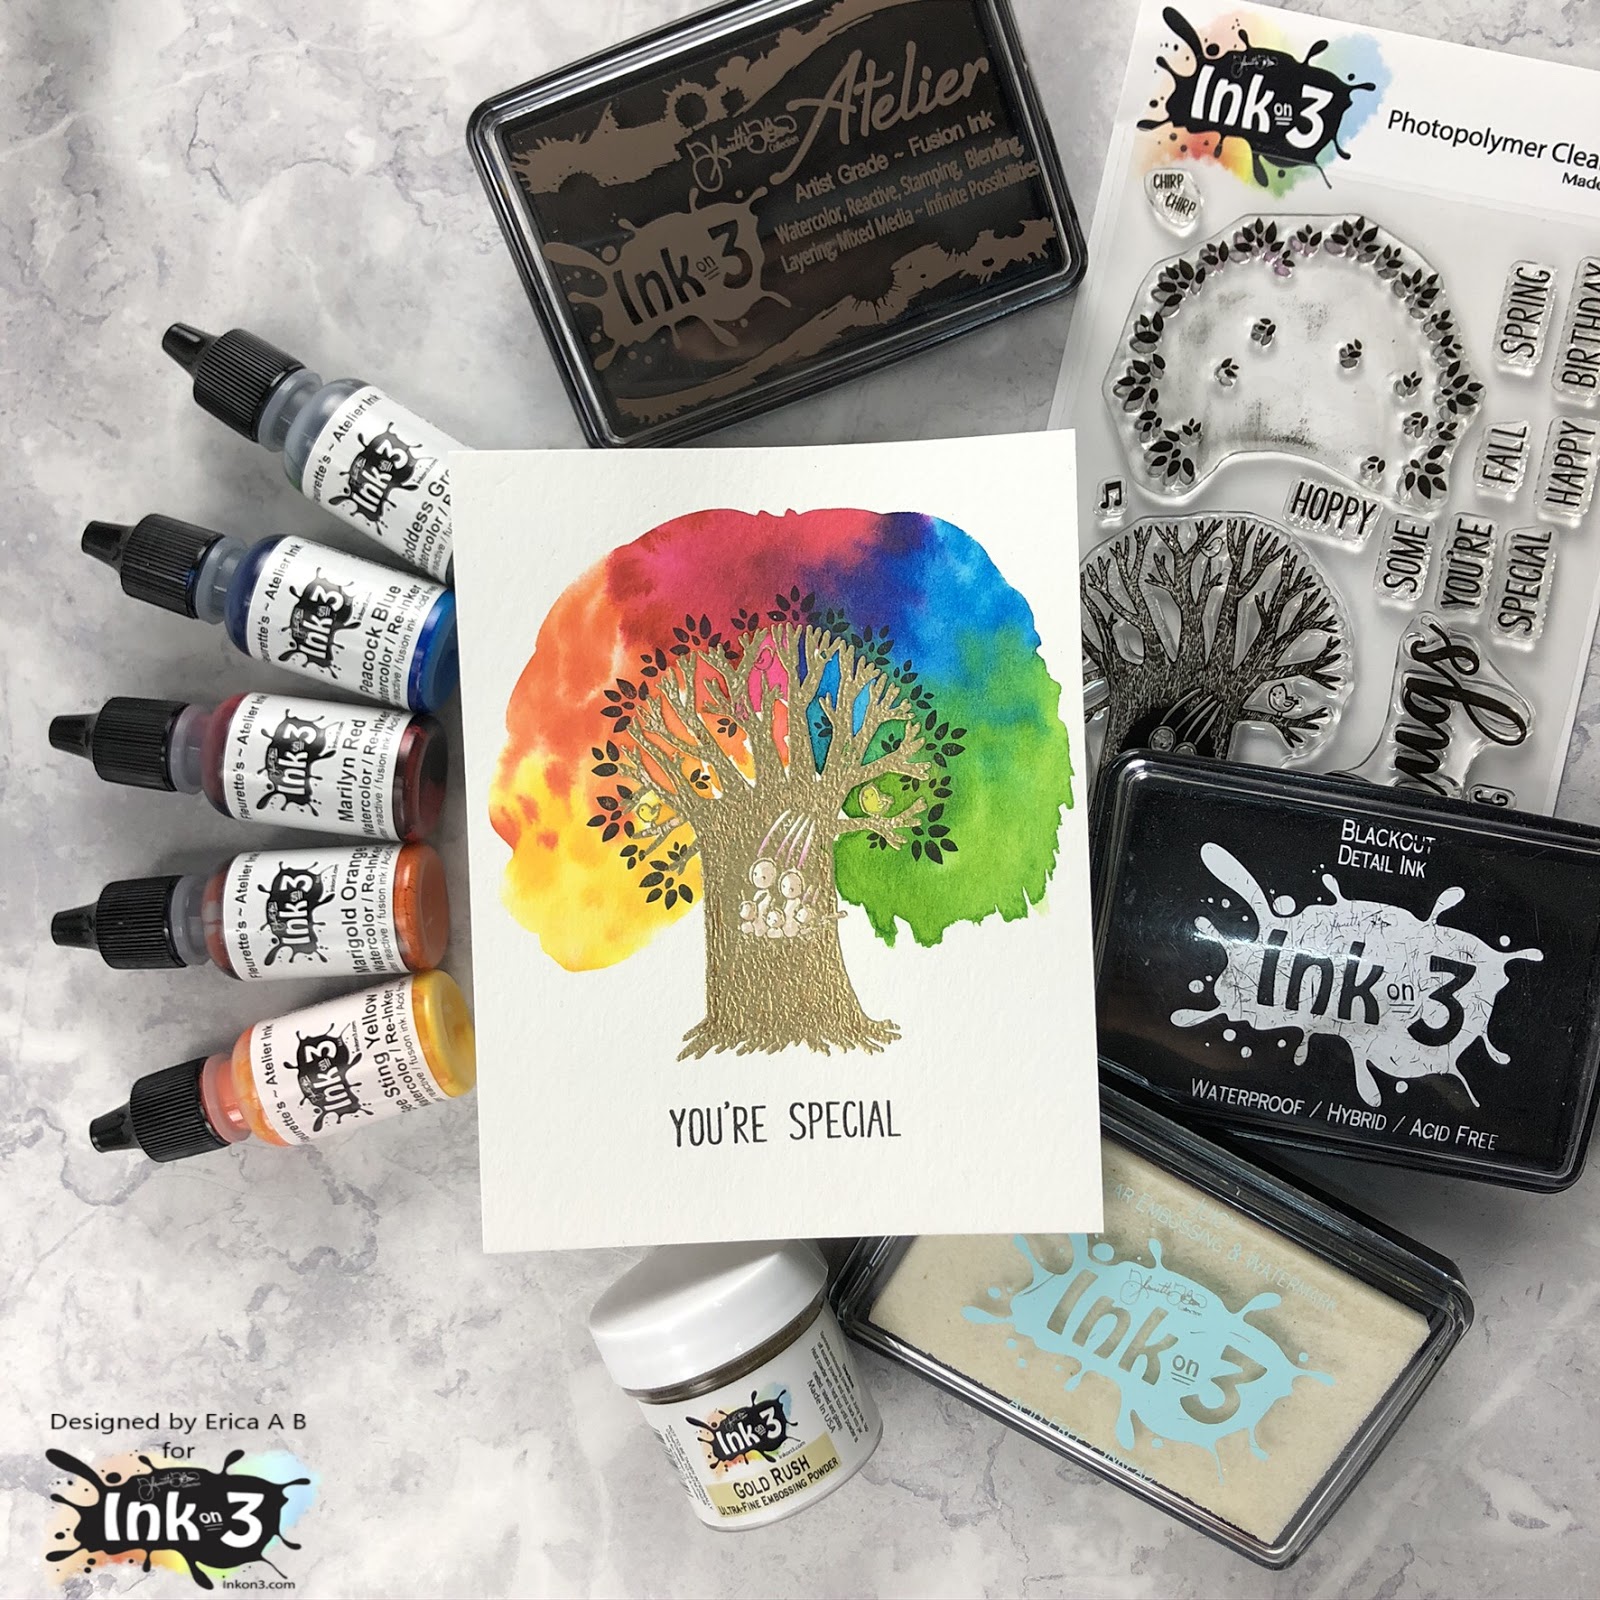
Erica back on the Inkon3 blog today with a quick but very bright card! I have used a new-to-me stamp set, Bunny Hugs, and I used the Atelier Inks to add colour.
To start with, I heat embossed the tree trunk in Gold Rush embossing powder. I used the Juicy pad to stamp it up before sprinkling the embossing powder very generously over the panel. This is water colour paper, Canson XL, that's been cut down to 4.25"x5.5".
After adding some colour to the actual tree trunk, with the help of the Twiggy Brown ink pad as I don't have the re-inker yet, I got the canopy part of the tree very wet and added colour to it by dabbing a paint brush filled with ink in it. Doing it this way, I feel, adds a bit of texture and you get that lovely natural spreading of the colour.
From left to right I have used Bee Sting Yellow, Marigold Orange, Marilyn Red, Peacock Blue and Goddess Green.
To make sure the canopy was dry, before I stamped up the leaves, I used my heat gun on the panel to set the colours. With the help of the MISTI, I then stamped the leaves with Blackout Ink until they were nice and solid. I also added a sentiment 'You're Special' from the Bunny Hugs set, under the tree.
I love a bit of heat embossing and a splash of colour for a quick card! What do you think?
If you are in the Phoenix area this weekend, Jan 18-20th, and are attending Creativation, make sure to stop by the Inkon3 and the Picket Fence Studios booths as I, and the rest of the teams, will be demoing the Atelier inks there! You will get to see these in action and try them out for yourself too!
Thanks for stopping by today, I hope you found this inspiring and will give it a go yourself. Oh, I made a video too! It's over on my YouTube channel if you wanted to have a look.
Lots of love and happy crafting from Erica
PS If you do attend Creativation, make sure to some up and say hello!
Erica back on the Inkon3 blog today with a quick but very bright card! I have used a new-to-me stamp set, Bunny Hugs, and I used the Atelier Inks to add colour.
To start with, I heat embossed the tree trunk in Gold Rush embossing powder. I used the Juicy pad to stamp it up before sprinkling the embossing powder very generously over the panel. This is water colour paper, Canson XL, that's been cut down to 4.25"x5.5".
After adding some colour to the actual tree trunk, with the help of the Twiggy Brown ink pad as I don't have the re-inker yet, I got the canopy part of the tree very wet and added colour to it by dabbing a paint brush filled with ink in it. Doing it this way, I feel, adds a bit of texture and you get that lovely natural spreading of the colour.
From left to right I have used Bee Sting Yellow, Marigold Orange, Marilyn Red, Peacock Blue and Goddess Green.
To make sure the canopy was dry, before I stamped up the leaves, I used my heat gun on the panel to set the colours. With the help of the MISTI, I then stamped the leaves with Blackout Ink until they were nice and solid. I also added a sentiment 'You're Special' from the Bunny Hugs set, under the tree.
I love a bit of heat embossing and a splash of colour for a quick card! What do you think?
If you are in the Phoenix area this weekend, Jan 18-20th, and are attending Creativation, make sure to stop by the Inkon3 and the Picket Fence Studios booths as I, and the rest of the teams, will be demoing the Atelier inks there! You will get to see these in action and try them out for yourself too!
Thanks for stopping by today, I hope you found this inspiring and will give it a go yourself. Oh, I made a video too! It's over on my YouTube channel if you wanted to have a look.
Lots of love and happy crafting from Erica
PS If you do attend Creativation, make sure to some up and say hello!
Saturday, November 9, 2019
Atelier Inks & Big Bold Magnolias
Hi everyone! It’s Jeannie (InsideoutJeans) on the blog today with featuring Ink on 3's new Atelier inks! The card I'm featuring today was entirely colored using the new Atelier inks plus the beloved Blackout hybrid ink.
Here's a little summary of the inks and what they can do:
- Artist Grade Quality
- Specialty, Water Reactive, Fusion Ink, Acid-free and archival
- Water coloring (remains bright even after dry)
- Stamping, Blending, Embossing
- Color Layering
- Artistic, Bright, Crisp Impressions,
- Alcohol / Copic Marker friendly (air dry or heat set)
- Full coverage on solid stamp images
- Fun effects - After inking surface, spritz with water.
- Buttery Smooth - Create beautiful blended backgrounds, using a blending tool or brush.
- Blend over stencils.
- Works on most paper surfaces.
For my card today, I'm using the inks alongside the Big Bold Magnolias stamp set, which were stamped out using Blackout hybrid ink. I'm only using THREE colors to color up this entire card: Marilyn Red, Bee Sting Yellow, and Goddess Green. I decided to use the re-inkers because I wanted to watercolor.
I started off with the background and painted an ombre using Marilyn Red and Bee Sting Yellow. The two colors blended together to create a smooth ombre look without any grittiness or chalkiness. I was especially shocked by how vibrant the yellow was!
Next, I went ahead and used the three colors (Marilyn Red, Bee Sting Yellow, and Goddess Green) to color in the floral images. I'm definitely not a pro at watercoloring, but these were really easy to use.I found that the lack of water spots really played a role in these inks. I have a tendency to end up with random spots that dried but the inks were super forgiving.
I wanted to use a sentiment from the Heels to You stamp set. For the die cut words, I actually used the Bee Sting ink pad and covered a piece of white cardstock and then die cut the words "Beautiful" and "Friend" from the Heels to You coordinating die set. You can really see the vibrancy of the yellow from the ink pad!
I added a few embellishments to the card and that finished up the card. I'm loving how I can use the same medium to color up an entire card. Have you checked out the inks yet? My first impression is that they are pretty amazing!
If you want to see them in action, head over to the Inkon3 YouTube channel.
Thanks for stopping by! Come back again soon for some more inspiration and ideas! Happy Crafting!
Subscribe to:
Posts (Atom)