Hi guys!
Apologies for the confusing headline, I was trying to be a bit clever and funny. Not the best idea on a day when you are tired, possibly on a delayed sugar-high and too full. Technically these cards are coloured, BUT only the backgrounds. The images themselves are not but oh well, I hope you will forgive me when you see how easy these cards are.
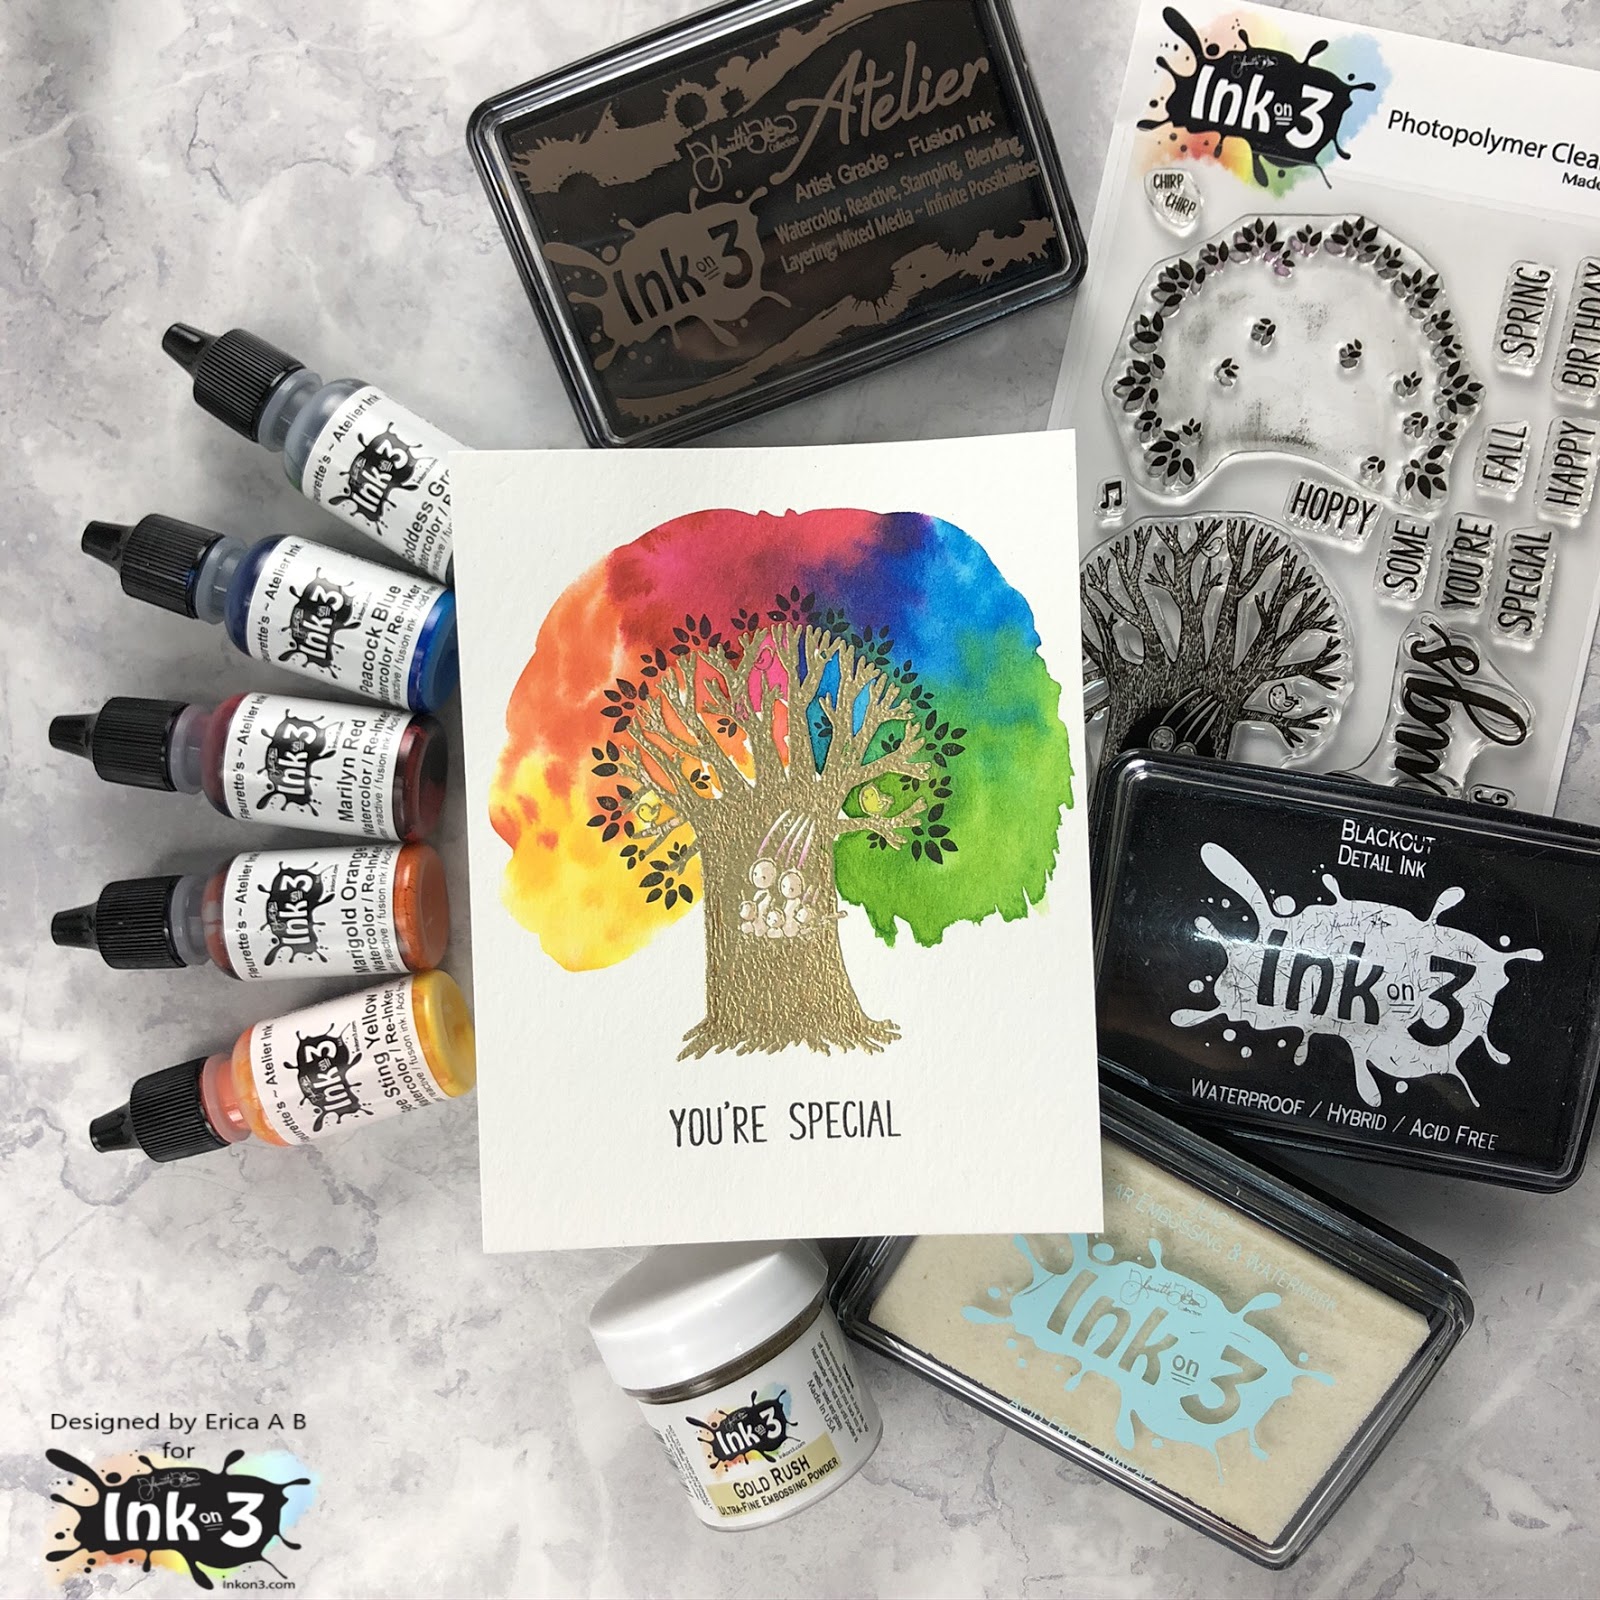
I started out by watercolouring some background panels with the Atelier Ink re-inkers. A bit too late I had a super brilliant idea (I’m totally tooting my own horn here but I can’t believe I didn’t think of it sooner!) I have dripped ink into a plastic palette and I use these for water colouring but it’s getting to the point where I’m running a bit low. Instead of adding more re-inker to the colours, I added Liquid Pixie Dust to the remains of the colours! This makes the colours shimmery without contaminating the colours on the paper, which is where I got the idea from. On my first two panels, the Liquid Pixie Dust smeared the colours a bit and I had to be very careful how I added it. With the Liquid Pixie Dust already mixed into the colours, you don’t have to worry! How brilliant is that??
The colours I used are Bee Sting Yellow, Goddess Green, Peacock Blue, My Jam Purple. Marilyn Red and Marigold Orange. With the backgrounds done, it was time to start thinking about the rest of the card making.
One of my favourite stamp sets from InkOn3 is the Magical Unicorn and I decided to use this one yet again. I also grabbed the Oh Deer set and heat embossed these on vellum with Gold Rush and Chrome embossing powders. First I used a anti-static tool on my pieces of vellum, and the images are stamped with the Juicy pad.
After they were heat embossed, I used the coordinating Magical Unicorn and Oh Deer diecuts to cut them out. I also stamped up some sentiments and heat embossed these too.
At first I did them all in Gold Rush, but then when it came time to put the cards together I decided to redo the sentiment for the Chrome Unicorn also in Chrome. This time I did it on turquoise card stock, instead of white.
The vellum images are adhered with a vellum adheisive. It works relatively well, but oh man, it is a pain in the bee-hind to work with. The sentiment strips are adhered with liquid glue and with that, the cards are done!
I made a video for this post too, you can find that over on my YouTube channel.
Thanks for stopping by today!
Lots of love and happy crafting from Erica
Showing posts with label heatembossing. Show all posts
Sunday, February 16, 2020
Thursday, January 16, 2020
Quick But Bright You're Special card with Erica
Hi guys!
Erica back on the Inkon3 blog today with a quick but very bright card! I have used a new-to-me stamp set, Bunny Hugs, and I used the Atelier Inks to add colour.
To start with, I heat embossed the tree trunk in Gold Rush embossing powder. I used the Juicy pad to stamp it up before sprinkling the embossing powder very generously over the panel. This is water colour paper, Canson XL, that's been cut down to 4.25"x5.5".
After adding some colour to the actual tree trunk, with the help of the Twiggy Brown ink pad as I don't have the re-inker yet, I got the canopy part of the tree very wet and added colour to it by dabbing a paint brush filled with ink in it. Doing it this way, I feel, adds a bit of texture and you get that lovely natural spreading of the colour.
From left to right I have used Bee Sting Yellow, Marigold Orange, Marilyn Red, Peacock Blue and Goddess Green.
To make sure the canopy was dry, before I stamped up the leaves, I used my heat gun on the panel to set the colours. With the help of the MISTI, I then stamped the leaves with Blackout Ink until they were nice and solid. I also added a sentiment 'You're Special' from the Bunny Hugs set, under the tree.
I love a bit of heat embossing and a splash of colour for a quick card! What do you think?
If you are in the Phoenix area this weekend, Jan 18-20th, and are attending Creativation, make sure to stop by the Inkon3 and the Picket Fence Studios booths as I, and the rest of the teams, will be demoing the Atelier inks there! You will get to see these in action and try them out for yourself too!
Thanks for stopping by today, I hope you found this inspiring and will give it a go yourself. Oh, I made a video too! It's over on my YouTube channel if you wanted to have a look.
Lots of love and happy crafting from Erica
PS If you do attend Creativation, make sure to some up and say hello!
Monday, December 23, 2019
Atelier Ink Magical Unicorn card with Erica
Hi guys!
Erica here on the InkOn3 blog with another Magical Unicorn card. I can't help it, I love that stamp! To check out my no-line colouring card, click HERE. There is also a YouTube video for that card HERE.
For this card I have created a very colourful background by ink blending all the Atelier Inks, except Paint It Black and Twiggy Brown. I used a stencil and the Life Changing Blender Brushes from Picket Fence Studios. The stencil is called Basket Weave.
I started out by adhering the stencil to a panel of Bristol Vellum paper. It was still a little bit tacky from the Pixie Spray I had used during another crafting session, but I secured it with some purple tape at the top and bottom just to be on the safe side. Then I blended the colours in a rainbow look, from bottom to top it's Bee Sting Yellow, Marigold Orange, Marilyn Red, My Purple Jam, Peacock Blue and Goddness Green. I added the Goddess Green over the blue thinking it would go turquoise but it went a dark teal instead. Because I wanted some green on the panel as well, I added a little bit of Goddess Green to the bottom of the yellow.
I trimmed this panel down to 5"x4.25" and this was adhered to a white card base. The reason I trimmed it shorter than the height of the card base was to give it a while border at the top and the bottom.
The Magical Unicorn I heat embossed by stamping up the image with Juicy Ink and sprinkling Chrome Embossing powder on it. Once set, it was ready to be coloured. I did some loose water colouring using the Atelier ink re-inkers and lots of water. To add sparkle I used a little bit of Paint It Black re-inker and Liquid Pixie Dust to colour in the actual head of the unicorn.
On a piece of white card stock I stamped up the sentiment 'Hugs, Kisses and Unicorn Wishes' with Blackout detail ink. This was trimmed down to a slim strip and adhered to the card with liquid adhesive. As was the unicorn itself once it was cut out using the coordinating diecut.
I wanted to add some sequins to it as well but managed to rein myself in, as it already has a lot going on. Look at that, I am making progress with my sequin addiction!! LOL!
That's it from me for today blog-wise but if you want to watch the whole card making shenanigan routine I call crafting, hop on over to YouTube for a video.
Thanks for stopping by, I hope you found some inspiration here with me today.
Lots of love and happy crafting from Erica
Wednesday, September 18, 2019
Bright Magical Unicorn No-Line colouring with Erica
Hi everyone! *waves excitedly*
Erica here with my first blog post on the Inkon3 blog as part of the design team! I’m so, so excited about working for this fab company. I’ve been such a fan of Fleurette’s magical Fadeout No Line Coloring ink since I first got my hands on it and to be asked to join the Inkon3 DT was a dream come true.
Right, I’m going to dive right in with the details of my card for today’s post! I’ve used the Magical Unicorn stamp set, paired with Fadeout ink and Zig Clean Color markers to create a bright and sparkly unicorn.
To start with, I stamped up the image with the help of my Mini MISTI. I use the MISTI whenever I stamp anything, just in case I feel it needs another stamp or two. To make sure I could really see the outlines of this stamp, I stamped it three times with the Fadeout ink.
Then it was colouring time! As I wanted a bright and vivid look, I added hardly any water to the Zig’s. Especially on the mane-bit. I did have to use some on the ears and the face and body, but that’s one of the brilliant things of the Zigs. You can get so many different looks just by adding water or just blending them without any water at all.
As the mane is so bright and colourful, I decided to keep the flowers all white and only add Liquid Pixie Dust to them. This is some serious sparkly stuff! If you are looking for something that will add sparkled to your projects, don’t look any further!
I used the dropper to get a couple of drops out, I use a tile as a palette as it’s easy to clean off, and then used the medium water colour brush to fill in the flowers. Once throughly covered I set this aside to dry to overnight to avoid any colours or Pixie Dust to get where it’s not supposed to. I’m over-cautious after having had one too many projects ruined by smudging ink, colour or something else because it wasn’t fully dry.
Coming back to the card the next day, I settled on a sentiment and heat embossed that with Chrome Ultra Fine embossing powder. Before I did anything embossing wise, I used my anti-static tool all over the image, except over the Pixie Dust flowers. I figured if a few stray silver bits went on them it would only make them more sparkly.
With the help of my Mini MISTI again, I stamped up the sentiment ‘Hugs, Kisses and Unicorn Wishes’ with Embossing ink and then sprinkled the embossing powder over it. A quick swish with the heat gun and a card base later, the card was done!
I have a video of the colouring coming to my YouTube channel soon, so keep your eyes peeled if you want to see how I coloured the Magical Unicorn.
That’s it from me this time. Thanks for stopping by and I hope you have found some inspiration here today! See you soon again!
Lots of love and happy crafting from Erica
Click here Click here Click here Click here Click here Click here Click here Click here
Subscribe to:
Posts (Atom)


