Showing posts with label Marigold Orange Atelier. Show all posts

Tuesday, January 26, 2021

Thinking Of You, BeYOUtiful!

  Hi and Happy 2021! 

It’s Erica back on the Ink On 3 blog, for the first time in 2021. It’s been a bit of a rough start to the year to be honest, so I decided to make a ‘thinking of you’ card, as I figured I am not the only one who’s feeling like 2021 is saying ‘hold my beer’.

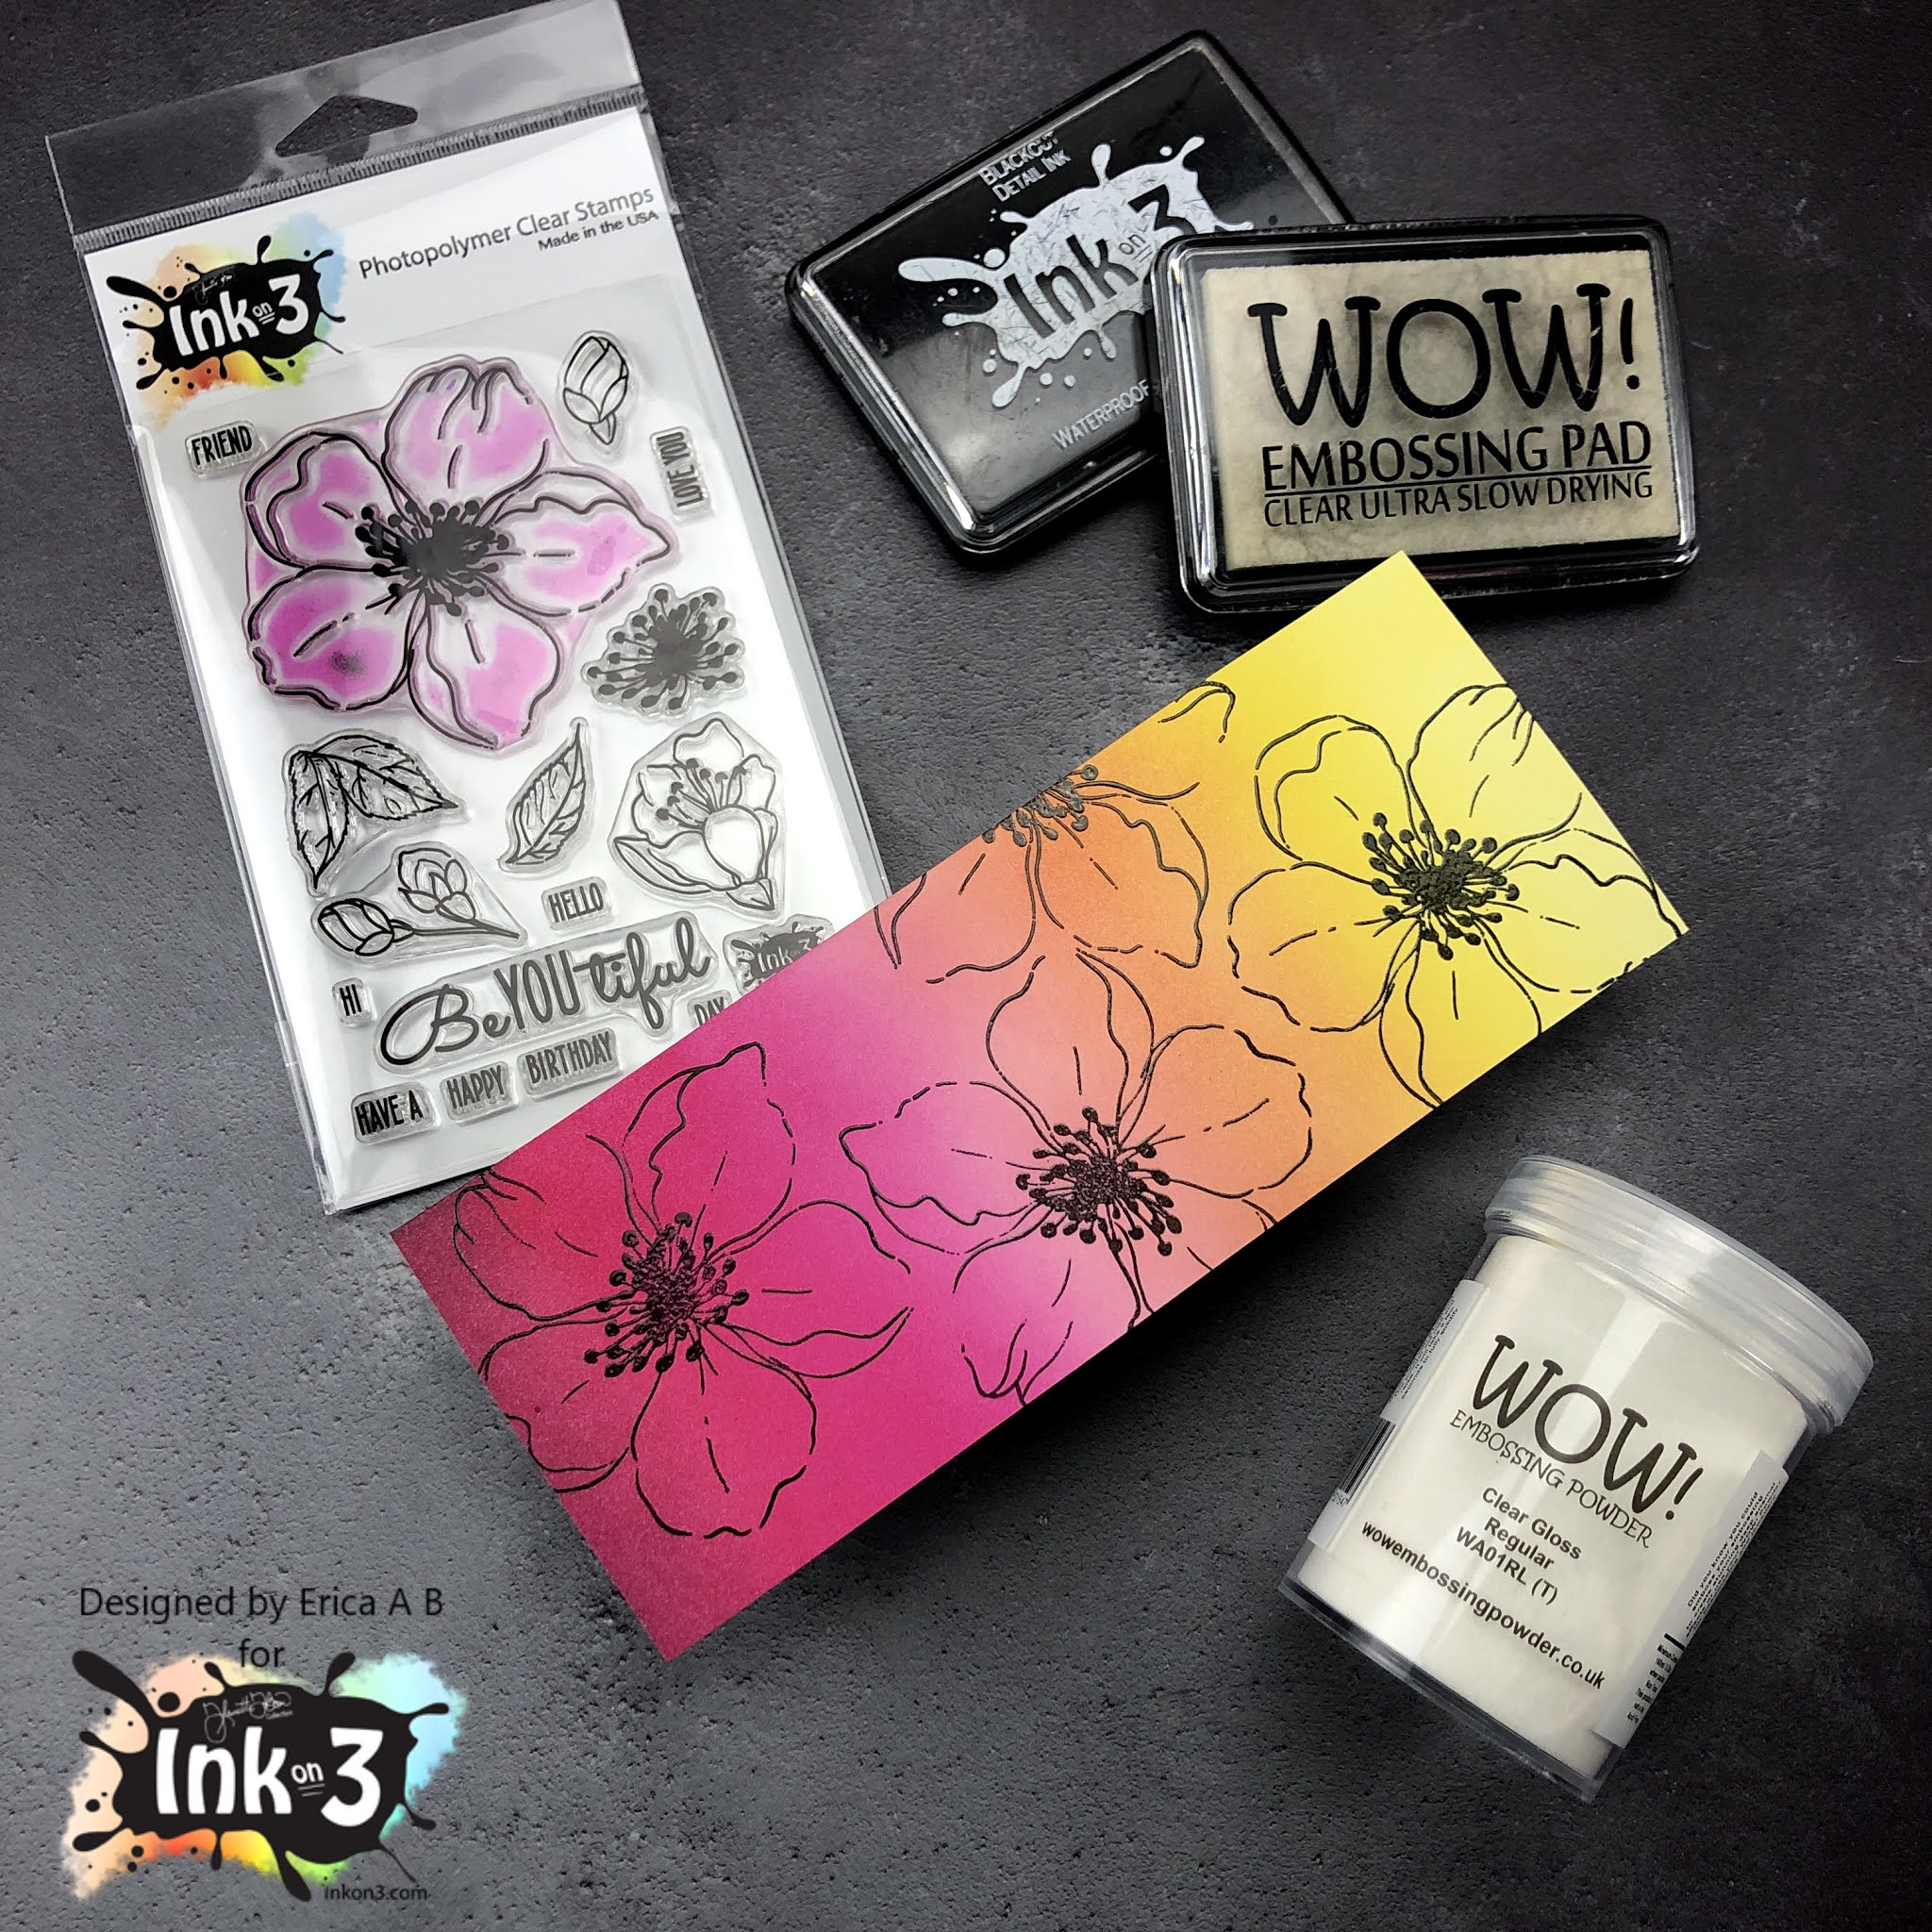
First off I did some ink blending with the goooooorgeou Atelier inks in Bee Sting Yellow, Marigold Orange, Sweet Petunia Pink and Marilyn Red using Life Changing Blender Brushes on Bristol Smooth paper. This combo has become quite a fave of mine for a variety of reasons, the main one being that it’s absolutely beautiful. I love it! 


These panels are actually one big piece that I cut up after ink blending over the whole thing. I love ink blending, and it’s always good to have some background panels done for when you need to make a card quickly! 


On the slightly smaller panel, I stamped up the big flower from the BeYOUtiful set with Blackout Detail ink and then Embossing ink. On top of these I sprinkled Clear Gloss embossing powder and set that with the heat gun. I did use a MISTI for the stamping to make sure the flower images were really solid. 

This panel I then layered up with the other one, but in different colour order. The reason I did this was to create some contrast and interest. 


To finish off this card I ended up using a diecut from Hero Arts that says Thinking Of You. I cut it out of white card stock three times, and then a fourth time in black card stock, and I layered these up to give the card some dimension. On top of this I heat embossed it with clear gloss embossing powder to give it a puffy sticker look. 


This word die I then glued down on the card with liquid glue and with that, the card was done. I contemplated adding some black gem stones or sequins, but if you can believe it, I decided against it. *GASP* I know.. 


That’s it from me for today! I hope you were inspired by this post, and will try this design for yourself. 


Lot of love and happy crafting from Erica


Monday, June 15, 2020

Making Your Own Patterned Paper with Erica

Hi guys!

It's Erica back on the Ink On 3 blog today. Sadly due to some unforeseen circumstances, cough cough (covid-19) I have not had the latest release yet. I was holding out and holding out as we sporadically get mail here in Spain still, but no luck.

Instead I've grabbed my beloved Magical Unicorn stamp set again BUT don't roll your eyes and groan "oh man, she ALWAYS use that one". I mean, I do, I love it. However, for these I have used some of the smaller images and made my own patterned paper with the help of the Atelier inks!


I do love a nice patterned paper but have a terrible habit of hoarding it instead of using it. It's madness, really. So, I decided to make my own so I can make as many as I want, whenever I want!

I lined up my Atelier inks in the order I wanted to use them: Bee Sting Yellow, Marigold Orange, Marilyn Red, My Jam Purple, Peacock Blue and Goddess Green. The photo below is from when I was swatching the inks.


On my first panel, I used two of the star stamps and just placed them close together on an acrylic block. Then I stamped from one corner to the opposite one, at an angle, one colour to the next. On the second panel I did them straight across.


I probably added a little bit too much yellow at the top of this one, which lead to not a lot of green at the opposite corner. But oh well, you live and learn.


For the second panel, I used only the clustered stars stamp and stamped horizontally. For more even colour, it would probably be smarter to do the middle line first and then work your way out. If you aren't bothered about that, just stamp away.


I love how these turned out. So fun!

To finish these off, I stamped up 'hugs' in Blackout Detail Ink, with the help of my MISTI. The 'hugs' is from the Bunny Hugs stamp set. When that was dry, I added these to white card bases. It was so tempting to add a little something else, but I wasn't sure exactly what so in the end I decided to keep them as they were. I know, shocker!


Thanks for stopping by today. I hope you have found some inspiration here today and will look at your stamps with new eyes and step outside the box with me.

Lots of love and happy crafting from Erica

Saturday, April 18, 2020

Planning with Fox & Bunny and other new Inkon3 goodies!

Inkon3 sneaked in some new products and they're pretty awesome! I'll show you how I used the adorable new Fox and Bunny stamps, and the new Leafy Forest Stencil in my planner!
  

First I masked around the rectangle on the bottom of my planner pages and applied Atelier Ink Bee Sting Yellow with a blending tool. Leaving the mask on, overlay the Leafy Forest Stencil over the yellow rectangle and stencil in the leaf pattern using the Atelier Ink Marigold Orange.

On the left page of my planner, I masked around the left-most rectangle, and applied the Marigold Orange Atelier Ink with a blending tool. Then I stamped the month onto the orange background.


Next, I stamped the large image from the Fox & Bunny Hugs Clear stamp set, and the small Fox & Bunny from the Forever Friends Clear Stamp set onto sticker paper. I fussy cut the images and then colored it in with copic markers. Then I adhered the stamps as shown in the pictures above.


Lastly, I used the leaf silhouette stamp and then three dots from the Forever Friends Clear Stamp set to add some accents around the little Fox curled up with the bunny.

Copic Colors Used:
Fox (Oranges): YR68, Y38, Y35, Y32
Fox (White): W1, W0, W000
Bunny: E53, E51, E50, E000

Inkon 3 Products Used:

Friday, March 27, 2020

Fun Biker Bunny Planner Notes Page

Hello Crafty Friends! I hope everyone is safe and healthy! It's Cheryl with the Inkon3 Creative Team here to show you how to make your notes pages in your planner super cute and fun! I love decorative notes pages, but when I buy them, sometimes I don't like being stuck with just one or two designs for all of my notes. SO I thought, how about taking a plain planner page and make it fun with stamps! 


 First I masked out a section of the page using post-it notes and then used orange distress oxide ink to make an orange rectangle. Then I stamped one of the bunnies and accessories from the Biker Bunnies Clear Stamp set using the Atelier Inks Marigold Orange onto the orange background.

Then I used a light blue distress ink to create a blue background on the bottom of the page. I stenciled in some rays using a slightly darker blue ink. 


Next, I used the Phat Alphanumeric Clear Stamp Set and Blackout Hybrid Detail ink to stamp out the word "NOTES" onto sticker paper. I also stamped out the motorcycle and the Biker Bunny that's sitting from the Biker Bunnies Clear Stamp Set onto sticker paper. I fussy cut the images and then colored them in with alcohol markers. 

Lastly, place the stamped images or "stickers" onto the planner page, and there you have it! A super fun Notes pages that you're going to love to keep open on your desk!


Products Used: 

Thursday, January 16, 2020

Quick But Bright You're Special card with Erica

Hi guys!

Erica back on the Inkon3 blog today with a quick but very bright card! I have used a new-to-me stamp set, Bunny Hugs, and I used the Atelier Inks to add colour.


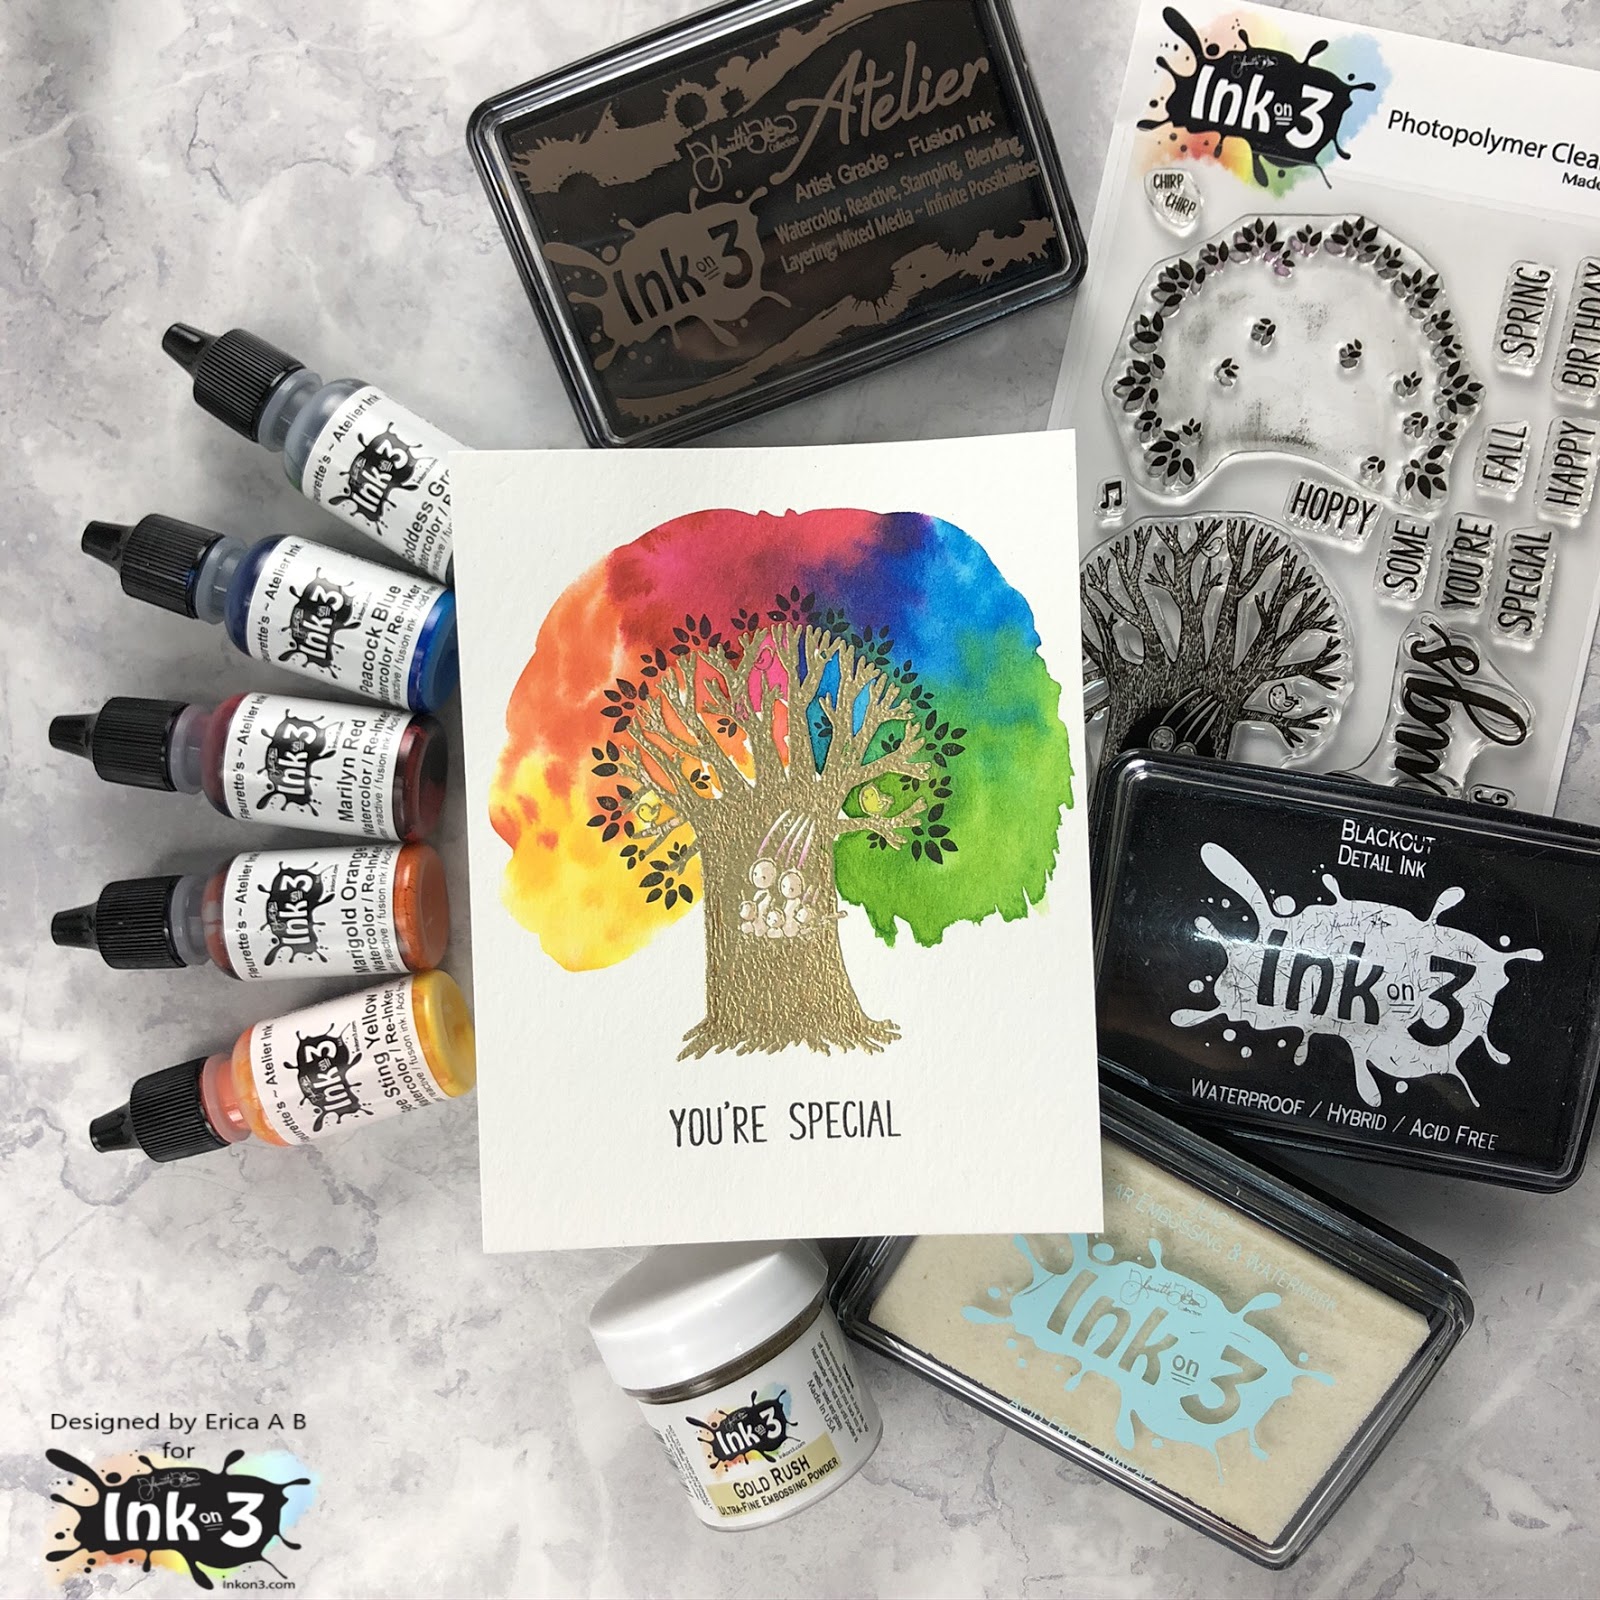
To start with, I heat embossed the tree trunk in Gold Rush embossing powder. I used the Juicy pad to stamp it up before sprinkling the embossing powder very generously over the panel. This is water colour paper, Canson XL, that's been cut down to 4.25"x5.5".


After adding some colour to the actual tree trunk, with the help of the Twiggy Brown ink pad as I don't have the re-inker yet, I got the canopy part of the tree very wet and added colour to it by dabbing a paint brush filled with ink in it. Doing it this way, I feel, adds a bit of texture and you get that lovely natural spreading of the colour.

From left to right I have used Bee Sting Yellow, Marigold Orange, Marilyn Red, Peacock Blue and Goddess Green.


To make sure the canopy was dry, before I stamped up the leaves, I used my heat gun on the panel to set the colours. With the help of the MISTI, I then stamped the leaves with Blackout Ink until they were nice and solid. I also added a sentiment 'You're Special' from the Bunny Hugs set, under the tree.

I love a bit of heat embossing and a splash of colour for a quick card! What do you think?


If you are in the Phoenix area this weekend, Jan 18-20th, and are attending Creativation, make sure to stop by the Inkon3 and the Picket Fence Studios booths as I, and the rest of the teams, will be demoing the Atelier inks there! You will get to see these in action and try them out for yourself too!

Thanks for stopping by today, I hope you found this inspiring and will give it a go yourself. Oh, I made a video too! It's over on my YouTube channel if you wanted to have a look.

Lots of love and happy crafting from Erica

PS If you do attend Creativation, make sure to some up and say hello!


Monday, November 18, 2019

Atelier Inks water colour backgrounds with Erica

Hi guys!

Today I have three cards to share with you. All of these are made with the re-inkers of the Atelier Inks, and I have used them as water colours, to create rainbow backgrounds.

These cards are a slightly different size, they are 6.5”x3.5”, so slimmer and longer than my usual card size. I thought this size might work better for the look I was after and I do like how they turned out!

The re-inkers I used are Peacock Blue, Goddess Green, Bee Sting Yellow, Marigold Orange and Marilyn Red. I used a palette tray and dropped a bit of each colour into a separate space to keep them from getting contaminated. After taping down each panel, I used a big paint brush and clean water to prep it. Once wet, I swished some colour into the wetness on the panel. Each colour had their own paintbrush for this too, again to avoid colour contamination.


Each panel was done slightly differently, and the one I thought I would like the least, is the one I ended up loving them most. Isn’t that funny? When I was doing it, I was thinking to myself ‘oh well, at least I’m having fun but this is not going to turn out very good’. Little did I know!

When the panels were all dry, I decided to use the ‘Thanks’ word diecut from the Pumpkin Patch coordinating diecut set. However, I wanted each card to be just a little bit different. On one panel I used the diecut directly, then added some height to these by layering two more cut of out white card stock.


As a final flourish I added Liquid Pixie Dust to the letters for sparkle.


Another one had grey and gold ‘Thanks’ cut out and layered up, slightly off-centre.


These were adhered to the card to make it relatively flat. The grey behind the gold highlights it beautifully, without the harshness black would have added. I tried, and it didn’t look quite right.


On the last one I used the diecut on five coloured pieces of card stock, similar to the ones on the panel, and layered these up. The effect is a rainbow when you look closely.


To make these stand out a bit more I added a final layer of black ‘Thanks’ on top.


I also have a video up on my YouTube channel showing the process if you want to see the whole thing in action.

Thanks for stopping by today, I hope you have enjoyed this post (and video if you watch that) If you are wondering whether to get these inks or not, I’m in the Yes camp for sure. I adore the colours and as you can see, the re-inkers works beautifully as water colours amongst other things!

Lots of love and happy crafting from Erica


Tuesday, November 12, 2019

Atelier Sand Dollar Tutorial

Hello my fabulous friends! 
It's Kassi here today!

I grew up hiking the mountains and and playing in the sands of Utah. It's a beautiful place, with lots natural diversity from the snow covered ski slopes in the north to Zion and Arches National Parks in the south.  And while I spent my summers boating on Lake Powell,  I was 17 years old before I saw an ocean for the first time. 

When I was in my mid 20's, I was able to spend some time touring the beaches, forests, and waterfalls of Oregon and Washington State with my parents and my camera... and I fell in LOVE.  I ended up moving to a rural town with beautiful ocean beaches less than an hour drive away. The beach is one of my happy places! 

The first year after moving near the ocean, I collected a bunch of sand dollars and made Christmas ornaments to send to my family.... and I've been altering sand dollars ever since!

Want to learn how? I promise, it's easy!


Paper: tissue paper
Stamps: Inkon3 Big Bold Magnolias
Ink: Inkon3 Blackout
Coloring: Inkon3 Atelier Watercolor Inks
Other: glitter, ribbon, twine, sand dollar

Let's get started!


Step 1: Stamp your image onto some white tissue paper (you know, that really thin, cheap paper you stuff in gift bags to make them look fancy) using Blackout ink. I suggest putting a scrap piece of paper under the tissue paper... The ink will bleed through, and you want something to absorb it so it doesn't smear anywhere. I also suggest using the MISTI since trying to stamp on thin tissue paper can be tricky. I'm using one of the flowers from Big Bold Magnolias set.

(yes, I know, I usually go with Fadeout and no line coloring... but because of the nature of this paper, lines are just better)


Step 2: Create a watercolor palette by smooshing various Atelier ink pads onto a non-porous surface (I'm using a piece of glass).  

Usually I use alcohol based markers to color on tissue paper, but I wanted to see if the new Atelier inks would work for this.
 What can I say... I like experimenting and seeing just how far I can stretch a product!


Step 3: CAREFULLY color your image by picking up some color using a damp paint and applying it to your image. Tissue paper is VERY thin, and NOT designed to be used with watercolors, so you don't want to over work things, or you might end up tearing it. This is why we want dark lines... It's really hard get any kind of detail or definition on paper that isn't meant to get wet. 


Note: You may have noticed that the blue on my palette is not the same blue as my flower. The Peacock Blue straight from the pad is a bright blue, and not what I wanted for this flower... However, just like other watercolor mediums, you can MIX colors to create new colors!

The swatch labeled "B" is what the blue ink looks like. The "B+o" is the blue with a LITTLE orange.  To get the "B+O", I added a bit more orange to the B+o.   The muted "G+r" is the green ink with a LITTLE red.  Currently there are only 8 colors in the Atelier line.. but you can get countless other colors by mixing! 


Step 4: Fussy cut. You can use the coordinating die if you want, but the more excess paper you have, the harder it is to hide. The idea is to make it look like the tissue paper isn't even there when we are done.. so I prefer fussy cutting. 


Step 5: Prep your sand dollar. If you are using a sand dollar you have picked up off the beach, you are going to want to wash it really well, and get all the sand out. Then let it dry COMPLETELY. If it hasn't sat on the beach long enough to bleach white, you can soak it in a mix of water and bleach for an hour or so, then rinse it in clean water and let it dry in the sun.

If you don't live near a beach, you can often find sand dollars in craft store, or online. 

Some types of sand dollars naturally have holes in them... Mine don't, so I use a hand drill to carefully drill a hole... Sand dollars are soft, and do best if you are gentle with them.


Step 6: Paint a layer of Mod Podge (or other decoupage glue) on the surface of the sand dollar, and quickly lay your image on it. The sand dollar will absorb the glue quickly, so work fast... if areas dry before they adhere to the paper, carefully lift the paper up a bit and get some glue under it and smooth the paper back down.. you want a good seal under the image and around all the edges. 

Once you have it glued on, gently cover the entire surface with a layer of Mod Podge.  Don't over work this... If you do, your colors might start to smear, and your paper will tear. I like to use a make-up edge to do this as bristles of a paint brush might snag or tear the fragile tissue paper. Let it dry completely.


If you are opposed to glitter, feel free to skip this step.... 

Step 7 (optional): Paint on another layer of Mod Podge, and cover in clear/iridescent glitter.  Allow to dry completely, then tap off any loose glitter.


Step 8: Finish by tying a loop of twine through the hole, and adding a bow (or any other embellishments you want)

These look beautiful on a tree, or hanging in a room! They make fabulous gifts, and are a fun way to preserve your travel souvenirs!

If you give this technique a try using Inkon3 products, please share your creation with us our Facebook group, or by using the hashtag #inkon3. We love seeing what you create!

Hugs!
~Kassi