Showing posts with label embossing powder. Show all posts
Wednesday, September 18, 2019
Bright Magical Unicorn No-Line colouring with Erica
Hi everyone! *waves excitedly*
Erica here with my first blog post on the Inkon3 blog as part of the design team! I’m so, so excited about working for this fab company. I’ve been such a fan of Fleurette’s magical Fadeout No Line Coloring ink since I first got my hands on it and to be asked to join the Inkon3 DT was a dream come true.
Right, I’m going to dive right in with the details of my card for today’s post! I’ve used the Magical Unicorn stamp set, paired with Fadeout ink and Zig Clean Color markers to create a bright and sparkly unicorn.
To start with, I stamped up the image with the help of my Mini MISTI. I use the MISTI whenever I stamp anything, just in case I feel it needs another stamp or two. To make sure I could really see the outlines of this stamp, I stamped it three times with the Fadeout ink.
Then it was colouring time! As I wanted a bright and vivid look, I added hardly any water to the Zig’s. Especially on the mane-bit. I did have to use some on the ears and the face and body, but that’s one of the brilliant things of the Zigs. You can get so many different looks just by adding water or just blending them without any water at all.
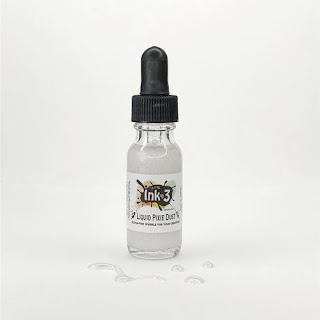
As the mane is so bright and colourful, I decided to keep the flowers all white and only add Liquid Pixie Dust to them. This is some serious sparkly stuff! If you are looking for something that will add sparkled to your projects, don’t look any further!
I used the dropper to get a couple of drops out, I use a tile as a palette as it’s easy to clean off, and then used the medium water colour brush to fill in the flowers. Once throughly covered I set this aside to dry to overnight to avoid any colours or Pixie Dust to get where it’s not supposed to. I’m over-cautious after having had one too many projects ruined by smudging ink, colour or something else because it wasn’t fully dry.
Coming back to the card the next day, I settled on a sentiment and heat embossed that with Chrome Ultra Fine embossing powder. Before I did anything embossing wise, I used my anti-static tool all over the image, except over the Pixie Dust flowers. I figured if a few stray silver bits went on them it would only make them more sparkly.
With the help of my Mini MISTI again, I stamped up the sentiment ‘Hugs, Kisses and Unicorn Wishes’ with Embossing ink and then sprinkled the embossing powder over it. A quick swish with the heat gun and a card base later, the card was done!
I have a video of the colouring coming to my YouTube channel soon, so keep your eyes peeled if you want to see how I coloured the Magical Unicorn.
That’s it from me this time. Thanks for stopping by and I hope you have found some inspiration here today! See you soon again!
Lots of love and happy crafting from Erica
Click here Click here Click here Click here Click here Click here Click here Click here
Monday, June 24, 2019
Feel Better Soon Card by Ilda
Hello, Ink On 3 Friends, Ilda here!
If you have been following me recently you may have noticed I have been a bit MIA from the Blog and Social Media this past week. I had my Gallbladder removed last Wednesday and have been slowly recovering since. Thankfully, every day I feel a little better and am sure I will be back to normal soon!
So today's Feel Better Soon card couldn't be more appropriate. At the time made it, I thought of other people going through some tough times and now I kind of chuckle as the beat up hamster reminds me of me! So ironic now.
CARD DETAILS
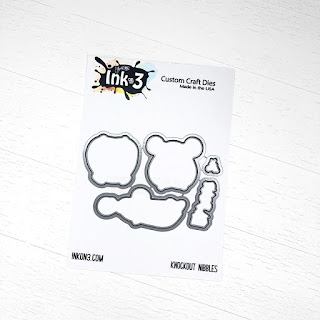
To begin I stamped out the beat up hamster from the KNOCKOUT NIBBLES set using Blackout Ink and then colored him in using Copic Markers. I then used the coordinating KNOCKOUT NIBBLES die to die cut the critter.
I then picked a spot on the lower half of the card front where the Hamster would be and used the same coordinating die to cut the space for the image to peek through from the inside of the card. On to the black card front base, I stamped out some images using Juicy ink and used 3 different colors of embossing powders to set the different images in. For the Ka-Pow I used Arctic White, the stars were done using Gold Rush and the starbursts were done using the Chrome Embossing powder.
Once the front embossing was complete, I added some foam tape behind the knocked out hamster and glued him into the die cut space.
Next, I stamped out the rest of the greeting on the inside of the card using Blackout Ink again and a stamp positioner to ensure it stamped well.
For some finishing details, I added some Liquid Pixie Dust to his bruised eye and also added some Glossy Accents and highlights to the gloves.
I hope you are all having a better week than I am. I will be back on my feet soon... but for now, I'm taking it easy with lots of couch breaks.
If your feeling down or beat up for some reason I hope this card has brought a smile to your face. Thank you for stopping by and until next time... Happy Crafting!
Ilda
Ilda
![]() KNOCKOUT NIBBLES Shop at: IO3 | ![]() KNOCKOUT NIBBLES Dies Shop at: IO3 | ![]() Blackout Ink Shop at: IO3 | ![]() Juicy Ink Shop at: IO3 | ![]() Arctic White Ultra Powder Shop at: IO3 |
![]() Gold Rush Embossing Powder Shop at: IO3 | ![]() Chrome Ultra Fine Embossing Powder Shop at: IO3 | ![]() Liquid Pixie Dust Shop at: IO3 | Mini Misti Tool Shop at: SSS | AMZ | SB | SK | ![]() Neenah 80 LB SOLAR WHITE Shop at: SSS | AMZ |
![]() Black Cardstock 110bs Shop at: AMZ | ![]() Gemini Jr Die Cutting/Embossing Machine Shop at: SSS | AMZ | SB | Double-Sided Foam Tape Shop at: SSS | AMZ | WHITE Gelly Roll Pens Set Shop at: SSS | AMZ | ![]() Glossy Accents Shop at: SSS | AMZ | SB | HBS |
Thursday, October 4, 2018
Thinking Of You Card | Coloring With Distress Oxide Inks by Ilda
Hey everybody, Ilda here with you today from I Love Doing All things crafty 👋
Today I’m sharing a water coloured card using distress oxide inks, and featuring some of the older stamps sets from Ink On 3. I hadn't water colored for a while and I was missing it, happy I did because I am super happy with the bright and colorful results I got!
To create this card I did some ink smooshing onto the card panel using three different distress oxide inks to create the rainbow like background. Once the panel was completely dry I stamped out the images using Juicy Ink and then heat set it with Arctic White embossing powder. Next, I took the same colors that I smooshed onto my surface and used them to color in the details of the vase from the Posies Set and the flowers from the Roses in Bloom set by adding multiple layers of oxide pigment. I then flicked some splatters of paint for some added splashes of color onto the panel and then die cut it using a stitched scallop rectangle die. For the sentiments I used the Hello stand alone die from the Dogwood Flower set and die cut 3 pieces and stacked them together. I then added Juicy Ink to the top of the Hello and added a coat of Crystal Clear Powder to emboss it. Next, I stamped out the thinking of you sentiment from the Posies stamp set using Salty Ocean distress ink and again used the Crystal Clear powder to heat set the ink. Finished off the card by adding some sparkling sequins.
(Distress Oxides Used: Salty Ocean, Picked Raspberry and Squeezed Lemon)
Thanks for stopping by 😊
Monday, August 13, 2018
Messy Watercolor and Embossing Powder
Hey everyone! Kelli here sharing another preview of the embossing powders that will come out tomorrow! These are by far the best embossing powders I have used yet. They melt so beautiful and are really fine! Great for detailed images.
For this card I used the Dogwood Flowers stamp set that was released last month.
I watercolored these flowers up real quick and I love the way they turned out!
Subscribe to:
Posts (Atom)