Showing posts with label Arctic White. Show all posts

Thursday, August 26, 2021

Lotus


Hello Everyone! 

It's Ceal, here.  Today I am sharing this card using the new Lotus stamp set, Y'all  it is so pretty when it's colored up.

I used some Graphit alcohol markers to color it and then masked it off so I could create a background. If you have followed me at all you know how much I love using stencils to create a background. For this background I used the Pondie stencil and Trinity Teal Atelier ink blended with brushes starting darker at the bottom and fading as I went up. 

To finish the card I removed the mask and added a sentiment from the same set that I heat embossed using our Juicy Clear embossing pad and some Arctic White embossing powder on a black strip. 


Thanks for stopping by!
until next time, Happy Crafting!

Saturday, April 24, 2021

Faux Watercolor Background with Atelier Inks

Hi! It's Lynnea! I have another easy way to add faux watercolor to your cards with Atelier Inks from InkOn3. It's more smooshing! But this time with an acrylic block! 


I am back at the ink smooshing! But this time I found a way to better control the ink by using an acrylic block! I started by heat embossing the large Triple Rose Stamp onto watercolor cardstock using my InkOn3 Juicy Watermark Emboss Ink and Arctic White Ultra Fine Embossing Powder. This will better allow me to see how much color I need to add to my panel. Plus the heat embossed portions sort of "trap" colors making the color darker in areas and lighter in others. 


I used three colors of Atelier Ink - Marilyn RedPeacock Blue, and My Jam Purple. I chose these colors purposely because no matter how they mix they won't make a brown color. I smooshed the colors onto my acrylic block and spritzed with water and pressed them onto a piece of watercolor cardstock holding the block in place until the color had a chance to "grip" the paper. I kept adding color until the whole background was full of GORGEOUS color! I added flicks of clean water as well as Shark Tooth White Atelier Ink for texture. 


I completed the card by adding a white die cut frame as well as a die cut sentiment. My stamped sentiment strip is from the Here for You Stamp Set. I've been using it for all of my sentiments lately! Thanks for joining me! 

Thursday, August 27, 2020

Floral and Plaid Card


Hello everyone! It's Cheryl with the Inkon3 Creative Team here to show you a fun and quick card that mixes beautiful magnolia flowers with a masculine patterned paper!


First you'll need the following pieces prepped, feel free to adjust the colors and patterns to whatever you'd like or have available:
- A2 Card Base
- 5.5"x 4.25" Blue paper 
- Black die-cut rectangle (I chose a scalloped rectangle die)
- Buffalo Plaid Patterned paper cut down to fit into black rectangle
- Black paper cut down to 2" high and whatever width is needed to fit into the rectangle
- 2"x 0.5" small black rectangle for sentiment 
- White card stock that's 1.5" high and whatever width is needed to fit into the rectangle


On the white card stock, randomly stamp images from the Big Bold Magnolia stamp set using the Blackout Hybrid Detail Ink. Color with coloring medium of choice. 

Then on the small 2"x 0.5 " black rectangle, stamp the sentiment "Have a Happy Birthday" from the BeYoutiful clear stamp set, using Juicy Clear Embossing & Watermark Ink, then sprinkle some Arctic White Ultra Fine embossing Powder and heat set!


Assemble the layers and components of the cards as shown in the picture above and that's it! This is a super fun and quick card!

Products Used:
Copics Used:
Greys: C3, C1, C0
Greens: G19, G14, G05
Blues: BG00, BG000, BG000
Yellows: Y19, Y15, Y11


Monday, August 10, 2020

Ink on 3 x ThermoWeb Collab | Big Bold Magnolias & Amethyst Watercolor

Happy Monday everyone! We're so excited to be collaborating with ThermOWeb all week long. 


Make sure you visit us daily for new inspiration! We will have one project for our blog and one project over on the ThermOWeb blog for double the inspiration. Today, Wendy will be sharing a project over there so be sure to stop by once you finish up here. 

At the end of the week, we'll be giving away a $30 gift certificate for Ink on 3 and ThermOWeb will be giving away a $30 gift certificate for their store as well! Be sure to stop by and leave a comment for a chance to win!  Ink on 3 will be announcing our winner on the blog on August 21, 2020. 

For today's first post, we have, the lovely, Cheryl! 

-----------

Hello Crafty Friends! It’s Cheryl with the Inkon 3 Creative Team here to share how I made this pretty card using Thermoweb and Inkon 3 products! 


First, I cut out a 3.75”x5” rectangle using white cardstock. I placed the 6x6 Wavy Stencil over the cardstock and spread an even layer of the Deco Foil transfer gel over the stencil. I removed the stencil and set the white cardstock aside to dry completely.


Once dried, I heated up my laminator. Once ready, I cut one sheet of the Deco Foil Transfer sheets in Amethyst Watercolor that’s approximately 3.75” x 5”. I place the transfer sheet over the white cardstock, placed it in between printer paper and ran it through the laminator two times. 


Next, I cut a 4”x5.25” rectangle and die cut a small pennant out of dark purple cardstock, and a 4.75”x 1.5” rectangle out of white cardstock. From the Big Bold Magnolia Stamp set, stamp out the magnolia flowers and two leaves shown in the picture above using Twiggy Brown Atelier Ink. Fussy cut the images, and then color with your choice of medium and colors.


On the small purple pennant, stamp the sentiments “Happy Birthday” from the Fox & Bunny Hugs Clear Stamp Set using the Juicy Clear Embossing & Watermark Ink. Sprinkle some Arctic White Ultra Fine Embossing Powder over the stamped sentiment and shake off any excess, then heat set the embossing powder. 


Now we are ready to assemble the card! Adhere the purple rectangle onto an A2 card base, then adhere the foiled cardstock on the purple cardstock. Adhere the rest of the pieces as shown in the photo above, be very careful with the foil as it can scratch easily! 


There you have it! The process for this card takes a while because of the transfer gel, but it is totally worth the time! And honestly, the picture doesn’t capture the full gorgeousness of the watercolor foil! 


Products Used:

Deco Foil Transfer Sheets - Amethyst Watercolor 

Deco Foil Transfer Gel Duo

Wavy 6X6 Stencil

Big Bold Magnolia Clear Stamp Set

Fox & Bunny Hugs Clear Stamp Set

Atelier Ink - Twiggy Brown

Arctic White Ultra Fine Embossing Powder

Juicy Clear Embossing & Watermark Ink


-----------

Be sure to stop by the ThermOWeb blog today and check out the project from Wendy! Remember to come back every day this week for new inspiration! 


Friday, June 26, 2020

Masculine Koi Pond Card

Hi Crafty Friends! It's Cheryl with the Creative Team here to show you how I made some cards for the important men in my life, the cards read "Happy Father's Day", but change up the sentiments and these cards can be used for any occasion!

I made the card in portrait and landscape orientation! Which one do you prefer?

First I created a 5.5"x 4.25" card base using white card stock. Then I used a rectangle die to cut out a panel that's slightly smaller than the card base. Next, I used distress oxide ink in Tumbled Glass and a blending tool to add a light blue background to the lower right hand corner of the card. Place the Wavy stencil over the light blue background and with a blending tool and Peacock Blue Atelier Ink, blend in the atelier ink concentrating on the lower right hand corner and lightly bring in the color towards the center of the card to create an ombre look.


From the Koi Pond stamp set, stamp out the Koi images of your choice using Blackout Hybrid Detail Ink, color with your choice of coloring medium and then fussy cut. For the Lily Pads, I first stamped the largest lily pad stamp using the Goddess Green Atelier Ink, then I used the Peacock Blue on the next layer, and Marigold Orange on the last layer. The Atelier Inks worked so well when layered! Fussy cut the lily pads.


Then I die cut some flags for the sentiments, for a perfectly coordinated sentiment flag, I die cut white card stock and applied Peacock Blue Atelier ink with a blending tool. I stamped the sentiments with embossing ink, used Arctic White Ultra Fine Embossing Powder and heat set.


Adhere the panel with the stenciled waves onto the card base. Then position the fussy cut images, and sentiment flags onto the card front as shown in the picture above. Trim off any excess of the sentiment flags that extends beyond the Koi. Adhere the fussy cut images and sentiment flags onto the card and there you have it!

Copic Colors Used: 
Reds: R29, R27, R24, R22
Oranges: YR27, YR68, YR14, YR12 

Products used:

Monday, January 27, 2020

Big Bold Magnolias Ombre Card with Atelier Inks

Hello Crafty Friends! It's Cheryl here to show you a quick and easy card using Atelier Inks and the Big Bold Magnolias Stamp set!


Preparations:
- Cut white card stock 4.5"x 9" and then score at 4.5" to create a card base.
- Cut white card stock 4" x 4" for front panel of the card.


Around the perimeter of the card base, use the Marilyn Red Atelier Ink and a blender tool to add color to the border, you'll only need about .25" of a colored border.

Next, stamp out three to four flowers from the Big Bold Magnolia Stamp set with Juicy Clear Embossing and Watermark ink, then sprinkle some Arctic White ultra fine embossing powder over the embossing ink, tap off any excess powder, then heat set. Use the Marilyn Red and Marigold Orange Atelier Inks with a blender tool to create an ombre effect on the flowers. Fussy cut the flowers.

On the white card panel, stamp the "You're Beautiful" sentiment from the Heels to You Stamp set. I created an ombre effect by tapping Marigold Orange ink on the middle of the sentiment, then I tapped the Marilyn Red ink on the remaining un-inked portion of the stamp.


Now it's time to put the card all together! Adhere the white front panel centered on card base. Then adhere the flowers as you'd like. I put a large flower on the left, then a medium flower on the far right. I put a small magnolia bud behind the flower on the right. Then I used some foam tape to adhere the medium sized Magnolia between the other two flowers for added dimension.


Inkon3 Products Used: 

Tuesday, December 24, 2019

Mass Card Production Tips & Tricks + Video


Hi everyone, welcome back to the Ink On 3 blog!  My name is Jaycee Gaspar, and I'm a holiday card procrastinator *cries.* Gradient backgrounds and beautiful die cuts make the suffering less painful and the NEW Artist Grade Atelier Fusion Inks take care of the stunning ombré backgrounds.  Below is a video where I share my tips and tricks on mass producing cards.  The occasion doesn't have to be holiday or Christmas, you can apply these tips to mass produced birthday cards, thank you cards, or whatever your stash needs!


Do you all have helpful tips and tricks to revive your card stash?  Like I said in the video, making this many cards does require some time, but there are still ways to remain efficient while making many cards at once.  Card projects usually require at least two hours of my creative energy, so spending four hours to make twelve is a personal achievement!  Happy Holidays and Merry Christmas from the Creative Team at Ink On 3!

Hey thank you so much for checking out my video on how I made these cards!  Do you all have stamp sets from Ink On 3 that you would like me to use in a future project?  Let me know in the comments below!  If you like what you've seen from me, make sure you subscribe to my YouTube channel and give me a follow over on Instagram!  Talk to you all very soon!

Materials:
Ink On 3 - Atelier Fusion Watercolor Re-Inkers
Ink On 3 - Water Brush Pen
Ink On 3 - Blackout Detail Ink
Ink On 3 - Juicy Clear Embossing Ink
Ink On 3 - Arctic White Embossing Powder
Ink On 3 - Strawberry Champagne Embossing Powder
Ink On 3 - Gold Rush Embossing Powder
Ink On 3 - Oh Deer Stamp Set


Jaycee Gaspar

YouTube | Instagram | Blog

Friday, November 22, 2019

Rainbow Ombre Card using Atelier Inks

Hi Everyone, it's Cheryl here to show you how to make a cheerful card that's bound to brighten up anyone's day!


First I used the Inkon3 Atelier Inks to make a diagonal rainbow background! I just did this freehand so I can get a slight gradient effect when I transitioned to the next color. Look at how vibrant the colors are!


I cut out a scalloped rectangle and scalloped circle, then I embossed the scalloped rectangle using an embossing plate. I also cut out a small flag and used the Marilyn Red Atelier Ink to "dye" the paper. Next, I stamped and fussy cut some of the images from the Lil Chicks stamp set. I used the Atelier Inks as water-coloring inks to color the images! Even watered down a bit, the colors are so vibrant!


Once the red flag was dried, I stamped the "You're EGG-STRA-SPECIAL" sentiment using an embossing ink and then sprinkled some Arctic White Ultra Fine embossing powder over the stamped sentiment and heat set the embossing powder.

I assembled the card by first adhering the large scalloped rectangle to the rainbow card base, then added the little chickie and then the rest of the stamped images on the top and bottom of the circle. Lastly, I adhered the red flag on the bottom left of the card.


There you have it! A nice, clean, and simple card that's super duper adorable!

Products Used: 


Friday, September 13, 2019

Product Focus - Knockout Nibbles Stamp and Die + Video


Hi everyone, welcome back to the Ink On 3 blog!  It's Jaycee Gaspar, and today I wanted to share the creative process on this street art inspired graphic card using Ink On 3 - Knockout Nibbles Stamp and Die Set.  I recently went to an art show and drew in a lot of inspiration from various talented artists for their composition. I thought of ways of bringing clustered composition and exquisite details into card making.  Below is a video over on my YouTube Channel on how I made this card.


Hey thank you so much for checking out my video on how I made this card!  Where do you get the most inspiration?  Let me know in the comments below.  If you like what you've seen from me, make sure you subscribe to my YouTube channel and give me a follow over on Instagram!  Talk to you all very soon!

Materials:
Ink on 3 - Knockout Nibbles Stamp Set
Ink on 3 - Knockout Nibbles Die Set
Ink on 3 - Blackout Detail Ink
Ink on 3 - Arctic White Embossing Powder
Ink on 3 - Juicy Clear Embossing Ink

Vellum
Copic Markers: E000, E04, E40, E41, E42, E43, E44, E47, E49, R59, R49, R35

Neenah Solar White 80lb Cardstock


Jaycee Gaspar

YouTube | Instagram | Blog

Monday, June 24, 2019

Feel Better Soon Card by Ilda

Hello, Ink On 3 Friends, Ilda here!

If you have been following me recently you may have noticed I have been a bit MIA from the Blog and Social Media this past week. I had my Gallbladder removed last Wednesday and have been slowly recovering since.  Thankfully, every day I feel a little better and am sure I will be back to normal soon!

So today's Feel Better Soon card couldn't be more appropriate. At the time made it, I thought of other people going through some tough times and now I kind of chuckle as the beat up hamster reminds me of me! So ironic now.


CARD DETAILS

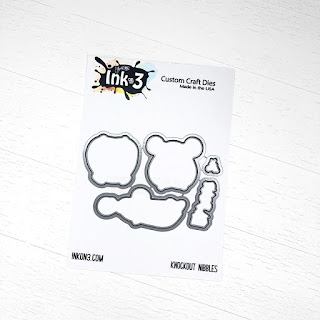
To begin I stamped out the beat up hamster from the KNOCKOUT NIBBLES set using Blackout Ink and then colored him in using Copic Markers. I then used the coordinating  KNOCKOUT NIBBLES die to die cut the critter.

I then picked a spot on the lower half of the card front where the Hamster would be and used the same coordinating die to cut the space for the image to peek through from the inside of the card. On to the black card front base, I stamped out some images using Juicy ink and used 3 different colors of embossing powders to set the different images in.  For the Ka-Pow I used Arctic White, the stars were done using Gold Rush and the starbursts were done using the Chrome Embossing powder.


Once the front embossing was complete, I added some foam tape behind the knocked out hamster and glued him into the die cut space.


Next, I stamped out the rest of the greeting on the inside of the card using Blackout Ink again and a stamp positioner to ensure it stamped well.


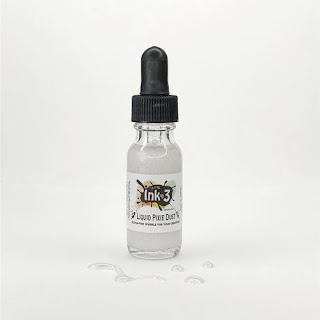
For some finishing details, I added some Liquid Pixie Dust to his bruised eye and also added some Glossy Accents and highlights to the gloves. 

I hope you are all having a better week than I am. I will be back on my feet soon... but for now, I'm taking it easy with lots of couch breaks.

If your feeling down or beat up for some reason I hope this card has brought a smile to your face. Thank you for stopping by and until next time... Happy Crafting!

Ilda


SUPPLIES
KNOCKOUT NIBBLES
KNOCKOUT NIBBLES
Shop at:
 IO3
KNOCKOUT NIBBLES Dies
Shop at:
 IO3
Blackout Ink
Blackout Ink
Shop at:
 IO3
Juicy  Ink
Juicy Ink
Shop at:
 IO3
Arctic White Ultra Powder
Shop at:
 IO3
Gold Rush Embossing Powder
Shop at:
 IO3
Chrome Ultra Fine Embossing Powder
Shop at:
 IO3
Liquid Pixie Dust
Liquid Pixie Dust
Shop at:
 IO3
Mini Misti Tool
Mini Misti Tool
Shop at:
SSS | AMZ | SB | SK
Neenah  80 LB SOLAR WHITE
Neenah 80 LB SOLAR WHITE
Shop at:
SSS | AMZ
Black Cardstock 110bs
Shop at:
AMZ
Gemini Jr Die Cutting/Embossing Machine
Shop at:
SSS | AMZ | SB
Double-Sided Foam Tape
Shop at:
SSS | AMZ
WHITE Gelly Roll Pens Set
Shop at:
SSS | AMZ
Glossy Accents
Glossy Accents
Shop at:
SSS | AMZ | SB | HBS