Showing posts with label Wavy Stencil. Show all posts

Wednesday, August 19, 2020

Rainbow Koi

Hi everyone! It’s Jeannie (InsideoutJeans) on the blog today sharing two cards using with Ink on 3’s stamp set named Koi Pond along with the Pondie and Wavy stencil. 


Using Fadeout ink, I stamped koi fish from the Koi Pond stamp set on watercolor paper. After trying out these technique in a previous card, I wanted to play a little more with unconventional colors that turned into rainbow colors.

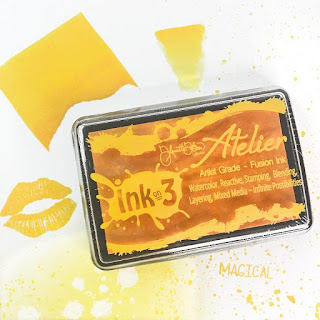
I used the Marilyn RedMarigold OrangeBee Sting Yellow, Goddess GreenPeacock Blue, and My Jam Purple re-inkers to watercolor the fish on the panel using two colors for each fish. The koi fish stamps have a ton of details so I loved how Fadeout ink absorbs the colors I place on top of it.


For my first card, I used the Wavy stencil along with the Atelier inks to ink blend a rainbow panel. I used Marilyn Red, Marigold Orange, Bee Sting Yellow, Goddess Green, Peacock Blue, and My Jam Purple. I used three of the koi fish for this panel. I used the sentiment from Koi Pond using Blackout Ink on white cardstock and matted it on black cardstock.  


For my second card, I used the Pondie stencil along with My Jam PurpleMarilyn RedMarigold Orange, and Bee Sting Yellow to add stripes of these colors to match the two fish for this panel. I stamped the sentiments from Hey Gorgeous on a thicker black strip of cardstock using Juicy Ink and added Artic White embossing powder so I could heat emboss it.


If you're interested, you can watch my process over on Ink on 3's YouTube channel.


Thanks for stopping by today and I hope you get inspired to create. Come back again soon for more inspiration and ideas! Happy Crafting! 

Thursday, August 13, 2020

InkOn3 x ThermOWeb Collab | Custom Colored Glitz Glitter Gel with Atelier Reinkers

GET EXCITED! It's Day 3 of InkOn3 and ThermOWeb's week long collaboration


Make sure you visit us daily for new inspiration! We will have one project for our blog and one project over on the ThermOWeb blog for double the inspiration. Today, Rebecca will be sharing a project over there so be sure to check it out reading about this project. 

As a reminder, at the end of the week, we'll be giving away a $30 gift certificate for Ink on 3 and ThermOWeb will be giving away a $30 gift certificate for their store as well! Be sure to stop by and leave a comment for a chance to win!  Ink on 3 will be announcing our winner on the blog on August 21, 2020. 

Here is Lynnea's project for today! 

------- 

I just adore both of these companies and I'm so excited to mix together their products to create a card. I used some Atelier Ink Reinkers from InkOn3 and Glitz Glitter Gel from ThermOWeb and made a custom color of Glitz for my stenciled background!


There is a whole wide array of colors of Glitz Glitter Gel in the ThermOWeb site, but some of my favorites are the White and Iridescent Glitz Glitter Gel because I can make them into any color I like! You can use liquid watercolors, ink from an ink pad, ... but I decided to go with the highly pigmented Atelier Ink Reinkers! I used Marilyn Red, Marigold Orange, and a bit of Bee Sting Yellow Reinkers and mixed them with some White Glitz Glitter Gel. I wanted to create a coral color - but it ended up more orangey than pink. That's okay! Be sure to watch the video above - I still created a completely custom color! I'll show you a comparison between my custom color and the existing "orange" colors of Glitz Glitter Gel.


I sprayed the back of the Wavy Stencil from InkOn3 with Pixie Spray and used a Stencil Pal from ThermOWeb and spread my custom mixed Glitz Glitter Gel over the Wavy Stencil. I'm in love with this pretty orangey glittery goodness!


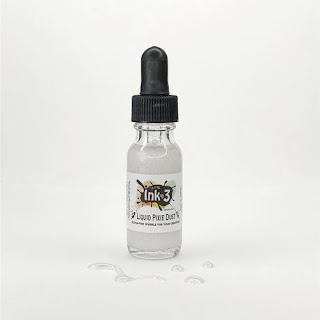
My images for this card are the GORGEOUS florals from the BeYOUtiful Stamp Set from InkOn3. I stamped them with my favorite black ink - Blackout Hybrid Detail Ink - and colored them with Copic Markers. I thought the yellow flower would really compliment the orange background! I trimmed them out and added them to the card with iCraft 3D Foam Squares. The background glitters so much that I thought the flowers needed some glitter, too! I keep some Liquid Pixie Dust in a Small Watercolor Brush so all I have to do is shake it up and brush it over the images and BOOM! They're sparkly, and glitter, and amazing!


I hope you've enjoyed this fun collaboration tutorial and that you'll use your Atelier Ink Reinkers to color your own custom color of Glitz Glitter Gel!

-----------

Be sure to stop by the ThermOWeb blog today and check out the project from Rebecca! She also has a video for you.


https://youtu.be/50--jVpLT6k


If you missed this week of inspiration, just check out the older posts on the blog! 

Monday, August 10, 2020

Ink on 3 x ThermoWeb Collab | Big Bold Magnolias & Amethyst Watercolor

Happy Monday everyone! We're so excited to be collaborating with ThermOWeb all week long. 


Make sure you visit us daily for new inspiration! We will have one project for our blog and one project over on the ThermOWeb blog for double the inspiration. Today, Wendy will be sharing a project over there so be sure to stop by once you finish up here. 

At the end of the week, we'll be giving away a $30 gift certificate for Ink on 3 and ThermOWeb will be giving away a $30 gift certificate for their store as well! Be sure to stop by and leave a comment for a chance to win!  Ink on 3 will be announcing our winner on the blog on August 21, 2020. 

For today's first post, we have, the lovely, Cheryl! 

-----------

Hello Crafty Friends! It’s Cheryl with the Inkon 3 Creative Team here to share how I made this pretty card using Thermoweb and Inkon 3 products! 


First, I cut out a 3.75”x5” rectangle using white cardstock. I placed the 6x6 Wavy Stencil over the cardstock and spread an even layer of the Deco Foil transfer gel over the stencil. I removed the stencil and set the white cardstock aside to dry completely.


Once dried, I heated up my laminator. Once ready, I cut one sheet of the Deco Foil Transfer sheets in Amethyst Watercolor that’s approximately 3.75” x 5”. I place the transfer sheet over the white cardstock, placed it in between printer paper and ran it through the laminator two times. 


Next, I cut a 4”x5.25” rectangle and die cut a small pennant out of dark purple cardstock, and a 4.75”x 1.5” rectangle out of white cardstock. From the Big Bold Magnolia Stamp set, stamp out the magnolia flowers and two leaves shown in the picture above using Twiggy Brown Atelier Ink. Fussy cut the images, and then color with your choice of medium and colors.


On the small purple pennant, stamp the sentiments “Happy Birthday” from the Fox & Bunny Hugs Clear Stamp Set using the Juicy Clear Embossing & Watermark Ink. Sprinkle some Arctic White Ultra Fine Embossing Powder over the stamped sentiment and shake off any excess, then heat set the embossing powder. 


Now we are ready to assemble the card! Adhere the purple rectangle onto an A2 card base, then adhere the foiled cardstock on the purple cardstock. Adhere the rest of the pieces as shown in the photo above, be very careful with the foil as it can scratch easily! 


There you have it! The process for this card takes a while because of the transfer gel, but it is totally worth the time! And honestly, the picture doesn’t capture the full gorgeousness of the watercolor foil! 


Products Used:

Deco Foil Transfer Sheets - Amethyst Watercolor 

Deco Foil Transfer Gel Duo

Wavy 6X6 Stencil

Big Bold Magnolia Clear Stamp Set

Fox & Bunny Hugs Clear Stamp Set

Atelier Ink - Twiggy Brown

Arctic White Ultra Fine Embossing Powder

Juicy Clear Embossing & Watermark Ink


-----------

Be sure to stop by the ThermOWeb blog today and check out the project from Wendy! Remember to come back every day this week for new inspiration! 


Wednesday, July 22, 2020

Just keep Swimming


Hello Everyone!
It's Ceal here to share with you today a card using one of our newest sets, Koi Pond. This set is so fun! 
To create my card I started with a white top folding card base and a panel of bristol card stock which is water friendly paper. I stamped the Koi using the Juicy Clear Embossing ink and embossed it with Gold Rush embossing powder. I watercolored them using the Karin markers and masked them off to create the background. To do that I used the new Wavy stencil and bending brushes, I also did a little ink smooshing to add some texture to it. 


Here's a little close up (above) that shows the shine of the Gold Rush embossing powder, it's my favorite!
To finish the card I added the "Just Keep Swimming" sentiment because that is what we are all having to do during this pandemic 

Thursday, July 16, 2020

BeYouTiful

Hi everyone! It’s Jeannie (InsideoutJeans) on the blog today with Ink on 3’s stamp set named BeYouTiful stamp set. I couldn't get enough and had to create another card using it. 


I know I love no line coloring, which is what I did previously in this post, but I wanted to color up this floral quickly using some alcohol markers. I stamped it out the largest floral from the BeYouTiful stamp set using Blackout Ink and colored it up using my favorite purple Copic Combo: V12, V15, V17

While using this set, I realized that there was a solid image for the stamen of the flower and it's an exact copy of the one in the floral image! This would be perfect for helping with no line coloring as well as adding a pop to the flower, which is what I did with today's card. I used Juicy ink and heat embossed the stamen using Chrome embossing powder in the middle. I kinda love it since I used the Blackout Ink for the image, it looked a bit harsh compared to the flower. 


I took a piece of white cardstock and inked it up using Peacock Blue and My Jam Purple Atelier inks. I wanted to try a technique I saw with stencils. I pulled out the Wavy stencil and a baby wipe. Using my normal sandwich for my die machine, I ran the card panel, stencil and baby wipe through my machine. It ended up being pretty cool! The stencil embossed itself to the card panel, while the baby wipe picked up the colors in the positive areas. 

To finish off the card, I wanted to tie in the Chrome embossed stamen. I stamped the sentiments using Juicy ink and then heat embossed with the same silver Chrome embossing powder. 


Thanks for stopping by today and I hope you get inspired to create. Come back again soon for more inspiration and ideas! Happy Crafting! 


Friday, July 10, 2020

Koi Pond Inspired Friendship Cards by Ilda

Atelier Inks, blending Fadeout Ink, Friendship, Ink On 3, Koi Pond Stamp Set, Pondie Stencil, Shaker Card, Water coloring, Wavy Stencil,

Happy Friday Peeps, Ilda here!
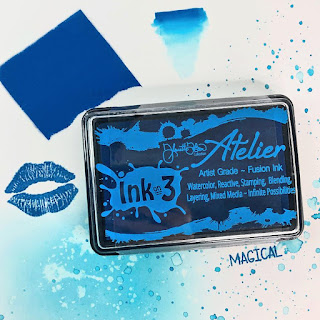
Today I am sharing a trio of cards inspired by the new KOI POND stamp set from Ink On 3.  I am in love with the latest release, which by the way I just received not too long ago because snail mail is really real right now people😏 Thanks Covid!

CARD DETAILS

The first card I created was this shaker card. I first stamped out the fish using the FADEOUT INK onto Bristol Paper. I then colored them in using a variety of ATELIER INKS, I used every color on them listed below in the Supply section. 

Next, I masked the fish and added a very light blend of blue using the new WAVY STENCIL and ATELIER PEACOCK BLUE ink.

I then stamped out the Lilly pads using ATELIER GODDESS GREEN by doing some second and third generation stamping to get the gradient shades. The ripples and bubbles were stamped using the ATELIER PEACOCK BLUE ink and just blurred and colored in with a water brush. 

The sentiment stamped in the center also comes from the KOI POND set that I stamped using BLACKOUT INK.

Before adding the shaker window,  I added a layer of LIQID PIXIE DUST to all the KOI fish for sparkle.

Atelier Inks, blending Fadeout Ink, Friendship, Ink On 3, Koi Pond Stamp Set, Pondie Stencil, Shaker Card, Water coloring, Wavy Stencil,

I then used a Rectangle Frame to create the window for the shaker panel that I filled with clear sequin bits to allow the colors to shine.

Atelier Inks, blending Fadeout Ink, Friendship, Ink On 3, Koi Pond Stamp Set, Pondie Stencil, Shaker Card, Water coloring, Wavy Stencil,

This next card was so simple to make and I love the results.

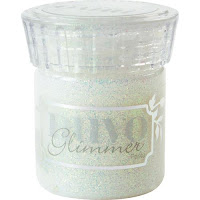
I began by adding a subtle green color of ATELIER GODDESS GREEN using the WAVY STENCIL. I then moved the stencil and repeated the process, this time using ATELIER PEACOCK BLUE. Before removing the stencil I added a layer of Glimmer Paste, removed the stencil, and allowed it to dry.
Atelier Inks, blending Fadeout Ink, Friendship, Ink On 3, Koi Pond Stamp Set, Pondie Stencil, Shaker Card, Water coloring, Wavy Stencil,

I then finished off this simple card by adding the stamped sentiment on the card from the KOI POND set and adding a few clear bubbles.

Atelier Inks, blending Fadeout Ink, Friendship, Ink On 3, Koi Pond Stamp Set, Pondie Stencil, Shaker Card, Water coloring, Wavy Stencil,

For this final card, I started by blending ATELIER BEE STING YELLOWATELIER MARILYN RED, and ATELIER PEACOCK BLUE together and overlapping them in areas to create the blended colors on the PONDIE STENCIL. Before removing the stencil I added a layer of glimmer paste and then set it aside to dry.

Atelier Inks, blending Fadeout Ink, Friendship, Ink On 3, Koi Pond Stamp Set, Pondie Stencil, Shaker Card, Water coloring, Wavy Stencil,

I then stamped out one of the KOI using JUICY INK, and then heat set it using GOLD RUSH EMB.PWD. I then used the same 3 colors that I used on the background to color the fish in. Once it was dry I fussy cut the fish out.

Atelier Inks, blending Fadeout Ink, Friendship, Ink On 3, Koi Pond Stamp Set, Pondie Stencil, Shaker Card, Water coloring, Wavy Stencil,

The sentiment comes from two older sets, the Hey from HEY GORGEOUS and the Friend from HEELS TO YOU set that were stamped again using JUICY INK, and then heat set it using GOLD RUSH EMB.PWD.

Atelier Inks, blending Fadeout Ink, Friendship, Ink On 3, Koi Pond Stamp Set, Pondie Stencil, Shaker Card, Water coloring, Wavy Stencil,

To finish this card, I popped the Koi onto a bed of coiled foil thread and added some iridescent bubbles.

Hope this trio of Koi Pond friendship cards inspired you today. 

Thank you for stopping by 😊
Until next time... Happy Crafting 👋


SUPPLIES
KOI POND
KOI POND
Shop at:
IO3
WAVY STENCIL
WAVY STENCIL
Shop at:
IO3
PONDIE STENCIL
PONDIE STENCIL
Shop at:
 IO3
HEY GORGEOUS
HEY GORGEOUS
Shop at:
IO3
Heels To You
Heels To You
Shop at:
IO3
FADEOUT INK
FADEOUT INK
Shop at:
IO3
Atelier Marilyn Red
Atelier Marilyn Red
Shop at:
 IO3
Atelier Marigold Orange
Shop at:
IO3
ATELIER BEE STING YELLOW
Shop at:
 IO3
ATELIER GODDESS GREEN
Shop at:
 IO3
ATELIER PEACOCK BLUE
Shop at:
IO3
ATELIER MY PURPLE JAM
Shop at:
IO3
Atelier Paint It Black
Shop at:
IO3
BLACKOUT INK
BLACKOUT INK
Shop at:
 IO3
JUICY INK
JUICY INK
Shop at:
 IO3
GOLD RUSH EMB. PWD.
GOLD RUSH EMB. PWD.
Shop at:
 IO3
SMALL TIP WATER BRUSH PEN
Shop at:
IO3
LIQUID PIXIE DUST
LIQUID PIXIE DUST
Shop at:
IO3
BRISTOL PAPER
BRISTOL PAPER
Shop at:
SSS | AMZ
INK BLENDER BRUSHES
INK BLENDER BRUSHES
Shop at:
SSS | SK
ORIGINAL MISTI
ORIGINAL MISTI
Shop at:
SSS | AMZ | SBC | HBS
GEMINI JR. DIE CUTTER
Shop at:
SSS | AMZ | SBC
NEENAH SOLAR WHITE 110
Shop at:
SSS | AMZ | HBS
CLEAR ACETATE SHEETS
Shop at:
SSS | SK
MEDIA SPATULAS
MEDIA SPATULAS
Shop at:
SSS | SBC | HBS
MOONSTONE GLIMMER PASTE
Shop at:
SSS | AMZ | HBS
SILVER DUST | SEED BEADS
Shop at:
SSS | SK
IRIDESCENT BUBBLES
IRIDESCENT BUBBLES
Shop at:
SSS | SK
MAJESTIC FUSION
MAJESTIC FUSION
Shop at:
SSS | SK
CLEAR DROPS MIX 1
CLEAR DROPS MIX 1
Shop at:
SSS | SK
EMBELLISHMENT WAND
EMBELLISHMENT WAND
Shop at:
SSS | SK
FOAM TAPE - WHITE
FOAM TAPE - WHITE
Shop at:
SSS | SK