Showing posts with label DT Jeannie. Show all posts

Wednesday, February 12, 2020

You're a Beautiful Friend

Hi everyone! It’s Jeannie (InsideoutJeans) on the blog today featuring a bunch of Ink on 3 products all in one card.

I stamped out the floral images from the Heels to You stamp set using Fadeout Ink. I love using Fadeout Ink for no-line coloring and today, I wanted to go for purple/blue flowers.

For the background panel, I used the new Atelier inks in My Jam Purple and Peacock Blue. I used these inks on watercolor paper and created a simple striped background. I painted three lines of purple and two lines of blue. I love how it turned out and it's such a pretty and vibrant background.

I trimmed my card panel and matted it on gold cardstock. Using some rectangular dies, I cut out a few borders. One was actually by accident but I liked how it looked a bit wonky and uneven so I used it.

I adhered the two sets of flowers on the top right and bottom left corner of the card. For the sentiment, I used the coordinating dies from the Heels to You stamp set to have the sentiment "Beautiful Friend". I also decided to use Juicy ink to stamp "You're A" directly onto the card and using Artic White Embossing Powder, it worked perfectly to match the sentiment in white cardstock.


I do adore how this card turned out and am really loving these Atelier Inks to create with.


Thanks for stopping by today and I hope you get inspired to create. Come back again soon for more inspiration and ideas! Happy Crafting!

Thursday, January 23, 2020

Hey Gorgeous!


Hi everyone! It’s Jeannie (InsideoutJeans) on the blog today with Ink on 3’s newest stamp set debuted at Creativation called Hey Gorgeous. It's such a pretty stamp set that speaks to me! The main image from this set is obviously this gorgeous girl, which I decided to no-line color using Fadeout ink with copic markers.

There's no coordinating dies for this set but it's large enough for me to fussy cut quite easily. Then I had to figure out what to do with it. I pulled out the Atelier inks to help me create a fun background. First, I used three Atelier re-inkers to watercolor a card panel. I used Marilyn Red, Marigold Orange, and Bee Sting Yellow.


Once the watercolored panel was created, I splattered water all over since these inks are water-reactive. I also splattered some of the ink using all three colors: Marilyn Red, Marigold Orange, and Bee Sting Yellow

To finish off the background, I stamped out the floral images randomly using the Marilyn Red ink pad. 


For the sentiment, I stamped Hey Gorgeous using Blackout ink. I just quickly fussy cut out the larger sentiment and added the "hey" using a strip. 


I'm loving how this all came together and I'm so excited to use these inks more! They are so versatile and fun. Have you tried them? 

Thanks for stopping by today and I hope you get inspired to create. Come back again soon for more inspiration and ideas! Happy Crafting! 

- Jeannie 

Saturday, November 9, 2019

Atelier Inks & Big Bold Magnolias

Hi everyone! It’s Jeannie (InsideoutJeans) on the blog today with featuring Ink on 3's new Atelier inks! The card I'm featuring today was entirely colored using the new Atelier inks plus the beloved Blackout hybrid ink.


Here's a little summary of the inks and what they can do:
  • Artist Grade Quality
  • Specialty, Water Reactive, Fusion Ink, Acid-free and archival
  • Water coloring (remains bright even after dry)
  • Stamping, Blending, Embossing
  • Color Layering
  • Artistic, Bright, Crisp Impressions,
  • Alcohol / Copic Marker friendly (air dry or heat set)
  • Full coverage on solid stamp images
  • Fun effects - After inking surface, spritz with water.
  • Buttery Smooth - Create beautiful blended backgrounds, using a blending tool or brush.
  • Blend over stencils.
  • Works on most paper surfaces.
For my card today, I'm using the inks alongside the Big Bold Magnolias stamp set, which were stamped out using Blackout hybrid ink. I'm only using THREE colors to color up this entire card: Marilyn Red, Bee Sting Yellow, and Goddess Green. I decided to use the re-inkers because I wanted to watercolor.

I started off with the background and painted an ombre using Marilyn Red and Bee Sting Yellow. The two colors blended together to create a smooth ombre look without any grittiness or chalkiness. I was especially shocked by how vibrant the yellow was! 
Next, I went ahead and used the three colors (Marilyn Red, Bee Sting Yellow, and Goddess Green) to color in the floral images. I'm definitely not a pro at watercoloring, but these were really easy to use.I found that the lack of water spots really played a role in these inks. I have a tendency to end up with random spots that dried but the inks were super forgiving. 


I wanted to use a sentiment from the Heels to You stamp set. For the die cut words, I actually used the Bee Sting ink pad and covered a piece of white cardstock and then die cut the words "Beautiful" and "Friend" from the Heels to You coordinating die set.   You can really see the vibrancy of the yellow from the ink pad! 


I added a few embellishments to the card and that finished up the card. I'm loving how I can use the same medium to color up an entire card. Have you checked out the inks yet? My first impression is that they are pretty amazing! 

If you want to see them in action, head over to the Inkon3 YouTube channel.


Thanks for stopping by! Come back again soon for some more inspiration and ideas! Happy Crafting!


Wednesday, October 9, 2019

Poinsettia: Non-Christmas Card

Hi everyone! It’s Jeannie (InsideoutJeans) on the blog today to share a card I created using Inkon3’s Poinsettia stamp set. Yes, I know what you're thinking … Christmas cards already? Nope! I actually decided to use this set in a non-Christmas way by just using a non-holiday sentiment. I even used Christmasy colors. Sneaky!

I pulled out this set and was actually all set out to do a Christmas card but changed my mind last minute. I stamped all the images using Blackout ink and masked them to create a cluster of the poinsettia. I love that in this set there are three different sizes. Whenever I do clusters of floral images, I prefer different sizes so it looks more natural.


Once I colored my images, I knew that the top left hand would look really empty so I grabbed one of my red distress inks and softly blended the color concentrating on the corner. To finish off the background panel, I pulled out some metallic watercolors and splattered a combination of red and gold paint.

For my sentiment, I built it using a couple sentiments from the Hollyhocks stamp set. I stamped them using Juicy ink on black cardstock and used Gold Rush embossing powder for heat embossing.


One last touch I added was some black gems around the sentiments and floral cluster. I kept it limited to maintain the clean and simple look.

I’ve had this set for awhile now and it’s about time I use it. You definitely can use the stamp set for Christmas or an everyday card. I hope you get inspired to create!


Thanks for stopping by! Come back soon!


Wednesday, September 25, 2019

Snow Buddies

Hi everyone! It’s Jeannie (InsideoutJeans) on the blog today to share a card I created using Inkon3’s stamp set named, Artic Buddies. The weather is getting a bit chilly and I'm so ready to break out all my wintery stamps (not that you really need that as a reason to do so).

Artic Buddies was actually one of the stamp sets that led me to discover Inkon3 because of the adorable critters so it was about time I created something with it.

For today's card, I decided to go with a simple scene using the polar bear duo. I stamped out everything using Blackout ink and created masks for them. I wanted them hanging out in the ocean right before sunset.

By masking everything off, I was able to create a background using all distress inks. I love how easy ocean scenes are because you're just able to mark off a horizon and use different colors to create the effect. To add a little bit of texture into the ocean, I used a couple markers in swipes.
I’ve had this set for awhile now and it’s about time I use it. I hope you get inspired to create! 


Thanks for stopping by! Come back soon! 

Wednesday, September 11, 2019

Big Bold Magnolias - No Line Coloring

Hi everyone! It’s Jeannie (InsideoutJeans) on the blog today with Inkon3’s new release with the amazing stamp set named, Big Bold Magnolias along with the coordinating dies. If you didn't hop along with us during our blog hop, you definitely should check it out because there have been some fabulous projects using this set!

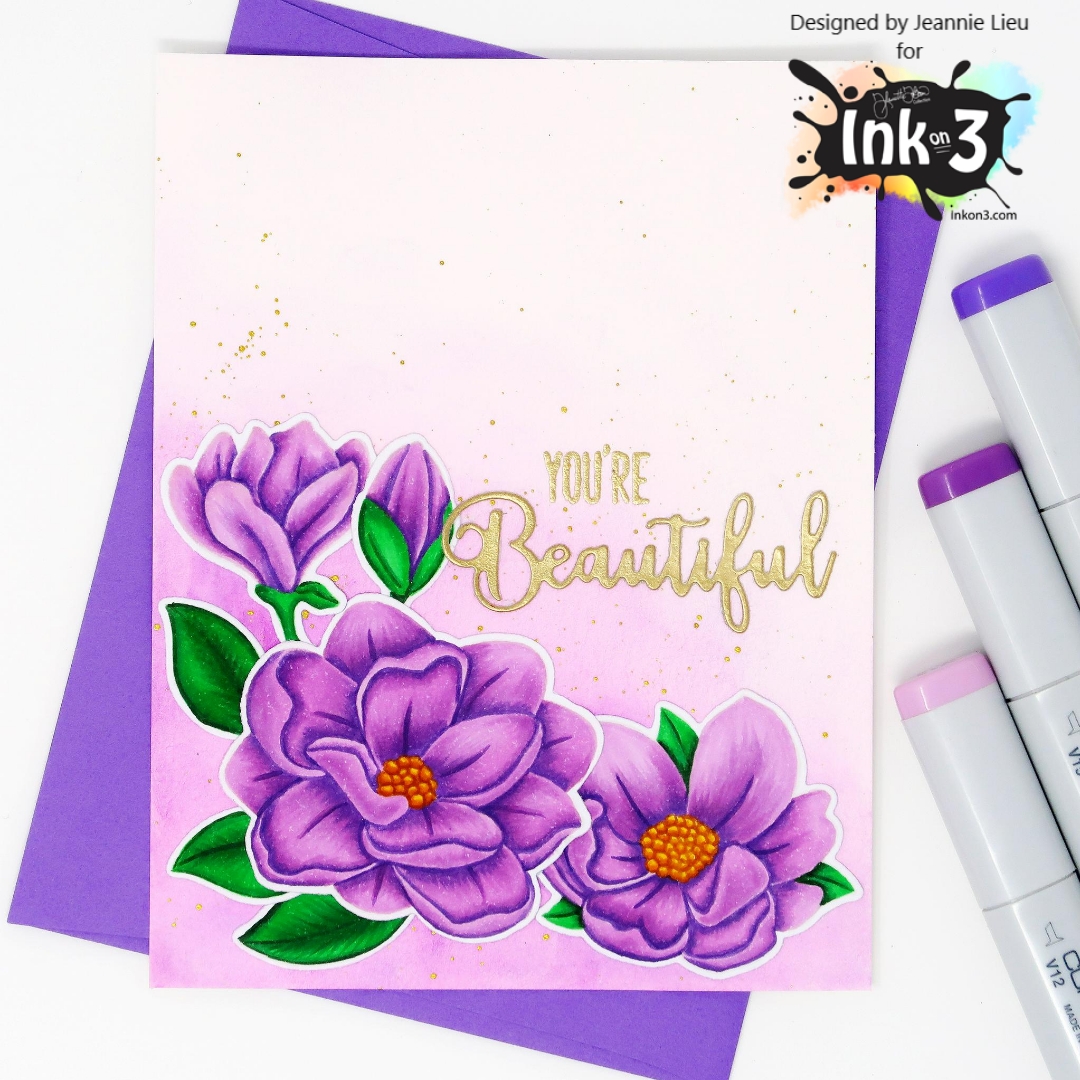
I previously had created two other cards using this set, but I just had to pull it out again to create another one. This time, I decided to take on some no-line coloring. Inkon3 has the fabulous Fadeout ink for no-line coloring. To start, I went ahead and stamped out all the images from the set, except for the largest magnolia. The last two projects, I had focused on the largest one so this time, I wanted to pay attention to the rest of the images from the set. 


Once I had stamped them out, I went in with some purple copic markers. For me, it's easiest to lay down the darkest color first so I know where all the shadows lay. I'll then work out to my lightest color. 

I tend to fussy cut a lot but for no-line coloring images, I prefer using the coordinating dies. It leaves that really nice white border so it really makes the images pop. 

For the background, I just did a few washes of purple watercolor. Nothing very fancy at all. I did keep the watercolor at the bottom left of the card where I have the flowers laid out. Before glueing my flowers down, I added some gold splatter. 

I wanted to tie in my gold splatter, so I decided to use the Juicy ink to cover a piece of white cardstock and added Gold Rush embossing powder. By doing this, I could use the standalone "Beautiful" sentiment from Heels to you die set. For the coordinating sentiment, I stamped the "You're" with Juicy ink and heat embossed with the Gold Rush embossing powder so everything matched up.

I hope you enjoyed this card I shared today and make sure to pick up your set too! This is so gorgeous and so fun to color! 


Thanks for stopping by! Come back again soon for some more inspiration and ideas! 

Tuesday, June 18, 2019

Heels to You - Reverse Image

Hello, my name is Jeannie and I'm a shoe addict.

So it's only fitting that I'm up on Inkon3 blog to share a card I created using the gorgeous Heels to You stamp set. When I first saw this set, I knew I had to have it because it is so, so pretty! Heels are something that I, now, wear when I'm going to a special event or want to feel extra girly and pretty! This particular shoe is just that especially with that flower!


However, I needed a pair of shoes, not just one and I thought that using the reverse image of it would be perfect in doing so. This stamp image is a rather large one and so I had to make sure both shoes would fit on an A2 card panel. Not only that, I'd have to create the reverse image of it!

I stamped out the first heel using Blackout hybrid ink and used a mask to cover the shoe since it'll be in the front. Then I decided where I was going to place the second shoe. Admittedly, I did this twice because the first time, I stamped the second shoe and the second heel was completely hidden and it looked so odd! To help me, I just marked off in pencil on the card where I wanted it to be.


To create the reverse image, I took a piece of scrap acetate to help. Using my Misti, I inked up my image and carefully stamped the image onto that piece of acetate. Note! Don't press too hard because the acetate is slippery. This method won't produce the clearest image, however,  you can go in with an alcohol friendly pen to outline it. It's a little extra work but totally worth it. It doesn't have to be perfect since the stamp will be pretty faint and when it's not perfect, I just use darker colors to cover up any imperfections.

Once I had the image of both heels, I was ready to color. This turned out exactly how I imaged in my head so I was pretty excited.

For the sentiment, I colored up a piece of white cardstock with the same red alcohol markers I used for the flowers and die cut the word "beautiful" from the coordinating Heels to You die set. To give it a little more dimension, I glued two additional white die cut words to it. Once I placed it on the card, I stamped the "You're" in the same Blackout hybrid ink.


To finish off the card, I added a little distress ink around the edges of the card and some Unicorn Tears embellishments from Trinity Stamps around the empty areas. It really completed the card!

I hope you enjoyed today's card and are inspired to create!

→ TO SEE MORE ←