Showing posts with label Poinsettia. Show all posts

Friday, July 9, 2021

Christmas in July Poinsettia Card

It's no secret that I LOVE all things winter and Christmas! I get so happy when July comes around because it gives me an excuse to share Christmas cards again! 


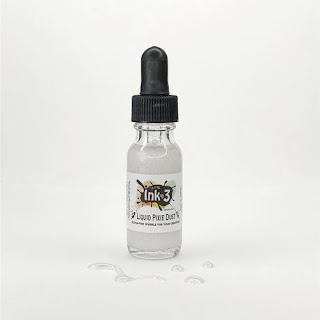
I wanted to have bold images against a wintery background, so I placed a snowflake stencil over a piece of black cardstock and used Shark Tooth White Atelier Ink to create the background for my card. For a bit more interest I spattered on some Liquid Pixie Dust. I love how easy it can be to create a magical background! 


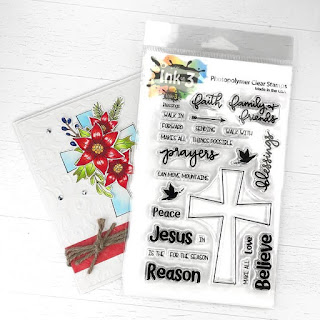
I stamped out flowers, leaves, and twigs from the Poinsettia Stamp Set with Blackout Hybrid Detail Ink and colored them with Copic Markers and cut them out with the coordinating Poinsettia Die Set. I arranged them onto my background with foam tape for dimension. I wanted a simple sentiment that wouldn't take away from the background and bright images, so I stamped a sentiment from the Merry & Bright Stamp Set with Juicy Watermark Emboss Ink and heat set it with Arctic White Ultra Fine Embossing Powder


No Christmas card is complete without adding even more shimmer so I covered my colored images with Liquid Pixie Dust! Now they sparkle and shine and make my heart so happy! Thanks so much for joining me! 

Wednesday, October 9, 2019

Poinsettia: Non-Christmas Card

Hi everyone! It’s Jeannie (InsideoutJeans) on the blog today to share a card I created using Inkon3’s Poinsettia stamp set. Yes, I know what you're thinking … Christmas cards already? Nope! I actually decided to use this set in a non-Christmas way by just using a non-holiday sentiment. I even used Christmasy colors. Sneaky!

I pulled out this set and was actually all set out to do a Christmas card but changed my mind last minute. I stamped all the images using Blackout ink and masked them to create a cluster of the poinsettia. I love that in this set there are three different sizes. Whenever I do clusters of floral images, I prefer different sizes so it looks more natural.


Once I colored my images, I knew that the top left hand would look really empty so I grabbed one of my red distress inks and softly blended the color concentrating on the corner. To finish off the background panel, I pulled out some metallic watercolors and splattered a combination of red and gold paint.

For my sentiment, I built it using a couple sentiments from the Hollyhocks stamp set. I stamped them using Juicy ink on black cardstock and used Gold Rush embossing powder for heat embossing.


One last touch I added was some black gems around the sentiments and floral cluster. I kept it limited to maintain the clean and simple look.

I’ve had this set for awhile now and it’s about time I use it. You definitely can use the stamp set for Christmas or an everyday card. I hope you get inspired to create!


Thanks for stopping by! Come back soon!


Friday, September 20, 2019

Fall Blessings


Hello Friends, Ilda here from I Love Doing All things crafty.

In a few days it will be Fall officially. Spring and Fall are definitely my favorite seasons of the year. I think it may have to do with how short the seasons are here in Canada and how quickly the leaves change everywhere. I love the warm colors of Fall and they are the inspiration for my card today.

CARD DETAILS

I began by stamping the images out using Blackout Ink and masking the beaver from the Platy-rific Pondies in the center of the card I then die cut a mask for it so that I could add the leaves around him using the die from Platy-rific Pondies Coordinating dies. Since the die cuts leave a white space around the stamp, I later will connect any lines afterward to finish the image.

For the pile of leaves, I used leaves from Heels To You and the Poinsettia set. I also die cut a few of each using the dies from the coordinating sets Heels To You and Poinsettia. Behind the beaver I also stamped out some pond greens that also come from the Platy-rific Pondies set.

To color these images in I used Copic markers. Under the pile of leaves, I stamped out the script blessings from the Blessings set using Blackout Ink.

Once the coloring was complete I die cut the panel using a Rectangle Stitched Die Frame and glued onto a Kraft Cardstock panel that I eventually glued on my card base.


Next, I die cut the letters out for "HAPPY FALL" using the Phat Alphanumeric Dies. To color them in I stuck them to the sticky side of a strip of washi tape to hold them in place while I colored them in using Copics.

I then used foam tape to pop the letters onto the card front. Next, I used a water brush pen filled with Liquid Pixie Dust to paint the shine onto each letter. Once it was dry I added a layer of glossy accents to seal in the sparkly shine and make them look like bubble letters.


Hope this cute Fall Blessings card inspired you to stretch out your stamps by pulling elements as I have with this card to create a totally different scene other then what the stamp sets were initially designed for.

Thank you for stopping by 😊
Until next time... Happy Crafting 👋

SUPPLIES
Platy-rific Pondies
Platy-rific Pondies
Shop at:
 IO3
Platy-rific Pondies Coordinating dies
Shop at:
 IO3
Phat Alphanumeric Dies
Shop at:
IO3
Heels To You
Heels To You
Shop at:
IO3
Heels To You Coordinating Dies
Shop at:
 IO3
Poinsettia
Poinsettia
Shop at:
 IO3
Poinsettia Coordinating Dies
Shop at:
IO3
Blessings
Blessings
Shop at:
IO3
Blackout Ink
Blackout Ink
Shop at:
IO3
Small Fine Tip Water Brush Pen
Shop at:
IO3
Liquid Pixie Dust
Liquid Pixie Dust
Shop at:
SSS | IO3
Neenah  80 LB SOLAR WHITE
Neenah 80 LB SOLAR WHITE
Shop at:
SSS | AMZ
Mini Misti Tool
Mini Misti Tool
Shop at:
SSS | AMZ | SB | SK
Gemini Jr Die Cutting/Embossing Machine
Shop at:
SSS | AMZ | SB
STITCHED RECTANGLES Dies
Shop at:
SSS
STUDIO KATIA GLUE
STUDIO KATIA GLUE
Shop at:
SSS | SK
Double-Sided Foam Tape
Shop at:
SSS | AMZ
Gelly Roll Gel Pen Set, Fine, Black
Shop at:
AMZ
WHITE Gelly Roll Pens Set
Shop at:
SSS | AMZ | SB
Glossy Accents
Glossy Accents
Shop at:
SSS | AMZ | SB | HBS

Tuesday, November 6, 2018

Liquid Pixie Dust on Poinsettia Blessings Card

Hello my crafty friends, Ilda here with you today!
Well, the snow has started falling here and it looks like it will stay with us for a while... before you know it Christmas will be here!

Today I'm sharing another Christmas creation for Ink On 3. This card features a couple of the newer released sets, PoinsettiaMerry and Bright and an older set Fairy Christmas.


To the ink blended background, I stamped out the evergreen branches. I then added the other pieces that I had stamped out with Blackout Ink and colored in with Zig Clean Clear markers. To the poinsettias, I added extra petals by masking each flower and stamping individual petals in between the spaces and then fussy cut each flower. I finished off the card by adding some glossy accents to the centers and some sparkly sequins.


Hope this Poinsettia Floral Christmas Card inspired you today. For a complete list of all the products used today, stop by my blog I Love Doing All things crafty.

Thank you for stopping by 😊
Until next time... Happy Crafting 👋

Tuesday, November 7, 2017

Fairy Christmas Slider Cards by Ilda

Hello Everyone, Ilda here!

Now that Halloween has come and gone and there are inches of snow outside it's time to switch gears and think of Christmas 😀 Can't believe how this year has flown by!!!

So today I'm sharing my first two Christmas Cards of the year! These cards feature Ink On 3's Fairy Christmas set and part of the latest release! As soon as I saw the Fairy Stamp I knew I had to make a card where it looked like she was flying in the air. So literally that is what I did... she does fly (well kind of, on a slider😉) I just can't help making interactive cards!

Here is a look at the first card and how the fairy looks at the bottom and the top position of the card. I wanted it to look like she was adding a star to the top of the tree.


and here is a closer look at this beautiful Blue Fairy!
(Yes, I also challenged myself to use non traditional Christmas colors and I'm really happy with the results) Isn't she beautiful!?!

To finish off the inside of the card, I simply stamped the Merry Christmas stamp from the same set. I'm really loving that font too!


And, here is my second card featuring the Pink Poinsettia Fairy! 


The Fairies were both colored using Spectrum Noir markers and finished with some sparkle using Wink of Stella. The backgrounds including the trees were done using Kuretake Gansai Tambi watercolors.

Make sure you watch my YT process video cause you won't believe how those trees were made! Also, see click HERE for a complete list of supplies used.


Here is a closer look at all the detail... check out the fussy cutting I did around the fairy 😲 Not hard to do with the right tools!


For those that love watching my process videos, this is for you!
Click →HERE to watch video in HD!

Hope these cards Fairy Christmas Slider Cards have inspired you create something beautiful and maybe interactive today! Don't forget to check out Ink on 3's Bundle Pack special right now... for a limited time you will get both new sets at a reduced price plus FREE shipping!

Thanks for stopping by!
Happy Crafting  :)