Showing posts with label Platy-rific Pondies. Show all posts

Wednesday, September 9, 2020

Platy-rific Pondies + Video

Hi everyone! It’s Jeannie (InsideoutJeans) on the blog today with Ink on 3’s stamp set named Platy-rific Pondies. 


I started off creating a background using Atelier Inks to create a rainbow background: Marilyn Red, Marigold Orange, Bee Sting Yellow, Goddess Green, Peacock Blue and My Jam Purple. I used water to splatter all over since the inks are water reactive. I also used the little star stamp and used the matching color to stamp them in their matching area. 

I quickly colored up the critters from Platy-rific Pondies along with some balloons. I stamped out a couple sentiments on black cardstock using Juicy Ink with Artic White embossing powder and heat set it.  


I also have a video showing process if you're interested in how this came together. 

Thanks for stopping by today and I hope you get inspired to create. Come back again soon for more inspiration and ideas! Happy Crafting! 


Wednesday, June 24, 2020

Watercoloring Fun with Atelier Inks - Guest Designer Laura


Hi everyone! It's Laura Volpes here and today I am back with my fourth and last post as a guest designer for InkOn3! In this post I will be sharing a card and a video tutorial and I will be showing how to use Ink On 3 Atelier inks to watercolor.

Before that, though, I want to take a moment to thank InkOn3 for having me as a guest this month - I had a blast creating with their fun stamps and great inks!
My card today is a scene card - my favorite kind! I started by creating the elements for my scene out of some watercolor cardstock. I used the Heffy Doodle Imperial Stitched Rectangles, the Lawn Fawn Stitched Pond and the Heffy Doodle Grassy Lass Border dies.

I watercolored each piece separately using Atelier inks in Peacock Blue and Goddess Green and I added some splatters and some Liquid Pixie Dust for extra fun and shimmer!

I set the panels aside to dry and started working on my images.
Like I did last week, I used images from the Platy-rrific Pondies stamp set. I did some no line coloring this time around, so I stamped the images with InkOn3 Fadeout ink and I colored them with Illustrator markers. I then used the coordinating dies to die cut them out.
I assembled the scene on a top-folding A2 card base and I then stamped my sentiment with InkOn3 Blackout Ink.
I finished off the card by adding couple of white pen gen details and by coating the balloons with more Liquid Pixie Dust!

And, as promised, here is my video for you! I hope you like it!


A huge thank you again to InkOn3 for having me as a guest this month and to you all for stopping by!
Have a great day!

Wednesday, June 17, 2020

Stamping with Atelier Inks - Guest Designer Laura


Hi everyone! It's Laura Volpes here and today I am back with my third post as a guest designer for InkOn3! I am continuing my experiments with InkOn3 Atelier Inks and today I will focus on stamping! Make sure to also check out my video to see all the fun things I tried out!

For my card today I used the Bad & Boujee and Platy-rific stamp sets - I had lots of fun mixing images from the two! As a first step, I created a DIY patterned paper effect on my background, by stamping one of the images in the Bad & Boujee  stamp set with Marilyn Red Atelier Ink. I was super happy with how vibrant and defined my stamping was!

Since I was having lots of fun stamping, I also did a few experiment to see how Atelier Inks layer - more about this in my video!

The focal images are two of the adorable critters in the Platy-rific  stamp set. I stamped them with Blackout Ink and I colored them with Illustrator markers. Once the coloring was done, I die cut them with the coordinating dies.

I then created three die cut hearts with some dies in my stash and pearlescent vellum.
I die cut the stamped background to 4 x 5.25" and I glued it to a black A2 sized card base. I glued the die cut hearts and the images to my card, raising the images over some foam squares.

I heat embossed my sentiment with white embossing powder over black cardstock and finished off my card with some red heart crystals.

As promised, here is my video tutorial, showing how to make this cute thinking of you card as well as my stamping experiments with Atelier Inks!

https://youtu.be/oFpmDkBiDZM

Thank you all for stopping by and have a great day!

Wednesday, February 19, 2020

Platy-rific Pondies featuring Guest Designer Rachel

Hi everyone! We have a special guest designer today... Rachel! Please head over to her instagram and give her a follow! She's created an amazing project today and will be back next week with a second project! Keep on reading to see how she created this amazing pop up box! 

---------

Hello crafty friends! It's Rachel here and I'm so excited to be guest designing today for Ink on 3! I created a 3D Box Card to share with you today featuring some cute critters from the Platy-rific Pondies Stamp Set. I absolutely love this stamp set! It's so versatile and full of so many cute images!


I first created the base of my card using a sheet of dark blue card stock, a scoring board, scissors, and some strong adhesive. I created my base so that when it lays flat, it fits perfectly into a standard A2 sized envelope. I used a rectangular die to cut a window in the front of my box and then glued a piece of clear acetate behind it prior to attaching the sides together.


I then stamped all of my images with some Copic friendly black ink onto a sheet of Neenah Solar White 110lb Card Stock, colored them with Copic Sketch Markers and then used my Brother ScanNCut to cut them out.


I added some inner shelves to my box card to hold both the strips of grass, water background piece, and my critters. For my water background, I blended some Tumbled Glass, Broken China, Stormy Sky, and Chipped Sapphire Distress Inks onto another small piece of Neenah Solar White 110lb Card Stock. Once blended, I then used a #4 paint brush to flick some water droplets onto the ink to create some more interest to this panel and to also look more like water. For my grass, I diecut each piece from white card stock using the Grassy Edges Die-namics from My Favorite Things and then blended each entire piece with Mowed Lawn Distress Oxide Ink. I then blended it again over the tips of the grass with Mowed Lawn Distress Ink.


Lastly, I added a background sky by blending some Ripe Persimmon, Wild Honey, Fossilized Amber, and Squeezed Lemonade Distress Inks. I stamped my sentiment onto the top right corner of this piece before I adhered it to the inside of my card.

I hope you enjoyed my card today! Thanks so much for stopping by!

Friday, September 20, 2019

Fall Blessings


Hello Friends, Ilda here from I Love Doing All things crafty.

In a few days it will be Fall officially. Spring and Fall are definitely my favorite seasons of the year. I think it may have to do with how short the seasons are here in Canada and how quickly the leaves change everywhere. I love the warm colors of Fall and they are the inspiration for my card today.

CARD DETAILS

I began by stamping the images out using Blackout Ink and masking the beaver from the Platy-rific Pondies in the center of the card I then die cut a mask for it so that I could add the leaves around him using the die from Platy-rific Pondies Coordinating dies. Since the die cuts leave a white space around the stamp, I later will connect any lines afterward to finish the image.

For the pile of leaves, I used leaves from Heels To You and the Poinsettia set. I also die cut a few of each using the dies from the coordinating sets Heels To You and Poinsettia. Behind the beaver I also stamped out some pond greens that also come from the Platy-rific Pondies set.

To color these images in I used Copic markers. Under the pile of leaves, I stamped out the script blessings from the Blessings set using Blackout Ink.

Once the coloring was complete I die cut the panel using a Rectangle Stitched Die Frame and glued onto a Kraft Cardstock panel that I eventually glued on my card base.


Next, I die cut the letters out for "HAPPY FALL" using the Phat Alphanumeric Dies. To color them in I stuck them to the sticky side of a strip of washi tape to hold them in place while I colored them in using Copics.

I then used foam tape to pop the letters onto the card front. Next, I used a water brush pen filled with Liquid Pixie Dust to paint the shine onto each letter. Once it was dry I added a layer of glossy accents to seal in the sparkly shine and make them look like bubble letters.


Hope this cute Fall Blessings card inspired you to stretch out your stamps by pulling elements as I have with this card to create a totally different scene other then what the stamp sets were initially designed for.

Thank you for stopping by 😊
Until next time... Happy Crafting 👋

SUPPLIES
Platy-rific Pondies
Platy-rific Pondies
Shop at:
 IO3
Platy-rific Pondies Coordinating dies
Shop at:
 IO3
Phat Alphanumeric Dies
Shop at:
IO3
Heels To You
Heels To You
Shop at:
IO3
Heels To You Coordinating Dies
Shop at:
 IO3
Poinsettia
Poinsettia
Shop at:
 IO3
Poinsettia Coordinating Dies
Shop at:
IO3
Blessings
Blessings
Shop at:
IO3
Blackout Ink
Blackout Ink
Shop at:
IO3
Small Fine Tip Water Brush Pen
Shop at:
IO3
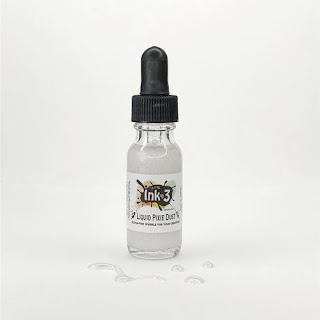
Liquid Pixie Dust
Liquid Pixie Dust
Shop at:
SSS | IO3
Neenah  80 LB SOLAR WHITE
Neenah 80 LB SOLAR WHITE
Shop at:
SSS | AMZ
Mini Misti Tool
Mini Misti Tool
Shop at:
SSS | AMZ | SB | SK
Gemini Jr Die Cutting/Embossing Machine
Shop at:
SSS | AMZ | SB
STITCHED RECTANGLES Dies
Shop at:
SSS
STUDIO KATIA GLUE
STUDIO KATIA GLUE
Shop at:
SSS | SK
Double-Sided Foam Tape
Shop at:
SSS | AMZ
Gelly Roll Gel Pen Set, Fine, Black
Shop at:
AMZ
WHITE Gelly Roll Pens Set
Shop at:
SSS | AMZ | SB
Glossy Accents
Glossy Accents
Shop at:
SSS | AMZ | SB | HBS