Showing posts with label BAD AND BOUJEE. Show all posts

Tuesday, July 28, 2020

Atelier Ink Stamped Kisses

Have you tried the Atelier Inks from InkOn3? You neeeeed to! They are perfect for ink blending, and watercoloring - and even just to stamp! I've played around with a bunch of techniques, but today I decided to do some simple stamping with all the rainbow colors of Atelier Ink!


The Atelier Ink stamps so crisp and beautiful without repeat stamping! Each of the little lips was stamped only once! And they're PERFECT!


I made four cards using the Bad & Boujee Stamp Set - two of them are rainbow ( ooooh my favorite! ), one has the first half of the rainbow, and the last has the second half of the rainbow.


I used the six "traditional" colors of the rainbow - Marilyn Red, Marigold Orange, Bee Sting Yellow, Goddess Green, Peacock Blue, and My Jam Purple. When I stamp a background with smaller images I try to start in the center of my panel and work my way out. That way I don't have large gaps in the center of my panel. I stamped the lips from the Bad & Boujee Stamp Set all over my panels making sure to use my Ink Off Cloth and Ink Off Cleaner in between colors of Atelier Ink.


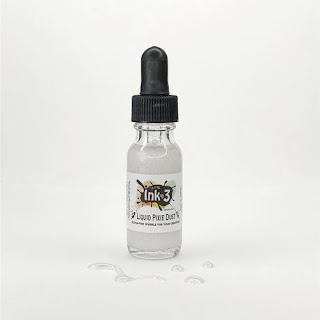
Let's make some sparkly die cut sentiments! I love my Liquid Pixie Dust for added sparkle on die cuts, but this time I cheated a bit! I took a piece of black cardstock and mixed a bit of water with Liquid Pixie Dust and used a flat paintbrush to paint my piece of cardstock. Boom! Magically glittery cardstock! Then I used the coordinating Bad & Boujee Die Set to cut out the sentiment and added it to each card.


I added flicks of black to each background and embellished with some gray or black pearls! And that's all! I hope you'll grab your Atelier Inks for some simple stamping! The results are gorgeous! See you soon!

Wednesday, June 17, 2020

Stamping with Atelier Inks - Guest Designer Laura


Hi everyone! It's Laura Volpes here and today I am back with my third post as a guest designer for InkOn3! I am continuing my experiments with InkOn3 Atelier Inks and today I will focus on stamping! Make sure to also check out my video to see all the fun things I tried out!

For my card today I used the Bad & Boujee and Platy-rific stamp sets - I had lots of fun mixing images from the two! As a first step, I created a DIY patterned paper effect on my background, by stamping one of the images in the Bad & Boujee  stamp set with Marilyn Red Atelier Ink. I was super happy with how vibrant and defined my stamping was!

Since I was having lots of fun stamping, I also did a few experiment to see how Atelier Inks layer - more about this in my video!

The focal images are two of the adorable critters in the Platy-rific  stamp set. I stamped them with Blackout Ink and I colored them with Illustrator markers. Once the coloring was done, I die cut them with the coordinating dies.

I then created three die cut hearts with some dies in my stash and pearlescent vellum.
I die cut the stamped background to 4 x 5.25" and I glued it to a black A2 sized card base. I glued the die cut hearts and the images to my card, raising the images over some foam squares.

I heat embossed my sentiment with white embossing powder over black cardstock and finished off my card with some red heart crystals.

As promised, here is my video tutorial, showing how to make this cute thinking of you card as well as my stamping experiments with Atelier Inks!

https://youtu.be/oFpmDkBiDZM

Thank you all for stopping by and have a great day!

Friday, December 13, 2019

Peppermint Kisses

Hello my fabulous friends!

Kassi here...
Are you looking for a quick last minute holiday card? 

 Maybe I can help...
This card is super quick and easy to put together!


Paper: Strathmore Bristol Smooth; Paper Studio Glitter Glam
Stamps: Inkon3 Bad and Boujee
Stencil: LDRS Creative Playful Patterns
Other: ribbon, candy cane


Start by taping a striped stencil down to the lower portion of your card front, then using your favorite ink blending tool to apply some Marilyn Red Atelier ink through the stencil.


Next, stamp the lips from Bad and Boujee using Marilyn Red ink. To get a darker red, use a MISTI and stamp the lips twice. As long as your paper doesn't move, you will still have a crisp image, just a darker color.


Use a paintbrush to apply some Liquid Pixie Dust over the lips to give them a frosty sparkle.


After the Liquid Pixie Dust dries, stamp 'kisses' using Blackout ink.


Add a hand written 'peppermint' to finish the sentiment.


If you have matching ribbon, you can skip this step, but I didn't have any ribbon the right color, so here's a quick tip for you if you need it..

Place some white ribbon in a sandwich bag... Spritz in a little water using a spray bottle, than add a drop or two of Atelier reinker... Smoosh it around to cover the ribbon.  Remove the ribbon from the bag and pat extra ink off with a paper towel. Carefully heat dry (or air dry) the ribbon. Now you have custom colored ribbon to match your stamped image! 
*note: If you don't want colored hands, put on a pair of gloves to remove the wet ribbon. 


Tie your ribbon around the top of the card front.. Then glue that onto a silver glitter card base.


Finish it off by adding a candy cane and a bow!


How amazing do those lips look!?!?!

I hope your holidays are sweet and full of sparkle!

Hugs!


Friday, August 2, 2019

#Boujee Watercolor Card + Video


Hi everyone!  It's Jaycee Gaspar for my first project as part of the Ink on 3 Design Team!  Thank you so much to Fleurette and Jeannie for the opportunity.  One of the things I love creating is floral arrangements, and Ink on 3 has many to chose from.  I am a little late for the Bad & Boujee release, but I couldn't help but make a project featuring this stamp set.  To find out how I made this #boujee card, I've got a video below!


Thank you so much for watching my video!  Let me know what you think about this super #boujee project in the comments below.  If you like what you've seen from me, make sure you subscribe to my YouTube channel and give me a follow over on Instagram!  Talk to you all very soon!


Materials:
Ink on 3 - Bad & Boujee Stamp Set
Ink on 3 - Bad & Boujee Die Set
Ink on 3 - Roses in Bloom
Ink on 3 - Blackout Detail Ink
Ink on 3 - Gold Rush Embossing Powder
Ink on 3 - Juicy Clear Embossing Ink

Windsor & Newton Watercolors
Silver Black Velvet #8 Round Watercolor Brush
Neenah Solar White 80lb Cardstock


Jaycee Gaspar

YouTube | Instagram | Blog

Friday, July 26, 2019

Colorful Gems

Hi everyone!

Kassi here today to share a colorful little gem with you...

Ever since I was a kid, I loved diamonds... Not because of their value (I couldn't tell a real one from a glass one), but simply because they are sparkly and pretty. It made me feel sophisticated to have jewels in my necklace... Well as sophisticated as a 8 year old can feel....

As I got older, I learned that sparkly jewels come in ALL colors of the rainbow! 


Supplies:
Paper: Strathmore Bristol Smooth; Neenah Classic Crest Solar White; Yupo
Stamps: InkOn3 Bad & Boujee
Ink: InkOn3 Juicy Clear Embossing, Blackout
Coloring: Zig Clean Color Real Brush, Arteza Real Brush, Copic Various Ink
Red- 037, 080, 038, 030, 044
Pink- A192, A129, A187, A190, A183, A151
Orange- A128, A135, A112, A140
Yellow- 050, 051, 061, 023, 036
Light Green- A159, A111, A152, A151
Dark Green- A185, A132, A147, A159
Light Blue- 031, 032, 086, 045
Dark Blue- 037, 080, 038, 030, 044
Purple- A109, A125, A186, A165, A136, A162
Background- YR23, BG15, V05, YG05, RV14, V04, B01
Dies: InkOn3 Bad & Boujee
Other: InkOn3 Arctic White embossing powder; Minc silver foil
_____________

Ready to make a colorful gem card with me? Let's get started! 


Step 1: Stamp a bunch of jewels using Juicy Clear Embossing ink, then heat emboss using Arctic White embossing powder. I ended up using 9 gems for my card, but I embossed a few extra just to be on the safe side. 


Step 2: Add color! I love the fire scintillation in gems (the flashes of different colors you see when light hits it), so I tried to incorporate more than one color into each gem...

(no, I'm no diamond expert... I had to look up the technical term for the pretty rainbow sparkles... LOL!)

Step 3: When you gems are finished, use the coordinating die to cut them out.


Step 4: On Yupo paper, create an alcohol ink background using your favorite techniques and inks.. Make your piece big enough to cover your card front plus die cut our sentiment...

For mine, I created a basic alcohol ink background using Copic Various ink (the marker refills). While the ink was still a bit tacky, I pressed some Minc Foil onto it, and let it dry, then removed the foil sheet.. this leaves veins of silver wherever the alcohol ink was tacky..


Step 5: Die cut the word 'Boujee' from the colored Yupo. To help make the word pop from the background, run the edge of a black alcohol marker along the edge.. this will give it a very subtle black outline.

Step 6: Trim the remaining yupo background to about 1/4 inch smaller than your card base.


Step 7: Adhere the yupo background to your card base. Stamp "You're so" using Blackout ink and carefully heat set (don't overheat your yupo, or it will warp). Adhere 'Boujee' to the card base. 


Step 8: Adhere your gems using foam tape.


This card is so bright and colorful! Having the gems popped up gives it great dimension, and the veins of silver really pull it together! 

I'm still partial to diamonds, but it is so fun looking at all the different colors and learning about the different types of gems! 

What is your favorite gem stone?

See you soon!
~Kassi

Friday, July 12, 2019

Boujee and Kisses Shaker Card with Ilda


Hey Peeps, Ilda here!

I am back again today with another shaker card. This time featuring the newest sets from Ink On 3 BAD and BOUJEE and it's Coordinating Dies.


CARD DETAILS

I began by stamping out the images for this card. I used Juicy Ink to stamp out the Perfume bottle and the large Diamond from the BAD AND BOUJEE set, and then heat set them using Chrome Embossing Powder. I then colored them in with a light blue zig brush and blended on some LIQUID PIXIE DUST to add sparkle. I then used the Coordinating Dies to cut out the pieces.


Next, I die cut the Black Rectangle Frame for the shaker as well as the scripted Boujee and Kisses from the Coordinating Die set. I then used JUICY INK to ink up the die cuts and heat set a few layers of the Black As Night Embossing Powder. I then glued the finished pieces to the top of the acetate piece that I had glued onto the frame.


The last thing I did, was to stamp the lips directly onto the card base using Worn Lipstick Oxide Ink and then heat set them using Crystal Clear Ultra Powder. I also stamped out the "&" onto the card base and added a tiny diamond to the perfume bottle using BLACKOUT INK.


To finish off this shaker card, I used foam tape under the frame and added a bunch of clear and iridescent shaker bits to the center of the card base before gluing the frame in place.

I think this card is pretty Bad and Boujee and hope it has inspired you today. Have a wonderful weekend.

Thank you for stopping by 😊
Until next time... Happy Crafting 👋

Ilda

SUPPLIES
Bad and Boujee Stamps
Shop at:
SSS | IO3
Bad and Boujee Die Set
Shop at:
SSS | IO3
Crystal Clear Ultra  Powder
Crystal Clear Ultra Powder
Shop at:
SSS | IO3
Blackout Ink
Blackout Ink
Shop at:
SSS | IO3
Juicy Ink
Juicy Ink
Shop at:
SSS | IO3
Chrome Ultra Fine Embossing Powder
Shop at:
SSS | IO3
Black As Night Embossing Powder
Shop at:
SSS | IO3
Liquid Pixie Dust
Liquid Pixie Dust
Shop at:
SSS | IO3
Small Fine Tip Water Brush Pen
Shop at:
IO3
Mini Misti Tool
Mini Misti Tool
Shop at:
SSS | AMZ | SB | SK
Strathmore Bristol Pad
Shop at:
SSS | AMZ
Oxide Ink Pad WORN LIPSTICK
Shop at:
SSS | SB
Zig CLEAN COLOR 60+ 80 SET
Shop at:
SSS | AMZ
Gemini Jr Die Cutting/Embossing Machine
Shop at:
SSS | AMZ | SB
Black Cardstock 110bs
Shop at:
AMZ
MFT STITCHED RECTANGLE FRAMES Die-Namics
Shop at:
SSS
ACETATE SHEETS
ACETATE SHEETS
Shop at:
SSS | SK
SPARKLING CRYSTALS MIX
Shop at:
SSS | SK
ONYX CRYSTALS
ONYX CRYSTALS
Shop at:
SSS | SK
MAJESTIC FUSION
MAJESTIC FUSION
Shop at:
SSS | SK
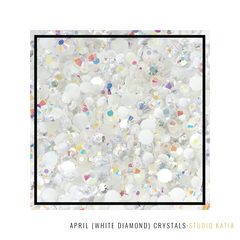
APRIL CRYSTALS
APRIL CRYSTALS
Shop at:
SSS | SK
JUST CHUNKY CONFETTI GLITTER
Shop at:
SSS | SK
Double-Sided Foam Tape
Shop at:
SSS | AMZ