Showing posts with label Bad and Boujee Die Set. Show all posts

Thursday, January 14, 2021

Tone on Tone Ink Blending

Hi everyone! It’s Jeannie (InsideoutJeans) on the blog today with Ink on 3’s stamp set named Bad and Boujee stamp and die set. I'm sharing four cards that I mass produced using different colors from the Atelier Ink line. 


Using Fadeout, I created a fun background using the lips from the Bad and Boujee stamp set. Because Fadeout absorbs the ink that you place on top of it, it made it for an easy tone on tone background panel for this really easy card. 

I used Sweet Petunia Pink, My Jam Purple, and Trinity Teal from the Atelier Ink line to ink blend all over the background panels. 


Isn't this such a fun technique to try out? To finish off the card, I die cut the "kisses" from the Bad and Boujee coordinating dies and layered two different cardstocks on top of each other. I also stamped the word "Sending" using Juicy Ink and heat embossed it with Artic White embossing powder


These cards are so fun and easy to put together, perfect for mass production. 

Check out the process of how I created these cards below on the Ink on 3 YouTube Channel. 


Thanks for stopping by today and I hope you get inspired to create. Come back again soon for more inspiration and ideas! Happy Crafting! 


Saturday, January 9, 2021

Boujee Kisses Card

Big, bold, boujee kisses to you! The Bad & Boujee Stamp Set from InkOn3 is definitely one of my favorites for Valentine's Day! 


I love the two new colors of Atelier Ink from InkOn3 - Sweet Petunia Pink and Trinity Teal. They pair together beautifully! And who doesn't love a nice bright pink lip?! I used the solid lip image from the Bad & Boujee Stamp Set and stamped a cascading line of lips using Sweet Petunia Pink Atelier Ink from the top right to the bottom left. 


I stamped the perfume bottle from the Bad & Boujee Stamp Set using Blackout Hybrid Detail Ink onto white cardstock. I chose my Copic markers to match the Trinity Teal Atelier Ink and colored in the bottle and used the coordinating Bad & Boujee Die Set to cut it out. I stamped the lips once more with Juicy Clear Embossing and Watermark Ink and heat embossed it with Gold Rush Ultra Fine Embossing Powder then cut it out. 


I die cut the kisses word die from the Bad & Boujee Die Set and added some color to the bottom with Trinity Teal Atelier Ink. I used a blender brush and kept the color concentrated towards the bottom and lighter at the middle, fading to white at the top of the die cut sentiment. I arranged all three elements onto my cascading lips card front. 


No boujee card is complete without some Liquid Pixie Dust! I covered the perfume bottle as well as the sentiment with a coating of the magical shimmer to finish the card. Thanks for peeking at my card! I hope this inspires you to be a bit boujee today! 

Tuesday, July 28, 2020

Atelier Ink Stamped Kisses

Have you tried the Atelier Inks from InkOn3? You neeeeed to! They are perfect for ink blending, and watercoloring - and even just to stamp! I've played around with a bunch of techniques, but today I decided to do some simple stamping with all the rainbow colors of Atelier Ink!


The Atelier Ink stamps so crisp and beautiful without repeat stamping! Each of the little lips was stamped only once! And they're PERFECT!


I made four cards using the Bad & Boujee Stamp Set - two of them are rainbow ( ooooh my favorite! ), one has the first half of the rainbow, and the last has the second half of the rainbow.


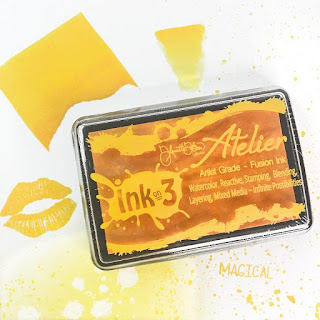
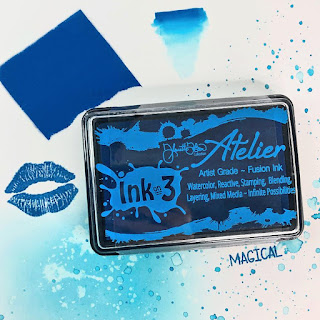
I used the six "traditional" colors of the rainbow - Marilyn Red, Marigold Orange, Bee Sting Yellow, Goddess Green, Peacock Blue, and My Jam Purple. When I stamp a background with smaller images I try to start in the center of my panel and work my way out. That way I don't have large gaps in the center of my panel. I stamped the lips from the Bad & Boujee Stamp Set all over my panels making sure to use my Ink Off Cloth and Ink Off Cleaner in between colors of Atelier Ink.


Let's make some sparkly die cut sentiments! I love my Liquid Pixie Dust for added sparkle on die cuts, but this time I cheated a bit! I took a piece of black cardstock and mixed a bit of water with Liquid Pixie Dust and used a flat paintbrush to paint my piece of cardstock. Boom! Magically glittery cardstock! Then I used the coordinating Bad & Boujee Die Set to cut out the sentiment and added it to each card.


I added flicks of black to each background and embellished with some gray or black pearls! And that's all! I hope you'll grab your Atelier Inks for some simple stamping! The results are gorgeous! See you soon!

Wednesday, June 17, 2020

Stamping with Atelier Inks - Guest Designer Laura


Hi everyone! It's Laura Volpes here and today I am back with my third post as a guest designer for InkOn3! I am continuing my experiments with InkOn3 Atelier Inks and today I will focus on stamping! Make sure to also check out my video to see all the fun things I tried out!
For my card today I used the Bad & Boujee and Platy-rific stamp sets - I had lots of fun mixing images from the two! As a first step, I created a DIY patterned paper effect on my background, by stamping one of the images in the Bad & Boujee  stamp set with Marilyn Red Atelier Ink. I was super happy with how vibrant and defined my stamping was!

Since I was having lots of fun stamping, I also did a few experiment to see how Atelier Inks layer - more about this in my video!

The focal images are two of the adorable critters in the Platy-rific  stamp set. I stamped them with Blackout Ink and I colored them with Illustrator markers. Once the coloring was done, I die cut them with the coordinating dies.

I then created three die cut hearts with some dies in my stash and pearlescent vellum.
I die cut the stamped background to 4 x 5.25" and I glued it to a black A2 sized card base. I glued the die cut hearts and the images to my card, raising the images over some foam squares.

I heat embossed my sentiment with white embossing powder over black cardstock and finished off my card with some red heart crystals.

As promised, here is my video tutorial, showing how to make this cute thinking of you card as well as my stamping experiments with Atelier Inks!

https://youtu.be/oFpmDkBiDZM

Thank you all for stopping by and have a great day!

Wednesday, January 29, 2020

Ink On 3 Inks - What's the Difference? + Video


Hi everyone, welcome back to the Ink On 3 blog!  I hope your 2020 is off to a wonderful start!  Over on my insta, I have seen a few people making crafty resolutions or rekindling their love for card making.  I know not everyone understands the multitude of inks and mediums that Ink On 3 has to offer.  So I thought this would be a great opportunity to show you all; beginner or expert, the four families of inks that complete your crafty collection.


Which of the four ink families from Ink On 3 do YOU use most on your card projects?  I hope you found the video helpful in shopping your stash and trying new ways to color.  There are so many combinations when mixing the four ink families as well.  Try coloring your Blackout Detail Ink images with the Atelier Fusion Ink Watercolor Refills!  You will be surprised at how easy it is to blend the colors and achieve smooth results.  Speaking of Atelier Fusion Inks, make sure you follow the video on this blog post with THIS POST specific to Atelier Inks!

Hey thank you so much for checking out my video on how I made these cards!  Do you all have stamp sets from Ink On 3 that you would like me to use in a future project?  Let me know in the comments below!  If you like what you've seen from me, make sure you subscribe to my YouTube channel and give me a follow over on Instagram!  Talk to you all very soon!

Materials:
Ink On 3 - Blackout Detail Ink
Ink On 3 - Juicy Clear Embossing Ink
Ink On 3 - Fadeout No-Line Ink
Ink On 3 - Atelier Fusion Ink
Ink On 3 - Strawberry Champagne Embossing Powder
Ink On 3 - Gold Rush Embossing Powder
Ink On 3 - Water Lily Stamp Set
Ink On 3 - Bad & Boujee Stamp Set
Ink On 3 - Bad & Boujee Die Set
Ink On 3 - Dogwood Flower Die Set

Ink On 3 - Raccoon Hugs Stamp Set
Ink On 3 - Raccoon Hugs Die Set


Jaycee Gaspar

YouTube | Instagram | Blog

Thursday, January 9, 2020

Hugs Kisses and Warm Wishes Valentine's Day Cards with Ilda

Hugs Kisses and Warm Wishes Valentine's Day Cards | Ink On 3 by ilovedoingallthingscrafty.com

Happy Wednesday Friends, Ilda here from I Love Doing All Things Crafty. I hope your week is going well for you all, I sadly still have a nasty cold but I guess shouldn't complain too much as I haven't been sick for the longest time, guess it's going around and it was my turn😒.

At least a cold can't stop me from creating, so today I have some colorful Valentine inspired cards to share with you featuring a few goodies from Ink On 3.

CARD DETAILS

For this first card, I started by stamping out the lips from Bad and Boujee Stamp set randomly but in a rainbow order all the way down the panel. Beginning with Marilyn Red, Marigold OrangeBee Sting Yellow, Goddess Green, Peacock Blue and ending with My Jam Purple Atelier Inks. I just love these ink names!!!

Hugs Kisses and Warm Wishes Valentine's Day Cards | Ink On 3 by ilovedoingallthingscrafty.com

I then stamped the "hugs and warm wishes" from the Raccoon Hugs set on vellum and heat set the ink using Black As Night Embossing Powder. I also used the "&" from the Bad and Boujee Stamp set and the Kisses die from the Coordinating Bad and Boujee Die Set that I coated using Juicy Ink and Crystal Clear Embossing Powder.

Hugs Kisses and Warm Wishes Valentine's Day Cards | Ink On 3 by ilovedoingallthingscrafty.com

For this next card, I began by gluing paper scraps onto my card panel that I had cut into random strip sizes to create the background.

Hugs Kisses and Warm Wishes Valentine's Day Cards | Ink On 3 by ilovedoingallthingscrafty.com

I then stamped out the lips horizontally across the panel. Here I used Marilyn RedMarigold OrangeBee Sting Yellow Atelier Inks.

Hugs Kisses and Warm Wishes Valentine's Day Cards | Ink On 3 by ilovedoingallthingscrafty.com

I then stamped out the sentiments from the Bad and Boujee Stamp set and then used Crystal Clear embossing powder to heat set them. I then popped on the stamped image strip onto the colorful card panel and Voila all done!

I hope these cards have inspired you. Both these cards could be used for Valentine's Day but they also could be used as friendship or encouragement cards. 

Thank you for stopping by 😊
Until next time... Happy Crafting 👋

Hugs, Kisses and Warm Wishes, Ilda

SUPPLIES
Bad and Boujee Stamps
Shop at:
IO3
Bad and Boujee Die Set
Shop at:
IO3
Raccoon Hugs
Raccoon Hugs
Shop at:
 IO3
Atelier Marilyn Red
Atelier Marilyn Red
Shop at:
 IO3
Atelier Marigold Orange
Shop at:
 IO3
Atelier Bee Sting Yellow
Shop at:
 IO3
Atelier Goddess Green
Shop at:
 IO3
Atelier Peacock Blue
Shop at:
IO3
Atelier My Jam Purple
Shop at:
 IO3
Vellum Value Pack
Vellum Value Pack
Shop at:
SSS | AMZ
JUICY INK
JUICY INK
Shop at:
IO3
CRYSTAL CLEAR Emb Pwd
Shop at:
 IO3
Black As Night Embossing Powder
Shop at:
 IO3
Neenah  80 LB SOLAR WHITE
Neenah 80 LB SOLAR WHITE
Shop at:
SSS | AMZ
VersaFine ONYX BLACK Ink
Shop at:
SSS | AMZ | SBC | HB
Ruler Stamping Block
Shop at:
SSS | SK
Mini Stamping Block
Mini Stamping Block
Shop at:
SSS | SK