Hi everyone! It’s Jeannie (InsideoutJeans) on the blog today with Ink on 3’s stamp set named Raccoon Hugs stamp set. This is a set that has been in my collection but I haven't pulled it out and I'm unsure why. The adorable raccoon holding the heart balloon is just so sweet.
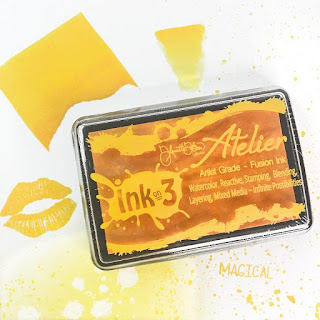
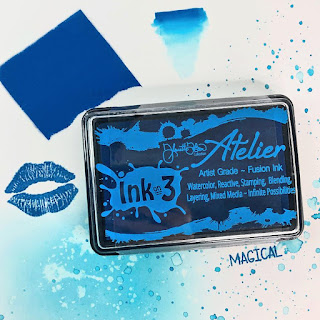
I wanted to create some easy backgrounds to go with this image so I just inked up them using the Atelier inks along with some masking tape. Nothing super special, no special items needed.
Here is my process video so you can see how these three cards came together.
Thanks for stopping by today and I hope you get inspired to create. Come back again soon for more inspiration and ideas! Happy Crafting!
Hey, there! It's hard to believe that Valentine's Day is in just 6 weeks, isn't it!? Here's a simple card with traditional colors that's perfect for using up scraps of cardstock. And the cute little raccoon from InkOn3 is just the cutest!
I always keep my scraps of cardstock ( and patterned paper ) to use on future projects - but I never actually get around to those "future projects"! This is one of my go to techniques for using up scraps. I cut four colors of cardstock into strips a quarter of an inch thick, but you could cut to any width you like - the technique works with just about anything! I covered a piece of A2 sized cardstock with my favorite liquid adhesive and adhered the strips in a diagonal pattern.
Once my background was covered in pretty strips of pink cardstock I used a circle die to cut a hill for my critter to sit on. I cut down a piece of cardstock and then hung a large circle die off the bottom to create a perfectly even hill shape. I added the hill to the bottom of my card using fun foam for dimension.
I wanted to finish the card with some glam so I added Liquid Pixie Dust to the raccoon and balloon as well as Glossy Accents to make the balloon shine. Thanks for joining me! I'll see you soon!
Hi everyone, welcome back to the Ink On 3 blog! I hope your 2020 is off to a wonderful start! Over on my insta, I have seen a few people making crafty resolutions or rekindling their love for card making. I know not everyone understands the multitude of inks and mediums that Ink On 3 has to offer. So I thought this would be a great opportunity to show you all; beginner or expert, the four families of inks that complete your crafty collection.
Which of the four ink families from Ink On 3 do YOU use most on your card projects? I hope you found the video helpful in shopping your stash and trying new ways to color. There are so many combinations when mixing the four ink families as well. Try coloring your Blackout Detail Ink images with the Atelier Fusion Ink Watercolor Refills! You will be surprised at how easy it is to blend the colors and achieve smooth results. Speaking of Atelier Fusion Inks, make sure you follow the video on this blog post with THIS POST specific to Atelier Inks!
Hey thank you so much for checking out my video on how I made these cards! Do you all have stamp sets from Ink On 3 that you would like me to use in a future project? Let me know in the comments below! If you like what you've seen from me, make sure you subscribe to myYouTube channeland give me a follow over onInstagram! Talk to you all very soon!
Happy Wednesday Friends, Ilda here from I Love Doing All Things Crafty. I hope your week is going well for you all, I sadly still have a nasty cold but I guess shouldn't complain too much as I haven't been sick for the longest time, guess it's going around and it was my turn😒.
At least a cold can't stop me from creating, so today I have some colorful Valentine inspired cards to share with you featuring a few goodies from Ink On 3.
I then stamped out the sentiments from the Bad and Boujee Stamp set and then used Crystal Clear embossing powder to heat set them. I then popped on the stamped image strip onto the colorful card panel and Voila all done!
I hope these cards have inspired you. Both these cards could be used for Valentine's Day but they also could be used as friendship or encouragement cards.
Hi everyone, welcome back to the Ink On 3 blog! It's Jaycee Gaspar, and today I wanted to share the creative process on this simple scene using the Ink On 3 - Raccoon Hugs Stamp and Die Set. The goal for this project was to make something super quick and easy, and in my case I used a scrap watercolor panel from a previous project to make this card super simple. Do you all have a scrap drawer full of small bits of paper? I feel like if I don't try to use these smaller scraps, then I'm hoarding. I don't want to admit I have a trash drawer.
This scrap blue ombré watercolor panel was made with Windsor and Newton Payne's Grey (my favorite color by the way). I watercolored the cute little sleeping raccoon in a mix of black and sepia outlined with Ink On 3 - Blackout Detail Ink. This ink is great because it's crisp like a pigment ink, but dries super fast like a dye ink and is waterproof--perfect for watercolor projects. I used the coordinating Ink On 3 - Raccoon Hugs Die Set to cut out the image once dry. Before assembling the card I used the small heart images in the same stamp set and created "vellum tape" to act like a decorative scotch tape to anchor the watercolor panel on to my ink splattered background. I used Ink On 3 - Gold Rush Embossing Powder and Juicy Clear Embossing Ink to make this. I love the script sentiments from the stamp set, but lately I've been OBSESSED with my embossed label maker. So I thought it was fitting to make my own sentiment and add it to my project. I added a bundle of black embroidery thread to the back of the raccoon image to break up and balance the hard angles all over the project.
Let me know in the comments below what you think of this very simple scene card. If you like what you've seen from me, make sure you subscribe to my YouTube channel and give me a follow over on Instagram! Talk to you all very soon!
Hi Everyone! Jeannie, here, popping
in to share a a DIY Dashboard Calendar with one of our newest designers
for Inkon3. Cheryl is just an amazing
planner, who uses them in planners and her creativity is just fabulous. Here's
her first blog post for Inkon3 and if you want to see more from her, please go
ahead, follow her on instagram for
lots of inspiration.
____________________________
Hello Crafty Friends! It’s Cheryl
here to show you how to make a fun and easy accessory for your planner! If you
love cute critters and coffee then this would be a fabulous dashboard calendar
for your planner!
First I used a rectangular die to
cut out some alcohol marker friendly white cardstock. For my A6 ringed planner,
I cut out a 4.5”x6” sheet of double sided patterned cardstock and punched it
(but you can cut out the size that’s appropriate for your planner). Next, using
the Inkon3
Blackout ink, I stamped the adorable little Raccoon holding a coffee mug
from the “Raccoon
Hugs” stamp set and die cut it using the coordinating
dies.
Next
I colored in the Raccoon image using alcohol markers. I also added some latte
art onto the Raccoon’s coffee using the round heart image from the “Raccoon
Hugs” Stamp set, I stamped it
using Juicy
Clear Embossing & Watermark ink and Artic
White embossing powder, and then heat set it. Then I used distress
oxide inks to add a background color for the Raccoon white cardstock. I added
the “Love you a Latte” sentiment to the top of the white cardstock.
I
stamped a calendar on the bottom of the white cardstock and added a few hearts
(also from the Raccoon
Hugs stamp set) as accents
and colored those in to match the coffee mug. I also added a little
bit of washi tape for more decorations. Lastly, I glued the Raccoon onto the
white cardstock over the colored background, and then adhered the white
cardstock onto the patterned cardstock.
I hope you enjoyed this quick and
easy project that is a staple accessory in my planner! Have a wonderfully
crafty day!