The Posies Stamp Set has the most gorgeous vase image and I have used it multiple times in InkOn3 projects - I just love it! I decided to slightly alter the Dogwood Flower image to make it a bouquet of flowers fit for the vase! I stamped my images using Blackout Hybrid Detail Ink, but was careful to avoid inking the bottom portion of the dogwood stem so that I could extend the lines a bit. I colored the images with Copic Markers and cut them out.
Showing posts with label copic markers. Show all posts
Saturday, May 8, 2021
Dogwood Flower Copic Coloring
Hi, everyone it's Lynnea! I combined a couple of my favorite stamp sets from InkOn3 on this easy card! Dogwood flowers are just so gorgeous!
I wanted to create a simple background so I adhered a stencil from my stash onto a white card base and mixed together Bee Sting Yellow and Marigold Orange Atelier Inks to create a pretty honey color. It's very subtle, but you can see areas of darker and lighter color across the background. SO pretty in real life!
I added a white heat embossed sentiment strip using a sentiment from the new Here for You Stamp Set and finished off the card with a white border and some gems. Thanks for joining me!
Labels:
Atelier Ink,
copic coloring,
copic markers,
copics,
dogwood flower stamp,
Here For You,
ink blending,
Lynnea Hollendonner,
Posies Set,
process video,
stencil,
Video,
Video Tutorial,
YouTube video
Friday, March 20, 2020
Easter Bunny Hugs Card with Ilda
Hello, my friends, Ilda here. I hope you are all safe and getting lots of crafting done while you are stuck at home.
Easter will be here before you know it and I thought it would be fun to pull out one of my favorite sets from Ink On 3, Lil Chicks and have some fun with it! Plus if you have been following me on IG, I have been trying to play along this month with Kathy Raccosin's Daily Marker Challenge, so I challenged myself to some no-line coloring today.
As I mentioned I used the Lil Chicks set from Ink On 3 for most of the card. To begin I drew a circle on the front of the card panel and used it as a guide to stamp out the Easter eggs into the shape of a wreath using Fadeout Ink. I then stamped the Lil Chicks wearing their bunny ears in the center of the wreath. I then used Copic markers to color the images in.
I had the most fun adding the gell pen details to the images. To the chicks, I added white details to give them some fuzzy texture, or bunny fur. To the eggs, I used my metallic and gell pens to add designs and make them pop a bit more.
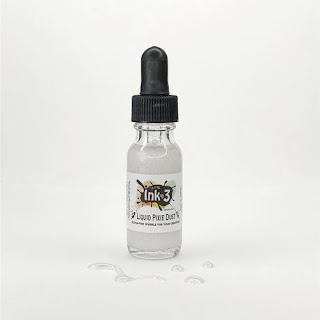
The sentiment comes from the Bunny Hugs stamp set that I stamped in Blackout Ink, and the Hugs die comes from the coordinating Bunny Hugs Die set. To give the Hugs word die cut more dimension, I stacked 3 layers and glued them together. I then added a layer of Liquid Pixie Dust to it and then heat embossed Crystal Clear embossing powder on top to give it a shiny finish.
I think it turned out pretty cute, and I hope you enjoyed this bright Easter Bunny Hugs Card featuring the Lil Chicks from Ink On 3.
Thank you for stopping by 😊
Until next time... Happy Crafting and stay healthy👋
SUPPLIES
Affiliate Links
![]() Lil Chicks Shop at: IO3 | ![]() Bunny Hugs Shop at: IO3 | ![]() Bunny Hugs Die Cuts Shop at: IO3 | ![]() FADEOUT NO LINE INK Shop at: IO3 | ![]() BLACKOUT INK Shop at: IO3 |
![]() JUICY INK Shop at: IO3 | ![]() CRYSTAL CLEAR Emb Pwd Shop at: IO3 | ![]() LIQUID PIXIE DUST Shop at: IO3 | ![]() Neenah 80 LB SOLAR WHITE Shop at: SSS | AMZ | MINI MISTI Shop at: SSS | AMZ | SB | SK | HBS |
![]() GEMINI JR. DIE CUTTER Shop at: SSS | AMZ | SB | WHITE GELLY ROLLER PEN SET Shop at: SSS | AMZ | SB | ![]() Gelly Roll Metallic Gel Pen Set Shop at: SSS | AMZ | ![]() Gelly Roll Stardust Pen Shop at: SSS | AMZ | SB | ![]() Micron Pens Shop at: SSS |
![]() STUDIO KATIA GLUE Shop at: SSS | SK | ![]() GLOSSY ACCENTS Shop at: SSS | AMZ | SB | HBS |
Labels:
Bunny Hugs,
card,
card making,
copic markers,
Die cutting,
easter,
Fadeout Ink,
handmade card,
how to,
ilovedoingallthingscrafty,
Ink On 3,
Lil Chicks Stamp set,
stamping,
stamps
Friday, February 21, 2020
Fun Spring Tags using Atelier Inks
Hi everyone! It's Cheryl with Inkon3's Creative Team here to show you some adorable tags using Atelier Inks to make fun and colorful backgrounds!
Spring is just around the corner and Inkon3 has some really adorable Spring themed stamps! For the project I'm sharing I'll be showcasing the Lil Chicks and Biker Bunnies Stamp sets.
First, I die cut some tags, tag reinforcements, and banner using white card stock. Then I used Atelier inks to add color to the tags. For one tag I used Bee Sting Yellow, for the other tag I used Peacock Blue, and for the last tag I used Marigold Orange. For the tag reinforcements and the banner for the sentiments I used Marilyn Red, Goddess Green, and My Jam Purple for each one.
Next, I stamped out the three chicks from the Lil Chicks stamp set using Inkon3's Blackout Waterproof Detail Ink. Then I colored the chicks using copic markers, and then fussy cut the images.
Once the tags are thoroughly dried, I create a background using the small stamps in the Biker Bunnies Stamp set. I used Marilyn Red on the Marigold Orange tag, Godess Green on the Bee Sting Yellow tag, and My Jam Purple on the Peacock Blue tag.
On the banners, stamp some sentiments using Juicy Clear Embossing ink, then sprinkle some Arctic White Ultra Fine Embossing powder and heat set. Adhere the banners and tag reinforcements matching the same color as the small stamped images on the tags, trim off any excess banner. Lastly adhere the cute little chickies onto the tag.
Spring is just around the corner and Inkon3 has some really adorable Spring themed stamps! For the project I'm sharing I'll be showcasing the Lil Chicks and Biker Bunnies Stamp sets.
First, I die cut some tags, tag reinforcements, and banner using white card stock. Then I used Atelier inks to add color to the tags. For one tag I used Bee Sting Yellow, for the other tag I used Peacock Blue, and for the last tag I used Marigold Orange. For the tag reinforcements and the banner for the sentiments I used Marilyn Red, Goddess Green, and My Jam Purple for each one.
Next, I stamped out the three chicks from the Lil Chicks stamp set using Inkon3's Blackout Waterproof Detail Ink. Then I colored the chicks using copic markers, and then fussy cut the images.
Once the tags are thoroughly dried, I create a background using the small stamps in the Biker Bunnies Stamp set. I used Marilyn Red on the Marigold Orange tag, Godess Green on the Bee Sting Yellow tag, and My Jam Purple on the Peacock Blue tag.
On the banners, stamp some sentiments using Juicy Clear Embossing ink, then sprinkle some Arctic White Ultra Fine Embossing powder and heat set. Adhere the banners and tag reinforcements matching the same color as the small stamped images on the tags, trim off any excess banner. Lastly adhere the cute little chickies onto the tag.
Copic Colors Used:
Yellows: Y000, Y00, Y02, Y21
Oranges: Y35, Y38
Inkon 3 Products Used:
Monday, October 28, 2019
Simple Sweet Posies Card
Hello Crafty Friends! It's Cheryl with the Inkon3 creative team here to share a sweet and simple card using the Posies stamp set.
I stamped the water pitcher, stem, and posies using the Fadeout No Line Coloring Detail ink onto white card stock. I love how the ink fades away, meaning no need to mask! I simply stamped where I wanted the flowers, and colored the flowers in! Once the image was colored, I fussy cut the stamped and colored image.
Copic Colors Used:
Pinks: R81, RV00, V0000
Blues: B0000, B000, B00
Blue-Greens: BG10, BG000
Greens: G43, G40, G24, G20
Next, I die-cut a few scalloped squares, one large square and two small ones. I used distress inks to add color to each of the squares. Then I used some water to activate the inks to give some subtle details to the background.
Then I cut out a large scalloped rectangle using beige patterned paper. I chose beige so that it doesn't overpower the soft no-line colored image.
I then heat embossed the sentiment "You're the Best" onto the large square and then assembled the card. I adhered the large scalloped rectangle onto the base of the card. Then I adhered one small scalloped square on opposite corners of the larger rectangle. Next, I adhered the large square over the two smaller square. Once all the squares have been placed onto the card, I adhered the colored in image of the Posies in the glass pitcher. Lastly I used some Nuvo jewel drops to add a few clear drops onto the card.
I hope you liked this tutorial! <3
Products Used:
Tuesday, October 2, 2018
Creating a Scene with Dance & Twirl
Hello Crafters. I'm Courtney, and I am super excited to be guest designing for Inkon3. I am a colorist, mainly Copics, and I love creating scenes. So today, I decided to create a scene using the Dance & Twirl stamp set along with the Fadeout Ink No Line Coloring Detail Ink.
*** Be sure to scroll down to see the Youtube video on how I created this fun card *** :)
I started by creating my scene with a pencil onto a piece of white card stock. I knew I wanted these cuties to be on a stage. I am not artistic in any way, so my scenes usually consist of straight lines and basic shapes.
Next, I stamped my images with the Fadeout Ink and colored them with my Copic Markers. I was blown away with this ink, It is as if it melts right into the alcohol ink!
I fussy cut my images and popped them up onto my stage. I added my sentiment and called this one done. (there are coordinating dies for this set, if you don't like fussy cutting)
For more information on this card, you can check out the video below:
If you enjoy my video, please hit the "subscribe" button <3
Thanks so much for stopping by and I hope you have a creative and crafty day!!
-Courtney Kreeber
Subscribe to:
Posts (Atom)