Showing posts with label No Line Water Coloring. Show all posts

Saturday, October 3, 2020

No-Line Colouring with Erica

 Hi! 

Can you believe it’s already December?? At one point it felt like we were just threading water in March, which became Mapril, which then morphed into Mapriay (March + April + May) and now here we are in the final month of 2020. I’m torn over this year being over. It kind of feels like we deserve a do-over. Or am I the only one?? 

Today’s card is a simple ‘hugs’ card as I am totally starved for hugs from my family and friends. It’s been so long since it’s been normal to be able to just hug someone, so I’m sending some paper hugs instead of the real thing, until it’s safe again. 

I’ve used two stamp sets for this card, and with the help of a MISTI, I’ve stamped the flowers from the BeYOUtiful and Little Birdie sets along the edges of it. I used Fadeout Ink as I wanted to do some no-line water colouring with the Atelier re-inkers. I have a palette with reinkers mixed with Liquid Pixie Dust, to make shimmery water colours, and I grabbed this to colour the panel with. 

I did film a lot of the card making, but unfortunately due to the fact I can’t plug my phone in to charge any longer, there is something wrong with the charging port, the battery ran out mid-colouring. Of course I didn’t realise either, so I could have stopped, charged it up and then carried on. Oh no. No such luck for me. So the video is only covering the first half of the colouring, but it’s better than nothing, right? 

When the colouring was done, and it was all dry, I stamped up ‘hugs’ from the Racoon Hugs set with Blackout Detail ink. I used an old-fashioned glue stick on the card base and after adding the panel, I put the whole thing under my diecutting machine as a weight to make sure it dried flat. 

Well, that’s it from me, I hope you like the card and found some inspiration here with me today. Lots of love and happy crafting from Erica 

Tuesday, June 23, 2020

No Line Koi Pond Watercolor

I'm using a couple of the newest released products from InkOn3 today to make a fun summery Koi Pond card with a bit of easy no line coloring.


This card is simple to make, but just look at those koi swimming around! They're the best! I stamped the koi images as well as the air bubbles from the Koi Pond Stamp Set onto watercolor cardstock with Fadeout No Line Ink. The fabulous thing about this ink is you can stamp it 2 or 3 times to build up the color (for people with bad eyes like me!) and the ink will still fade back to give you the no line effect! I used a Small Fine Tip Watercolor Brush to color the koi with Marigold Orange Atelier Ink. Check out the video above to see just how easy this is! The Fadeout Ink grabs the color and makes no line coloring a BREEZE!


I needed a fun background for my koi, so I used the new Pondie Stencil along with some Goddess Green Atelier Ink. These inks are so juicy and wonderful! I didn't even have to re-ink my blending foam to do the background!


I added the koi with foam tape to my stenciled background and stamped a coordinating sentiment from the Koi Pond Stamp Set with Blackout Hybrid Detail Ink in the bottom corner of the card. I added some Liquid Pixie Dust to the bubbled and koi using a Small Fine Detail Watercolor Brush to finish the card. Thanks for joining me!

Friday, May 15, 2020

Rainbow Hugs Friendship Card | No Line Coloring Using Atelier Inks

Rainbow Hugs Friendship Card | Using Atelier Inks | Ink On 3

Hello my Friends, Ilda here!

I hope you all are doing well and have had a wonderful week. I'm sure by now you all know how much I love rainbows, for me rainbows symbolize hope and happiness to come. So I thought it was fitting to add a rainbow in today's friendship card. I pray this Pandemic will end soon so we can hug our families and friends again.

CARD DETAILS 

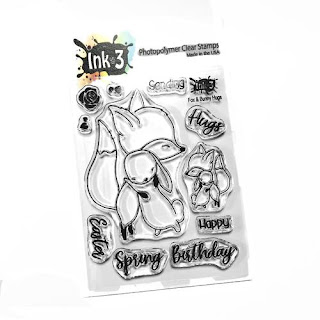
To begin, I stamped out the cute image from the new FOX AND BUNNY HUGS stamp set using FADEOUT INK. I then lightly drew the rainbow around the fox and bunny image.

I then used both the Atelier Re-inkers and the inkpads to color the images in. I found it easiest to add a drop of ink from the re-inkers onto a paint palette and dilute it with another drop of water. Where I needed a touch of color I picked up ink directly from the ink pad. (See thumbnails below for all the colors used). Once the image was completely dry I added pencil detail for an added layer of shading.

Rainbow Hugs Friendship Card | Using Atelier Inks | Ink On 3

To create the grass I masked off the area under the images and then blended out the area using the ATELIER GODDESS GREEN ink. I then spritzed the area and picked up the water with a paper towel to distress the area. To complete the grass, I added some flicked grass blades using a water brush. To the sky, I added clean water and then added a touch of blue ink from the ATELIER PEACOCK BLUE ink pad. 

Rainbow Hugs Friendship Card | Using Atelier Inks | Ink On 3

I then finished the card by stamping out the Hugs from the FOX AND BUNNY HUGS and then the little butterflies from the FOREVER FRIENDS using JUICY INK and heat setting them using CHROME EMB PWD

I hope this Rainbow Hugs Friendship Card inspired you today and for those of you that need a hug right now during this time, I am sending you one too.

Thank you for stopping by and until next time... Happy Crafting 👋
SUPPLIES
FOX AND BUNNY HUGS
FOX AND BUNNY HUGS
Shop at:
IO3
FOREVER FRIENDS
FOREVER FRIENDS
Shop at:
IO3
Medium Water Brush Pen
Shop at:
IO3
Atelier Marilyn Red
Atelier Marilyn Red
Shop at:
SSS | IO3
Atelier Marigold Orange
Shop at:
SSS | IO3
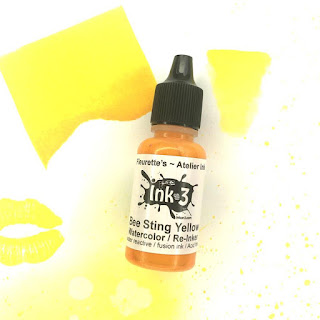
ATELIER BEE STING YELLOW
Shop at:
SSS | IO3
ATELIER GODDESS GREEN
Shop at:
SSS | IO3
ATELIER PEACOCK BLUE
Shop at:
SSS | IO3
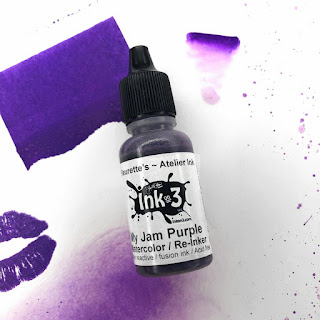
ATELIER MY PURPLE JAM
Shop at:
SSS | IO3
Atelier Twiggy Brown
Shop at:
SSS | IO3
Atelier Paint It Black
Shop at:
SSS | IO3
Re-inker Marilyn Red
Shop at:
IO3
Re-inker Marigold Orange
Shop at:
IO3
Re-inker Bee Sting Yellow
Shop at:
IO3
Re-inker Goddess Green
Shop at:
IO3
Re-inker Peacock Blue
Shop at:
IO3
Re-inker My Jam Purple
Shop at:
IO3
Re-inker Twiggy Brown
Shop at:
IO3
Re-inker Paint It Black
Shop at:
IO3
FADEOUT INK
FADEOUT INK
Shop at:
SSS | IO3
BLACKOUT INK
BLACKOUT INK
Shop at:
SSS | IO3
JUICY INK
JUICY INK
Shop at:
SSS | IO3
CHROME EMB PWD
CHROME EMB PWD
Shop at:
SSS | IO3
MISTI TOOL - ORIGINAL SIZE
Shop at:
SSS | AMZ | SB | HBS
BRISTOL PAPER
BRISTOL PAPER
Shop at:
SSS | AMZ
Prismacolor Colored Pencils 48 Pack
Shop at:
SSS | AMZ
Black and Decker  Heat Gun
Black and Decker  Heat Gun
Shop at:
AMZ
INK BLENDER BRUSHES
INK BLENDER BRUSHES
Shop at:
SSS | SK
DISTRESS SPRAYER Ranger
Shop at:
SSS | SB | HBS
STUDIO KATIA GLUE
STUDIO KATIA GLUE
Shop at:
SSS | SK

Monday, March 16, 2020

Dogwood Flower No Line Colouring with Erica
Hey guys!

It’s Erica back on the InkOn3 blog. How are we all doing? Everyone staying safe and well with the Corona virus outbreak? I have been practically a hermit for the last couple of weeks due to a bad back, so I’ve been doing the social distance thing already. My hands are all chapped and dry from over-washing, but better safe than sorry.


Because I have had back issues I’ve not managed to do much crafting but I’ve tried to colour along with #thedailymarker30day challenge. One thing I have been practicing is my no-line colouring. Some has been more successful, than others but it’s all fun and educational. Sometimes your mistakes will teach you more than your successes so don’t be discouraged when it doesn't turn out they way you imagined it.

Here is an example: I started this no line colouring wreath on the left and wasn’t overly happy with how it was turning out. My attempts on the right side of the wreath look so much better!


For the card I have made today, I have used the Dogwood Flower stamp and the Fadeout Ink. I’ve coloured it, and the wreath above, with Daniel Smith water colours. 

I stamped the image with the Fadeout Ink three times to make the lines very visible, with the help of my Mini MISTI. The colouring is done both with a water colour brush and a refillable brush. 


This one isn’t one of my better results, but the next one is bound to be better. The leaves I’m quite pleased with though! 

To add some interest I added some splatters to the background. I mixed two drops of Liquid Pixie Dust with a drop of Paint It Black reinker in a little tray, and went to town. To protect the image I covered it up with a little piece of paper. Usually I cut out a mask but this worked in a pinch. 


Sentiment wise I kept it simple, ‘my favorite besties’ and stamped that in Blackout ink. I managed to smudge the splatters a little, so to cover it up, I added some more. As you do.


The whole thing was then adhered to a light gray card base. A white one was too harsh, and it need a little something softer and the light gray was just perfect. Oh and to fix the sentiment, I covered up the s on ‘Besties’ to make it say ‘My Forever Bestie’. 


With that, I’m done for today. Thanks for stopping by today and spending time with me.
Lots of love, wash your hands for your health and craft for your sanity! 

Erica 


Thursday, February 6, 2020

Birthday Candles with Atelier inks

Hello my fabulous friends!

Kassi here

I've had lots of birthday cards to make lately, because there are a bunch of birthdays in my family right near the beginning of the year. When I sat down to work on this card, I knew I wanted something colorful but simple  (I have some lovers of CAS designs in my family)...  and the rainbow Altelier inks sitting on my shelf became my inspiration!

Let's take a look at how I made this card, and I'll throw in a few little tips along the way!

Tuesday, January 14, 2020

Sparkly Faux Enamel Die Cuts

Hello everyone, Kassi here..

It's no secret, I love doing no-line coloring, and keeping my cards CAS... but I also like including elements that make it pop... Just a little something to add a bit of sparkle or dimension...

One of my recent favorites is sparkly faux enamel die cuts.... They are beautiful, customizable, and look fabulous without adding much bulk.... which means you can keep your cards easy to mail, while still having some sparkle and dimension!

 Let's take a closer look at how this card is made, and I'll show you how easy it is to make sparkly faux enamel sentiments....  

Thursday, November 21, 2019

Stamping, Blending, No Line Water Coloring with Atelier Inks

Stamping, Blending, No Line Water Coloring with Atelier Inks | Ink On 3 by ilovedoingallthingscrafty.com

Hello friends, Ilda here!

Today I am sharing the cutest no line colored holiday card that I created while testing out the new Atelier Inks from Ink On 3. You all, these inks are like nothing you have used before, I can see why they took 2 years to develop. They are truly unique because of their versatility! They stamp, they blend, they are water-reactive, you can watercolor with them and just look how bright they are 😍 And of my favorite thing about them is that they work so well with Fadeout Ink for no-line coloring!

CARD DETAILS

I started off this card by stamping out and my images using Fadeout Ink and doing some masking to add a hat, mittens and the block of Ice from the Snow Buddies Stamp Set to the Ducky from Platy-rific Pondies.

I then watercolored the images in using the Atelier Inks. I loved how buttery smooth the inks felt when I blended them on to the paper and how well I could layer the colors. To add shadows to some of the areas I used Twiggy Brown and was pleasantly surprised at how well it blended with the previous colors.

Once I had finished water coloring I then stamped out some snowflakes from the Merry and Bright set using Juicy Ink and then heat set them using Arctic White Ultra Powder. Since the background was white this made it difficult to see the snowflakes, so using very light pressure I blended some of the Atelier Peacock Blue ink around the snowflakes to make them more visible. I first blended onto some scratch paper before blending it to the background and then I also used a dry paper towel to clean off any ink that was on the embossed snowflakes.

The sentiments I used also come from the Merry and Bright set that stamped using a stamping block, but I wished I had used the Misti so I could have stamped it twice to get more of a solid impression. To finish off the scene, I added water under the ice block also using the Atelier Peacock Blue ink and slightly touched the bottom of the sentiment to make it look like the letters were melting into the water. 

To finish off the image I used liquid pixie dust on the ice block to add some sparkle and added glossy accents to the ducky's beak. To darken the eyes I used a fine line marker and for highlights, I used a white gel pen.

Stamping, Blending, No Line Water Coloring with Atelier Inks | Ink On 3 by ilovedoingallthingscrafty.com

Here is a closer look at this cutie. Just look at all the different shades of blue I got using only Atelier Peacock Blue ink pad. Blended sky, watercolored the hat, mitts, ice, water, and stamped out the sentiment. Unreal right!? And I love how it goes from an aqua like color to a dark blue. This time I didn't use ink from the Reinkers but if I had you probably would have seen even more gradients in the colors.

Stamping, Blending, No Line Water Coloring with Atelier Inks | Ink On 3 by ilovedoingallthingscrafty.com

I hope you found this post informative. I highly recommend these inks if you are looking for versatile inks that are artist-grade, bright and very affordable. For more information on them please visit the Inkon3.com.

Thank you for stopping by 😊
Until next time... Happy Crafting 👋
SUPPLIES
Atelier Inks
Atelier Inks
Shop at:
IO3
Platy-rific Pondies
Platy-rific Pondies
Shop at:
IO3
Snow Buddies
Snow Buddies
Shop at:
 IO3
Merry and Bright
Merry and Bright
Shop at:
 IO3
Fadeout No Line Ink
Fadeout No Line Ink
Shop at:
 IO3
SMALL TIP WATER BRUSH PEN
Shop at:
 IO3
Atelier Marilyn Red
Atelier Marilyn Red
Shop at:
IO3
Atelier Marigold Orange
Shop at:
 IO3
Atelier Bee Sting Yellow
Shop at:
 IO3
Atelier Peacock Blue
Shop at:
 IO3
Atelier Twiggy Brown
Shop at:
 IO3
JUICY INK
JUICY INK
Shop at:
 IO3
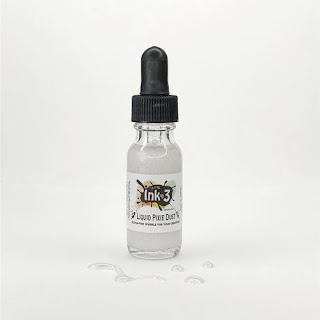
LIQUID PIXIE DUST
LIQUID PIXIE DUST
Shop at:
 IO3
Arctic White Ultra Powder
Shop at:
IO3
Strathmore Bristol Pad
Shop at:
SSS | AMZ
MINI MISTI
MINI MISTI
Shop at:
SSS | AMZ | SBC | SK
Simon Says Stamp 2.5 Inch ACRYLIC BLOCK
SSS 2.5 Inch ACRYLIC BLOCK
Shop at:
SSS
STUDIO KATIA GLUE
STUDIO KATIA GLUE
Shop at:
SSS | SK
Micron Pens
Micron Pens
Shop at:
SSS
WHITE Gelly Roll Pens Set
Shop at:
SSS | AMZ | SBC
Glossy Accents
Glossy Accents
Shop at:
SSS | AMZ | SBC | HBS