Saturday, March 23, 2013

Basket, Bunny -N- Buttons Sweet & Simple Card - SVG Cutting File, Printable's and Coordinating Papers

Easter in upon us!  So, sweet and simple is a must!  Here are all the details on how you can create this adorable card in just minuts!  :)

I used the print and cut feature on my Cameo Silhouette, so fast and easy!  The Basket is a Freebie this week @ Fleurette Bloom  Hop on in for yours!

click on picture to enlarge

All details on how you can make one below:

Collections Used:

Fleurette Bloom - "Easter Traditions Elements"
  • Chocolate Bunny
  • Tulips
Fleurette Bloom - "Easter Traditions Coordinating Paper"
  • Picket Fence
  • Tiptoe Through The Tulips
  • Thanks Card (Card Base and Interior)
Supplies Used: 
  • white textured  card stock -  (untextured will work too)
  • Trendy Twine - Tickled Pink
  • Buttons - pink, blue and blue
  • Paper Easter Grass
  • Glue gun and glue
  • Foam Dimensional stickies 
Dimensions: 
  • Basket - 3.505"W x 4.430"H
  • Chocolate Bunny - 1.940"H x 2.810"H
  • Tulips - 1.095"W x 2.070"H
  • Card Base - 8.500"W x 5.500"H
  • Front panel on card - 3.710"W x 4.980"H                                                                           (interior panel from SVGcuts Thanks card) 
Instructions:
  1. Print and cut all elements
  2. Use dimensional sticky foam pieces to adhere the front pannel onto the card base
  3. Hot glue a little paper grass to the back side of your basket element
  4. Adhere dimensional sticky foam to the back of your tulips and place on basket
  5. Adhere dimensional sticky foam to your chocolate bunny - place in the center of your card
  6. Adhere (approximately) three pieces of  dimensional sticky foam stacked, to the back/ bottom of the basket.  It will depend on the thickness of your foam, how many you will need to lift it off the card dimensionally, to the level of the grass you glued on, then place it in front of the bunny.  
  7. Hot glue in your buttons and twine as the finishing touch :)  
Designer Tips:
  1. I like to make my entire card print and cut, by laying the patterns of the digital paper directly inside my card shape.  That way I use less ink and less paper :)
  2. Always layout your pieces before gluing them on, that way you can make adjustments if needed. 
  3. Using paper pack collections makes creating fast, easy and fun! You are insured the colors and pieces will look great together every time.
Be creative, have fun, the possibilities are endless :)
Happy Crafting!

Fleurette Bloom

P.S. If you have a fun easter card you have created with your Cameo Silhouette Stop by Cameo Creations Challenge blog, there is still time to enter :)  http://cameocreationschallenge.blogspot.com/

Sunday, March 10, 2013

Go Green Every Day, Not Just For St. Patricks Day - SVG Cutting Files and Papers


Go Green, not just for St. Patricks Day, but everyday!  Using digital paper along with the print & cut features of some paper cutting machines is a great way to take your crafting green!  Rather than buy and store loads of scrapbook paper, all you need is some white card stock! One box will do the trick for all your projects.  I cant stand using 4 to 5 pieces of paper to create one card, not to mention all the scraps left over that you try to find a way to use later, or never use at all. 

With digital scrapbook paper and elements you can make a card  with 1 to 2 sheets of paper with almost no leftover scraps!  I LOVE that!  Not only is it better for the environment, its better for your environment, your studio that is. :)  I love how much more space I have now that I don't have to dedicate so much of it to paper storage.  I also love that I don't have to search through everything to find just the right patterned paper and then later put it all away.  All I have to do is look through my computer files, select my designs and create!  Then when I'm done, cleanup is a breeze :) 

Now for the question of printers and ink, there are a few options here: 
  • Any printer will work for digital scrapbooking and card making - I create all my paper collections to include both 8.5x11 and 12x12 sheets, so you can print them on any standard printer! Even all the  elements can be printed this way.   I still use a standard printer myself. 
  • Use a cutting machine that has a print & cut feature, you won't ever need to print full pages.  You just fill the shapes you are cutting with the digital patterns (see pictures below).  This uses very little ink :)  I use is a Cameo Silhouette and I love it, it's print and cut feature is excellent!
  • If you plan on printing loads of stuff, you can opt for a CIS System (continuous ink system).  With these you don't have to use print cartridges anymore, they use bottles of ink, that will print tons and tons of papers for pennies!  Here is a link for more information on printers and the CIS systems:  http://www.cobraink.com/CIS/CIS%20Kit.htm there you can find out everything you need to get started with one of these systems. I have some friends that use them and they swear by them.   I am planning on getting one myself very soon.

The photo below shows all the pieces that I printed on one piece of 12 x 12 paper.  I printed this on a wide format standard printer, but it could have been printed just as well on 2 - 8.5 x 11 sheets of paper. Plus you can add more to the page than I did below.  I usually fill the whole page with other project piece too, but for the purpose of demonstration I kept it simple.  


This is a picture of the Cameo Silhouette cutting out the pieces


Here are the cut pieces


This is the finished card 


So as you can see going digital is a great way to go green with your crafting.  :)  


Sweet Card "Chick With A Bonnet" By Brigit Man

I love this sweet little card that Brigit created using the "Little Chicks Element Collection" and Easter papers that will be available this week!  So cute!

See more on Brigit's Blog:  http://www.brigitsscraps.com/

Sunday, March 3, 2013

Panda Palace Printable's Card

A super cute card made by Brigit mann! Created with the Panda Palace Printable's and Panda Palace Paper collections @ http://fleurettebloom.com/! See more details on Brigit's blog http://www.brigitsscraps.com/


Saturday, March 2, 2013

Monday, December 24, 2012

Have a Merry Christmas and a Happy New Year!  I forgot to post this last tag I created for the SVGcuts 12 Days of Christmas Giveaway.  Here is a  simple little reindeer tag, using SVGcuts files.


Sunday, December 23, 2012

Ice Skater Tag

When I think of winter and Christmas, ice skating, snowflakes and gingerbread houses come to mind.  Nothing more fun than holiday traditions.  That's where my inspiration came from to create this sweet little tag. All details including files etc. are below the photo.

SVGcuts files used: 

Punkin Patch Stamps:
Holiday Traditions (plus free printables) 

Other Items:
  • buttons
  • natural twine
  • Burlap scrap  
  • Wire ribbon  
  • Ink - to give it more dimension  
Have fun!

 I had a great time creating fun little tags to celebrate the SVGcuts 12 Days Of Christmas giveaway.
 Hope you all have a wonderful holiday!   Be sure to scroll down for your chance to be the grand prize winner of the Sizzix Eclips!

The SVGcuts 12 days of Christmas is coming to an and and some lucky winner will go home smiling  with as Sizzix eclips !  How nice of Leo and Mary to put this giveaway together!  click the image for your to chance to win!

Friday, December 21, 2012

Mixed Media Tag for the SVGcuts Tim Holtz Giveaway

One of my favorite things, Mixed Media!  Today is day 10 of the SVGcuts 12 days of Christmas, featuring Tim Holtz!  How fun!!!  Be sure to check out the giveaway at the bottom of this post.

To celebrate the Tim Holtz / SVGcuts giveaway I created this cool angel/fairy tag! Utilizing the stamps, inks, and accessories by Tim Holtz, so much fun!  All details, products, files, etc. listed below image.


Tim Holtz Products Used:

SVGcuts files used:

Kate's Holiday Silhouettes SVG Collection   
*Have Yourself A Merry Little Christmas Card  
  • interior.svg (used for tag base)
  • top.svg (used for middle layer of tag) 

Woodland Fairies SVG Collection

  • fairy1.svg 

    Remember to enter the SVGcuts 12 Day's Of Christmas, for your chance to win some fantastic prizes!!!

    Click Image To Enter

     Day 10 is the Tim Holtz Giveaway!

    Click image to enter

    Have fun creating and good luck! :)

Tuesday, December 18, 2012

Puppie Dog Dreams Gift Tag

Another day closer to Christmas!  Are you ready?  My daughter keeps asking for a puppy!  Well, we already have two dogs,  a puppy is not in our near future, lol! It's an everyday discussion, needless to say  puppy's are on my mind.   So,  I created a cute little tag with a sweet pup on it.  Reminds me of Toto from the Wizard Of Oz, love that cute little dog!  This file comes from SVGcuts (All  files used just below the image).

Enjoy, and be sure to enter the SVGcuts 12 Days Of Christmas Giveaway!  So many fantastic prizes!!!


Files used:

Kate's Holiday Silhouettes SVG Collection  

  • scottie_bottom.svg 

    (the red bow comes from the subset -All I want is you card) 

Christmas Open House SVG Kit    

  • lid_circle-bottom.svg 

  • lid_flake_bottom.svg 

  • lid_flake_top.svg 

Supplies Used:

Punkin Patch Stamp -  Holiday Traditions - with free stampables
  • Wire Ribbon
  • Pop dots - to add depth to the layers 
  • Card stock
Remember to enter the SVGcuts 12 Day's Of Christmas, for your chance to win some fantastic prizes!!!

Click image below:  To Enter The SVGcuts 12 Days Of Christmas!!!


 All dates listed in above link.  

Day 7 is Paper Play Studio and Punkin Patch Stamps!!! 

 
Click image to enter
Good Luck!!!


Sunday, December 16, 2012

SVGcuts Day - 4 
(12 Day's Of Christmas Giveaway)

Hope you are having a good weekend!  Today SVGcuts giveaway is a $100 Paper Issues gift certificate!  Paper Issues is a blog where you can meet other crafty friends, link up your creative pieces, win crafting supplies or shop for the latest paper crafting products!  So, check it out and enter to win!

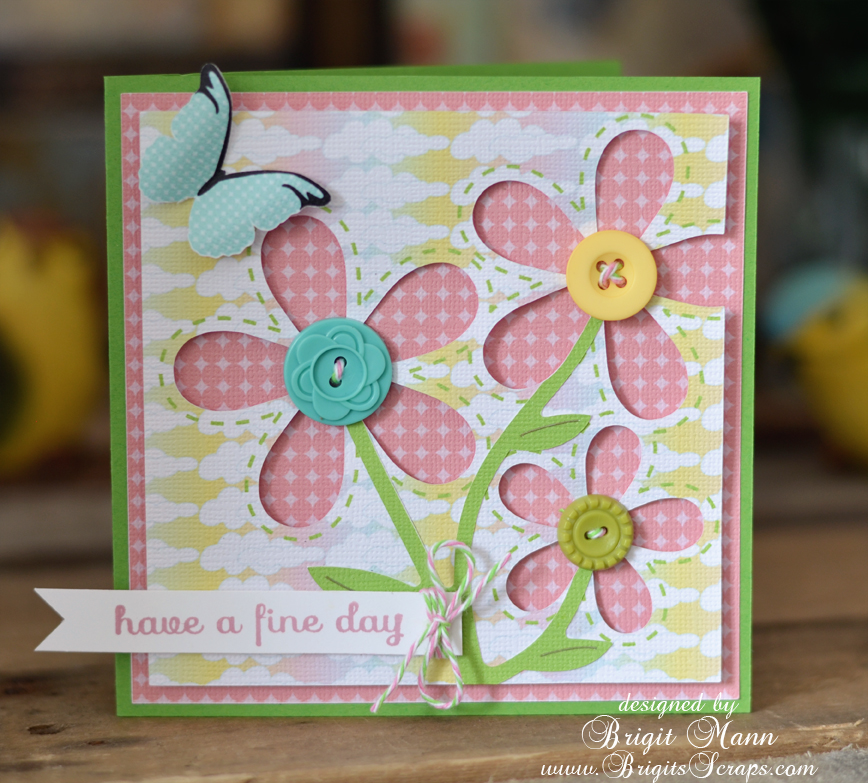
To kick off this week I create a fun, sweet simple tag you can give to that special someone in your life.  I created this using SVGcuts:

Thanks for stopping in and hope you will have fun creating a tag for your sweetheart!


Enter to wing the $100 Paper Issues Gift Certificate!


  See the beautiful new Everyday Winter Cards SVG Kit.

Thursday, December 13, 2012

SVGcuts 12 Days Of Christmas - Day 1 Gift Tag


Well, it's finally here and to celebrate  Brigit Man my fellow Design Team member at SVGcuts, came up with the fun idea of creating gift tags! So, I am playing along for some of the days, how fun!
Here is my 1st tag. 
 
I created this cute simple yet elegant tag using:
  •  Comet's Candy Land SVG Collection - for the tree
  •  My Big Day SVG Collection - for the banner 
  • The star and circle shapes from - shapes in Ecal 
  • Sparkle blue paper for the inside of the tree
  • White paper for shadow
  • The inside of a Rits cracker box for the natural tan star. (love to get a little recycling in when I can) :)  
Includes:
  • Silhouette CAMEO® (MSRP: $299.99)
  • Silhouette Studio Designer Edition (MSRP: $50.00)
  • $25 SVGCuts.com Gift Card
So exciting!  Good luck everyone, this is going to be fun! :)

Friday, September 7, 2012

My New Candy Dish! - Revolving Art Organizer

I have to share my newest favorite toy with all of you.  Its this revolving art organizer! Just looking at it makes me want to make something, its a carousel of candy for the artist and crafter!  I can't tell you how much easier it is to create with.  In the past, I would rustle through my supplies  to find the right color, or type of media I wanted to use.  So much time was spent pulling out pencils, pens, markers, pastels etc., then sorting them out to work on a project, leaving me less time to play!  With this great new tool, when I get inspired, all I have to do is grab my sketch pad or other substrate and create!  Love, love, love this!!!

This is my new candy dish :)

Monday, September 3, 2012

Let Them Blossom - Mixed Media On Canvas

The other day I did a tutorial on creating pretty little faces, so I thought I would share with you the piece I created using a few that I made.

It is titled "Let Them Blossom"  It's about watching and guiding our children as they grow.  You may have noticed my name is Fleurette F. Bloom well, the F in the middle stands for Flower.  Yes my parents were hippies and artists.

When I was a little girl my Father would always tell me, that I was their little flower and it was their job to help me grow.  He would say "a flower needs water, sunshine, tender loving care and protection, just like a child.  If you give them all those things then they will blossom into what they are meant to be."  So, this piece is a tribute to that sweet story my Dad would always tell me. (Thanks for being such a great Dad) :)

I added the time pieces in upper left hand corner to show, as time passes with the sun, so do the children grow.

I hope you enjoy this piece and that it inspires you to create something unique to you! :)


Click on photo to enlarge 

The captions in the piece are:

Plant the seeds
Nourish them
Protect them
Let them bloom
Watch them blossom

Sunday, September 2, 2012

Create some pretty little faces! With How-To Tutorial :)

Today I created some pretty little faces to use in future mixed media pieces. A fun little sketch project that can be done almost anywhere.

What you will need:
* Plain White Paper
* Regular and Colored Pencils
* Markers (I used Copic as I love the blend-ability and variety of soft and dark colors)
* scissors
* White Gell Pen (for highlights)

Just sit relax and have fun sketching :).

Here are some I created today.
The first photo is of my basic sketches, with colored pencil. The second is with the addition of markers, that I  cut out with scissors.

These faces are great for creating all sorts of things from mixed media paintings, cards to creating doll faces and so much more!

Can't wait to create something fun with them!!!


How-To, Step By Step Sketch Tutorial

If you want to create a pretty face, you will need to keep things symmetrical.
If you want a comical face you can draw the features off kilter.

This tutorial is on drawing fanciful faces, the process for drawing a realistic face
is similar but with a few more adjustments.  

The below steps show how to create a symmetrical pretty face. 
All faces turn out best by using this same method of dividing and using guidelines as shown below.


1. Draw a circle, find the center and draw one vertical line and one horizontal to divide your face. 
2. Create an even wave through the center (this will form your eyes)


3. Draw another wave line, connecting to your first (This will essentially give you 3 eyes)

* you will later erase the center eye, this is used for correct spacing.


4. Draw a small vertical eye shape below and centered benieth the center spacing eye.
5. Draw three circles at the bottom of this shape (this will create your nose)
6. Draw three more circles a bit below your nose shape (This will create your mouth)


7. Draw circles in your two side eyes and erase the center eye.
8. Create your nose and mouth by outlining your guide circles, then erase the unneeded extra lines that helped you form these features


9. Draw in smaller circles for your pupils (you can center these or position them where you want to look.  Just be sure to position each in the same location in each eye. 


10. Draw in eyelids from one corner to the next, it looks nice when you have it cut through the pupils.  
11.  Erase your extra lines (you can see I have erased the lines on the left, but left the ones on the right
so you can see how to draw your lines through the pupil)  
12.  Draw in eyebrows. 


13. Outline your face with a black or sepia fine tip marker/pen. 
14. Erase your pencil marks (if you want a rougher look you can leave some of your pencil marks to create a folk art or look, it's just a matter of choice.

Now you have a great face to color anyway you like! :)

Here is the one above, I colored it in just a bit and I will add more color and shading  later in the finished piece. 

Monday, August 20, 2012

Bingo Ball Drop - Aug. 20th 2012 Winner Announced
Good luck to everyone!!!


Monday, July 30, 2012

Let The Bingo Balls Bounce!!! It's GIVEAWAY TIME!!! WIN A $20.00 JO-Ann's Gift Card


Here is all you have to do to enter, to win a $20.00 JO-ANN's Gift Card.
  • Hit Like on my Face book page and Join my blog :)
  • Enter a comment in this thread or the FB thread!
  • Just for fun, in your comment, share what your favorite SVGcuts.com file is or which of my projects is your favorite! :)
  • If you have already joined both, post a comment and I will enter your name too!!! If you have joined one but not the other, join that one and enter a comment!
It's that easy to enter!!!

*Remember you must join both the FB page and my blog and leave a comment on one to quailfy. :)

That's it!

*Please Share this with your friends, the more the merrier!!!

One random winner will be selected and win, the $20.00 Jo-Ann's gift card!!!


It will be fun, a bingo ball will be pulled from the cage on camera and if your name/number gets pulled, you win!!! Be sure to watch :) Winner will be notified via this thread and on FB.


Winner will be announced in the evening, Monday August 20th!!! So, you have two weeks to enter!

* Just for fun in your comment let me know what your favorite SVGcuts.com file is! I would love to know!


Sometimes Their Are Good Accidents "Soar To New Hight's"


The other day, I grabbed my camera and snapped a few pics of a hot air balloon. Later when I was looking at the pictures I noticed not only did I get a picture of the hot air balloon, but there was a large hawk soaring in the sky as well! I thought it was kinda cool, so I gave it the title "Soar To New Hight's" I found it uplifting and motivational :) Have a great day!


Tuesday, July 24, 2012


So happy you stopped in!  Scroll down for a little peak into the CHA 2012 show.  I Had a wonderful time with the SVGCuts Design Team!!!!  So cool to finally meet Tamara of Happy Life, Crafty Wife and Thienly of Mod paperie in real life!!!  We walked the show all together and had a great time with Leo and Mary!!! All truly terrific, creative, fun people!!!  So happy to have had the opportunity to hang out with all of them! :)

Me coming out of the house that was created on the new TLC show Craft Wars with Tori Spelling, at CHA 2012.

Svgcuts getting ready to interview Tim Holtz

SVGcuts Leo and Mary interviewing Carta Bella at CHA.

Some pretty things and displays at CHA 2012

Meeting Dear Lizzy from American Crafts

Had fun with Mary, Thienly, Tamara and Leo walking the show! Here we are with Lizzy.

Entering CHA

Here is what it looks like when you enter the show :)