Showing posts with label Becki Wagner. Show all posts

Thursday, October 15, 2015

Autumn Shaker Box

Hello again! Becki from the Happy Card Factory here and back with an adorable little Fall shaker box. I just love how it turned out. Such festive boxes for candy favors at your next holiday party. 
The Holly Days collection for Christmas by Fleurette Bloom Designs has some of the cutest gift giving elements, but I wanted to make an Autumn themed shaker box. Using the Holly and Bow box, I broke the holly out of the front panel and replaced it with one of the leaves from the Harvest Happenings- Leaf card SVG. See how having multiple kits in your crafting arsenal can help you make any design your heart desires? :)
A little glitter here with a few sequins there and you won't be able to stop shaking this little guy. Super easy and such a beautiful touch to gift giving! If you want a some more information regarding how I put this shaker box together, head over to HCF for details.

Thanks for stopping by and checking out the Design Team's projects week after week. We appreciate it. Please leave a comment to let us know how we are doing or any kits/designs your would like to see featured. Then head over to the store to pick up the amazing SVG files from Fleurette. Your electronic cutting machine will thank you. ;)


Wednesday, September 30, 2015

Happy Birthday Burger Box


Hello! I'm Becki from the Happy Card Factory and I am back today with another project for you. Who doesn't love a happy meal box? Especially when they are filled with treats. I finally got a chance to play with the new Fleurette Bloom stamps. After seeing this happy burger, all I could think of was a happy birthday burger box shaped after those fast meals with the toys that kids love. I think it came out similar without getting in trouble. ;)


There were a few sets I used to get my happy burger box. To make the house box, I used the Christmas Memories 3D luminary house. I had to do a little renovation on it by releasing the compound paths to delete the windows and door. I also added a rectangle to the peaks of the roof so there wouldn't be a hole where the chimney is supposed to go. The scalloped mat is from the I'm Wishing kit's Lace card. With the addition of the burger stamp and sentiment from the Fast Foodies, it makes one adorable, fast happy burger box.


I wanted a handle similar in style to the "m" you get on the other box. Since this will be filled with birthday goodies, it was decided to add the occasion sentiment as the "handle." I used the Arial font, welded the letters together with little tabs. The tabs were then inserted into the slits I cut with an Exacto knife into the flat peak of the roof. The tabs were then glued down on the underside to give it stability. Now the box can be picked up with the "HB2U" instead of the decorative wire. Add a twine bow and sentiment, you're done. How cute! It's a very happy box to give to the birthday boy or girl.

Thanks for stopping by. Feel free to leave some love in the comments sections and have a very crafty day!

Supplies:
Christmas Memories 3D kit - luminary house
I'm Wishing 3D kit - scallop from Lace card
Fast Foodies stamp setSpectrum Noir markers 
American Crafts cardstock 
Trendy Twine Cherry Latte

Wednesday, September 23, 2015

Motorcycle Birthday card


Motorcycle birthday card 3

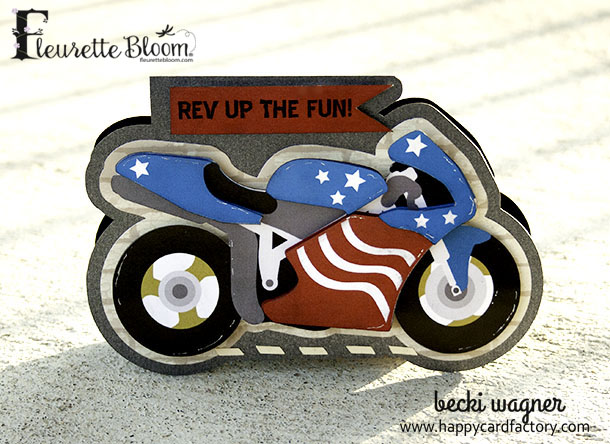
Becki from Happy Card Factory here with a new project! My nephew loves motorcycles, he helps his dad "fix" the ones in his shop. So Fleurette Bloom Designs Motorcycle Racing set was the way to go. Even though the set doesn't come with a motorcycle birthday card, it is real easy to make one with the included elements. I was intrigued by the motorcycle box, but sending it all the way to Ohio wasn't a good idea to me. Instead, I used elements from various parts of the kit. 

Motorcycle birthday card 1

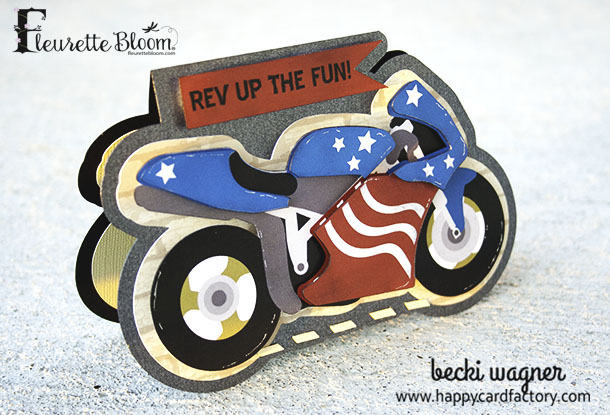
I used the offset from the box to make a mat for my motorcycle and the card base. To keep the card quick and easy, the Stars and Stripes motorcycle printable (no need cutting all the little pieces of the bike and reassembling them) and the decorative bike pieces from the SVG (made into a Print n' Cut) gave the motorcycle a dimensional, pieced together look fast. The flag shape and sentiment (made by me) was added to the cycle offset card base along with the kit's highway lane stripe to complete my shaped motorcycle birthday card. 

Motorcycle birthday card 2

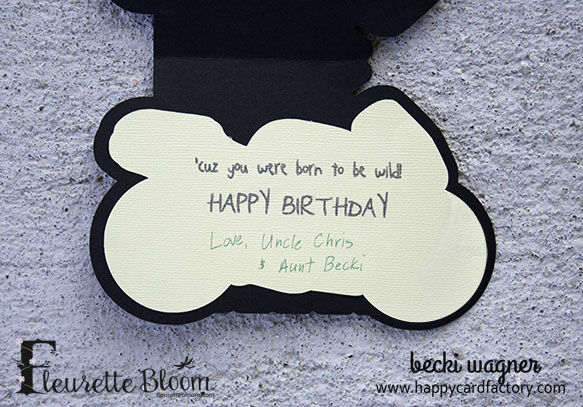
For the inside, I added a sentiment on another offset. Adds a nice little touch. I really hope that kid likes his card. Chances are he will probably destroy it within an hour. 

To make your own motorcycle card, check out the Motorcycle Racing 3D SVG kit!


Thursday, July 16, 2015

Change Your Fishing Basket into a Fabulous Purse!

Hello, everyone! It's Becki from the Design Team and I have a cute little project for you today. I took the fishing bag from Hooked on Fishing and transformed it into an adorable purse!


I love files that with just a simple choice of papers can become whole new projects for a myriad of different holidays or people in your life. Makes gift giving so much easier on you...especially your pocketbook. ;)


#svgcutfilespurse, #svgcutfiles, #svgcuts, #svgcutfilespurse, #svgcuttingfilepurse, #svgcutpurse
I used a paper set I have had for a while now - Antique Chic by We R Memory Keepers. It is such a feminine collection. I think it goes great with turning Fleurette's fishing basket into a beautiful purse.

Tuesday, June 16, 2015

Faux Wood Nautical Sign by DT Member Becki Wagner

I am so excited to announce Becki Wagner of the Happy Card Factory is now part of the Fleurette Bloom Design Team!!! Join us in giving her a big warm welcome!  

Enjoy her 1st of many Creative Design Team projects!   Be sure to leave her a comment to congratulate her and let her know how much you love it!  ~ Fleurette :)


Hello, everyone. I'm a super excited to be here as part of Fleurette's Design Team and work with these wonderful ladies! For my first time sharing with you, I have a pretty nifty project today. A faux wood sign that is perfect for those that love Coastal design. My youngest came over checking out my progress and asked me where I got the wood blocks from. Guess that means I did a pretty good job with Fleurette's files, huh? ;)


For this project I used the "Live, Laugh, Love" kit as the base of my faux wood sign then overlayed the plaques with elements from "Ships Ahoy!" and the "Sunshine" file.


To get the faux wood look on the "Live, Laugh, Love", I used about 4 different colors of Distress Inks. Sponging and dabbing on in various patterns. To give a more weathered look, I took a craft knife and chipped, then frayed the edges of the plaques. I scattered them a bit on the twine to look like they had been hanging in the salt air for a while. The "sand, surf, sun" sentiment does not come in the kit. I used a beach look font with a shadow layer including the starfish that comes with the "Ships Ahoy!" elements.


To get the watercolor effect on the sun and seagull, I used a water brush directly on the Distress Ink pads. To just highlight and contour the cuts. Brushing over with just water to blend and wash out a little color. I really love the way it looks on the sun. The water helped make the paper soft so I could scrape the wing and give a feathery look to the seagull.

Now that I live minutes from the beach, my faux wood sign will help kickstart the re-decorating of my living room to a fabulous coastal look. I can't wait to hang it! 

I really hoped you enjoyed my first project as part of the team. If you would like to see more of my work, please stop by the Happy Card Factory. I would love to have you!

Supplies: