Wednesday, September 18, 2019

Bright Magical Unicorn No-Line colouring with Erica


Hi everyone! *waves excitedly*

Erica here with my first blog post on the Inkon3 blog as part of the design team! I’m so, so excited about working for this fab company. I’ve been such a fan of Fleurette’s magical Fadeout No Line Coloring ink since I first got my hands on it and to be asked to join the Inkon3 DT was a dream come true.


Right, I’m going to dive right in with the details of my card for today’s post! I’ve used the Magical Unicorn stamp set, paired with Fadeout ink and Zig Clean Color markers to create a bright and sparkly unicorn.


To start with, I stamped up the image with the help of my Mini MISTI. I use the MISTI whenever I stamp anything, just in case I feel it needs another stamp or two. To make sure I could really see the outlines of this stamp, I stamped it three times with the Fadeout ink.

Then it was colouring time! As I wanted a bright and vivid look, I added hardly any water to the Zig’s. Especially on the mane-bit. I did have to use some on the ears and the face and body, but that’s one of the brilliant things of the Zigs. You can get so many different looks just by adding water or just blending them without any water at all.


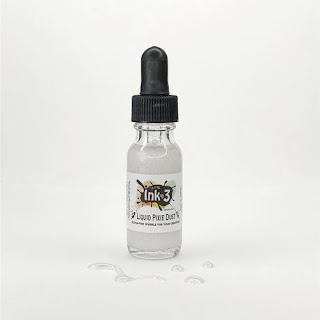
As the mane is so bright and colourful, I decided to keep the flowers all white and only add Liquid Pixie Dust to them. This is some serious sparkly stuff! If you are looking for something that will add sparkled to your projects, don’t look any further!

I used the dropper to get a couple of drops out, I use a tile as a palette as it’s easy to clean off, and then used the medium water colour brush to fill in the flowers. Once throughly covered I set this aside to dry to overnight to avoid any colours or Pixie Dust to get where it’s not supposed to. I’m over-cautious after having had one too many projects ruined by smudging ink, colour or something else because it wasn’t fully dry.


Coming back to the card the next day, I settled on a sentiment and heat embossed that with Chrome Ultra Fine embossing powder. Before I did anything embossing wise, I used my anti-static tool all over the image, except over the Pixie Dust flowers. I figured if a few stray silver bits went on them it would only make them more sparkly.

With the help of my Mini MISTI again, I stamped up the sentiment ‘Hugs, Kisses and Unicorn Wishes’ with Embossing ink and then sprinkled the embossing powder over it. A quick swish with the heat gun and a card base later, the card was done!


I have a video of the colouring coming to my YouTube channel soon, so keep your eyes peeled if you want to see how I coloured the Magical Unicorn.

That’s it from me this time. Thanks for stopping by and I hope you have found some inspiration here today! See you soon again!

Lots of love and happy crafting from Erica


Click here Click here Click here Click here Click here Click here Click here Click here

Monday, September 16, 2019

Thinking of You Roses


Hello my fabulous friends! 
Kassi here, with a project featuring a beautiful stamp, no line coloring, and little sparkle... 

I can't say that I have a favorite flower... there are just too many amazing flowers to pick one... but I will say that roses hold the most memories for me. My grandma had beautiful roses lining the walkway to her front door... We would walk through them just to smell them and see all the pretty colors. 
She died when I was 11, and that rose garden were never the same... but to this day, when I smell roses, I think of her, and it makes me my heart happy. 

Friday, September 13, 2019

Product Focus - Knockout Nibbles Stamp and Die + Video


Hi everyone, welcome back to the Ink On 3 blog!  It's Jaycee Gaspar, and today I wanted to share the creative process on this street art inspired graphic card using Ink On 3 - Knockout Nibbles Stamp and Die Set.  I recently went to an art show and drew in a lot of inspiration from various talented artists for their composition. I thought of ways of bringing clustered composition and exquisite details into card making.  Below is a video over on my YouTube Channel on how I made this card.


Hey thank you so much for checking out my video on how I made this card!  Where do you get the most inspiration?  Let me know in the comments below.  If you like what you've seen from me, make sure you subscribe to my YouTube channel and give me a follow over on Instagram!  Talk to you all very soon!

Materials:
Ink on 3 - Knockout Nibbles Stamp Set
Ink on 3 - Knockout Nibbles Die Set
Ink on 3 - Blackout Detail Ink
Ink on 3 - Arctic White Embossing Powder
Ink on 3 - Juicy Clear Embossing Ink

Vellum
Copic Markers: E000, E04, E40, E41, E42, E43, E44, E47, E49, R59, R49, R35

Neenah Solar White 80lb Cardstock


Jaycee Gaspar

YouTube | Instagram | Blog

Wednesday, September 11, 2019

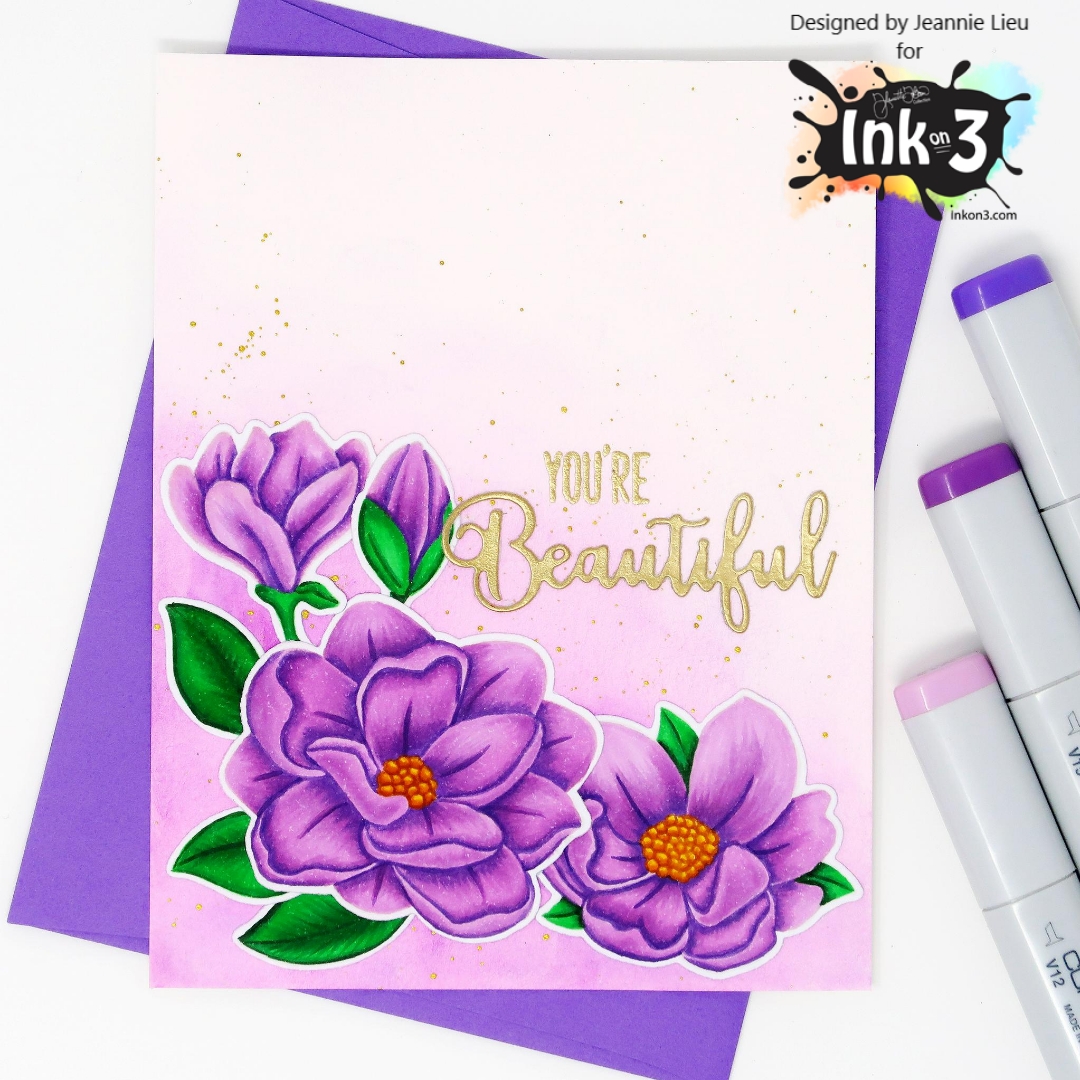
Big Bold Magnolias - No Line Coloring

Hi everyone! It’s Jeannie (InsideoutJeans) on the blog today with Inkon3’s new release with the amazing stamp set named, Big Bold Magnolias along with the coordinating dies. If you didn't hop along with us during our blog hop, you definitely should check it out because there have been some fabulous projects using this set!

I previously had created two other cards using this set, but I just had to pull it out again to create another one. This time, I decided to take on some no-line coloring. Inkon3 has the fabulous Fadeout ink for no-line coloring. To start, I went ahead and stamped out all the images from the set, except for the largest magnolia. The last two projects, I had focused on the largest one so this time, I wanted to pay attention to the rest of the images from the set. 


Once I had stamped them out, I went in with some purple copic markers. For me, it's easiest to lay down the darkest color first so I know where all the shadows lay. I'll then work out to my lightest color. 

I tend to fussy cut a lot but for no-line coloring images, I prefer using the coordinating dies. It leaves that really nice white border so it really makes the images pop. 

For the background, I just did a few washes of purple watercolor. Nothing very fancy at all. I did keep the watercolor at the bottom left of the card where I have the flowers laid out. Before glueing my flowers down, I added some gold splatter. 

I wanted to tie in my gold splatter, so I decided to use the Juicy ink to cover a piece of white cardstock and added Gold Rush embossing powder. By doing this, I could use the standalone "Beautiful" sentiment from Heels to you die set. For the coordinating sentiment, I stamped the "You're" with Juicy ink and heat embossed with the Gold Rush embossing powder so everything matched up.

I hope you enjoyed this card I shared today and make sure to pick up your set too! This is so gorgeous and so fun to color! 


Thanks for stopping by! Come back again soon for some more inspiration and ideas! 

Thursday, August 29, 2019

Big Bold Magnolias Blog Hop

Thank you for joining us on the Inkon3 blog hop featuring the newest stamp set, Big Bold Bold Magnolias. One of the magnolias might look familiar since it's featured in our Heels to You set, but it's been so popular, we decided to dedicate an entire stamp set to it
We are giving away a $25 Inkon3 shopping spree to one lucky hopper!
To enter:
* Leave a comment on each blog in the hop
* Follow Ink On 3 on Facebook and Instagram.
It's that easy! :D
Winners will be announced a week from today, Thursday, September 5, 2019 over on the main Inkon3 blog.
Scroll down for blog hop lineup, exciting news and my card :)


Now for the other exciting news!  We are officially introducing and welcoming the New Ink On 3 Creative Team!!! Such an mazing and talented group of people with so much creativity to share!!! 
We can't wait for all the crafty fun to come!!! 


Fleurette here, thank you so much for joining us! I had so much fun designing these Big Bold Magnolias and even more fun coloring them and creating this card!!!
To create this card, I started with Blackout Ink which is an amazing ink that I really don't talk about enough. It's really great and different because it dries instantly to the touch, so no more smearing! If your like me, I used to always smudge my cards because, well I never could seem to wait long enough for ink to dry before I would touch it! Now with Blackout I don't have to worry about that :) It's also super black. waterproof, dries permanently on all surfaces and is Copic friendly, Yay!!! I
Using a Misti stamping tool, I stamped all the flowers at once, such a great tool, don't know how we used to stamp without it (LOL) right!
I then colored the flowers with Copic (markers which I have listed below). Once everything was colored, I cut them all out with the Big Bold Magnolias coordinating die cuts, arranged them and attached them to my card base using foam tape to give it some nice dimension. I used the Beautiful die cut from the Heels To You stamps set, I thought it fit perfectly with the Big Bold Magnolias. Then to give it that extra pizzaz I painted on some gorgeous Liquid Pixie Dust, I swear I am totally addicted to the stuff!


Here is a close up showing all the bling from the Liquid Pixie Dust :) 
Copic Markers used, from dark to light
Blues - B18, B06, BG02, B00
Yellow - Y13, Y15, YR24
Green - YG03, G94

Now for the blog lineup with all the amazing projects by the Ink On 3 Creative Team. Be sure to leave a comment at each stop on the hop and follow us on Instagram and Facebook to be entered to Win a $25.oo Ink On 3 Shopping Spree!

You are here ---Inkon3 ~ Fleurette
Go here next - Cheryl Luu
Erica Andersson
Ilda Dias
Jaycee Gaspar
Jeannie Lieu
Kassi Hulet
Guest Designer -Rachel Alvarado
Courtney Miles

Thanks so much for joining us!!!
Happy Hopping :D
                 

Friday, August 23, 2019

Raccoon Hugs - Clean and Simple Watercolor Card


Hi everyone, welcome back to the Ink On 3 blog!  It's Jaycee Gaspar, and today I wanted to share the creative process on this simple scene using the Ink On 3 - Raccoon Hugs Stamp and Die Set.  The goal for this project was to make something super quick and easy, and in my case I used a scrap watercolor panel from a previous project to make this card super simple.  Do you all have a scrap drawer full of small bits of paper?  I feel like if I don't try to use these smaller scraps, then I'm hoarding.  I don't want to admit I have a trash drawer.


This scrap blue ombré watercolor panel was made with Windsor and Newton Payne's Grey (my favorite color by the way).  I watercolored the cute little sleeping raccoon in a mix of black and sepia outlined with Ink On 3 - Blackout Detail Ink.  This ink is great because it's crisp like a pigment ink, but dries super fast like a dye ink and is waterproof--perfect for watercolor projects.  I used the coordinating Ink On 3 - Raccoon Hugs Die Set to cut out the image once dry.  Before assembling the card I used the small heart images in the same stamp set and created "vellum tape" to act like a decorative scotch tape to anchor the watercolor panel on to my ink splattered background.  I used Ink On 3 - Gold Rush Embossing Powder and Juicy Clear Embossing Ink to make this.  I love the script sentiments from the stamp set, but lately I've been OBSESSED with my embossed label maker.  So I thought it was fitting to make my own sentiment and add it to my project.  I added a bundle of black embroidery thread to the back of the raccoon image to break up and balance the hard angles all over the project.


Let me know in the comments below what you think of this very simple scene card.  If you like what you've seen from me, make sure you subscribe to my YouTube channel and give me a follow over on Instagram!  Talk to you all very soon!


Materials:
Ink on 3 - Raccoon Hugs Stamp Set
Ink on 3 - Raccoon Hugs Die Set
Ink on 3 - Blackout Detail Ink
Ink on 3 - Gold Rush Embossing Powder
Ink on 3 - Juicy Clear Embossing Ink

Windsor & Newton Watercolors
Silver Black Velvet #8 Round Watercolor Brush
Neenah Solar White 80lb Cardstock


Jaycee Gaspar

YouTube | Instagram | Blog

Monday, August 12, 2019

Magical Planner Layout by Cheryl


Hi Crafty friends! It's Cheryl with the Inkon3 Design Team here to show you how to make a magical planner layout using the Magic Dragons Stamp set and the Phat Alphanumeric Stamps!


First, I masked my dot-grid planner so that I can stencil in a colorful blue and purple background.


Using a foam blender, I added purple and blue ink to my planner pages. It takes a little bit of effort to build enough coverage so don';t get discouraged if the background doesn't initially look the way you want.


My stencil was a little smaller than my page, so I picked up the stencil and continued to stencil in below the larger block of color. 


Next, I stamped the Magic Dragons and Phat Alphanumeric stamps, using the Blackout Hybrid Detail Ink, onto sticker paper and then fussy cut them. Then I added them onto my planner layout. (Tip: I like to apply the stickers and then color, to be more efficient. I used to stamp and then color, but I often had unused colored images). I accidentally stamped out July for the month! LOL, but thank goodness I use removable sticker paper! :P 


Then I colored in the stamped images using copic markers. I also used a light grey pen to draw a divider for each day of the week. I added some washi tape to the white gap between the stenciled areas too!


I felt like I needed to add something to the bottom right box, so I decided to mask around that box and randomly stamp some of the diamonds, hearts, etc. to make a fun pattern!


Lastly, I used a white gel pen to add a few fun details! I hope you liked my planner pages and that it has inspired you to create a magical planner layout too!


Copic colors used:
Blues: B01, B00, B000, B000
Purples: BV01, BV00, BV000, BV0000
Greys: N1, N0

Inkon3 Products Used:
Inkon3 Magic Dragons
Inkon3 Phat Alphanumeric Stamps
Inkon3 Blackout Hybrid Detail Ink

Friday, August 9, 2019

Magical Unicorn Birthday Card


Hello, again my friends, Ilda here!

Today I am sharing this beautiful Unicorn card featuring the Magical Unicorn set.

CARD DETAILS

I colored in this partial stamp using Zig Clean Brushes, that I had first stamped out using Fadeout Ink for a no-line watercolored look onto Bristol Paper. Then on some areas, I added Liquid Pixie Dust for extra sparkle.

Next, I die cut some clouds and blended out some Broken China lightly to the bottom of them and also blended out Picked Raspberry onto the heart.

For the background, I used a strip of an alcohol rainbow panel that I had previously made and then popped all the elements on to the card front. The sentiments also come from the Magical Unicorn set and were stamped out using Blackout Ink.


Here is how I finished off the inside of this pretty card.


Hope you were inspired by my Magical Unicorn Birthday Card today.

Thank you for stopping by until next time... Happy Crafting!


SUPPLIES
Magical Unicorn
Magical Unicorn
Shop at:
SSS | HD
Fadeout No Line Ink
Fadeout No Line Ink
Shop at:
SSS | HD
Blackout Ink
Blackout Ink
Shop at:
SSS | HD
Liquid Pixie Dust
Liquid Pixie Dust
Shop at:
SSS | HD
Small Fine Tip Water Brush Pen
Shop at:
HD
Strathmore Bristol Pad
Shop at:
SSS | AMZ
Mini Misti Tool
Mini Misti Tool
Shop at:
SSS | AMZ | SB | SK
Zig CLEAN COLOR 60+ 80 SET
Shop at:
SSS | AMZ
Gemini Jr Die Cutting/Embossing Machine
Shop at:
SSS | AMZ | SB
BLENDER BRUSH Set
BLENDER BRUSH Set
Shop at:
SSS | AMZ | SB | PF
Oxide Ink Pad BROKEN CHINA
Shop at:
SSS | SB | HBS
PICKED RASPBERRY
PICKED RASPBERRY
Shop at:
SSS | SB | HBS
WHITE Gelly Roll Pens Set
Shop at:
SSS | AMZ | SB
EK Tools 5-Pack Journaling Pens, Black
Shop at:
AMZ
STUDIO KATIA GLUE
STUDIO KATIA GLUE
Shop at:
SSS | SK
Glossy Accents
Glossy Accents
Shop at:
SSS | AMZ | SB | HBS
Double-Sided Foam Tape
Shop at:
SSS | AMZ

Wednesday, August 7, 2019

Coral Wreath Tutorial

Hello everyone! 

Kassi here...

Have you ever had an idea for a card rattling around in your brain for a while before you decide to tackle it? I had this one sitting on the back burner for a while... My original plan was a very complicated one that left me feeling too overwhelmed to tackle... than I realized that if I simplify, not only will it make it more approachable, but it might actually look better... 

Let's take a look at how it ended up coming together...

Friday, August 2, 2019

#Boujee Watercolor Card + Video


Hi everyone!  It's Jaycee Gaspar for my first project as part of the Ink on 3 Design Team!  Thank you so much to Fleurette and Jeannie for the opportunity.  One of the things I love creating is floral arrangements, and Ink on 3 has many to chose from.  I am a little late for the Bad & Boujee release, but I couldn't help but make a project featuring this stamp set.  To find out how I made this #boujee card, I've got a video below!


Thank you so much for watching my video!  Let me know what you think about this super #boujee project in the comments below.  If you like what you've seen from me, make sure you subscribe to my YouTube channel and give me a follow over on Instagram!  Talk to you all very soon!


Materials:
Ink on 3 - Bad & Boujee Stamp Set
Ink on 3 - Bad & Boujee Die Set
Ink on 3 - Roses in Bloom
Ink on 3 - Blackout Detail Ink
Ink on 3 - Gold Rush Embossing Powder
Ink on 3 - Juicy Clear Embossing Ink

Windsor & Newton Watercolors
Silver Black Velvet #8 Round Watercolor Brush
Neenah Solar White 80lb Cardstock


Jaycee Gaspar

YouTube | Instagram | Blog