Showing posts with label Hello. Show all posts

Wednesday, August 5, 2020

Hello BeYOUtiful Friendship Card


Hello, my BeYOUtiful Friends! Ilda hereπŸ‘‹

Today I am back with a card that took me no time to make mainly because the background was super quick and easy to create and I am loving the results. It would be a great card to send a friend for a birthday or any other special occasion.

CARD DETAILS

I began by stamping out the large magnolia image from the new BEYOUTIFUL stamp set using JUICY INK onto a piece of Bristol paper. I then used GOLD RUSH EMB. PWD. to heat set the lines in.


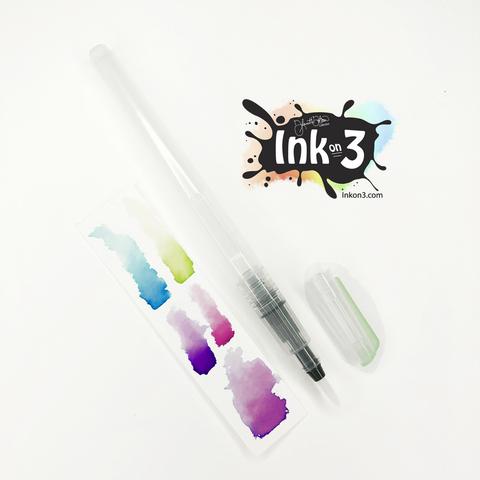
I then used the ATELIER PAINT IT BLACK ink to paint in the flowers using a SMALL TIP WATER BRUSH PEN. I just dipped the tip of the brush onto the ink pad and began coloring where I thought a shadow would be, gradually pulling and blending the ink out. It is hard to see in the photos but this ink has some pink and green undertones that show up so beautifully on the card in real life. I could have added more layers of paint to give the petals more dimension but I was happy with the one layer which made this so much easier too.


Once the ink was dry I die cut the panel with a pierced frame and glued it onto the card base. Next, I die cut a pierced heart from vellum and then stamped and embossed the BeYOUtiful sentiment on to it. I then figured out where I was going to place the heart and stamped the "HELLO" right over where the center of the sentiment would be and then glued the heart in place and cut off the edge that hung over the card.


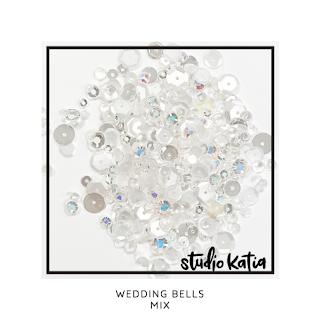
To finish off the card, I added some crystals and sequins for sparkle.

I hope you were inspired by this elegant friendship card. Thank you so much for stopping by and until next time... Happy Crafting!

Connect with me also on my Blog, Facebook Page, Instagram, and YouTube

SUPPLIES
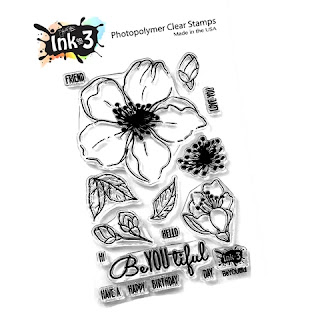
BEYOUTIFUL
BEYOUTIFUL 
Shop at:
IO3
JUICY INK
JUICY INK
Shop at:
IO3
GOLD RUSH EMB. PWD.
GOLD RUSH EMB. PWD.
Shop at:
IO3
Atelier Paint It Black
Shop at:
IO3
SMALL TIP WATER BRUSH PEN
Shop at:
IO3
BLACKOUT INK
BLACKOUT INK
Shop at:
IO3
BRISTOL PAPER
BRISTOL PAPER
Shop at:
SSS | AMZ
DARLING RIBBON & FRAMES
Shop at:
SSS | SK
PIERCED XOXO HEART DIES
Shop at:
SSS | SBC | HBS
GEMINI JR. DIE CUTTER
Shop at:
SSS | AMZ | SBC
ORIGINAL MISTI
ORIGINAL MISTI 
Shop at:
SSS | AMZ | SBC | HBS
Vellum Value Pack
Vellum Value Pack 
Shop at:
SSS | AMZ
WEDDING BELL MIX
WEDDING BELL MIX
Shop at:
SSS | SK
EMBELLISHMENT WAND
EMBELLISHMENT WAND
Shop at:
SSS | SK
TRIANGLE TRAY
TRIANGLE TRAY
Shop at:
SSS | SK
STUDIO KATIA GLUE
STUDIO KATIA GLUE
Shop at:
SSS | SK

Friday, June 5, 2020

Hello Magnolia Friendship Card


Hello Friends, Ilda here and happy Friday!

Today I am sharing a card featuring the BIG BOLD MAGNOLIAS Stamp set, that I previously had colored for the last Kathy Raccosin's coloring challenge. I love participating in her challenges because I end up with a ton of colored pieces ready to go on a card.

CARD DETAILS

So to begin, I stamped out the images first onto Bristol paper using BLACKOUT INK. I then colored the images in with Karin Brush Marker Pro Brushpens that were new to me and I wanted to test them out. Once the water coloring was dry I went back to add some pencil detailing. I then place the colored images back into the stamp positioner and re-inked the images using JUICY INK this time. 


Next, I sprinkled GOLD RUSH EMB. PWD. over the panel and then heat set the lines in. As you can see some of the BLACKOUT INK is still showing through some areas, but that didn't bother me as it looks like a shadow line. Please note, when you watercolors the paper will warp a little so linning it back may not be perfect unless you use non-waterbased media. I then die cut each flower up using the BIG BOLD MAGNOLIAS coordinating dies and glued them on to a strip of cardstock that I had added the same gold embossing using the LEAFY FOREST STENCIL.


To finish, I die cut, stacked and glued together the Hello from the DOGWOOD coordinating die set. Before adhering it all to the card base I diluted some of the red I used on the flower and added splatters onto the card front.

I hope you have been inspired by this Magnolia Friendship Card. 

Thank you for stopping by 😊
Until next time... Happy Crafting πŸ‘‹


SUPPLIES
BIG BOLD MAGNOLIAS
BIG BOLD MAGNOLIAS
Shop at:
 IO3
BIG BOLD MAGNOLIAS DIES
Shop at:
IO3
DOGWOOD FLOWER DIES
DOGWOOD FLOWER DIES
Shop at:
IO3
LEAFY FOREST STENCIL
Shop at:
IO3
BLACKOUT INK
BLACKOUT INK
Shop at:
IO3
JUICY INK
JUICY INK
Shop at:
IO3
GOLD RUSH EMB. PWD.
GOLD RUSH EMB. PWD.
Shop at:
IO3
MED. WATER BRUSH
MED. WATER BRUSH
Shop at:
IO3
MISTI TOOL - ORIGINAL SIZE
Shop at:
SSS | AMZ | SB | HBS
NEENAH SOLAR WHITE 110
Shop at:
SSS | AMZ | HBS
KARIN BRUSHMARKER PRO
KARIN BRUSH MARKER PRO
Shop at:
SSS | AMZ
PRISMACOLOR PENCILS
PRISMACOLOR PENCILS
Shop at:
SSS | AMZ
GEMINI JR. DIE CUTTER
Shop at:
SSS | AMZ | SB
STUDIO KATIA GLUE
STUDIO KATIA GLUE
Shop at:
SSS | SK
FOAM TAPE - WHITE
FOAM TAPE - WHITE
Shop at:
SSS | SK

Wednesday, August 29, 2018

Hello My Friend - Gold Rush Ultra Fine Embossing Powder

Hello my Friends, Ilda here from ilovedoingallthingscrafty.com!

I am back from vacation and finally had a chance to play with the new Ultra Fine Embossing Powders from Ink On 3. I am completely in love with how these powders melt, they are AH-Mazing! If you like using Embossing Powders I'm sure you will LOVE these!

Hello My Friend - Gold Rush Ultra Fine Embossing Powder from Ink On 3 by ilovedoingallthingscrafty

Here is how I made this card:
  • I used the Juicy Ink pad to stamp the Hollyhocks onto a piece of watercolor paper.
  • I then sprinkled Gold Rush Ultra Fine Embossing Powder onto the stamped images and melted the powder with a heat gun.  
  • Next, I colored in the images with Migello Mission Gold Watercolors.
  • Once the panel was all colored and dry I trimmed the edges to fit onto an A2 card front. I then inked the edges of the panel with Juicy Ink and then embossed them with the Gold Rush Powder.
  • For the sentiment, I used the standalone die from the Dogwood flower die set and embossed it with a couple of coats of Gold Rush Embossing Powder.
  • I also stamped out the "my friend" from the Hollyhocks set using Juicy Ink onto a piece of black cardstock that then once again embossed with Gold Rush. 
Here is a close up of the Gold Rush Powders melted on the card 😍


Hello My Friend - Gold Rush Ultra Fine Embossing Powder from Ink On 3 by ilovedoingallthingscrafty

Hope you were inspired by this friendship card today.  For more inspiration using the NEW Ultrafine Embossing Powders, check out the previous post on this Blog.

I appreciate the time you spent here, thank you for stopping by 😊
Until next time... Happy Crafting πŸ‘‹