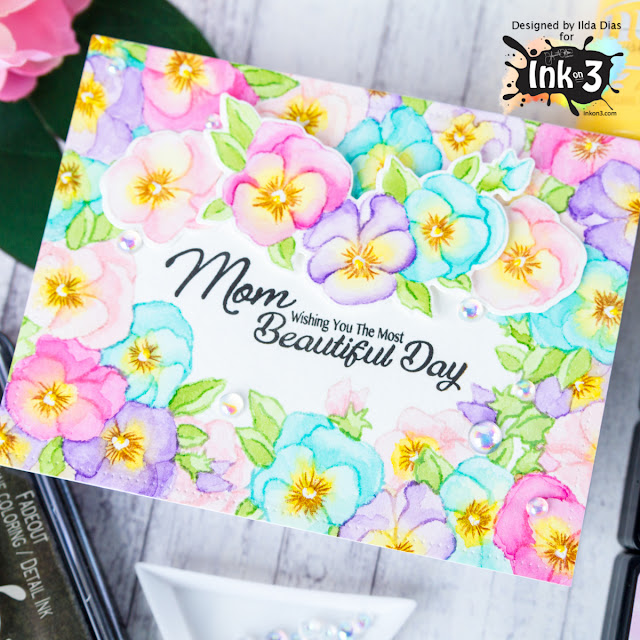
Hello everyone! Kassi here!
If you have been following me over on Instagram, you may have noticed that I've been doing a lot of no-line watercolor painting lately...
I've really enjoyed painting Pansies. Pansies come in SO many different varieties, which makes them fun to color! And let's face it, this stamp set is BEAUTIFUL!
Do you to create with pansies too?
Let me walk you through this elegant pansy shadowbox card...

Supplies
Paper: Strathmore Bristol Smooth; Neenah Classic Crest Solar White; DCWV Metallics
Stamps: InkOn3 Pansies
Ink: InkOn3 Fadeout, Juicy Clear Embossing
Coloring: Zig Clean Color Real Brush markers
Blue/yellow- 302, 030, 038, 083, 051, 061, 050, 010
Pink- 230, 028, 082, 051, 052, 050
Peach- 071, 051, 028, 230
Light Purple bud- 030, 302, 083, 080
Dark Purple bud- 030, 038, 082, 080
Green- 046, 043
Dies: La-La Land Crafts Nested Frames Large
Other: InkOn3 Chrome Embossing Powder
Now you have your supplies, let's jump in!

Step 1: Stamp you pansies on cardstock using Fadeout Ink. Use whichever paper you prefer for the coloring medium you want to use. I knew I would be using Zig Clean Color markers, so I stamped on Bristol Smooth cardstock. I didn't know exactly which pansies I would end up using, so I just stamped them all!
Tip: I suggest using a MISTI for this.. Fadeout ink is a very light ink.. with some images (and depending on how good your eyes are), you may find that double, or even triple stamping is needed to make sure you can see all the lines clearly enough.. I like having that option even if I don't end up needing to double stamp for a darker line.

Step 2: Color away!
I used this as a time to experiment.. If you do a quick image search for 'pansies', you'll find they come in SO MANY different colors and patterns! I chose some reference photos that I liked, and tried to recreate with my painting.
Step 3: When you have finished coloring, cut them out... You can fussy cut like I did, or use the coordinating dies

Step 4: Cut 2 cardstock panels to fit your card size (I'm using A2). Using a set of nesting dies (must have at least 3 nested dies), die cut the smallest from the center of one panel, and the middle size from the center of the other panel.

Step 5: Use the largest die and the middle die to create a frame from metallic cardstock.

Step 6: Stamp your sentiment on your card base using Juicy Clear Embossing ink, and emboss with Chrome embossing powder. Use the panel with the smallest window as your placement guide.

Step 7: Adhere your small window panel to the card base using foam tape. Adhere the metallic frame to the larger window panel, then adhere that panel on top of the smaller one using foam tape.

Step 8: Adhere the bunch of pansies across the bottom of your frame using foam tape. If the flowers overhang different layers (like mine do), you'll need to add 2-3 layers of foam tape in places to ensure it is supported and won't get crushed in the mail.

Step 9: Finish it off by tucking extra buds and leaves in the lower frame areas to help fill it out and make it look like the flowers are growing through all the layers of the card.
I don't know about you, but I think I'm addicted... If you need me I'll be in my studio paining pansies....