Today I am sharing another creation for Ink On 3. This cute little shaker card features the little mouse from the Dance and Twirl Stamp set.
I began by stamping out the mouse using Blackout ink. I then colored it in with Copic markers.
(I will list all the Copics I used at the bottom of this post.)
Next, I worked on the background panel. I used Fadeout Ink to stamp out the little bell cluster from the Fairy Christmas Set all over the background. I created holly clusters instead by coloring the bells in red.
Ilda here👋, back again today to share with you a couple of cards I made using the same stamps to get different looks!
The stamps I'm using today comes from an older Ink On 3 set, Magic Dragons.
This set is super cute with lots of fun images, but for today's post I will just be using the gem stones from the set to create some friendship cards.
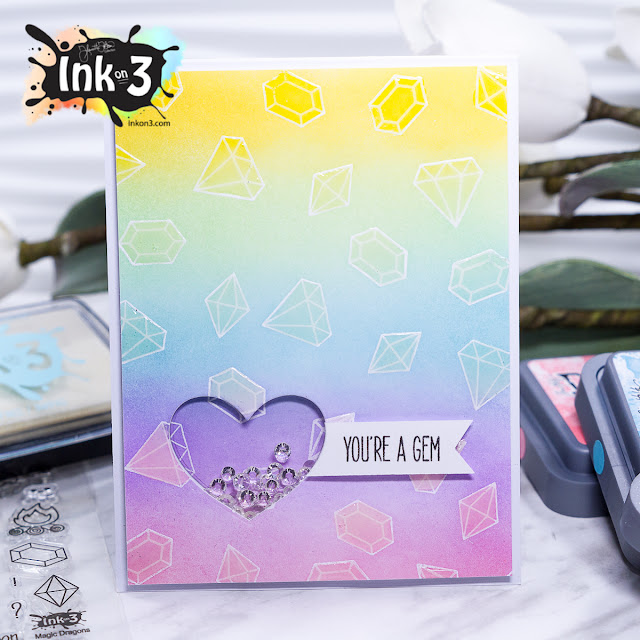
For my first card, I did some ink blending with distress oxide inks to add color to my background panel. I used Bristol paper, stamped the images in with the Juicy Inkpad, then I heat set it with white embossing powder to make the lines pop once colored.
To create this cute little shaker window, I used a small heart die and added these beautiful little sparkling crystals. Used the heart die to cut the sentiment banner and lined it up next to the shaker window.
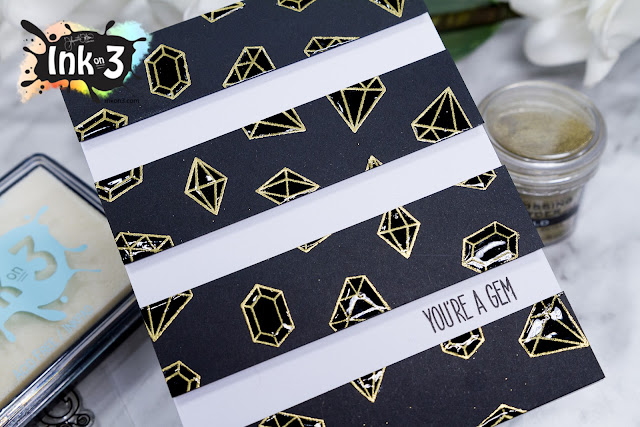
For the next card, once again I stamped the gems using the Juicy Ink only this time onto black cardstock and then used gold embossing powder.
Then all I did was cut my black cardstock piece into equal sections, then spaced them out onto the card base popping them up with foam tape. Stamped my sentiment with the Blackout Ink and then added glossy accents to each gem.
These cards were easy to do and relatively quick to make. Hope you were inspired by these Gem Cards ft. the Magic Dragons set. For a complete list of products used click →HERE
Today I'm sharing another card for Mom today. Yes, another one... and yes I only have one mom, but it's always nice to have Mom cards on hand because not only are they perfect for Mother's Day they are also great for other occasions (A just because card, or even a birthday card too, plus you can give them away to anyone who is Mom).
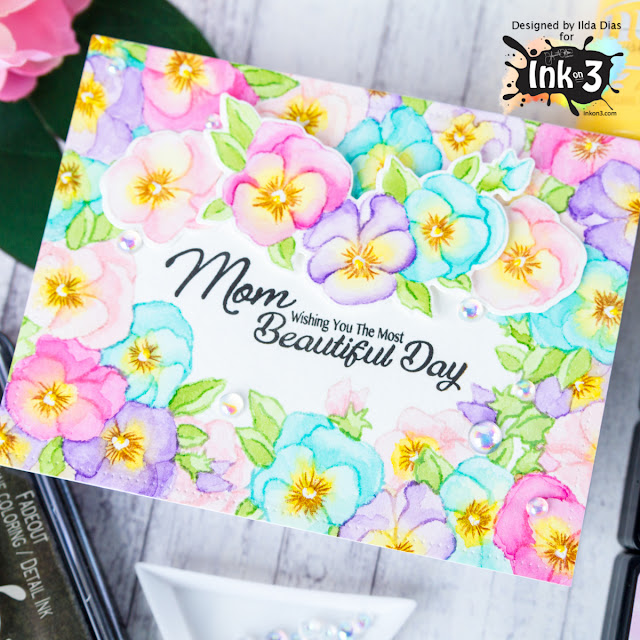
So for this card, I wanted to play a little more with the Fadeout Ink from Ink On 3 as I love the no line watercolor look and still need tons of practice. So for practice, I played with the new Pansies set creating this beautiful floral background. Overall I am super happy with the results. Yes, it isn't perfect but that's OK because I keep learning from each experience and that's what is important to me plus I had fun doing it. This ink makes the no line coloring process so easy. Honestly you drop the color next to the stamped lines and the pigment gets absorbed, making it super easy to see where you stamped. That is the magical part about this ink.
To create this card I had to do quite a bit of masking along the card panel. Once I was happy with the stamped image I began coloring it in with a variety of distress inks. First I laid down a light layer of color to define my stamped images and then went back adding more color and depth to each pansy. Once my coloring was done, I die cut the panel with the pierced rectangle and mounted it on to the card base. I then stamped out the sentiment using Blackout ink and added a few more flowers to frame the sentiment that I had cut out with the coordinating dies.
To finish the card I added some detail lines to the center of each Pansy using a burnt ochre Prismacolor pencil. To each flower, I also added a bit of white with a gelly roller and topped it off with a small drop of Dandelion yellow Tonic drops. For some shine, I added a few scattered iridescent bubbles. For links to all the supplies I used, click → HERE!
Hope you were inspired by this no line colored card for Mom. Thanks for stopping by and to all the Mommies out there Happy Mother's Day, enjoy your weekend!
Hello Friends, Ilda here!
The snow is all gone, there are puddles everywhere and the sun is shining... finally Spring has arrived here 🙌 It feels almost as warm as today's card looks!
Today I have another card to share with you featuring the Playtirific Pondies Set from Ink On 3.
These little critters are so cute I had to use them again on another card. This time I wanted to create a shaker card.
For this card I had planned on creating a process video, but sadly lost some of the footage. So I will explain the process to you below. For now I have included a very short clip here so you can see it up close and in detail!
The first thing I did was stamp out the critters using Blackout Ink (my new favorite). I then colored them in using Spectrum Noir markers and die cut them out using their coordinating dies. Next, I moved on to the front panel.
To create the pond shaker area, first I used the second largest balloon die from Simon Says Stamp to die cut the pond shape on the right edge of the panel. I then lined up the die cut panel onto the card base to use as a guide and die cut the base. The balloon end will cleverly be hidden behind the duck so you would never know it was a balloon die you used to cut out the pond. I then used distress oxide inks to blend out the area along the pond. Once that was done blending, I stamped out the pond plants along the edge of the water and colored them in.
To create the shaker pocket, I used a clear cello bag (the kind you use to store the finished cards in) trimmed it to size, and adhered it with the finished bottom edge of the bag along the open edge of the card base. I then filled the pocket with sequins and glued the opening of the bag shut. Next, used foam tape along the edge of the pond to create a rim for the top panel to adhere to and to keep the sequins in place. There still was some areas that the sequins snuck into under the panel, so if you want to avoid that I would trim the bag all the way around the pond and use some double sided tape to close it together.
Once the top panel was adhered to the card base I added the critters in place with some foam tape. For the sentiment tag, I stamped the words out with Salty Ocean distress oxide ink and heat set it with clear embossing powder. The last thing I did was add some blue cardstock to the inside of the card and adhered it under the front panel. This did not only add color to the pond but it also hid the balloon end from being seen on the inside of the card.
Here is a closer look at this cuties 😍
Make sure to check out the links here for the supplies I used in making this card.
Have a Platirific Week and hope this card inspired you today 😀
Even if it is to go outside and enjoy the Spring weather!