


Hello Everyone!
It's Ceal, here. Today I am sharing this card using the new Lotus stamp set, Y'all it is so pretty when it's colored up.
I used some Graphit alcohol markers to color it and then masked it off so I could create a background. If you have followed me at all you know how much I love using stencils to create a background. For this background I used the Pondie stencil and Trinity Teal Atelier ink blended with brushes starting darker at the bottom and fading as I went up.
To finish the card I removed the mask and added a sentiment from the same set that I heat embossed using our Juicy Clear embossing pad and some Arctic White embossing powder on a black strip.


Hi Friends! It's Cheryl with the Inkon3 Creative Team! I'm really in love with the My Sweet Petunia Clear Stamp set. Sometimes it's nice to just have to deal with one stamped image for a card!
I googled Petunias to see what different color variations there were and I absolutely fell in love with this white and purple petunia!

First stamp the Petunia bouquet onto white cardstock. Then color with the Copic Markers listed below, or with your choice of coloring medium. Fussy cut the stamped image.
Then on white cardstock and black ink, stencil in the Squiggles background using the Squiggles 6x6 stencil. Trim the stenciled cardstock down to 5" x 3.75".
Trim down grey patterned paper down to 5.25"x4". Adhere to a 5.5"x4.25" card base, then adhere the stenciled cardstock over the grey patterned paper. Next, adhere the Petunia bouquet onto the stenciled cardstock as shown in the pictures.
Then die cut a sentiment tag using white cardstock. Then stamp the sentiment "You make my heart smile" from the My Sweet Petunia Clear stamp set. Adhere the sentiment onto the bottom of the card.


Hi guys!

It’s Erica back on the Ink On 3 blog with another card using the My Sweet Petunia stamp and layering stencil set. On this one I made a big mistake, and thought I’d share it with you so you can avoid it yourself.
If you saw my last blog post, I used this set for those cards too, but on those I ink blended first and then heat embossed the outline stamp on top. For this card, I did not do that.. and it ended up a bit meh… not going to lie. Take it from me, if you want a white heat embossed outline, do that last.
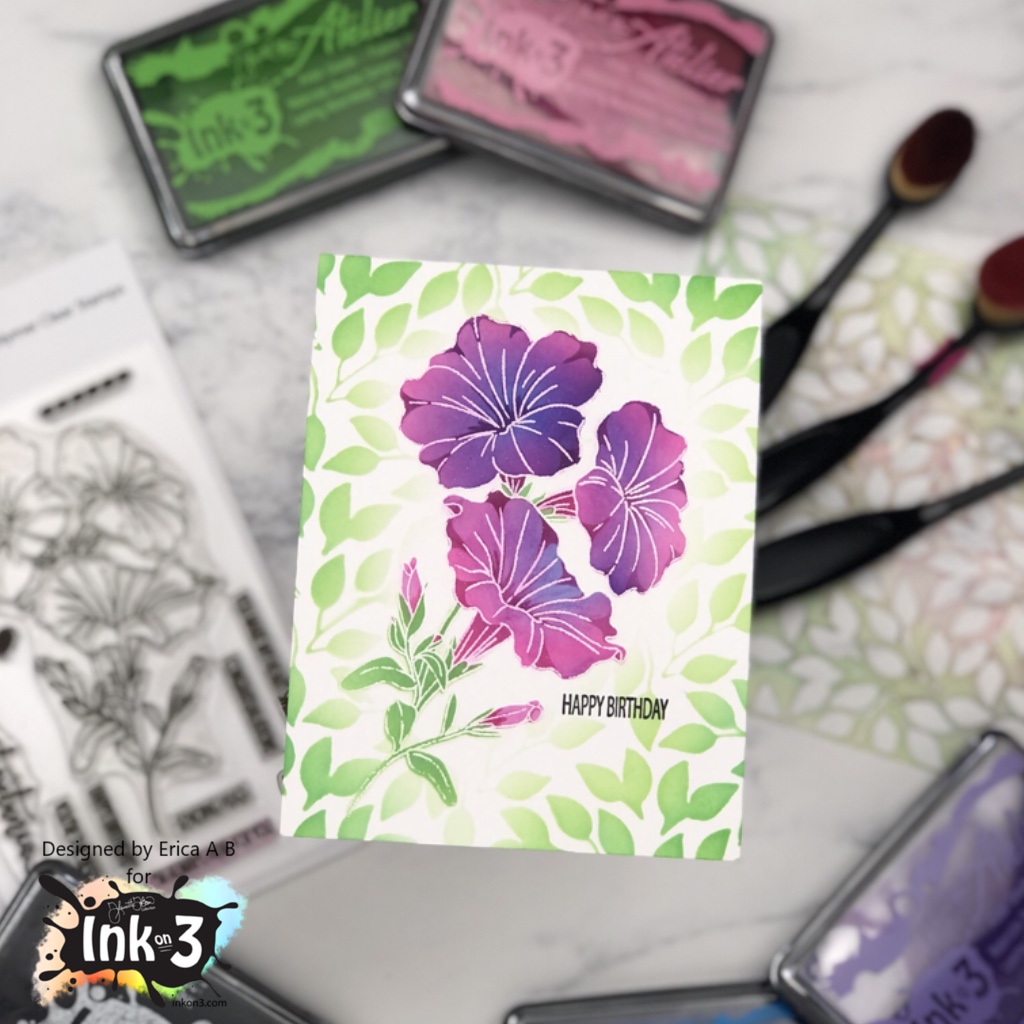
So I started out by heat embossing the gorgeous My Sweet Petunia stamp on white card stock. I’m not sure why I did it this way, I should know better by now, really. Anyway, I grabbed Sweet Petunia Pink, My Jam Purple and Peacock Blue Atelier Inks, some Life Changing Blender Brushes and the My Sweet Petunia layering stencils.
Right off the bat, I realised what a mistake I had done as the inks are so pigmented and vibrant, they instantly discoloured the white embossed lines. I SHOULD know better by now! And yeah, I said it again, because I really don’t know what I was thinking here.
Anyway, onward and upwards. I ink blended the My Jam Purple and Peacock Blue to create a deep, vivid look for the flowers and then went softly with Goddess Green for the stem and leaves layer. I tried cleaning up a little, but it’s very easy to smudge and leave marks on the project when doing this, so I did what I felt I could do safely without making too much of a mess.

Around the flower I also ink blended more Goddess Green using the Leafy Forest Stencil, just to add some softness to the card, which is a true one-layer card if you can believe it! A quick Happy Birthday was stamped up with Blackout Ink and that was it.
Super simple, and it can work for so many occasions. Just change up the colour scheme and sentiment, and you are good to go! Oh, and ink blend FIRST, and heat emboss when all the ink is dry. Maybe best to leave it overnight to make sure. Take it from me, don’t do it my way, because that did not work out very clean. Having said that, that’s only with white embossing powder, I guess? Maybe gold will be fine? Ok, I’m off to best that theory! See you next time!
Lots of love and happy crafting from Erica


Hello and thanks for stopping by! Today I'm happy to share a project with you using the Triple Roses stamp set and Atelier Inks with a fun technique, including a video.

https://inkon3.com/products/triple-rose-4x6-clear-stamp-set
https://inkon3.com/products/squiggles-6x6-stencil
https://inkon3.com/products/fadeout-no-line-coloring-detail-ink
https://inkon3.com/collections/re-inkers
https://inkon3.com/products/liquid-pixie-dust
https://inkon3.com/products/large-water-brush-pen
https://inkon3.com/products/bee-sting-yellow-atelier-artist-grade-fusion-ink
https://inkon3.com/products/atelier-paint-it-black-artist-grade-fusion-ink


 Squiggles Stencil Shop at: IO3 |
 Sweet Petunia Stamp Set Shop at: IO3 |
 ATELIER SWEET PETUNIA Shop at: IO3 |
 ATELIER BEE STING YELLOW Shop at: IO3 |
 ATELIER PEACOCK BLUE Shop at: IO3 |
 ATELIER MY PURPLE JAM Shop at: IO3 |
 BLACKOUT INK Shop at: IO3 |
 NEENAH SOLAR WHITE 110 Shop at: SSS | AMZ | HBS |
 INK BLENDER BRUSHES Shop at: SSS | SK |
 New Mini Misti Shop at: SSS | SB |
 AMETHYST PEARLS Shop at: SSS | SK |
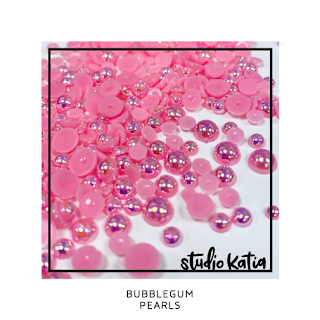 BUBBLEGUM PEARLS Shop at: SSS | SK |
 RIPE PERSIMMON PEARLS Shop at: SSS | SK |
 LEMON BURST PEARLS Shop at: SSS | SK |
 SEAFOAM PEARLS Shop at: SSS | SK |
 BEARLY ART PRECISION GLUE Shop at: SSS | AMZ |
 Tim Holtz 8.5 Inch Trimmer Shop at: SSS | SB | TS UK |
I really love the details in the flower in the Here for You stamp set, it's definitely designed to be used with the Blackout Hybrid Detail Ink!

On a white card base, mask off about 1/3 of the card, then stencil in a background using the Squiggles Stencil. I used Distress Oxide Inks in Victorian Velvet, Tattered Rose, and Milled Lavender.
Then I stamped out two of the flowers in the Here for You clear stamp set, colored with copic markers, and then fussy cut the image.
Next, I die cut one black and one white rectangles. On the white rectangle, I stamped out the sentiment "You are Never Alone" with Blackout Detail Ink, then on the black rectangle I stamped out "I'm here for You" with Juicy Clear Embossing Ink. Then I sprinkled some Ultra Fine Embossing Powder in Arctic white onto the embossing ink, and heat set.
Assemble the card as shown in the picture above. There you have it! A beautiful card to let your friend know that you're always there for them!
Hi guys!
It’s Erica back on the Ink On 3 blog with a couple of cards, using the fabulous and fantastic and amazing new My Sweet Petunia layering stencils and coordinating stamp set. Oh boy, they are just gorgeous on their own but used together they are a total knockout!!

I’m getting ahead of myself though, let’s go back to the beginning: I’ve got two cards to show you. Both are made with the same colours, but with different levels of intensity. They are also finished off with different colours of embossing powder.

This first one is done with a softer, lighter ink blending. For the flower petals, I’ve used Sweet Petunia Pink and Bee Sting Yellow, and I’ve inkblended them through the first two layers of the stencils. I wanted to keep the colours very cohesive, so I used the same colours on top of each other.

I use Life Changing Blender Brushes when I ink blend, for me that’s what gives me the best results, but the Atelier inks are buttery smooth and blend so great that any blending tool you have will probably do just as good a job.
For the stems I have mixed Goddess Green, Trinity Teal and a bit of Bee Sting Yellow. I really should have skipped the yellow though, it didn’t really work out OR I should have gone in with the yellow first, perhaps, for a more spring like look.

When all the ink blending was done, and the panel had been left to dry a little, I used an anti-static tool all over it, and then popped it into my MISTI. I really wanted to use the My Sweet Petunia outline stamp on top of that luscious ink blending.
I heat embossed it with Rich Gold from WOW! Embossing and once the embossing powder was set, I splattered some gold water colour on top for extra wow-factor. The final touch was a sentiment from the Here For You stamp set, stamped up with Sweet Petunia Pink ink, on a slim banner.

The second card is done almost the same, however I skipped the Bee Sting Yellow on the stems, and I went in heavier with the Sweet Petunia Pink and the yellow on the flower petals.

On this one I used embossing powder in Platinum for the My Sweet Petunia outline stamp instead. Just to make sure they are not totally the same. Naturally the gold splatters were still added. Those you can never have too many of.

The sentiment from this one is from the My Sweet Petunia set, but it’s also stamped with Sweet Petunia Pink ink. Hey, that rhymes!
I did make a video for the first card, you can find that on my YouTube channel. For the Platinum card I made a reel, that you can find on my Instagram feed.
I hope you enjoyed this post and liked the cards, I have linked most of the products used for these card with compensated affiliate links in the post. These links do not cost you anything extra at all, promise!
Lots of love and happy crafting from Erica

